Has your furniture gotten old and taken on a shabby look, ruining the aesthetics of your home? Perhaps, but you don’t want to replace it as it is still functional, of good quality, and likely has some sentimental value.
I’ve often found that refurbishing an old piece is much cheaper than buying a new one. However, most old furniture has a stubborn sealing or top coat of varnish.
The challenge with painting varnished wood is making the paint stick to the wood. You’ll need to ensure you use the right painting supplies and follow the right process when you paint furniture.
So, can you paint over varnished wood? Let’s find out!
Can You Paint Over Varnished Wood?
You can paint varnished wood if you utilize the right painting materials and follow the recommended steps. You’ll need to prepare the surface, sand it, prime it and give it a top coat before painting it. Water-based quality acrylic paint is ideal, but if you choose to use oil-based paint, ensure you use an oil-based primer as well.
How To Paint Over Varnished Wood
Painting varnished wood may sound easy, but the job is quite tricky and time-consuming. However, the results are very satisfying.
It is also an inexpensive option, and with the right equipment and method (and a little help from me!), you can effectively restore or refurbish your old furniture.
Before starting your DIY painting project, remember that the surface you are painting is problematic and slick, and most varnished wood does not bond well with paint.
You need to work on the adhesion and bonding challenges. Remember to clean, sand, and prime the surface for paint adhesion to achieve the desired result.
We’ll split this process into two parts—cleaning the wood and applying the paint. But first, here are the supplies you’ll need for the project.
What Supplies Will You Need To Paint Over Varnished Wood?
Before starting the project, ensure you have all the supplies handy, so you do not have to stall your project mid-way. All these materials are easily available at hardware stores as well as online.
- Tack cloth (you can use a lint-free rag as a tack cloth alternative)
- Household cleaner (detergent)
- Protective clothing (face mask, gloves, and safety goggles)
- Sandpaper (medium and/or fine grit)
- Primer (depends on your furniture and the type of paint that you will use. Wall paint on wood requires a suitable primer that promotes adhesion and prevents the paint from soaking into the wood grain unevenly)
- Paint (water-based paint, oil-based paint, or chalk paint, depending on your preference)
- Paint sprayer or roller or brush (depends on the surface area and the type of paint)
- Wood putty or wood filler (if needed)
- Protective sheets
Step 1: Clean The Varnished Wood
You can clean the surface before or after sanding. However, it is always preferable to start with cleaning. Note that cleaning does not replace sanding. Both are essential steps, and you can’t skip either.
Cleaning is an essential preparatory step; it readies the wood to accept the paint. You can easily remove varnish from a clean surface. This also ensures dirt, dust, and grease do not mix with the primer or paint.
To clean your surface and keep it dust and pest-free, follow the steps below:
- Spray a household cleaner on a clean, lint-free cloth.
- Wipe the surface with a cloth to remove all the dust, dirt, and grime.
- Scrub with a cloth to remove sticky grease stains, old furniture polish, or residual debris.
- If any stubborn spots remain on the surface, use trisodium phosphate.
- Once the surface is clean, wipe it with a clean, dry cloth.
Things To Keep In Mind While Cleaning
- You don’t need harsh chemicals to clean the surface. Household cleaners are good enough. Furthermore, chemicals come with their drawbacks. They are hazardous to health, and their traces on the wood can cause fish-eye and interfere with bonding.
- Once you have cleaned the surface, remove the wet cloth immediately. This is important because wood is not waterproof, and you do not want to extend the interaction between the varnish and water.
- Let the surface dry for a few minutes before moving to the next step.
Step 2: Try and Fix the Surface as Much as You Can
Once you have a clean surface, you can inspect it better. All the irregularities, dents, dips, and scratches will appear clearer on a cleaned surface.
Try to eliminate as much imperfection as you can. Never skip the step, thinking that paint will do the job of covering it up. Paint cannot fix dents and dips. Contrarily, an irregular surface will interfere with paint adhesion, resulting in blistering and flaking.
So, to avoid this, get a wood filler or a wood putty and fill the gaps, holes, scratches, and more.
Wood putty is denser than a filler and also very pliable. It is a mixture of oil and plastic-based solvents and does not harden like a wood filler. It also does not crack or shrink; however, you will need a knife to apply it.
How To Fix Dents, Holes, And Gaps With Wood Putty
- Scoop a quarter-sized wood putty with the putty knife.
- Evenly spread it over cracks and any other irregularities.
- Evenly spread the putty with a scraper.
- Remove any excess putty.
- Let the putty dry for 30 to 90 minutes.
- Touch with your fingertips to check if the putty is completely dried.
- With 120 to 220 fine grit sandpaper, sand the areas to even the surface.
- For a smoother finish, sand again with finer sandpaper of 60 to 80 grit.
- Clean the surface to remove any dust or debris completely.
For more significant cracks or missing chunks, you will need to consult a professional carpenter before moving to the next step.
Step 3: Remove Varnish From Wood
Varnish is a protective coat meant for the protection of the underlying wood. It is a tough seal that is slippery to avoid clinging to the surface. It also protects the paint from getting damaged.
Do I need to remove varnish before painting?
Absolutely. This step where you remove varnish from wood is crucial. Imagine painting on a varnished surface. The paint will just slide off. For this step, you will require muscles, tools, know-how, and some experience.
You can remove the varnish using one of the options below:
Sanding
Bring out your artistic side because sanding is artistry, but it sucks. However, it is also the key to achieving a surface that readily bonds with paint. It adds finesse to your work and de-glosses the varnish. So, for a perfect top coat, sand the surface with sandpaper.
You can use medium to fine-grit handheld sandpaper for flat and large surfaces. Usually, 120-220 grit sandpaper works well. However, if there are tricky edges, curved pieces, and trim lines, it is best to use a contour sanding grip.
Avoid using coarse sandpaper, especially if you are inexperienced, as it will leave marks and scratches on the surface.
Follow the below steps to remove varnish off wood:
- First off, get prepared for the process. Sanding will result in a lot of dust. So, do it in a well-ventilated room, and make sure you put on a mask or a respirator to avoid inhaling the particles.
- Sand along the direction of the wood’s grain and over the entire surface. Do not press into the wood too much. If you are new to this, you can count the number of strokes and be consistent with the number of strokes in each area. Avoid breaking the grain and overworking.
- Stop when you have removed the varnish finish. Do not sand down to bare wood.
- Clean the surface once you have finished sanding.
While sanding, keep the following tips in mind:
- Sand properly around damaged areas to ensure you leave no loose varnish behind.
- Next, look for hard edges around damaged areas. You must only see smooth surfaces. If not, sand the rough spots.
- Look out for areas that are easy to miss. It is these areas that may ruin the overall effort.
- After you have finished, check the entire surface to detect any missed spots.
- Use a damp cloth to remove any traces of dust.
Step 4: Apply Primer
Once you are done with cleaning, repairing, and sanding, the next step is to apply a primer. You’ll find primer spray paint or brush-on paint products that will help create a better base for your paint job.
But, is applying a primer necessary? Well, you can paint wood without a primer if the surface is in good condition, and doing so will even save you time.
However, a primer is an extra safety step that will increase the durability of your paint. It also offers many other benefits.
- A primer seals the wood surface.
- It hides the wood grain effectively and does not show through the top coat.
- Functions as a sealant, protecting the surface beneath.
- It protects the grain, tannins, and knots from bleeding through the paint.
- It facilitates the adhesion of the surface and the top coat.
- It reduces the number of top coats (the desired color is achieved more easily with primed wood, especially over dark stained wood).
- Increases adhesion.
What to look for in a Primer
When searching for a primer, do not grab the first one you see at the store. Remember that you are working with a varnished surface.
Primers are very surface-specific, so before finalizing one, check the one most suitable for your varnished surface.
Here are some commonly used primers for varnished surfaces:
Shellac primer: This is the best option if you are in a hurry. The primer dries off faster than most and effectively blocks severe odors. It is the ideal choice for wood with stains and furniture that has been exposed to harsh exterior conditions.
However, the job can be pretty messy for inexperienced painters. The paint is smelly and can leave marks that will interfere and make the net steps more difficult.
Stain-blocking primer: If you are working with a piece exposed to high humidity, a stain-blocking primer is an ideal choice. It will hide stains, grease, and tannin and prevent ugly dark blotches.
Water-based or oil-based primer: Deciding between the two may seem like a big decision. However, you need not worry; both work well with varnished wood.
However, the water-based primer may raise the grain of the wood, which is not worrisome, although it might take longer to dry.
On the contrary, oil-based primers dry faster and have a much better bonding surface. But the smell!
Color? The color of the primer matters too. For white and pale colors, a white primer is the best foundation. However, a tinted primer will be an excellent choice for darker shades of paint. The primer must be tinted to get a closer color to the paint.
Follow These Steps To Apply The Primer:
- Clean the surface and the surrounding area.
- Get the appropriate tools. Whether you need a paintbrush, a paint roller, or a spray depends on the surface to be painted and whether there are tricky or intricate areas. Use a roller for large surfaces. It is easy, fast, and you do not have to deal with brush marks. However, if you have a piece with trims, edges, or corners, a 1-2 inches brush is a necessity. Also, you solve the problem of overworking the paint with a brush. There is the issue of brush marks, especially if you are a beginner. You’ll need to get familiar with the right brush strokes to use.
- Lay a coat over the entire surface. Follow the instructions on the tin to the tee.
- Let the primer dry completely. The time will vary from one primer to another and depend on the wood. Once completely dried, apply a second coat of primer.
- Let the second coat dry. Leave it to dry overnight or more, as the longer you leave the coat to dry, the better the results will be. For better results, sand the first coat before applying the second one.
- With fine-grit sandpaper, sand the primed wood. This will smoothen the surface.
- With a tack cloth, whisk the debris for best results.
Things To Keep In Mind While Applying A Primer
- You don’t necessarily have to apply two coats of primer. Usually, a single layer is sufficient, but if you have a wooden surface with dark stains or varnish, applying two or more coats does the trick. It hides the stains and does not let the wood pigments show through the top coat.
- Paint along the direction of the wood grain and not against it.
- Use long, sweeping strokes and avoid putting too much force on the brush.
- When painting edges, baseboards and trims, cover the flooring beneath with masking paper or tape to protect the floor. You need to know what paint for baseboards and trims is the best to ensure optimal adhesion, durability, and a smooth finish
- Keep a dry brush handy. It will be useful to brush out any drips or excess primer buildup.
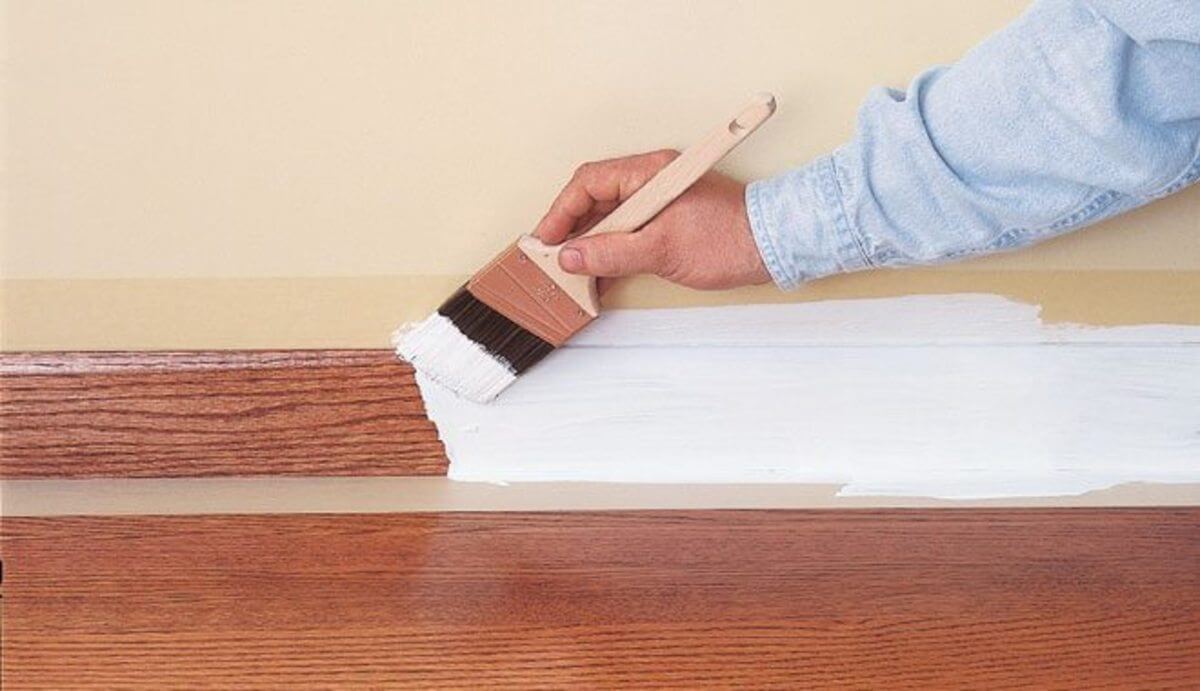
Step 5: Applying The Paint
Which Is The Best Paint For Varnished Wood?
Make sure you have treated the surface properly for a better paint job. If you prepare varnished wood, any paint will work. If you miss any of the above preparatory steps or do not follow them correctly, the paint will not adhere properly.
This will result in peeling and chipping off. Also, with varnished woodwork, there is the issue of tannins bleeding, leaving a blotchy finish.
Let’s look at the different types of paint that you can use to paint your varnished woodwork:
Water-Based Paint
Water-based Paint (latex/acrylic) is considered the best, especially for painting on painted wood or varnished surfaces. The results are effective and quick. You can apply the paint even if you have used an oil-based primer; however, it will not work the other way round.
Water-based paints may not withstand heavy use and may require a few touch-ups. However, you can overcome the problem with the help of a sealer.
Latex paints are also preferable as they come in different finishes like satin, flat, high-gloss, and semi-gloss. They usually have a low Volatile Organic Compounds (VOCs) formula. This makes them ideal for indoor use.
Latex paint dries fast, is less messy, and as it is water-based, you can easily clean it with water and some soap. One common question many DIY enthusiasts ask is, “Can I paint over latex paint?” The answer to this question depends on the specific situation and surface you are dealing with.
However, it is good to know that latex paint is easily applicable and comes in various colors, making it readily available in most hardware stores.
Oil-Based Paint
Oil-based paints are ideal for surfaces like doors, cupboards, and wood furniture where you desire a vibrant look and rich color.
Also known as alkyd paint, the paint is the preferred choice for outdoor decks, furniture, and surfaces that are more prone to wear and tear.
The paint is durable, can withstand rough use, and does not scratch or chip easily. But it is difficult to work with and contains VOCs, so use protective gear and work in a well-ventilated room.
The paint is hard to apply with a roller, and you need to apply it using a paintbrush, which is time-consuming. Also, they are very slow drying compared to water-based paints and are much costlier.
Also, you must use an oil-based primer, but on the positive side, the paint does not require a topcoat or sealant.
Chalk Paint
Chalk paint is used over varnished surfaces as it hides imperfections, which is a major issue when painting varnished pieces. It gives your furniture a vintage look that is ultra-matte.
The paint is very adhesive and does not require any primer. However, it does require a sealing or a top coat for paint protection. You can use wax or a polyurethane top coat.
Applying chalk paint is not easy, and first-time painters may find it difficult initially, specifically if they don’t get the best chalk paint brush. (You may also want to know how to clean brushes for chalk paint).
Chalk paint dries fast and adheres effectively to most surfaces, giving a smooth finish. The paint is more expensive than latex paints.
Now your varnished piece is ready to be painted. Pick the right paint depending on the use of the wood and the primer you have applied.
Water-based paint will require an oil-based primer. Although you can use oil-based paint without a primer, it is always advisable to use a primer.
For chalk paint, you do not need a primer. However, not everyone appreciates the trendy ultra-matte finish that comes with it. Before applying the paint, make sure the primer is completely dry.
Some experts even suggest leaving the piece aside for a week before painting. When painting, keep certain tips and tricks in mind to help you achieve the smooth finish you desire.
- Make solid strokes on the clean and dry surface. Make sure your strokes are even to avoid any brush marks. This will be your first coat.
- Once completely dried, sand the surface lightly. This will give you a smooth and seamless finish.
- Sweep the surface with your hand to detect any imperfections. If you find any gaps, fill in, sand, and repeat.
- Apply a second coat of paint after the piece is thoroughly dry and smooth.
- Let the paint dry, and do not use the furniture for a couple of days to prevent damage.
Read also: Polyurethane vs varnish.
Painting Over Varnished Wood Without Sanding
You may want to avoid sanding as it is hard and tedious work. And with a piece of furniture like a rocking chair, the job is much more challenging. Also, if the surface is in relatively good condition, you can skip the sanding and use a deglosser instead.
Deglossing
Can you paint over varnished wood without sanding? Yes, you can with a deglosser. Here’s everything you need to know about deglossing.
Deglosser is also known as a liquid sander. It works by dulling the smooth finish through a chemical reaction.
Deglosser Application Process
So, if you are up to repainting your furniture without sanding, here is the guide to using a liquid deglosser:
- Using a spray: Spray the deglosser on the target wood piece and let it rest. Follow the instructions on the product and time the wait accordingly. Wipe the surface with a rag.
- Using a sander deglosser: Pour sufficient quality of the liquid on a piece of cloth and run it over the entire surface. Use circular motions and continue till all the varnish disappears.
Once you have removed the varnish, let the surface dry completely before moving to the next step.
How To Paint A Varnished Door White
You can paint a varnished wood white using the proper supplies and painting methods. Preferably, use an oil-based primer.
For optimum results, use high-quality water-based acrylic paint. You will want to apply two coats of paint for high coverage and an even finish.
- Sand the surface to prepare it.
- Prime it and allow it to dry for about an hour.
- Once the primer is dry, apply the first coat of paint with a brush or roller.
- Wait about 30 minutes to allow the coat to dry.
- Apply the second coat of paint and let it dry, and you’re done.
Find the difference between stain and varnish.
Best Varnished Wood Paint
1. Rust-Oleum 1976730 Painter’s Touch Latex Paint

- Use for a variety of indoor and outdoor project surfaces including wood, metal, plaster, masonry or unglazed ceramic
- Water-based acrylic formula is low odor, resist chips and provides long-lasting protection
- Covers up to 30 sq ft and dries to touch in 30 minutes for quick project completion
Rust-Oleum 1976730 Painter’s Touch Latex Paint can be used over various indoor and outdoor surfaces like masonry, wood, metal, and unglazed ceramic.
It offers long-term protection and dries in as little as 30 minutes. It provides a flat finish, free of imperfections. The water-based acrylic composition is low odor and resistant to chipping.
2. Majic PAINTS Interior/Exterior Satin Paint
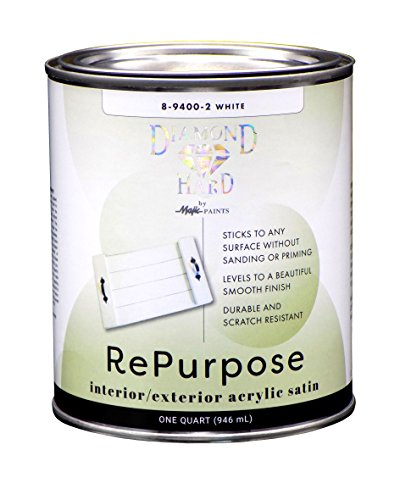
- Color: White
- IDEAL FOR DIY PROJECTS: Repurpose furniture, trim, cabinets, doors, or any project you have in in mind
- SUPERIOR COLOR-RETENTION: Levels to a beautiful smooth satin finish
Revamp your old furniture and take on DIY projects confidently with Magic Paints Interior/Exterior Satin Paint. It helps achieve a gorgeous, flawless, smooth finish.
Application is easy, and it requires no priming or sanding to adhere to any surface. It is ideal for masonry, wood, metal, brick, steel, tile, vinyl, aluminum, most plastics, and drywall.
3. Rust-Oleum 331052 Milk Paint Finish

- Use to accent details on interior décor and furniture with a unique brushed effect
- Water-based, low VOC, low odor formula cleans easily with soap and water
- Covers up to 125 sq. ft. per quart, dries to the touch in 30 min and ready for recoat in 2 hours
This low VOC and low-odor paint dries quickly and is ready for a second coat in just 2 hours. It provides long-lasting results and a contemporary, matte finish ideal for interiors.
This one-step solution adheres well to various surfaces and does not require a primer.
Read Also: Will Permanent Vinyl Stick to Wood?
Best Primer For Varnished Wood Without Sanding
1. Zinsser 03504 Cover Stain Interior/Exterior Oil Primer Sealer
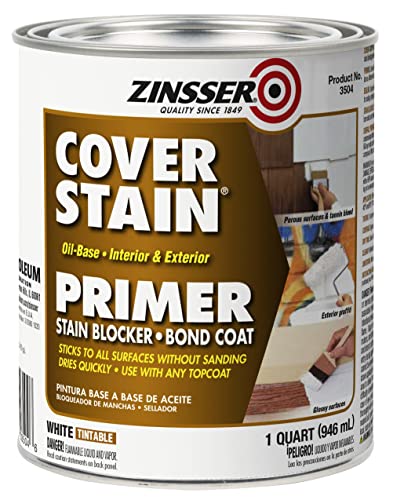
- Cover stain, QT, Oil based stain killer primer/sealer
- Adds extra shine to your product
- Manufactured in United States
This high-hiding composition helps conceal water, smoke, cigarette, and nicotine stains. It adheres to all surfaces without sanding. It is ideal for interior as well as exterior surfaces.
2. General Finishes Stain Blocking Primer
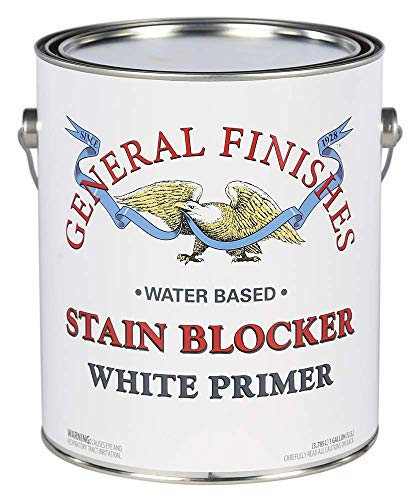
- Plastic Gallon Jug - due to an metal can shortage, product may come in a plastic jug instead of a metal container
- can be used to protect pigmented finishes from stain, dye and wood tannin bleed-through
- Use over an existing finish, raw wood, or MDF as a base coat for GF Milk Paints, Chalk Style Paints, & Pigmented Polys
This high-quality general finish helps prevent stain, dye, and wood tannin bleed-through on painted surfaces. You can use it as a base coat for most paints.
It is necessary to use two coats. The first coat will draw out impurities from the wood, changing its color, and the second coat will lock it in.
3. KILZ Original Primer, Interior

- PRIMER | SEALER | STAINBLOCKER: KILZ Original is a fast-drying, oil-based, multi-surface primer-sealer-stainblocker that seals porous surfaces, promotes adhesion, hides previous color, blocks heavy/severe stains and seals odors.
- ADVANCED FORMULA: This oil-based modified alkyd primer is a powerful stainblocking formula that blocks most heavy/severe interior stains including water, smoke, tannin, ink, pencil, felt marker, grease. It also helps block and seal pet and smoke odors. This oil-formula has max 450 grams/liter volatile organic compounds level.
- MULTIPLE SURFACES: Use this versatile primer on interior surfaces including wood, drywall, tannin-staining wood, HDF/Hardboard, MDF, plywood/T1-11 siding, composite wood, concrete, plaster, paneling, wallpaper, masonry, brick, painted and ferrous metal, aluminum, chalky, previously painted and properly prepared glossy surfaces. Surfaces should be free of dust, grease, chalk, rust and peeling paint prior to application.
This is an excellent primer that helps the paint adhere well to different kinds of surfaces. It is ideal for white-colored interiors. It covers up old stains and odors and blocks new ones.
The primer repels stains from pens, markers, water, smoke, and grease for a start. It blocks pet, food, and smoke odors. It helps with moderate to severe stains on ceilings and walls.
So, do you put paint over Kilz? Absolutely, painting over Kilz primer is a crucial final step
FAQs
Can gesso be applied over varnish?
Gesso can be applied over a sanded and cleaned surface to prepare or prime it for painting. It dries quickly, so you can apply acrylic paint soon after.
Can you paint over varnish acrylic?
You can paint over varnish acrylic as long as you use restraint and only do touch-ups as needed. Add another layer of varnish to the painted surface after.
Read also: Can you paint teak wood furniture, and can you apply exterior paint inside?
Can you paint over stain?
Yes, you can paint over stain. To do so effectively, ensure the surface is clean, dry, and lightly sanded. Applying a primer designed for painting stained wood can enhance the adhesion and final result.
Conclusion
As we have already established, painting over varnished wood is possible. All you need to do is follow the simple steps we’ve listed here.
Make sure you have all the right tools and equipment before starting this DIY project and follow the instructions above carefully.
And if the project does seem to get out of hand, you can always hire a professional to continue from where you have left off.