People are drawn to woodworking for different reasons. Some people like working with their hands; others use it to express their creativity or earn a living. However, no one gets into woodworking because they love sanding wood.
It is a long, tedious process we wish we could skip. That is why we need a faster way to prepare wooden surfaces, which brings us to the question: can you sandblast wood?
This article will address:
- What sandblasting is
- What happens when you sandblast wood
- How sandblasting affects furniture
Let’s get to it!
Can You Sandblast Wood?
Yes, you can sandblast wood. Even though sandblasting was originally intended for metal, wood is also very tough, so it can withstand the process. However, the method for sandblasting wood is different from the method for sandblasting metal. So, even if you have done sandblasting on other materials, there is a lot to learn about getting the best results with wood.
What is Sandblasting?
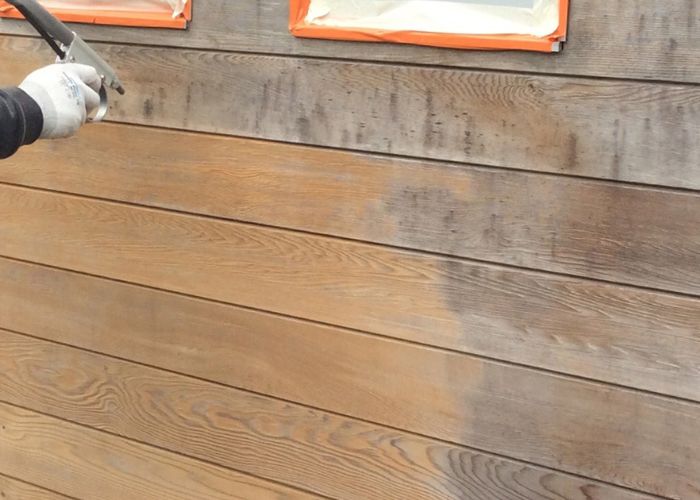
Sandblasting refers to stripping away dirt, debris, or topcoat off objects with the help of pressurized blasting media.
The most common blasting media is sand, hence the name, although other things can also be used, such as baking soda, walnut shells, corn cobs, and many other abrasive materials.
Sandblasting or abrasive blasting does a similar job to grinders and sandpaper, but it is much faster. From cleaning wood surfaces to restoring antique furniture, this method can save you a lot of time and resources if done right. However, because you are forcing tiny particles of sand unto a surface, sandblasting is also very dangerous to people and other objects in the vicinity.
According to the CDC, abrasive blasting with sand containing crystalline silica can cause serious or fatal respiratory disease. The flying shards of sand can also damage property and plants. That is why some states require a blasting permit.
This permit normally applies to industrial-scale activities and not for soda blasting wood. However, you should check with your state to ensure you are permitted.
Can You Sandblast Paint off Wood?
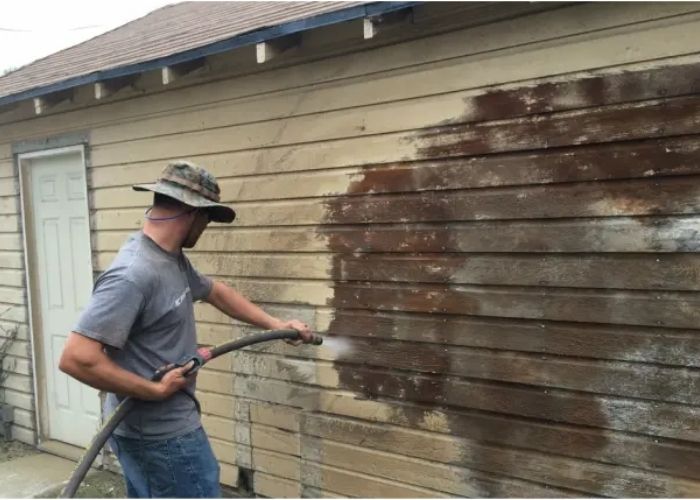
The first part of most restoration jobs involves either removing paint off wooden furniture or sanding it down to a smooth finish.
Unfortunately, many people either don’t like sanding, or it takes too long. While there are other ways to remove paint from wood, none is as fast as sandblasting.
Sandblasting can remove in minutes, what could take hours with a paint scraper or paint stripper. However, you still need to sand the wood surface.
Can You Sandblast Wood instead of Sanding?
Abrasive blasting is similar to sanding, but it is not a direct replacement. In most instances, you will still need to sand, depending on what you’re working on.
For example, when you sandblast wood furniture, you would need to sand it afterward. Therefore, whatever you do, you can’t escape sanding.
However, you can drastically cut down your work time and have a smoother surface to begin with. If you intend on repainting the surface or adding a stain, you need to get the buttery surface smooth by going through incremental grits of sandpaper.
Abrasive blasting is a very aggressive process, so doing it for too long will ruin the wood or take too much off the surface.
Benefits of Sandblasting Wood
There are several advantages of sandblasting wood, but we will focus on the five most common ones.
Prepares wood surfaces
The original purpose of sandblasting is to clean the surface of whatever you are working on. In the case of wood, especially old wood, there is a lot of debris, dirt, and germs accumulating on the surface over time.
Sandblasting can clean wood effectively, even when it has a wood finish. Outdoor wood may also have moss, mushrooms, mud, or mold.
Even when these are absent, the impact of UV light might have made the surface of the wood look so dull that it needs to be removed. One pass of sandblasting will make old wood look considerably newer.
Remove paint or other surface coverings
As mentioned before, this is another common and important benefit of sandblasting wood. Old paint or wood finish can be a nightmare to remove manually, either by sanding or scraping.
Using paint removers can also be toxic. Plus, when you’re working on a large project like wood cabinets and have to apply paint stripper a few times, it can be time-consuming. These chemicals can also damage the surface of the wood, as could a heat gun.
Sandblasting can remove old paint, but it can also remove or at least reduce other chemicals like stains from the surface. So, depending on the sandblasting method, it can also be environmentally safe.
Add texture to the surface
One peculiar benefit of sandblasting wood is adding a bit of life to the surface. In some instances, sandblasting gives the wood a glossy look. This works on newer wood or when the previous finish was not there for too long.
You can also reduce the pressure and blast fresh paint to give it this glossy look. However, this method requires skill and practice, so don’t be too eager to try it on valuable wood furniture.
Restore old wood furniture
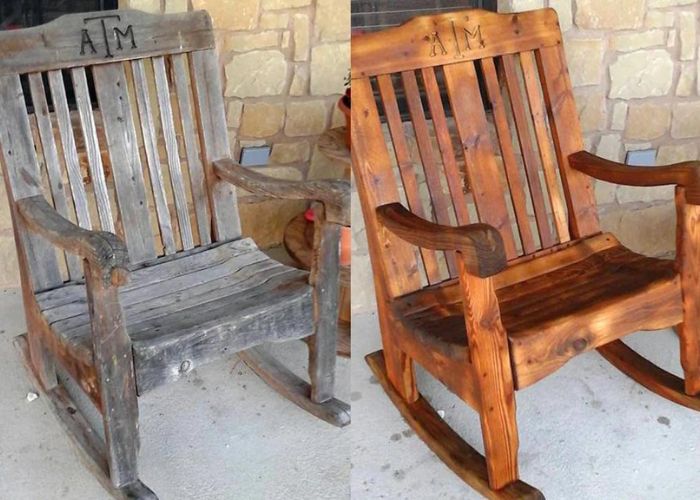
Restoring old furniture is a good way to save money and, in some instances, make money. If you work with antique furniture, you can’t risk aggressive methods to revive the furniture’s surface.
By adjusting the psi on the compressor, you can blast just enough to make the old furniture look better, yet not so much that it ruins the aesthetic.
Give a rustic look
The different types of sandblasting have varying impacts on wood, which is how this irony has emerged: you can use sandblasting to either make wood look new or old.
Sandblasting new furniture can give it an aged look or a weathered appearance. This type of style is favored when painters are looking for rustic furniture. It also complements chalk paint when used to give a rustic look to furniture.
It is important to stress that the type of effect you get from sandblasting will depend on your method.
Different Types of Sandblasting Media
There are so many different sandblasting media that can be used for sandblasting, but they tend to be used in one of two ways:
- Dry sandblasting – the abrasive material is blasted unto the material’s surface using air pressure only. This is the most common method of sandblasting.
- Wet sandblasting – the abrasive material is mixed with water to create an abrasive spray. Wet sandblasting or sandblasting with water is often used when restoring old furniture.
Depending on which one you choose, you have options on the different abrasive media you can use. The three common options for wet sandblasting are dry sand, wet sand, and soda.
If you would rather stick with the original method of sandblasting, here are the most common options to consider:
Silica Sand or Silicon Dioxide
Silicon dioxide is the original medium used for sandblasting. Silica sand is just ordinary sand, and it has been revered in the woodworking industry for centuries.
Sand particles are uniform in size and have tiny sharp edges. So, they are not too sharp to cut deeply into the wood but sharp enough o remove any impurities.
Due to the respiratory disease caused by silicon dioxide, and is no longer the best medium for abrasive blasting.
Soda
Soda or baking soda is the most common method used for sandblasting wood. It has really good articles, so it can remove the tough exterior and smooth the surface simultaneously.
Soda is biodegradable, so you don’t have to clean it when you’re done working. However, it is harmful to plant life, so you should keep a distance.
Steel grit
As the name implies, this method uses tiny shards or grits of steel to clean mainly metallic surfaces. When done right, it makes the surface smooth. However, using steel grit on wood will cause damage and possibly make the surface unusable.
Bristle blasting
Bristle blasting is the most distinct process as it works differently from the others because nothing is fired out of the blaster. Instead, you attach steel wires to the rotating nozzle and get rid of debris.
Glass bead
This is another method popular in woodworking. When tiny glass beads are shot against the work surface, they create a smooth and gorgeous matte or satin finish.
The glass bead is popular in the cabinet-making industry. It may not be the most efficient, but it does make furniture look beautiful.
How to Sandblast Wood
Now that we have covered why we should sandblast wood and the best abrasive blasting media, it is time to see how the process works.
Tools you’ll need
The abrasive blasting equipment you need will depend on the wood sandblasting process you want to use and the abrasive particles that are best for what you want to achieve.
The best sandblasting results for most wooden jobs are gotten from dry abrasive blasting with soda, which is what we are focusing on.
- Sandblaster
- Air compressor
- Ceramic nozzle
- Safety goggles
- Protective gloves
- Baking soda
- Blast hood
- Coveralls or protective clothing
Preparing the place for safe sandblasting
As mentioned earlier, the sandblasting process can be pretty dangerous. Therefore, you need to ensure your workshop or blasting area is well prepared before you begin. Ideally, you should have a sandblasting cabinet.
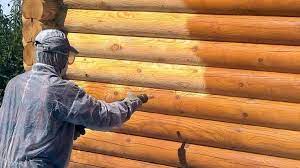
Sandblasting will cause a lot of dust to float in the air, so it is best to work outdoors and far away from any plants, people, or buildings.
If you’re working indoors, you need to create a blasting booth. You can achieve this by building a plywood box or creating an enclosure with a tarp or a thick drop cloth. You will also need a powerful dust collector to suck up the particles in the air.
Ensure you work in a well-ventilated garage to easily escape the abrasive materials. You should also take the time to remove any furniture near the blast zone.
But, again, unless you are sure it cannot be damaged, it is best to move them to a separate room. Once you do that, you are ready to start sandblasting.
Related read: Best wood shop dust collector.
Step by Step Sandblasting Process
Step 1: Prepare the wood
Before you put the sandblaster to work, you need to clean up the surface of the wood a little bit. This is just a simple process to eliminate any obvious dirt, cobwebs, gum, etc.
This will ensure that the sandblaster doesn’t push some of these further into the wood’s pores. You can wipe down the wood with a tack cloth or use a shop vacuum to prepare it.
You also need to remove any hardware or hinges. This will ensure that you don’t mistakenly alter the look of the hardware if they are fine the way they are.
Step 2: Wear your protective equipment
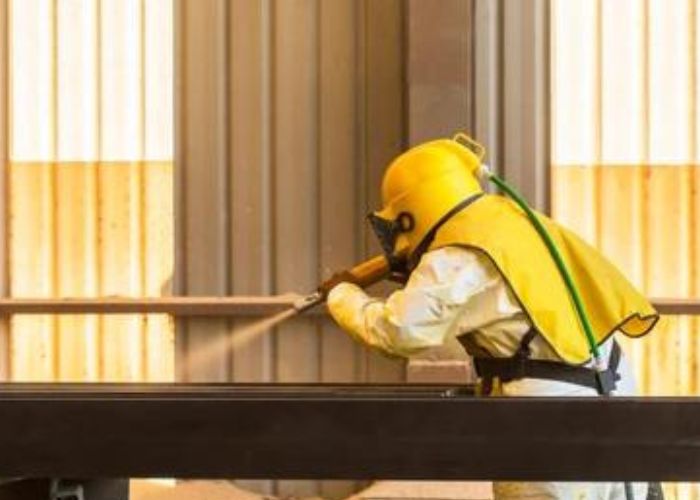
You need to be fully covered whether you are using something as innocuous as soda or walnut shells. This step is so important that I wouldn’t recommend you do anything else without it.
When using soda blasting, you need to cover your eyes, nose, and skin; you don’t want wood particles inside your body.
Some people don’t bother with protective equipment when using a homemade blasting kit because the force isn’t that much, but you should never underestimate this step.
Safety goggles and coveralls are pretty standard, but some people also use earplugs to reduce the noise from the air compressor.
If you’re not using professional coveralls, at least wear trousers and a long-sleeved shirt. Failure to follow proper safety precautions could endanger you.
You also need protective gloves.
Step 3: Test it out
Now that you are ready to start the sandblasting process, it is best to test it out first. Then, you can either practice on scrap wood or on a small part of the furniture you’re working on.
The test will help you choose the right pressure, so you don’t end up damaging the wood or wasting your time. You also need to ensure that you have chosen the right nozzle size and enough of the abrasive blasting media is coming out.
Step 4: Start sandblasting
Once you’re happy with your test results, you can start blasting the wood surfaces. Keep the nozzle roughly 8 inches away from the surface, and make steady, even passes. Try not to overlap too much, or some areas will be darker or lighter than others.
Keep going until there are no dark spots. Depending on what you are working on, you might have to go over the piece several times until you achieve the desired result.
Ensure there is no paint, varnish, or finish left on the surface and that the wood color is pretty consistent. You can adjust the pressure until you are satisfied with how it looks.
What you may not do, however, is change the medium you are using in the middle of the application. That is why you need to be certain of what you want to use and what you want to achieve before starting the process.
FAQs
What is the best sandblasting method for wood?
The best method for sandblasting wood is soda blasting. Soda blasting uses baking soda or sodium bicarbonate. Soda is sharp enough to remove debris and old paint but soft enough to not damage the wood. Glass bead blasting is also good for sandblasting cabinets and other completed furniture. It gives a matte or satin finish.
Can you sandblast old furniture?
Yes, you can sandblast old furniture. This is a popular way of restoring old furniture. Abrasive blasting is quicker than removing dirt and old paint from old furniture without destroying it. You can use abrasive blasting for small projects to an entire house. You just have to choose the right abrasive material.
Do you need to sand after sandblasting?
Yes, you need to sand after sandblasting. Even though abrasive blasting does a good job of getting rid of paint and dirt, it cannot make the most smooth enough to apply primer, stain, or paint. Sanding will eliminate any inconsistencies left behind from the abrasive blasting process. If you want to paint over sandblasted wood, you must effectively sand it first.
Time to Embrace Sandblasting
Sandblasting is on the verge of revolutionizing the woodworking industry by minimizing the need and intensity of sanding.
Given its various applications, we expect to see more professionals and beginners adopt sandblasting as their main way of cleaning large projects. However, while sandblasting is fast, it is not always safe, so always handle it with care.
As great as sandblasting is, you may need a backup. To that end, check out how else you can remove paint from wood without sanding.

Great information, thank you! Hi from Monterrey, México.