Painting wood is a fast and easy way to change the color or enhance the grain. But sometimes, paint isn’t the right finish.
Shellac is a popular alternative to paint for woodwork and walls because it’s easy to apply and has a beautiful, high-gloss finish.
But can you shellac over paint? Here we explore whether you can apply shellac over paint and provide tips for getting the best results.
Can You Shellac Over Paint?
Yes. You can shellac over paint. However, there are a few things to keep in mind when applying shellac over paint. First, the surface must be clean and free of dirt, grease, and other contaminants. Second, the paint must be dry and cured before you apply shellac. Finally, you’ll need to roughen up the paint’s surface with sandpaper to give the shellac something to cling to.
What is Shellac?
Shellac is a type of resin derived from the secretion of female lac bugs. It has been used as a wood finish for centuries and is known for its high gloss, durability, and ease of use. Shellac can be applied with a brush, sprayed on, or wiped with a cloth.
It mostly comes from India, where the lac bug is native. The resin is harvested from the bugs and refined to create various shellac products. It is available in clear and amber tones and a variety of colors.
It can also be made by dissolving flakes of shellac in denatured alcohol.
How to Shellac Over Paint
Shellac is a fast-drying finish, so it’s important to work quickly and have everything you need at hand before you start. Here are the steps for how to apply shellac:
Tools and materials needed:
- Can of shellac
- Paintbrush
- Sandpaper
- Denatured alcohol (for cleaning)
- Lint-free cloths (for wiping)
- Gloves
Step 1: Preparation
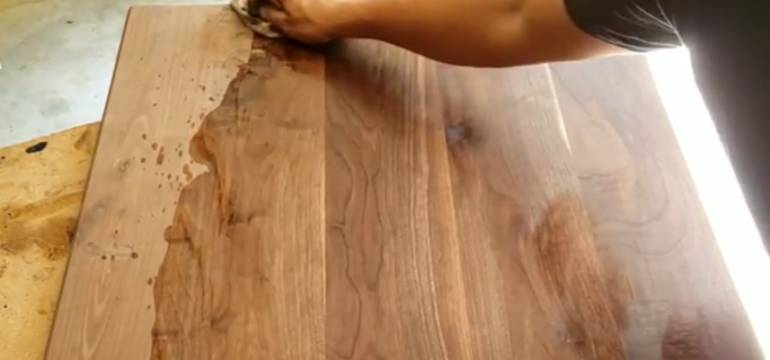
Before starting, make sure you do a shellac surface prep. Clean and wipe the surface to be free from dirt, grease, or other contaminants. You can do this by wiping the surface down with a cloth dampened with denatured alcohol.
Be sure to put on gloves to protect your hands from the alcohol. Let the surface dry completely before moving on to the next step.
Also, select a brush with synthetic bristles. Natural bristles will absorb the shellac and make it difficult to apply evenly.
Step 2: Sanding
Once the surface is clean and dry, you’ll need to sand it to create a rough surface for the shellac to adhere to. Again, use medium-grit sandpaper and sand in the direction of the grain.
If you’re working with a painted surface, be sure to sand until the paint is dull and there’s no sheen left. This will help the shellac adhere better.
Step 3: Testing
Once you’ve sanded the surface, it’s time to test the shellac. First, apply a little shellac to an inconspicuous area and let it dry. If it’s sticky, add a few drops of mineral oil to help lubricate it.
If the finish is satisfactory, you can move on to step three. If not, sand the surface again and try another test patch.
Step 4: Applying shellac
Once you’re satisfied with the test patch, you can start applying shellac to the rest of the surface. Begin by pouring a small amount of shellac into a container.
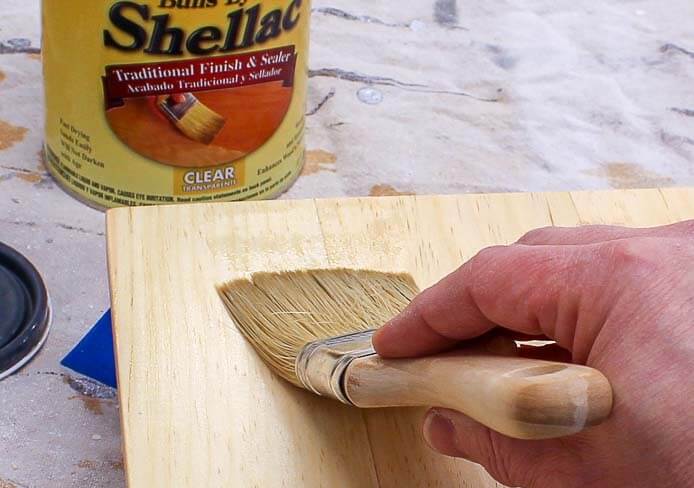
Dip your brush into the shellac and then tap it on the side of the container to remove any excess. Apply the shellac in long, even strokes in the direction of the grain. Overlap each stroke by about half to ensure even coverage.
Work quickly because shellac paint dries fast. If you need to, you can apply a second coat of shellac after the first coat has dried completely. (If you need to have done a bad job, read our article on removing shellac from wood to help you in making corrections. )
Sand the surface lightly with fine-grit sandpaper for the second coat before applying shellac. This will help the top coat adhere better.
Read also: Shellac curing time.
Step 5: Cleanup
Once you’re done, clean your brush with denatured alcohol and then rinse it with water. Store any leftover shellac in a cool, dark place. Cleanup is pretty simple.
Be sure to dispose of any rags or other materials that have been soaked in denatured alcohol properly.
Shellac Alternatives Over Paint
Other than shellac, you can use a variety of finishes to protect your painted surfaces. Each of these finishes has its pros and cons, so be sure to do your research before choosing one.
Polyurethane
Polyurethane can be applied over paint as a clear finish. It is durable and resists scratches and stains. It also gives a beautiful sheen, just like shellac.
However, it can yellow over time and is not as easy to repair as shellac.
Varnish
Varnish is a common option for finishing painted surfaces. It is available in both oil-based and water-based formulas. In addition, it comes in satin, gloss, and semi-gloss finishes. So, if you want a sheen that resembles shellac, go for the high gloss varnish.
It is important to note that varnish adheres better to water-based paint than oil-based paint. Therefore, if you work with oil or latex paint, ensure you use a primer.
Polycrylic
This water-based finish is similar to polyurethane. It is available in a variety of sheens and dries quickly. It is also non-toxic and doesn’t yellow over time.
The main downside of polycrylic is that it isn’t as durable as shellac or polyurethane. So, if you need a finish that will withstand a lot of wear and tear, this might not be the best option for you.
Lacquer
Lacquer is a durable finish that can be applied over paint. It’s available in both clear and colored formulas. It dries quickly and gives surfaces a beautiful sheen.
Just like shellac, lacquer can be dissolved with alcohol. So, if you need to make any repairs, this will make the process a lot easier. It is also easy to apply and doesn’t require any special equipment. And in case you’ve made a mess, here’s how to remove lacquer from wood.
The main downside of lacquer is that it is flammable. So, be sure to use it in a well-ventilated area and avoid any open flames.
Difference Between Shellac and Varnish
When it comes to shellac and varnish, here are the most distinctive features:
1. Drying and curing method
Shellac dries when the solvents evaporate, while varnish cures when the evaporation process happens and a chemical reaction occur between the resin and oxygen in the air.
Because of this, shellac paint dries faster than varnish. However, it is also more susceptible to damage during the drying process.
Varnish, on the other hand, takes longer to dry and cure. But it is more durable and can withstand more wear and tear.
2. Uses and application
Shellac is often used as a sealer or primer. It can also be used to create a high-gloss finish. In addition, it is used to create beautiful furniture and antique pieces.
Most people, however, prefer it for interior surfaces and pieces like floors, cabinets, furniture, and decor. Varnish, on the other hand, is mostly used as a topcoat.
Shellac can be applied over stain, paint, or bare wood. It is excellent when used on exterior surfaces like walls. When applying varnish, use a brush with synthetic bristles for water-based varnish and a natural brush for oil-based varnish.
This will help prevent the bristles from shedding into the finish. Applying shellac needs either of the brushes. You may also need a piece of cloth or cotton wool to make it smooth if it doesn’t come out the way you want.
3. Origin and composition
Shellac is a resin that is secreted by the female lac bug. It is composed of alcohol and pigment.
On the other hand, Varnish is made from a resin derived from trees. It is then mixed with oil or solvent to create a liquid form.
FAQs
Can you put shellac over acrylic paint?
Yes, you can put shellac over acrylic paint. Shellac is a resin that is secreted by the female lac bug. It is composed of alcohol and pigment.
Can you put shellac over kitchen cabinets with latex paint?
Yes, you can put shellac over latex paint. However, it is not recommended, as the two products will not work well together. The shellac will create a seal that will prevent the latex from bonding to the surface, and eventually, the paint will start to peel off. (Here’s the best clear coat for painted kitchen cabinets with latex).
Can shellac be used over enamel paint?
Yes, shellac can be used over enamel paint. It can provide a smooth and a very durable finish over any paint. When applied correctly, shellac will protect the paint from scratches and stains while still allowing the paint to breathe. Shellac is also resistant to water and alcohol, making it ideal for high-traffic areas or locations where spills are likely to occur.
Can I use shellac over oil-based paint?
Yes, you can use shellac over oil-based paint. However, there are a few things you should keep in mind. First, make sure the paint is completely dry before applying shellac. Otherwise, the shellac could react with the wet paint and cause problems. Second, apply a thin layer of shellac so that it doesn’t crack or peel off easily. Lastly, be sure to sand the surface before painting so that the paint will adhere properly.
Is shellac good for painted furniture?
Yes, shellac is good for painted furniture. Shellac is a great sealant for painted furniture. It dries clear, is non-toxic, and forms a durable finish that can be buffed to a high sheen.
Can you paint over shellac on wood?
Yes, you can paint over shellac on wood. Shellac is a sealant used to protect the wood from moisture and other contaminants. Once it has been applied, it is usually necessary to wait for it to dry completely before painting over it. However, if you are careful not to get any paint on the shellac, you should be able to avoid any problems.
Will paint stick to Shellac?
Yes, paint will stick to Shellac, but it is not the ideal surface for painting. Shellac is a natural polymer that the female lac beetle secretes. It is used as a wood finish and sealant. If you are going to paint over shellac, use an oil-based shellac primer or paint to ensure good adhesion.
So, Can You Shellac Over Paint?
As seen in this article, it is possible to shellac over paint. We have also taught you how to go about this process, so you don’t mess up your painting.
With all these tips in mind, we hope you will be able to achieve the perfect finish for your project! Thanks for reading!
If you have any questions, feel free to leave a comment below, and we’ll get back to you as soon as possible. Happy painting!