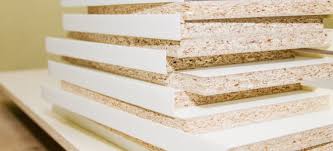
MDF, or medium-density fiberboard, is a popular material for various building projects for its low cost, lightweight profile, and beauty. But can you stain MDF to make it even more beautiful?
Read along to see if you can enhance the beauty of your MDF tables, cabinets, or shelving with a fresh coat of wood stain.
Can You Stain MDF Cabinets or Doors?
Absolutely! You can stain your MDF furniture with dark or light-colored wood stain and improve its appearance. However, the stained MDF piece won’t be as well-polished and glossy as natural wood since it lacks wood grain. You will also need to seal the stained surface with a coat of polyurethane since the MDF doesn’t absorb the stain too well.
Related: Can you stain particle board?
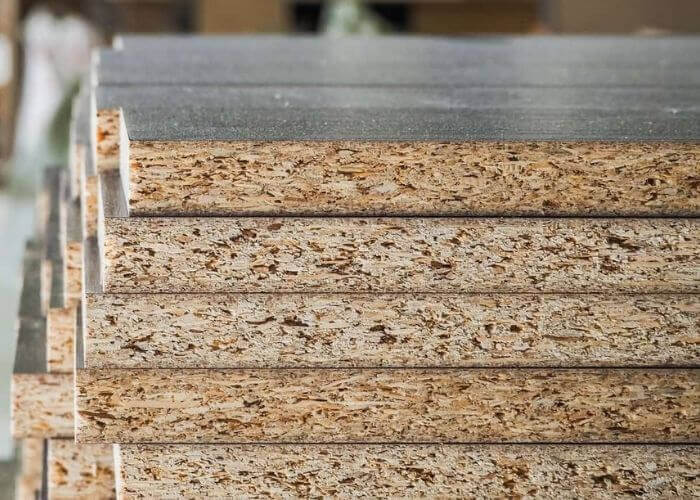
What is MDF
MDF, or medium-density fiberboard as it’s called in Europe and Canada. MDF is manufactured from wood fibers or veneer broken down into residuals and mixed with wax plus resins using heat and pressure to form a durable sheet.
It was designed for manufacturers who wanted a cost-effective way of making sliced wood products such as paneling and cabinets with fine details but without any knots or other clarities from sawmill rejects.
How to Stain MDF Cabinets, Doors, and Stairs
The procedure for staining your MDF furniture like doors is simple, just like staining or painting natural wood, albeit with minor variations.
You could carry with you a scrap piece of MDF to your local home improvement store to test the stain you intend to buy. This should help you manage your expectations better by giving you a sneak peek of the look to expect after staining your medium-density fiberboard.
What you will need
- Hand gloves
- Safety goggles
- Protective face mask
- Your preferred stain, preferably a solvent-based option
- Sealer – Varnish or polyurethane for the topcoat
- Applicator, preferably a chip brush
- Rag
- Electric sander and sanding pads
- Sandpapers for sanding curved or hard-to-reach areas
- Drop cloth
- Chemical stripper
- Scraper
Procedure to follow
Here are the steps to follow to complete this task.
Step 1: Prepare the workstation
In this project, you will use pigmented substances to stain the floor or objects you don’t intend to color. Unlike natural wood, MDF has tiny dust-like particles that could be hazardous to get inside your lungs.
So, ensure you work in a well-ventilated room and cover the ground with a drop cloth. You could work outside the house or open the windows and fans to improve the airflow if you are working indoors.
Step 2: Strip out any old finish
First, protect yourself. Wear your safety goggles, protective face mask, and hand gloves. You need to remove any old finish on the surface of your MDF board.
Often, the piece will have a clear or hard finish that you need to remove using a chemical stripper. Apply an even layer of your stripper across the surface of your workpiece.
Let it sit until it starts to bubble or for the time recommended on the product label. Then use a scraper to remove the old finish along with the chemical stripper residue.
This exercise should be easy. Unlike real wood, MDF usually has all the finish on its surface, unabsorbed. Therefore, you should get rid of the old finish with a single application of the stripper.
Step 3: Stand and clean the surface
Let the stripped surface dry before you begin sanding. We recommend using an orbital sander with a vacuum attachment to minimize the number of wood particles that go into the air.
Notice that MDF consists of light wood fibers which can stay airborne for a long time. Since these tiny wood and resin fragments can have varying amounts of formaldehyde, they may be hazardous to inhale.
So you want to use a method that will minimize their exposure to the air as much as possible. Sand lightly with 100 or 120-grit sandpaper. Then switch to medium-grit sandpaper and sand for a smoother finish.
A 180-grit sanding pad on your power sander should give you an excellent finish. Once you are done sanding, wipe the surface with a brush or dry rag to remove all the wood dust.
Afterward, ensure that the MDF surface is free of dust particles. Using a cloth rag, you can use a brush for this task and then wipe away any remaining dust on the surface.
Step 4: Apply the new coat of stain
You can use a sponge brush, rag, or chip brush to apply your stain. A sponge brush or chip brush will be more effective than a cloth when using a gel stain. For regular stain, you can use a cloth to apply it on the MDF table or furniture.
In any case, a solvent-based wood stain should do a better job coloring your MDF piece. The pigment will spread out evenly on the surface.
Ensure you apply several thin coats of stain on the workpiece, and allow each coat to dry completely before applying the subsequent layer. The goal is to make the color even and uniform across the surface.
To be on the safe, please confirm how long to wait between coats of stain.
Step 5: Protect the MDF with a coat of sealant
You can use varnish or polyurethane to seal the MDF board. Either of these clear coats will do an excellent job protecting the surface and giving it a nice sheen or gloss.
Ensure the stained surface is dry before you apply polyurethane or varnish finish to it. Consider using a clean brush when applying the finish. Alternatively, you could use a spray version for more even coverage and depending on the level of gloss you need.
One or two coats of sealant should be plenty for the medium-density fiberboard. Once done, wash your paintbrushes and let the MDF dry.
Read More: Knotty Alder Stain Colors
How to Wash your Paintbrushes Properly
High-quality paintbrushes are a solid investment. But that investment quickly goes to waste if you don’t clean the brushes correctly. To help you preserve your investment, here are some quick best practices for cleaning your brushes and how to do it.
- Clean your brushes immediately after use.
- Don’t soak paintbrushes in water or solvent. This can damage the bristles.
- Consider setting aside one set of brushes for water-based products and another synthetic set for oil-based products. Avoid switching them back and forth between these two types of bases.
- Always stick your cleaned brushes back in their cardboard jackets when you’re done using them for the day. Storing the brush this way helps it keep its form.
What you will need for cleaning your brushes
- Mineral spirits or paint thinner
- Liquid dish soap
- Plastic buckets
- Roller spinner
- Brush comb
Steps to cleaning oil-based paints, lacquers, varnishes, and shellacs
Step 1
Pour the recommended solvent into a container and dip the dirty brush bristles into it while holding the handle. The manufacturer’s label should indicate the solvent to use.
Often, this will be paint thinner or mineral spirits for oil-based paint and varnish and denatured alcohol for shellac.
Step 2
Work the solvent through the bristles by dipping the paintbrush up and down, and stir it around the container several times.
While at it, wipe and squeeze the bristles on the sides of the container. You can also run a brush comb through the bristles to remove excess paint without damaging them.
Step 3
Spin the brush into a waste collection area to remove the excess solvent and repeat the cleaning process with a fresh solvent.
Step 4
Once the brush is clean, insert the handle in the bottom of the roller spinner, hide its head in the bucket, and pump. What the tool does is help spin the brush rapidly, removing all the liquid hiding inside it.
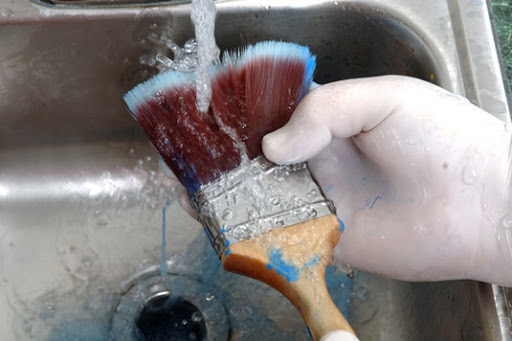
Steps to cleaning water-based (latex) paints from a paintbrush
Step 1: Prepare a soapy solution by mixing warm water and soap in a clean container.
Dip the brush bristles into the solution, holding the handle.
Step 2: Work the soap through the brush bristles with your fingers.
You can also run a brush comb through the bristles to remove the excess paint without damaging them.
Step 3: Rinse the bristles with clean water.
You can place them under running tap water to rinse them—with the water hitting the bristles from the side. In the case of stubborn water-based paints, you can wash them in lacquer thinner or mineral spirits first before the warm soapy water.
Step 4: Dry the brush
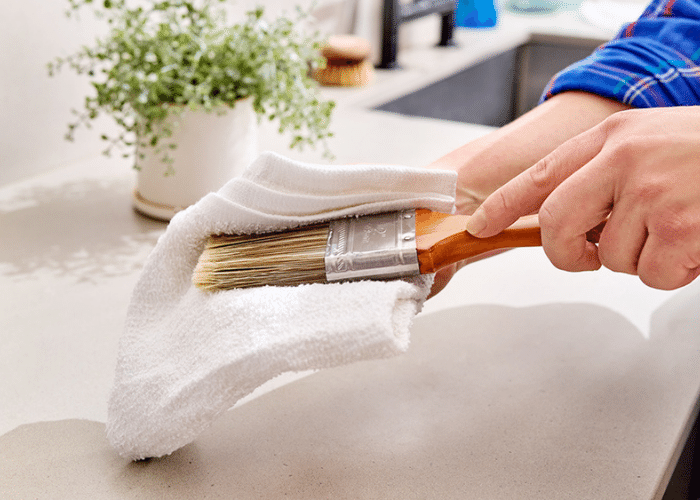
While you could shake the brush in the bucket to remove the water, this is often ineffective. Consider using a roller spinner that speed-dries the paintbrush using centrifugal force.
Insert the brush handle in the bottom of the tool and then pump the other end of the tool several times to spin the brush. Consider keeping the brush pointing inside the bucket to collect the liquid droplets.
Editor’s recommendation: Learn the difference between oil-based and water-based stain
FAQs
Is it better to paint or stain MDF?
Both paint and stain work well for coating MDF pieces. The face of these boards is dense and smooth, hence easy to stain or paint. On the other hand, the edges of MDF pieces are porous and will require a primer to paint well. Therefore, it would be better to stain your MDF if you are unfamiliar with primer and paint techniques.
What is the best finish for MDF?
Shellac is the best finish for MDF. It does an excellent job sealing the MDF surface and the edges of the composite material, creating a tough, protective layer when it dries. This way, it offers protection to your MDF on both the surface and the edges.
Wrap Up
So, can you stain MDF?
Indeed, you can stain MDF pieces, including tables, cabinets, and furniture. The stain can help make your MDF piece look better and more in sync with the rest of your home’s décor, even though it lacks wood grain and the sheen of natural wood.
After all is done, this article will help you dispose of the remaining stain.