Can you stain over polyurethane? This is a question many DIYers have, but it has no hard and fast rules.
Perhaps you have a polyurethane finish on your furniture that is chipping off. Maybe you want to change the color of your wood but are afraid of sanding or stripping it all down and starting over with a stain.
As a DIY expert, I am here to tell you, yes—you can stain over a polyurethane clear coat. But some caveats go along with the process.
Read on for more details about how to stain after polyurethane successfully.
Can You Stain Over Polyurethane Finish?
Yes, you can stain on top of a polyurethane coat, but only with a gel stain. Gel stain forms a film over the polyurethane finish, unlike standard wood stains that work by soaking into the wood pores.
How to Stain Over Polyurethane Wood
Staining over polyurethane wood can be achieved with two simple methods;
- Using Gel stain over Polyurethane
- Using Minwax PolyShades
Method 1: Applying Gel Stain Over Polyurethane
First off, can you put Gel stain over polyurethane? And why use gel and not regular stain? Here’s a gel stain vs regular comparison to give you more insights.
Yes, Gel stain contains urethane, the same ingredient found in polyurethane. So when you apply gel stain on top of a polyurethane coat, the urethane in it will bond to the existing poly on the surface you are staining.
Stripping down an existing finish before staining isn’t always necessary. If the finish is still in good condition, gel stain can refresh the wood and stain it in your desired shade.
How to apply gel stain over polyurethane finish
The process is straightforward—but ensure you follow the steps below to get the desired results. First things first, here are the supplies you will need.
- A can of gel stain (we recommend General Finishes Oil Base Gel Stain)
- A pair of disposable gloves
- Foam applicator
- Lint-free cloth
- Dropcloth or plastic sheeting
- Fine-grit sandpaper
- Tack cloth
- Orbital sander
Steps to follow
Once you have everything you need within reach, it’s time to begin your stain job. Start by preparing the place you want to work.
Gel stains can be messy, so ensure you cover the floor beneath you or any objects around you with plastic sheeting.
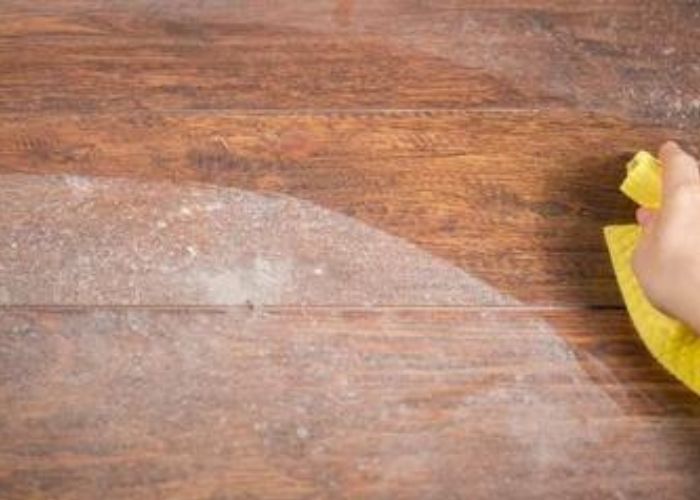
Step 1: Clean the polyurethane surface to degrease it
You want to remove dirt, grease, and grime from the wooden surface you plan to stain. Any of these things can undermine the quality of your stain job.
Consider using a solution of denatured alcohol and water. Dunk a scouring pad into the cleaning solution and scrub the coated surface with it to get rid of any potential contaminants.
Alternatively, you can use a solution of warm water and dish soap or a commercial cleaner such as Krud Kutter to get the job done.
Krud Kutter is a potent degreasing product that you spray on the surface and wipe with a clean rag to remove grease and dirt.
If you opt for such a commercial cleaner, you’ll need to clean it off with a cloth dampened with warm, clean water. This final part is crucial as you need to remove all traces of the cleaning product from the surface before you can apply stain on it.
Once the workpiece is clean, let it dry for about an hour or two, depending on the cleaning method you used. Ensure it’s fully dry before proceeding to the next step.
Also Read: Can You Stain Over Painted Concrete?
Step 2: Scuff sand it with fine-grit sandpaper
Use fine-grain sandpaper to scuff up the surface lightly by hand. The idea is to smoothen the surface and remove any imperfections to allow for an even finish.
You can use 320-grit sandpaper or sanding sponge for this purpose. The light scuff sanding will also de-gloss the surface and enable the gel stain to stick better.
A sanding sponge is the best for use in this case. It’s flexible and will do an excellent job scuffing up the piece without leaving behind any sanding marks.
In any case, ensure you lightly sand along the direction of the wood grain just to be safe.
Step 3: Wipe the dust.
After lightly sanding the entire piece, wipe it with a tack cloth or a damp rag to remove the sanding dust and residue.
You want to ensure no dust remains because any residue will show through the stain. Such residual material can cause the stained surface to appear uneven.
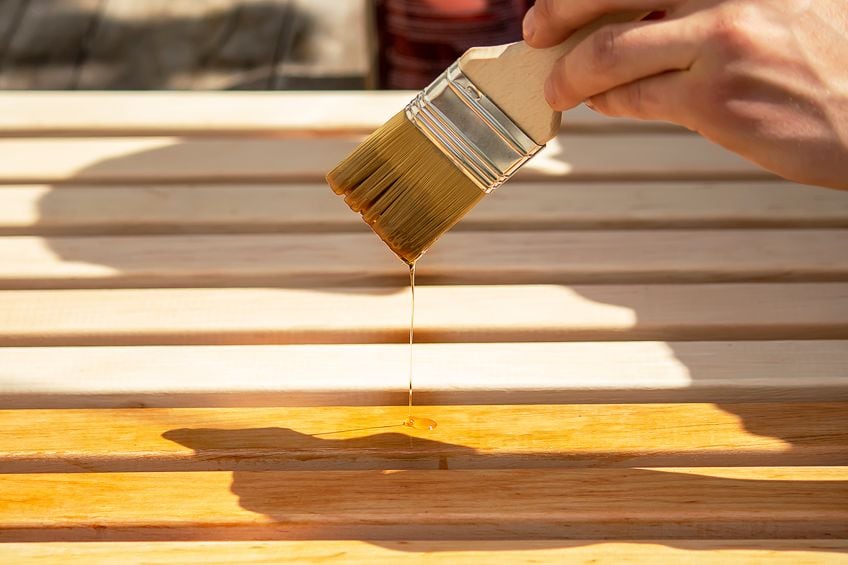
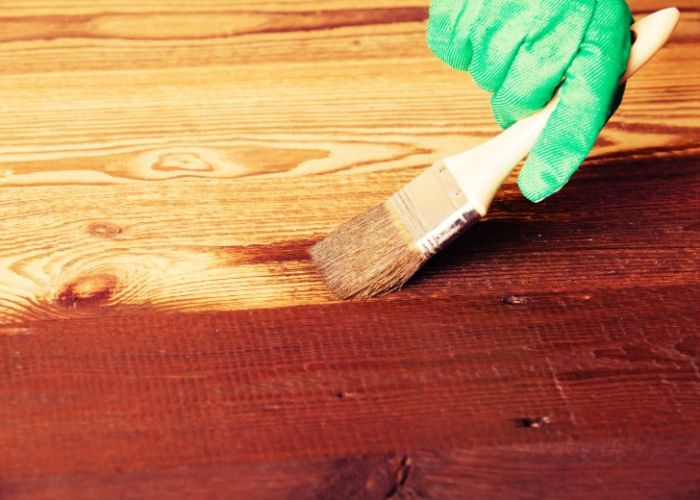
Step 4: Apply the gel stain.
As soon as the piece is ready, use a foam brush to apply an even layer of the gel stain across the surface. If you’re working on deck, here are a few deck staining tools that I recommend.
Ensure you cover every inch with a generous amount of the stain and apply it along the grain.
Wipe off the excess gel stain with a lint-free cloth. While wiping, use the cloth to distribute the stain into a thin, even coat.
Notice that wiping the stain is the most crucial part of the process; it determines how well the surface will look. So ensure you do a good job at it.
One way to ensure the desired results is to rub the stain in circular motions and then back and forth along the grain. This way, you distribute the stain across the surface and then ensure any lines you leave behind align with the wood grain to appear natural.
Start by wiping lightly, then apply more pressure if necessary, albeit gently.
If you want a darker color, let the coat dry for about two to three hours (or as indicated on the product label), then add another coat.
You can put as many coats as you desire until the color is as dark as you want it.
Step 5: Let the stain dry
Will stain dry over polyurethane? Yes, the drying time for gel stains varies depending on the weather. In any case, let the wood dry for approximately 24 to 48 hours.
It’s best to let the stain dry for as much time as possible before applying anything on top of it. Applying a top coat before the stain is fully dry will make the surface take several days to cure and harden. Here is how to get stain to dry faster.
Step 6: Clear coat it
After finalizing your stain application process, you need to lock it in. Gel stain isn’t durable on its own, so you need to add something on top to make it longer-lasting.
Since staining is designed to color the wood, you wouldn’t want to mess up that natural color once you apply it.
So whatever you apply on top of the gel stain should have no additional color of its own.
Instead, use a clear topcoat that will cover and protect the layer of the stain without influencing its color. There’re various clear coat options to choose from:
1. Polyurethane
Gel stains are usually oil-based, so consider coating them with an oil-based poly.
2. Lacquer
Lacquer consists of shellac dissolved in some synthetic substances or alcohol, so it will adhere well to a coat of gel stain. Lacquer forms a hard protective coating that locks in the stain color.
3. Shellac
Like lacquer, shellac dries to form a hard coat that protects the coat of stain and keeps it from peeling and stripping off.
We recommend a spray-on product for the topcoat. It’s easier to apply and doesn’t involve rubbing an object on the stained shellac surface. Spraying also ensures better coverage across the entire surface.
Note: It’s always advisable to test your stain on a piece of scrap wood before using it on your project. This test can help you confirm if you have the color you want.
You can also apply the stain on an inconspicuous area, such as the underside of furniture before going all in.
The objective is to be sure you are getting the right color.
Mistakes to Avoid When Using Gel Stain
To get the best results on your project, following the required steps carefully while avoiding potential pitfalls is best. Here are some of the five pitfalls to watch for when working on your stain project.
Working with a badly damaged wood
Staining over a badly damaged piece of furniture or wooden appliance may not solve the underlying problem. Specifically, the gel stain will not fix the problem if your wood has deep scratches, missing pieces of veneer, or old water stains.
You will need to fix the missing veneer first and strip the old coat before applying your gel stain in any of these cases.
Using a lighter colored stain
You should always consider going darker when staining on top of an existing finish. The darker the stain you use, the better you will cover the imperfections on your piece.
So, use a darker gel stain than the original color when staining over poly. Avoid working with a lighter shade if you want the best results.
Sanding against the wood grain
We always recommend light sanding in the same direction as the wood grain when prepping a wood surface for clear coating or staining.
This is crucial since sanding against the grain will likely leave scratch marks that show through your gel stain.
Using coarse sandpaper or power sander
You need to avoid coarse sandpapers because they will likely leave scratch marks on your polyurethane finish. The objective here is to make the surface smooth and scuff it up to give the stain something to grip on.
Additionally, you don’t want to sand down the entire topcoat down to bare wood, which is what your power sander might do.
The powerful motor action makes it difficult to control the pressure you apply while sanding a thin topcoat such as the poly.
Applying thick coats of gel stain
Two problems are associated with thick coats of gel stain: firstly, the thickness makes it hard to dry, so it may be several hours or days before the stained wood cures. Secondly, thick layers usually appear uneven with patched coloring.
Overall, the results will be much better if you apply thin coats of gel stain and recoat as necessary until you achieve the shade you want.
Moreover, always wait for one coat to properly dry before applying the next one. And, always wipe off the excess stain to ensure you have even coverage.
Can you stain over water-based polyurethane?
Yes, you can apply wood stain on top of a water-based poly as long as you use a gel stain. The stain also needs to be water-based for better compatibility. While at it, be sure to scuff sand the surface with fine-grit sandpaper or sanding pad before staining it.
Can you use oil-based stain over polyurethane?
No, a standard oil stain won’t work on top of a polyurethane coat. Instead, the stain will just wipe off and leave no color behind after applying it.
Standard oil-based wood stain works by seeping into the wood, but the coat of poly won’t allow penetration.
However, the oil stain will stick on the existing topcoat if you mix stain with polyurethane or use an already mixed product such as the Minwax PolyShades.
Method 2: Using Minwax PolyShades
Other than applying gel stain, you can coat over polyurethane with a combination of wood stain and poly. In this case, we recommend PolyShades from Minwax.
- POLYSHADES WOOD STAIN – Minwax PolyShades is an oil-based wood stain and poly in one. It enhances wood grain by combining beautiful, rich color and long-lasting polyurethane protection in one easy step.
- REDUCE FINISHING TIME – This one-step wood finish can be used over polyurethane finishes, so you can change the color of your wood surface without removing the existing finish. Use on bare or already-finished wood.
- BEAUTIFUL RESULTS – This beautiful wood stain provides a rich finish with a glossy sheen. It offers a classic, warm brown color that looks great on a variety of projects. Recommended uses: furniture, woodwork, doors, cabinets & accessories.
The product contains wood stain and polyurethane combined. It dries hard due to the poly and will adhere to the existing polyurethane topcoat without a problem.
Here is the procedure to use when coating with Minwax PolyShades.
Read also: Is Varathane the same as Minwax?
Step 1: Clean and prep the surface
You may want to start by degreasing the surface using a suitable degreasing agent if it has noticeable grime or grease on it.
Once the surface is dry, prep it by sanding it lightly with a fine-grit sandpaper. A 320-grain sandpaper or sanding block should do an excellent job preparing the finished wood for staining. After sanding the entire surface, wipe it clean with a tack cloth or damp rag to remove the dust.
Step 2: Apply PolyShades
Since you are staining over a clear coat, you don’t need to use any pre-stain wood conditioner. Simply go straight to staining once you have lightly sanded and cleaned the surface.
First, open the Minwax PolyShades can and stir the contents thoroughly to mix them up with a mixing stick before putting it on your project.
Immediately after stirring, brush PolyShades finish onto a piece of scrap wood to see how the color looks. This will give you a feel of exactly what to expect for the final color.
Also, the test will show you if you have mixed the stain adequately.
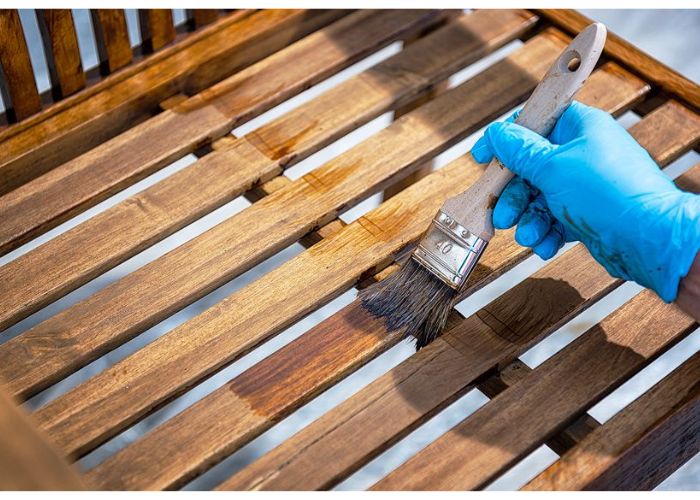
Dip the paintbrush into your PolyShades can and brush on a thin layer of the stain in the direction of the wood grain. Ensure you form an even coat with the stain covering every inch of your project.
Step 3: Clean the brushes
Once you are done staining, use mineral spirits to clean the brush or brushes you have used. Simply dip the brush in a container of mineral spirits, let it soak for about two minutes, then swirl the bristles through the liquid.
Shake and lay the paintbrush on a clean rag to dry.
Step 4: Let it dry and then recoat if you want it darker
Leave the coated surface to dry for at least six hours. If you prefer a darker shade, go over the stained surface with fine steel wool, wipe the debris and apply another coat with the clean brush.
You can add one or two coats depending on the depth of color you wish to achieve. Ensure there’s sufficient drying time between coats, following the manufacturer’s recommendation in the product label.
Related Article: How to Stain Wood Furniture Darker
Things To Consider When Staining Over Polyurethane
You should keep a few things in mind when staining over a polyurethane finished surface. Read along to learn the things to consider for a successful project.
Woodgrain
You must have noticed we emphasize the need to follow the direction of the wood grain when you stain wood over a polyurethane finish. This is an essential consideration polyurethane is typically clear colored, so any stain marks against the grain will show over the coat.
You want to pay attention to the grain so you can follow it and disguise any marks that may remain during staining.
The wood stain color
Always go for a darker color than your existing finish. That way, you can easily hide any imperfections on the wood surface with the new stain.
If you bought a stain that isn’t dark enough and you find this out after testing on a piece of scrap wood, consider returning to the shop for a darker option; you will be happy you did.
Wood stain adherence

In terms of adherence, notice that standard stain won’t adhere to a coated surface because the polyurethane acts as a barrier. Therefore, while wiping the excess, you will wipe off all the stains you applied, which may be a waste of time and money.
So we recommend using gel stain or a combination of stain and poly that will adhere to the existing finish without an issue.
More importantly, always scuff up the surface with fine-grit sandpaper to improve adhesion because polyurethane wood can be pretty glossy.
Learn More: Staining Bamboo Wood
Will Stain Stick to Polyurethane?
Yes, if it’s a gel stain, it will stick to poly. This is because both poly and gel stains contain urethane as the primary ingredient.
So, the urethane in the stain will bond to the existing poly on the coated surface when you apply a gel stain.
How Long Should I Leave a Gel Stain to Dry on Top of Polyurethane?
Gel stain is much like other wood stains, typically requiring 8 to 24 hours to dry. If you use multiple coats, consider leaving about 8- to 24-hour intervals between the coats for proper drying.
Will Polyurethane Darken Stain?
Oil-based polyurethane has an amber tone that can significantly alter the color of stained wood. However, this alteration will likely be in the form of amber and not necessarily darker color.
Water-based polyurethane, on the other hand, has no significant tinting effect on wood stain.
Related Post: Can You Stain Over Stain?
Can You Paint Over Polyurethane?
Yes, you can paint over polyurethane. You only need proper preparation for good adhesion.
Before painting, clean the polyurethane surface to remove any dirt, grease, or wax. Lightly sand the surface to create a rough texture, which helps the new paint adhere better.
Apply a coat of primer designed for slick surfaces to improve paint adhesion. Once prepared, you can paint over the polyurethane with your chosen paint.
Remember, painting over polyurethane may result in a different finish compared to painting directly on bare wood or other surfaces.
FAQs
Should I sand between stain and polyurethane?
Yes, sanding is always necessary between coats of stain and poly to remove any surface imperfections that might appear through the finish.
Can you stain over Polycrylic?
Yes, you can apply a tinted gel stain over a surface coated with Minwax Polycrylic Finish to give it your preferred shade. Ensure you sand the surface lightly and wipe off the debris before applying the gel stain.
Read: Can you put Polyurethane over Polycrylic
Can you stain over lacquer?
No. Much like any clear coated surface, any attempts to apply standard stain over the lacquered wood surface will be unsuccessful. However, you can use gel stain over lacquer after a light sanding of the existing coat to remove the sheen.
Can you stain over varnish?
Yes, it is possible to use wood stain over varnish, except the results won’t be as good as those when staining porous, untreated wood. Also, be sure to clean and sand the varnished surface to texture it enough and let the wood stain stick.
Do you have to remove polyurethane before staining?
No. Removing poly before staining isn’t always necessary if you intend to use a polyurethane-stain blend of your desired shade. The blends can be applied over the existing finish and aren’t designed to soak in. Instead, they will dry to form a protective film on the surface.
How do you darken stain after polyurethane?
You can use a dark-colored gel stain or polyurethane-stain blend such as Minwax PolyShades to darken stain after poly. Ensure you scuff up the surface by sanding it lightly before applying the product though.
Does stain penetrate polyurethane?
No. Stain doesn’t penetrate polyurethane. Poly dries to form a hard coat impervious to water and other liquids, including wood stain.
Can you polyurethane over stain
Yes, you can put polyurethane on top of a stained wood surface after roughing up the stained surface by sanding it slightly to improve adhesion. You can apply the finish with a spray gun, fine brush, cloth, or foam pad.
Learn how long to wait before applying polyurethane over stain so you don’t ruin your woodwork.
Can you Put Stain over Polyurethane Summary
If you have a piece of furniture coated with a polyurethane finish, but you don’t like the color, you can change it without having to strip the existing finish down to bare wood. Just apply gel stain over polyurethane and you’ll be good to go.
We hope this article helped you learn how to stain over polyurethane without the arduous work of stripping or sanding down the old finish. Next, you should learn about staining over painted wood.
Let us know your thoughts in the comments sections below.
Hi David!
Thank you for this lovely post! It is the most helpful and informative post I’ve found so far.
My question regards cabinets that are for a high end client, and were coated in a water based stain and a polyurethane and mineral spirits satin top coat. The final result was a color a bit light for the clients liking, and I want to ensure that the adjustment does not look like plastic, is drip free and streak free. The shift would be similar to going from a natural wood stain to a golden oak, so quite a subtle shift. I also want to avoid having to strip the cabinets and start from square one.
Which product above do you think would be best to use to make this adjustment, and is a poly application necessary upon completion of the stain adjustment with either of the above choices?
Thank you?
I have butcher block counter top. They were stained than top coated with polyurethane. I would like to darken the countertop. What is the best method , or is this even possible
Sand scuff up the top layer of poly then get a stain and poly combo and apply. The right way is strip and sand (You would need to bring this all the way back to bare wood to do this right) but whatever way you use make sure and use food-grade material to finish if it’s for chopping.
If it’s not not for chopping, I would go with a dye like Trans tint dye and delayed shellac before recoating it.