Teak is a popular wood choice for outdoor furniture and fences due to its strength, durability, insect resistance, and weatherproof qualities.
It is loaded with natural oils that give it its characteristic tawny golden color and protect it from rotting. The oils occupy the pores in this tropical hardwood, leaving little room for water to penetrate and damage the wood.
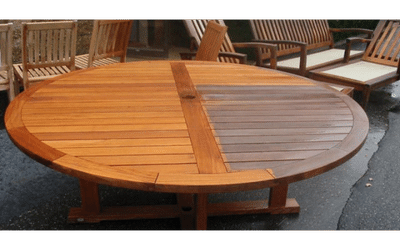
However, sun exposure causes teak to lose some of the protective oils over time. This process leaves the wood faded, with a grey patina on the surface.
So, can you stain teak wood furniture, decking, or fence to prevent fading?
Let’s dive in to find out.
Can You Stain Teak Wood?
Yes, it is entirely possible to use non-pressure treated wood outdoors. However, this is not recommended as the volatile outside weather can quickly damage the wood irreversibly, so it is always best to protect the wood when using it outside.
Leaving the wood untreated for some weeks allows some of its oil to evaporate, leaving it with more room to absorb the wood stain.
While at it, it is essential to prep the surface properly to ensure better stain absorption and achieve an even, beautiful finish.
The other important thing is to choose wood stains formulated specifically for teak wood furniture, decking, and fence. These can be water-based or oil-based, but not gel stains or glaze.
Why Should You Stain Teak Wood?
You may be familiar with teak oil. However, while the name has teak in it, the oil is not made from the natural oils in teak wood. So it does not behave like the protective oils in teak, even though it can preserve the wood’s color for a short period.
Unfortunately, teak oil provides a petri dish for molds and mildew, introducing a fungal discoloration problem that untreated teak normally does not have.
With prices of teak wood going up every year, using wood stains instead of oils provides a more permanent solution with numerous benefits.
Related read: How to apply teak oil to outdoor furniture.
1. Wood stain changes and enhances the color
The primary reason to stain any wood is to enhance its color and make its grain pop. Teak is one of the most beautiful wood types on the market, with a nice grain pattern.
Staining, especially with a light-colored wood stain, can help make the grains pop. More importantly, teak wood normally loses its golden honey charm with prolonged exposure to the elements.
Over time, the tawny golden color disappears as a grey patina replaces it. Wood stain can color the wood and prevent it from greying.
Since wood stain works by penetrating the pores, it can offer a lasting color that remains durable despite exposure to the sun’s radiation. Stains are available in many shades, so you can choose one that accentuates the wood’s golden-brown hue.
The lighter the shade, the more likely it is to absorb less heat when in direct sunlight, which helps minimize fading.
Related: How to Check Teak Wood?
2. Stain can protect Teak from the elements
While teak does not typically require any finishing to protect it from weather elements, leaving it unprotected can reduce its service life. The more it stays out exposed to the elements, the more it loses its natural oils and becomes grey.
Staining can protect the wood from losing its natural oils and give the wood an extra layer of protection from the sun’s damaging radiation and other elements like rain and snow.
We highly recommend staining teak fences due to their constant exposure to harsh weather elements. The constant contact with rain, dirt, the wind, and the sun’s UV rays can significantly affect the wood’s long-term structural integrity.
Staining and sealing go hand in hand, so the exercise can prevent buildup on the surface of the wood and keep it looking new and strong for longer.
See Also: Cherry Wood Stain Colors
3. Stain can add some aesthetic appeal
Wood stains for teak are versatile and allow the wood to have various shades. For outdoor living spaces with teak furniture, decking, and fence, adding a beautiful splash of color can make the place more livable.
Consider choosing relatively bright hues to make your teak furniture and fence more visually appealing and in sync with your overall style.
4. Stain can prolong the service life of Teak wood
When teak becomes grey, the wood has lost some of its natural, protective oils. While some people have no problem with the grey patina, the greying means the wood is less resistant to water and moisture.
When water can penetrate the wood, it slowly weakens it, which can take a few years off the projected lifespan of your teak.
By staining teak and keeping it from losing its protective oils, it can retain its structural integrity and remain durable as it should.
Does Teak Stain Easily?
Teak accepts both penetrating and wiping wood stains well due to its regular grain structure. However, staining teak furniture or fence can involve a bit of elbow grease because of the wood’s preparation before applying a stain on it.
How to Stain Teak Furniture?
Preparation is essential in staining teak wood furniture, decking, and fence. This section provides the supplies you will need to complete this project and the specific steps to follow to do it correctly.
Supplies for staining teak wood
- Wood stain
- Sanding sealer (wood filler)
- Drop cloth
- Hand gloves
- Sanding block or random orbital sander
- Sandpaper
- Tack cloth
- Clean absorbent rags
- Foam brush
The procedure to follow
Follow the procedure below to stain your teak wood once you have everything you need for the task.
Preliminary step: Prep the work area
The chances are that you will be working outside. So the first thing you want to do is clear anything that might be on your way or that you don’t want the stain on.
For instance, if you are staining a teak fence, move any garden furniture out of the way to allow you enough room to work.
If you are finishing the deck, you will need to do the same, and if you are working on teak furniture, you will need to lay down plastic sheeting or drop cloth to collect any sanding residue and spills.
You could also cover the adjacent lawn and any potted plants nearby if you are staining a deck or fence. Wood stains are made of chemicals that you don’t want spilling on the adjacent foliage as they could damage it.
Once that is done, put together all the things you will need within arm’s reach, so you don’t have to stop in the middle of your project to pick something.
Step 1: Clean the wood
The first prep work here is to clean the wood properly. If it has accumulated dirt on the surface, you may use a soft-bristled brush with a solution of mild dish soap and water to wash the wood.
Otherwise, you can wash it with a soft sponge saturated with a soapy solution, then rinse it with clean water. If the wood is only slightly dirty, use a clean rag dampened with water to wipe the dirt and debris off the surface.
Using chemical cleaning products is not recommended for teak. They can damage the wood and complicate things for you.
Step 2: Sand
Use a random orbital sander with 120-grit sandpaper attached to remove any surface inconsistencies. If you are refinishing a teak with a previous finish already, this step is essential in ensuring you remove the previous finish.
If it is a small project, you can use a handheld sanding block. But an orbital sander is best for larger, flat surfaces.
After sanding, feel the entire wood surface for rough spots that require further sanding. You want to ensure that all the inconsistencies are gone by the time you finish this first sanding phase.
Switch to 220-grit
After removing all the surface inconsistencies, wipe the sanding dust with a clean lint-free cloth or dry paintbrush, and then switch to 220-grit sandpaper.
Sand the entire surface as you did with the coarse 120-grit sandpaper, keeping the pressure on the sander even and gentle until you have covered every inch.
When you finish sanding, the wood should be completely smooth to the touch and even with no noticeable bumps on the surface.
Then, you can use a tack cloth or clean rag dampened with water to wipe the sanding residue. Notice that we recommend a damp rag in this case because you want to remove every ounce of dust from the surface.
Leaving wood dust on the surface can cause undesirable residue that can form a mess when you stain the wood.
A tack cloth does an excellent job of removing the sanding dust, but a clean damp rag is also a good alternative; it gets the job done.
Sanding is essential in creating a smooth surface for the stain to go onto. It also helps open up the wood pores to absorb the stain. So ensure you take your time and do a good job at it, as it will directly affect the quality of your final results.
Step 3: Apply a sanding sealer
After the sanded wood has sufficiently dried, use a foam brush to apply a light coat of sanding sealer on the wood. You want to keep the coat light enough not to fill up the pores but just to condition the wood to absorb the stain better.
Ensure you cover every inch of the wood surface with the sealer to make the teak wood accept stain better. Then wipe off the excess sealer immediately after applying to avoid splotching and pooling.
You don’t want to leave the sealing product on the wood for too long before wiping. It will dry and pool on the wood, messing it up.
Do it correctly, as you will have a smooth teak wood surface ready to receive the stain. It also helps promote better pigment distribution, leading to a more even color.
If you prefer the color lighter, you can add mineral spirits to the sealer to thin it. Of course, you can always consult with the supplier for the recommended thinning ratio depending on the product you are using.
Step 4: Scuff sand the sealed surface once dry
Allow the sealer to dry completely according to the drying time on the label, and then give it a quick once over with fine 220-grit sandpaper. You should not use a power sander at this point when sanding between coats of the finish.
The idea is to scuff up the surface and smoothen it up to prepare it for the subsequent product. The sealer is a liquid, so it will raise the grain slightly. Sanding at this point helps smoothen the raised grain.
So just go over it lightly and evenly with sandpaper, keeping a light touch throughout. Use a tack cloth to wipe off any residue left from sanding.
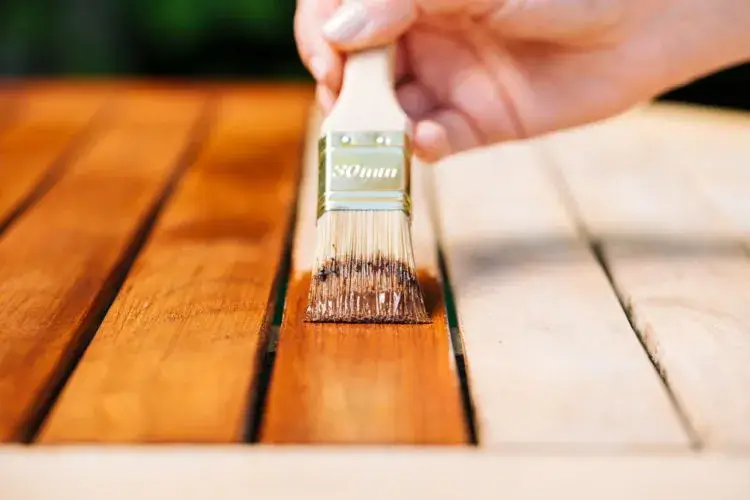
Step 5: Apply the wood stain
Once the wood is dry, you can proceed to apply the stain. Start by testing out the stain on an inconspicuous area before proceeding with the rest of the wood surface.
This allows you to get your strokes right and to check if you like how it comes out. If you are happy with the color, go ahead and wipe the stain all over your project, following the direction of the wood grain.
While many tools will do the job, we recommend a clean, lint-free cotton cloth for this purpose. It does an excellent job distributing the stain across the wood surface.
Simply dunk it into the stain and rub it onto the wood until you cover the entire surface with an even coat.
NB: As an alternative, if you’re exploring different staining options, consider the art of hemlock stain application. Hemlock wood presents its own unique charm when stained, and the process is quite similar.
Step 6: Wipe off the excess stain and let it dry
After rubbing on the stain, wait for 5 to 10 minutes, and then wipe off the excess with a clean absorbent cloth. Wipe within the grain so that any lines created are nicely aligned with the wood grain.
If you prefer a darker color, you will need to leave the stain on the surface for longer, often slightly more than 5 minutes, but not more than 10 minutes.
However, if you want the color lighter, you can wipe the excess stain immediately after applying it in less than five minutes. The longer the stain stays on the wood before wiping, the deeper the color you achieve.
After wiping, leave the wood to dry completely. The drying time will vary depending on the stain you are using. Water-based stains will dry sooner, while oil-based wood stains may take several hours to dry completely.
Step 7: Apply a second coat of stain once the first has dried
Once dry, observe the surface to see if you like the color. Stained wood will appear lighter when dry than before it dries. If you are happy with the color, you can proceed to the final step: sealing.
However, if the color is too light for your liking, apply a second coat the same way as the first, wiping off the excess and allowing it to dry for the same number of hours.
Step 8: Apply a sealant to the stained teak wood
When you are finally happy with the color, apply a clear topcoat to protect the surface and lock in the stain color.
You can use any preferred clear coat such as lacquer, polyurethane, or varnish. Ensure you read the product label for the application instructions and follow the manufacturer’s directions to create the best finish.
Interestingly, just as teak can be stained, acacia wood can also undergo staining. For valuable insights into the art of staining acacia wood, explore our comprehensive guide on acacia wood staining tips.
How often Should You Stain Teak Wood?
You can reapply wood stain to teak wood fences, furniture, or decks after every 2 to 5 years, depending on the product you chose and how well it was applied.
When applied correctly, these stains can last as long as 7 years outdoors before they need reapplication.
Do I Have to Finish Teak?
Teak has natural protective oils in its structure, so it is not always necessary to finish teak wood. However, applying a protective finish is recommended for outdoor teak items and structures like furniture and fences.
While choosing the finishing method for your teak, consider going for sealant types designed specifically for teak wood. Such teak wood finishes will likely give you the best and most durable results on your project.
What is the Best Finish for Teak Wood?
Lacquer is the best finish for indoor teak wood, whether it is used for handrails, flooring, or posts. Lacquer goes on thin, so it is essential to apply several coats for the best protection.
Its consistency is generally lighter than polyurethane, varnish, or shellac, allowing it to penetrate the wood better.
Lacquer also dries pretty fast but may not be the best option for outdoor teak because it is less durable. For exterior applications, you may consider polyurethane over lacquer.
Read: How to Apply Polyurethane over Lacquer
How do You Change the Color of Teak Furniture?
The best way to change the color of teak furniture is to apply liberal amounts of the wood stain of your preferred color in the direction of the wood grain.
Allow the stain to soak into the wood for a minute or two, and then remove the excess with a clean, absorbent cloth.
Can I Paint my Teak Garden Furniture?
Painting teak furniture is possible but not often recommended, especially when the wood is still new. When you paint teak wood, it hides the teak’s natural beauty, and the paint may experience adhesion problems down the line.
Teak has protective oils in its structure that tend to impede the adhesion of paint, potentially causing peeling and chipping.
Teak Stain Colors
Teak wood stain is available in different shades, including:
- Black ebony
- Cherry
- Teak
- Mahogany
- Walnut
- Dark walnut
- Antique walnut
- Pearl
- Whisky
- Artic
- White
- Neutral
- Grey
- Light grey
- Honey
- Cappuccino
- Blue Capri
- Night blue using a Navy blue wood stain
Best Teak Stains
When it’s time to stain teak outdoor furniture, you want the best products and techniques to ensure a long-lasting finish. There are many different stains on the market, but not all of them are created equal.
Here are the teak wood stains available.
1. Best Stain for Teak Wood – SamaN Interior Water Based Wood Stain
- The product is 6PK ASSTD ALO Sandpaper
- Easy to use
- The product is manufactured in China
If you are looking for excellence in your interior teak furniture project, this SamaN water-based stain is the ideal choice. It boasts years of proven excellence as the best wood stain for professional and DIY applications.
The stain is available in more than 40 shades, ideal for teak wood. This allows you to choose the color you love the most for your furniture, flooring, and more.
This teak-colored stain has an unbeaten safety profile. It comprises a natural formula, making it odorless and safe for the user and the environment around them.
More importantly, the stain is highly durable and delivers lasting results.
2. Best Stain for Teak Outdoor Furniture – General Finishes Oil-Based Penetrating Wood Stain
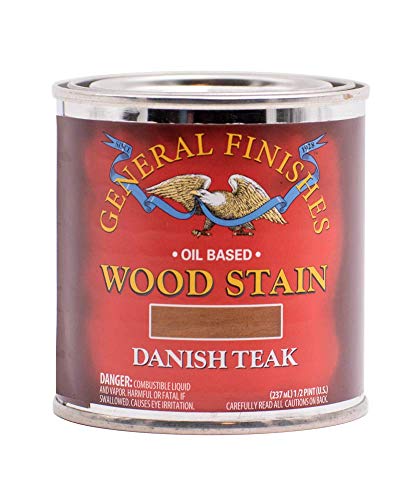
- Oil based stain penetrates the grain of the wood to promote uniform acceptance of stain
- Prevents streaking and blotching to help ensure a beautiful, even stain
- Brush, Wipe On with Clean Rag, Wipe Off
You need something more weather resistant to withstand the volatile outdoor weather, water, and UV radiation for outdoor teak.
This wood stain features an oil-based formula, making it durable enough to survive the harsh weather elements outside. The stain penetrates the teak wood grain deeply, distributing the pigment uniformly and evenly across the entire surface.
It is easy to apply with a high-quality bristled brush, foam brush, or lint-free cotton cloth, so you can choose the application method you like the most. It won’t form splotches, creating a beautiful, blotch-free finish.
3. Best Teak Table Stain – SEAL-ONCE Exotic Premium Wood Sealer, waterproofer & stain
- WOOD SEALANT: Our Exotic liquid formula is engineered to penetrate Ipe, Cumaru, Garapa, Teak, Brazilian mahogany, cherry hardwoods as well as Thermally Modified Woods which are denser than North American hardwoods. It creates a UV-stable coating for protection against the elements.
- DECK STAIN: Exotic is a penetrating wood sealer, furniture and deck stain, and finish, formulated for tropical lumber species. Seal Once forms a water-resistant shield around wood fibers at the cellular level to help preserve the natural color.
- WATERPROOF WOOD SEALER: It's water-based, ultra-low VOC, and great for enhancing the extended life of your siding, deck or porch. Do not brush with other waterproofing products and apply each coat in the shade and out of direct sunlight.
This teak sealer, waterproofer, and wood stain combo is the best way to treat your teak dining table, especially one you use. The stain features an enhanced formula specifically for dense hardwoods like teak.
Its water-based formula is low in volatile organic compounds, making it low-odor and non-toxic. The stain is eco-friendly, so it will not harm your pets, plants, or family.
It cleans easily with soap and water and offers the best protection against the elements. Its superior UV protection helps ensure your teak does not lose its golden honey charm.
Teak furniture stain
FAQs
Can you stain teak wood darker?
Yes, you can stain teak wood darker by allowing the wood stain to stay on the surface for longer before wiping the excess. You can also use a darker-colored wood stain to make your teak darker.
How to modernize teak furniture?
You can modernize antique-looking teak furniture by treating it with a teak brightener. The product helps restore and enhance the color of weathered teak wood, removing mildew, mold, and other stains from the furniture. You can then stain the wood with your preferred stain color and finish it with a clear topcoat like lacquer to give it a nice gloss and modern look.
Read Also: Can You Stain Over Stained Wood?
Final Thoughts on Staining Teak Outdoor Furniture
So, can teak wood be stained? Absolutely yes!
Wood stain can significantly enhance the look of teak wood items and structures if chosen correctly and used properly.
The stain can also prolong the service life of the wood by making it more resilient to the elements, especially in exterior environments.
We hope this guide helps answer your questions and leads to better results on your teak projects.