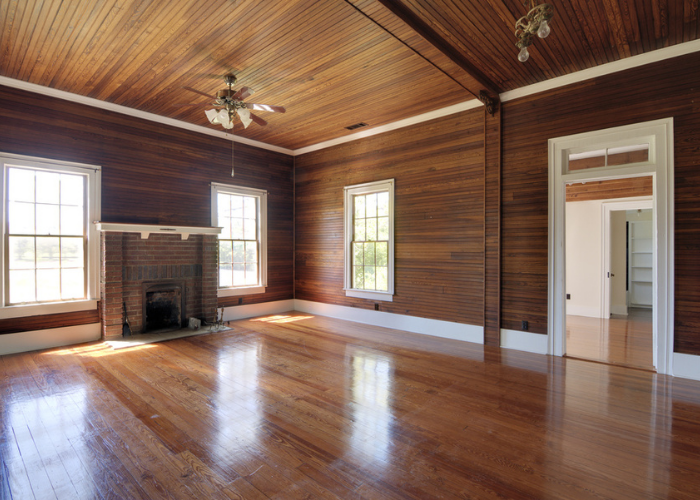
If your home has one of those trusty wood-paneled walls, the chances are that have taken some beating from the years of use. Staining wood paneling can be an excellent way to breathe fresh life into these walls.
The paneling could use some makeover if it noticeably looks worn around the edges or still has those dark colors making the space look dated and dingy.
A simple coat of new color can brighten things and transform the space. But can you stain wood paneling on your own? Read along to learn the simple steps you might follow to complete this task.
Can You Stain Wood Paneling?
Yes, staining wood panels can be an excellent way to change a room’s appearance or transform the entire house. Stains come in all shades, allowing you to choose the best color to give your space a brighter, livelier look.
You do not have to hire a professional to stain fake wood paneling or actual wooden paneling. You could save money and use the simple steps in this guide to complete the task on your own.
How to Stain Wood Paneling
After deciding to give your wall panels a facelift, the next essential thing is to assemble a few tools of the trade. Here are the supplies you will need for the job.
- Rubber gloves to protect your hands from staining
- Applicator(s) for the stain and finish
- Bucket for cleaning
- Sandpapers and sanding sponge (120, 220, and 400-grit)
- Tack cloth or lint-free rags for wiping the sanding dust
- Vacuum for removing the wood dust
- Drop cloths or plastic sheeting to collect spills
- Painter’s tape for clean, professional-looking edges
- Paint roller, paintbrushes
- Primer
- Stain
- Sponge
Step 1: Prepare the area
If the room has furniture, this is the time to move them to create enough space to move around and work freely.
Additionally, keep drop cloths nearby. You will need to lay it down after washing and drying the wood flooring on wall just before you begin sanding the paneling.
Check to ensure you have everything you will need nearby. Before beginning your project, you should ensure everything in the list of supplies above is available. Then, you can proceed to the next step of the process.
Step 2: Clean, rinse and dry the panels
A clean set of wooden panels will better accept the primer, stain, and topcoat. So, start by cleaning the walls. A solution of soap and water should do the job.
Prepare the cleaning solution by mixing one tablespoon of a dishwashing detergent with a gallon of hot water in a bucket.
Then dunk a sponge into the solution and use it to gently scrub the panels. You want to eliminate any body oils, handprints, grime, heel scuffs, and all the dirt accumulated over time.
While cleaning, you don’t want to apply too much force that might only push the stains deeper into the wood.
Once you finish cleaning the entire surface, use a soft, absorbent, lint-free cloth to dry the paneling. Ensure no water remains on the boards. You can also use a bop to remove any water spilled on the floor.
Let the surface air dry for a few minutes or hours before proceeding.
Step 3: Sand the paneling
Once the panels have dried completely, use medium-coarse 120-grit sandpaper to give it a first sanding to remove any surface inconsistencies. Ensure you fill any dents with wood putty and let them dry before sanding.
After evening it out, switch to 220-grit sandpaper and gently sand the entire surface to smoothen it. After the second sanding, the surface should be smooth to the touch. However, you still need to give it a quick once over with 400-grit sandpapers for the final touch.
The extra-fine 400-grit sandpaper gives the paneling an extra smooth feel and readies it for the primer and stain.
The whole sanding process also helps remove the wood’s worn outer layer, restoring its warmth and natural beauty. For even more efficient sanding, consider using the best electric drywall sanders available for a professional finish.
Step 4: Vacuum up and wipe the dust
After sanding, use a vacuum to remove the wood dust from the boards. Pay more attention to the spaces between the wooden panels where the dust can hide.
Next, wipe the entire surface with a lint-free rag dampened with water. Ensure you wring the rag to remove the excess water before using it on the boards.
Alternatively, you can use a tack cloth instead of a damp rag. Tack cloth generally does a better job of wiping the wood dust off sanded surfaces.
Step 5: Apply a conditioner
Let the surface dry, then follow it through with two thin coats of stain-blocking primer.
Wall panels typically comprise softwoods like pine and spruce. Such woods have uneven pores in their structure. Therefore, they are prone to blotching when stained without a primer.
Applying thin coats of pre-stain primer helps even out the pores and ensures proper staining without forming blotches and color patches.
We recommend choosing a primer of the same brand as the stain. Also, a high-quality primer like KILZ 2 All-Purpose Interior/Exterior Primer could make a difference between an ordinary finish and a professional-looking one.
Also Read: Can You Spackle Wood Paneling
Step 6: Stain the wood
Staining is undoubtedly the most important part of this project, even though every other step in this process is essential.
That said, the best way to apply the stain is by using a piece of a soft, lint-free cloth. Saturate it with the wood stain and rub the panels with it inconsistent, even strokes along the direction of the grain.
You can wipe the excess stain immediately with a lint-free rag if you want a light color. However, if you prefer the stain color deeper, allow the stain to stay on for 5 to 10 minutes before wiping.
The longer the stain stays on the surface, the deeper the color. More time allows more of the colorant to penetrate the wood and color it.
However, you don’t want to let the stain stay on for too long. Often, you should not let the stain stay on for more than 15 minutes before wiping—depending on its drying time.
Leaving wood stain on the solid wood paneling for too long will lead to a tacky surface that never dries. Water-based stains may dry in 5 to 10 minutes, while oil-based stains may take up to 15 minutes, so pay attention to the stain’s recommended drying time.
More importantly, ensure you wipe all the excess stain and remain with a thin stain coat. Wiping is the most important part of staining and should follow the direction of the wood grain for the best results.
Let this coat dry for the entire recommended dry time before recoating. You add another coat once the first one has dried if you want more color, or you could make do with a single coat if you prefer a light color.
So, adding a subsequent coat or not should depend on whether you are happy with the color or prefer more of it.
Step 7: Apply a protective finish
After the stain has dried completely, you can always apply a protective topcoat to lock in the color. Topcoats such as varnishes or polyurethanes dry to form a hard coat that helps make the wood resistant to scratching.
Such coats also help waterproof the wood and protect it against chemical spills. This kind of protection can go a long way in preserving the color and prolonging the service life of your panels.
You could apply the finish with a paintbrush, paint roller, or sprayer. Your choice of the applicator may depend on the finish or personal preferences. In any case, each product will have the use instructions on the label to guide you. You might be wondering, can you use a roller for stains? Read to find out how to.
The Benefits of Staining Wood Paneling
You may know that staining wood paneling adds a touch of color that can significantly transform the space, especially if the panels have come of age.
However, this is not the only advantage of staining wood paneling. Here are some more reasons why staining wood paneling can be such a brilliant idea.
- Staining and applying a hard-wearing topcoat can waterproof the panels. Since most wood panels are made of softwoods, leaving them unprotected can allow water to penetrate them, leading to swelling and warping.
- Staining can prevent rotting. Since the stain will block the wood’s pores and keep water from entering it, rotting will unlikely occur.
- Staining can prolong the lifespan of wooden panels. Rotting and water damage typically reduce the service life of wood by damaging it prematurely. However, once you stain the wood, you prevent moisture from entering and damaging it prematurely.
- Wood stain can help preserve the aesthetics of your home. Since wood stains come in all kinds of shades, you can choose a color that best suits your interior décor.
Read More: Can You Stain a Wet Deck?
Can You Stain Wood Without Sanding?
Staining without sanding wall panels is possible if the wood has been stained but not finished. Sanding at this point is discouraged since doing so will remove the stain color from the edges of the wooden boards, leaving your project looking uneven.
Otherwise, sanding is always necessary when staining. It helps prep the surface for the stain to penetrate better and create the desired results.
Related post: Can you paint over wood paneling without sanding?
How Can I Change the Color of the Wood Paneling?
While staining is an excellent way to change the color of wooden paneling, it is not the only method. If you wish to change the look of your panels, you could laminate wood paneling, stain them or try out one of these methods.
Method 1: Paint the wooden panels
Painting is a relatively quick way of transforming the look of any wooden panels. It follows almost the same surface preparation as staining. Just as you must wash and dry the paneling before staining, you must clean the boards before painting them.
Paint requires a clean and well-sanded wood surface to adhere properly. Also, you will need to apply a suitable paint primer before applying the paint.
From here on, painting differs slightly from staining in that you can use a paint roller or sprayer, which are not recommended for staining. You also do not need to wipe any excess paint.
Instead, ensure you paint wood paneling with an even coat covering the entire surface properly. Finally, you do not need a protective topcoat over paint. So, ensure you choose a durable paint and primer when you opt for this method.
While the paint is available in numerous different colors, white is always the best option for wooden panels. It does an excellent job of brightening up the room.
Related Post: Can You Put Stain Over Paint?
Method 2: Use drywall to turn the panels into a standard wall
If you prefer a quicker and easier way to give your paneling a facelift, consider covering them with a sheet of drywall. This construction material can quickly create ceilings and walls without much mess.
The drywall method can be a neater and quicker way to change the color of your panels since all you need to do is to install them onto the panels. And you do not need to clean or sand the boards, which saves you a considerable lot of time.
A drywall is incredibly durable and inexpensive. You can purchase them at your local home improvement store and follow the installation instructions that come with them to complete the task.
Related Post: How to Get Wood Stain Off Concrete
Method 3: Hide the wood paneling behind wall art
The beauty of wall art is it comes in various sizes. So you can go for large sizes to cover substantial sections of the paneling, disguising it partly or completely, depending on your preference.
If you do not intend to invest in too many pieces of wall art, you can choose one or two striking pieces for the paneling. These should divert the attention from the wall paneling to the wall art content.
Alternatively, you could opt for enormous sculptures, a photo gallery, or even mirrors. Any one or more of these ideas will do the job.
Method 4: Conceal the paneling with curtains or shelves
You can construct shelves right in front of the panels you wish to hide and make the section functional. Alternatively, you can place a couple of curtains in front of the paneling. Any of these should help you conceal the wall panels.
Interesting Read: How to Finish Bamboo
FAQs
How do you lighten wood paneling?
You can lighten wood paneling by painting it white. Staining wood paneling lighter can also help brighten up the space. If you prefer a quicker method instead, you can line the paneling with brightly colored curtains, concealing it.
Can you stain over old paneling?
Yes, you can stain over any wooden paneling or restain wood paneling if it already has a stain finish on it. S tart by cleaning and sanding it, then applying a suitable stain-blocking primer before applying the stain.
You may want to use a lighter-colored wood stain if the objective is to lighten the space.
Can you gray wash wood?
Staining wood paneling grey is one way to give it a shade of grey. Alternatively, grey wash the wood with paint and wax to add rustic charm.
How do you make paneling look like weathered wood?
You can make paneling look like weathered wood by whitewashing the boards after light-sanding them to help the paint adhere.
Can you stain wood white?
Yes, white wood stain is currently one of the most sought-after on the market. Staining wood paneling white can be a great way to brighten an otherwise dingy-looking room.
How do you refurbish old wood paneling?
You can refurbish old wood paneling by applying gel stain, staining with regular woodstain, or painting it after cleaning and sanding the boards. Refinishing wood paneling or completing artificial wood paneling projects can be DIY or professional, whichever works for you.
How much does it cost to refinish wood paneling?
Refurbishing wood paneling can cost as little as $3.23 per square foot to as high as $6.58 per square foot.
Other Post: What Does Stained Particle Board Look Like?
Conclusion
Can you stain your wooden panels? If you have wood panels that you wish to remodel, we hope this article helped guide you in what direction you could take.
You can stain wood paneling, paint it, conceal it with curtains, or cover it with murals to change its color.
Please leave a comment to let us know your thoughts on the topic.