Polycrylic has become very popular among woodworkers seeking a polyurethane alternative. It’s inexpensive, easy to use, and takes little effort to clean up. Above all, many polycyclic products don’t turn yellow over light-colored finishes.
So, we’ve developed this guide to help you better understand how the wood finish works, its uses and benefits, and how to apply polycrylic without streaks or brush marks. We also provide valuable tips for fixing polycrylic streaks and blemishes.
How to Apply Polycrylic Without Streaks
To apply polycrylic without streaks;
- Use a high-quality bristle brush.
- Apply polycrylic along the wood grain.
- Use long strokes in a single direction.
- Ensure thin, even coats.
- Work from wet areas toward dry areas.
What is Polycrylic?
Polycrylic is a water-based wood finish developed by MinWax. It’s primarily a protective finish that forms a solid layer over the surface, shielding the project from scratches, dents, heat, UV, and other external elements.
It also protects against normal wear. Besides protection, you can use a polycrylic finish to add some spark to your furniture.
For instance, colored polycrylic finishes add valuable excitement to chairs, cabinets, and others. Alternatively, you can use it to add a touch of gloss to your project.
Additionally, you can use food safe polycrylic on countertops and chopping boards.
Types of Polycrylic
There are two main types of polycrylic; spray-on (aerosol) and roll-on (or brush-on) polycrylic. The two work slightly differently.
Spray-on polycrylic
A spray-on polycrylic finish is a good option if you desire a thin layer that dries fast. It comes in an aerosol bottle and sprays with ease. But, more importantly, it dries very quickly.
Unfortunately, applying a thin and even layer without air bubbles can be a big challenge. Moreover, the authorities aren’t very happy with aerosols. So, you may have to check with your municipality first. It’s best for small projects.
Roll-on polycrylic
Roll-on polycrylic is similar to regular paint and comes in a large can, so you can easily dip the roller or brush for quick application. There are several options to choose from.
Unfortunately, it’s very difficult to apply roll-on polycrylic without brush strokes. This is because the finish dries fast, making it difficult to keep a wet edge.
You must be very quick to maintain a uniform finish. However, it is the best option for large projects if you can pull it off.
Polycrylic uses
Different people use polycrylic differently. For instance, you can use it purely as a protective finish over bare wood to cover an underneath paint coat. You can also use it to protect chalk-paint finishes.
Alternatively, you can use a colored polycrylic finish to beautify your wood projects. A glossy or satin option works marvelously in such cases.
Perhaps you’re wondering where to use it. Polycrylic works on almost any woodworking project, outdoors or indoors, though it’s best for indoor projects. It works equally well on horizontal and vertical projects in light and dark woods.
Finally, you can use polycrylic over polyurethane. The two serve the same purpose. But polycrylic is less smelly and not as toxic, though oil-based polyurethane is more durable.
Does Polycrylic Turn Yellow?
Unfortunately, yes. Most polycrylic finishes immediately turn yellow when applied to a white coating as the finish pulls tanning out of the wood. It also reacts with other light-colored finishes and turns yellow.
The good news is you can do something about the yellowing process. For instance, some DIYers claim spraying the finish when it’s tacky (almost dry) with a light mist of one part vinegar and 10 parts water prevents yellowing.
Why is My Polycrylic Streaking?
Polycrylic can cause streaks for many reasons. First, it dries so fast that keeping a wet edge is difficult. So, touching sections that have sat for even a few seconds can cause streaks or brush marks (if using a brush instead of a roller).
Additionally, it is water-based and super thin. This is another key advantage over oil-based polyurethane. As a result, many people are tempted to apply many coats of polyacrylic.
Unfortunately, applying too many coats over a dark surface may cause a streaky, milky finish. Fortunately, you can take precautions to apply polycrylic without streaks or brush strokes.
Furthermore, you can minimize or remove the streaks and air bubbles (if using spray-on polycrylic).
Applying Polycrylic Without Brush Strokes
The following is a step-by-step guide to applying polycrylic without steaks, brush strokes, or air bubbles.
Best Brush for Polycrylic: What’s the Right Brush
Any synthetic bristle brush will do when applying polycrylic on wood projects. However, it would be best to get a polycrylic paint brush from MinWax. Choose one that you feel comfortable handling.
Can you apply polycrylic using a foam brush? Yes, you can apply polycrylic with a foam brush. However, it’s not a good idea. First, foam brushes hold too much paint, increasing the risk of streaks. Additionally, foam brushes don’t give you the best control.
Can you apply polyacrylic using a foam roller? Yes, you can apply polycrylic using a roller. However, we don’t recommend it as rollers often introduce air bubbles into the finish, making the surface feel bumpy.
Requirements
- Minwax polycrylic protective finish
- Polycrylic brush
- Painter’s tack clothes
- Paint stirrers
- Gloves
- Dust mask
- Sandpaper
How to Apply Polycrylic Without Brush Marks: Step-by-Step Guide
Step 1: Before you begin
It’s easy to apply polycrylic. However, it would help if you remember a few things as you prepare for the project. First, although polycrylic doesn’t have a strong scent, it produces a few fumes.
So, it’s best to apply it in a well-ventilated area. Also, always wear dust masks. In addition, you don’t want to trap dust on the wood surface, as this often impacts the quality of the finish while simultaneously hampering adhesion.
Two ways to prevent this problem are ensuring a dust-free work environment and wiping the surface with a rag before you start applying the finish.
Finally, weather is critical. Although polycrylic dries fast, humid or rainy weather can substantially slow the drying process. So, choose a day with moderate weather – not too sunny but not too humid.
Step 2: Prepare the surface
All wood finishing projects begin with surface prepping, and polycrylic processes aren’t different. The best way to prepare the surface depends on whether it’s bare wood or a previously finished surface.
Prepping bare/raw wood
If you’re applying polycrylic on bare wood, take precautions to prevent wood grain raising, which is common when using water-based finishes. Grain raising causes wood hairs to rise, resulting in a rough surface.
An easy way to prevent this issue is to wipe the surface with a wet rag (dip the rag in water), wait for the surface to dry, and then lightly sand it with 220-grit sandpaper.
After sanding, remove the sanding dust using a vacuum cleaner, then wipe the surface with a tack-free cloth.
Prepping stained wood
The best way to prep stained wood for a polycrylic finish depends on the type of wood and stain. For instance, woods like cypress become blotchy when stained. So, begin with a pre-stain conditioner.
This prevents blotchiness and ensures a strong and durable polycrylic bond. Consider wax-free shellac if you’re worried that the water-based polycrylic may react with the stained surface.
It serves as a barrier between the stain and water-based acrylic. Then on d-day, clean the surface with soap and water and allow it to dry.
Then sand lightly with 220-grit sandpaper to enhance adhesion, use a vacuum cleaner to remove all the dust, and wipe with a tack-free cloth to remove the last dust traces.
Step 3: How to apply roll/brush-on polycrylic without streaks or brush marks
Preventing streaks and brush strokes starts when you open the can of polycrylic. Here’s how to apply the finish with minimal disturbance.
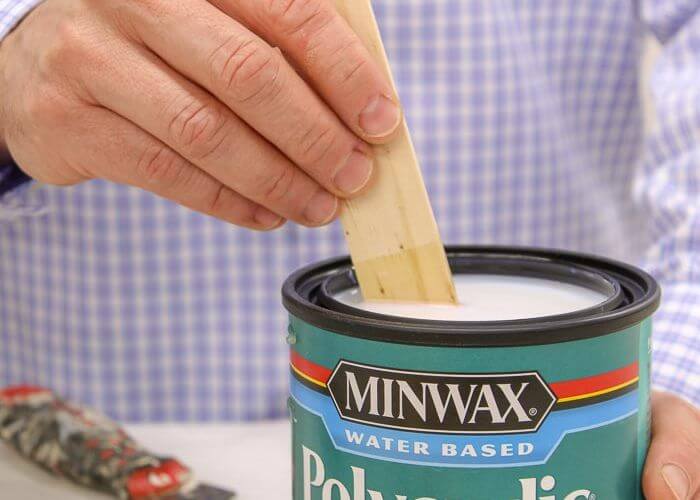
Open the can without shaking, then stir gently
The first step to preventing air bubbles or streaks is to open the polycrylic can without shaking. If you shake the can, you may trap air in the liquid.
Instead of shaking, stir the liquid gently with stir sticks. However, you must be careful here too. You may have a streaky or inconsistent finish if the heavier solids don’t mix evenly throughout the liquid.
Dip the brush in water
There’s a specific way to use the brush when applying polycrylic. First, dip it in water to wet it and squeeze out the excess water. Then dip the first one-and-a-half inches of the brush into the polycrylic.
However, don’t wipe the brush on the side of the tin to remove excess liquid, as this usually traps air between brush bristles. Instead, if you wish to remove excess polycrylic from the brush, hold it over the tin and allow the excess to drain.
Apply thin coats
Thinner coats dry faster, typically within 30 minutes, while thicker ones are more likely to produce drips. An easy way to produce thin coats is by using light strokes. Use only the first half of the brush, angling it 15-20 degrees in the direction of the stroke.
The following are additional tips to follow;
- Avoid applying polycrylic to dark woods: This doesn’t mean you’re completely prohibited from applying polycrylic to dark wood. However, achieving a quality finish with dark wood is more difficult.
- Use a new can of polycrylic: A new can contains the highest quality polycrylic. Contrastingly, older polycrylic cans have been exposed to the sun and other weather elements. It may also have slightly dried, increasing the risk of brush marks.
- Apply in one direction: Only apply the finish in the direction of the grain. Applying it in different directions or overworking one area with repeated brush strokes can leave brush marks on the surface.
- Use long straight strokes: Short strokes are great for some paints and stains. However, the opposite is true when trying to prevent brush marks. The longer you dwell on one area, the greater the risk of brush marks.
- Work one small area at a time: Polycrylic dries fast. So, working in a large area is difficult as it often leaves you working on a dry edge, resulting in banding or streaking.
- Allow the previous layer to dry completely: You need two or three coats of polycrylic for the best results. However, wait for the previous coat to dry fully before applying the next coat. Minwax recommends waiting at least two hours before applying the next coat.
- Wash the brush before the next coat: Polycrylic quickly dries within the brush bristles as you wait for the previous coat to dry, which can cause brush marks. So, wash it with soap and warm water to prevent brush strokes.
- Sand before applying the next coat: Sanding polycrylic in between coats does two things. First, it levels the surface while removing brush marks from the previous coat for a higher-quality finish. Secondly, it ensures maximum adhesion of the second coat. However, don’t use steel wool for sanding. Also, don’t sand after the final coat.
- Clean before applying the next coat: After sanding, use a vacuum cleaner to remove the sawdust. Then wipe the surface with tack free cloth for a dust-free surface. After that, you can apply the next coat.
- Wait for the final coat to dry fully: Polycrylic dries to the touch in about an hour, and you can recoat the surface within two hours. However, polycrylic dry time for the final finish is longer, ideally 24 hours. You may even want to wait 48-72 hours before resuming normal use.
Step 4: Applying spray-on polycrylic without air bubbles
Most of the above guidelines apply to roll/brush-on and spray-on polycrylic. However, you must observe a few extra precautions to prevent air bubbles when spraying polycrylic.
- Avoid areas with strong winds: Aerosol finishes follow the wind. Therefore, even a little breeze can direct the polycrylic away from the intended surface. That’s why it’s best to work on a wind-free day, ideally indoors.
- Hold the spray bottle about a foot away: Holding it at least a foot away from the workpiece gives you more control, making it easier to apply an even coat.
Polycrylic Spray vs Brush
Yes, you can spray polycrylic, and yes, you can produce exceptional results with spray cans. However, if you can choose, it’s easier to produce a quality finish with a brush than a spray can.
Another advantage of spraying polycrylic is speed. You can cover large areas quickly. Moreover, it’s convenient and less tiring. You don’t have to worry about dipping the brush back into the can every few seconds.
However, spraying minwax polycrylic has many downsides. First, it’s easy to trap air bubbles on the wood surface even after thoroughly cleaning the wood boards.
In addition, aerosol paints and finishes are highly regulated in many municipalities due to environmental concerns. Applying polycrylic with a brush eliminates the risk of air bubbles.
But more importantly, it gives you more control, guaranteeing better finish quality. Of course, brushes also eliminate the risk of inhaling potentially poisonous gases.
How Many Coats of Polycrylic Should I Use?
Minwax recommends three coats of polycrylic. Two coats or fewer may leave the surface too exposed, as you often need very thin coats to ensure a streak-free surface free of brush strokes and air bubbles.
On the other hand, more than three coats are an unnecessary burden. The extra sanding, surface cleaning, and careful application don’t provide additional value.
How Can You Fix Polycrylic Streaks and Brush Strokes?
We’ll assume the damage has happened, and you now have polycrylic streaks, brush strokes, and air bubbles on the finished surface. You can restore the surface by sanding and reapplication. Here’s what to do;
- Let the brush strokes dry completely.
- Sand lightly with 220-grit sandpaper.
- Vacuum the surface to remove the sanding dust.
- Wipe the surface with a dry, lint-free cloth.
- Reapply a coat of polycrylic, following the best practices above.
The big takeaway here is that you need to fix the issues immediately. For instance, if the second coat is blemished, allow it to dry, then fix it before moving to the final coat.
Can You Use Polycrylic Over Paint?
Yes, you can use polycrylic over paint and wall coverings. It helps protect the painted surface by forming a durable solid finish over it, shielding the area from weather and everyday wear.
However, greying is a common challenge. Therefore, it helps to spot test before applying it over a large area. The best way to apply polycrylic over paint is to apply two or three coats of your favorite paint and allow it to dry completely.
Waiting at least two full days is the best idea. When the day for applying polycrylic comes, use fine sandpaper (220-grit) for sanding the painted surface to get some texture.
Otherwise, the polycrylic finish won’t stick to the smooth painted surface. After sanding, vacuum the surface and wipe with a tack-free cloth. Then apply the polycrylic.
Can You use Polycrylic Over Chalk Paint?
Yes, polycrylic is one of the best top-coat finishes for chalk-painted surfaces. In fact, water-based polycrylic works better than oil-based poly over chalk paint.
Specifically, you want to consider the fast-drying Minwax Polycrylic Protective Finish. It protects the surface while adding a beautiful layer to interior wood surfaces, including furniture, woodwork, and cabinets.
FAQs
What is the best way to apply polycrylic?
A high-quality, synthetic bristle brush is the best way to apply polyacrylic. First, apply a thin coat in the grain direction, and do not overbrush. Then allow the surface to dry for at least two hours before sanding with 220-grit sandpaper for an even finish and to maximize the adhesion of additional coats.
How long does polycrylic take to dry?
Polycrylic dries to the touch in as little as 30 minutes and is ready for handling 2-3 hours after the final coat. However, it takes at least 24 hours to dry completely. Indeed, a few experts recommend waiting 48-72 hours before resuming normal use. You’ll know the finish is fully dried when it forms a clear, hard, protective coating.
Can you apply polycrylic with a rag?
Yes, you can apply polyacrylic using a rag. It’s another fast way to apply polyacrylic without creating bubbles. Pour some polyacrylic on a soft cloth and gently rub it over the wood surface. Circular rubbing motions produce the best results.
How long should you let the paint dry before polycrylic application?
Generally, you want to wait 8-12 hours before applying polyacrylic over water-based paint and 12-24 hours before applying polyacrylic over oil-based paint. However, the exact waiting time depends on several factors, including the weather (temperature and humidity) and the properties of the paint.
How to get a smooth finish with polycrylic?
The only way to get a smooth finish with polyacrylic is to use a quality brush to apply thin, even coats with the grain. Use long strokes in a single direction and keep a wet edge to avoid lapping paint (lap marks). Then wait for the polyacrylic finish to dry and sand with fine sandpaper.
How long should you let the stain dry before polycrylic application?
Before applying polyacrylic over a stained surface, you must wait at least 24 hours. However, the specifics vary, depending on many factors, including the type of stain and weather conditions. For instance, a water-based stain dries quickly. However, oil-based stains take longer to dry. Anyway, 24-48 hours is a good range.
How long does polycrylic take to cure?
Polycrylic fully cures in 24 hours. That’s how long you must wait before resuming normal use of the finished surface. However, it’s often dry to the touch within 30-60 minutes, and you only need to wait three hours before light handling.
Summary
A polyacrylic finish coat is the durable final coating you need to protect your wood projects. It forms an enduring colourless finish, shielding your furniture, cabinets, and other wood projects from weather elements and other damages.
Try it on your next project, and you won’t regret it.