
Many people prefer a glossy wood finish because of how effectively it can bring out the wood’s natural beauty.
The high gloss wood finish also does an excellent job of protecting surfaces such as tabletops and kitchen cabinets that take a lot of abuse over their service life.
But getting that nice and smooth, blemish-free finish is a challenge for many DIY enthusiasts.
So we have put together a detailed guide on how to get a high gloss finish on wood finish to simplify your work and save you from hiring an expert to do the work.
How to get a High Gloss Finish on Wood: Step by Step
To get a glossy finish for wood, start by sanding the surface smoothly, then apply a grain filler before lacquer or varnish. For professional-looking results, finalize the work by wet-sanding it with ultra-fine sandpaper and buffing it to create a polished look and feel.
Grain filling is an essential part of the process, especially for open-grained wood varieties like walnut, oak, and mahogany.
Pros of Glossy Wood Finish?
- High gloss surfaces are easy to clean and maintain. A simple wipe with a damp cloth is enough to remove any dirt from the shiny surface.
- Surfaces with a glossy finish can highlight the size of a small space by reflecting more light, making the space look larger.
- Glossy finishes can bring out the wood’s true color, making it look vibrant. This can be particularly useful when you have an item of old wooden furniture looking dull; a bit of spotless gloss on its surface can turn that dullness around and make it look years younger.
- Wood tends to look more attractive with a mirror-like finish. Whether the item is new or old, the mirror-like gloss finish will make it stunning.
See also: How to dull gloss paint finish
How to Get a Glass-Like Finish on Wood
Getting a professional-looking mirror-like finish is a matter of following the right procedure and using the right products and techniques.
It’s a two-stage process that involves leveling the wood surface and then polishing it. The second part of the process involves wet-sanding with ultra-fine sandpaper and polishing with a buffing.
The entire process doesn’t require any special equipment or knowledge. A bit of elbow grease and a patient mindset will do.
The supplies you will need
- Regular aluminum oxide sandpaper; 150-, 220-, 320-, and 400-grit
- Silicon carbide sandpaper for wet sanding; 400-, 600-, 800-, and 1000-grit
- Power sander
- Lacquer or varnish
- Rubbing compound
- Dry clothes for wiping the surface
- Protective hand gloves
- Your preferred choice of wood grain filler
- Plastic paint scraper
- Paintbrush
- Spray equipment (optional)
- Cotton buffing cloths
- Power buffer
- Vacuum with a brush attachment
- Tack cloth
Step by step procedure
Once you have all the required items, you can follow these steps to complete the job.
Preparation step
If you are dealing with a new piece of wood, you won’t need to clean it. You can start by sanding the surface to remove surface inconsistencies and even it out.
However, for an old piece likely to have accumulated dirt and grime, you may want to clean it first before sanding.
Of course, this preliminary step adds to the amount of work you must do, but it also helps increase the quality of your outcomes.
And it shouldn’t be difficult. You can use soap and water to clean the wood surface, then rinse and let it air dry completely before sanding.
Step 1: Sand the wood
Sanding is an essential part of surface preparation when creating a mirror-like finish on the wood. You want to remove every bit of imperfection on the surface before applying any finish on the wood.
A high-gloss finish reveals surface imperfections quite readily. We recommend using a random-orbit sander to create a smooth, flat surface. It does an excellent job of sanding surfaces evenly.
Notice that the power sander is ideal for initial sanding to even out the surface. However, once you start using fine-grit sandpapers, you may want to switch to a sanding block instead of leaving any swirl marks on the flat surface.
Sanding blocks are ideal for creating smooth surfaces with zero dips and ridges. They also come in different sizes, so you can choose based on the size of your project. A bigger project will require a larger block.
And you can start with a coarse 80-grit or 120-grit sandpaper on the random orbital sander, depending on how rough or uneven the wood surface is.
Next, you can up the grit to 180 or higher for smoothing the sanded wood. Ensure you sand the surface along the direction of the wood grain each time you use a sanding block.
This way, any scratches from sanding will be parallel to the grain, making them impossible to notice.
Wipe the sanding dust and inspect the surface
After sanding, run a vacuum with a brush attachment on the entire wood surface to remove the sanding dust. Then wipe it with a tack cloth or lint-free cloth dampened with clean water or mineral spirits to make it completely dust-free.
Once done, inspect the surface to ensure you have covered every inch, and no dents or scratches remain.
Using a tack cloth or lint-free cloth dampened with mineral spirits should give better results than a water-dampened cloth. If you dampen the cloth with water, ensure you wring out all the excess water that could raise the grain.
Still, ensure you give it a few minutes to dry before proceeding to the next step.
Read also: What Can I Use Instead of a Tack Cloth.
Step 2: Apply a grain filler
You will likely work with open-grained wood varieties like walnut, oak, and mahogany. If that is the case, ensure you fill the pores before applying the finish.
Commercial wood fillers consist of a bulking agent such as silica suspended in a suitable solvent and finish to fill the wood pores.
You could go for water-based or oil-based paste wood fillers available in various shades to match whichever wood color you have. These options provide quick and reliable results and are easy to apply.
Like any water-based wood finishing product, the water-borne fillers will dry faster than their oil-based cousins.
So, if you want to work faster, we recommend a water-based option. Consider an oil-based option if you prefer more time to get your filler into the wood pores.
Mix the filler with a sturdy stirring stick before applying
Start by mixing the filler in its container. The paste particles often settle at the bottom and must be stirred with a sturdy stick to redistribute it into a uniform product.
Once you have mixed the filler, use a high-quality bristled paintbrush to apply it to your workpiece. Apply generous amounts of the product, pushing it into the pores for even coverage.
Next, use a plastic putty knife or scraper to remove the excess gently. The idea is to scoop out the excess product without pulling out the ones already covering the pores.
You may want to work across the grain instead of along the wood grain for this part. This is a nice trick to avoid pulling the filler off the pores.
Always wipe off the excess filler after applying it to create a clean finish. Then leave the piece to dry overnight.
Finally, use fine 220-grit paper or a non-woven abrasive pad to smoothen the wood. Apply gentle pressure at this point so that you don’t remove the entire coat of wood filler.
Step 3: Apply varnish or lacquer finish
Both lacquer and varnish are excellent high-gloss finishes for this purpose and give great results. However, their application methods may differ due to their drying times and consistency.
Regardless of what you choose between them, your objective is to create a thick enough film that will allow for polishing rubbing through to bare wood.
Applying lacquer
If you work with lacquer, apply it with a sprayer to get the best results. The product dries pretty fast, so brushing it on may not be ideal.
On the other hand, using a sprayer will allow you to apply it much faster and achieve the desired coverage.
Spray the first coat of lacquer on your project and leave it to dry. Usually, the surface should be dry enough to recoat in 15 to 20 minutes. Still, it’s best to leave it on for up to 30 minutes to dry better.
Once dry, add at least two more coats of the product, leaving about 30 minutes of drying time between each coat.
Also, ensure you inspect the surface for any bumps once it has dried, then scuff sand it using ultra-fine 320- to 400-grit sandpaper. Ensure you repeat this step between each subsequent coat.
Lacquer goes on thin, so you need more coats for better coverage.
Find out why lacquers are the best finishes for walnut wood.
Applying varnish
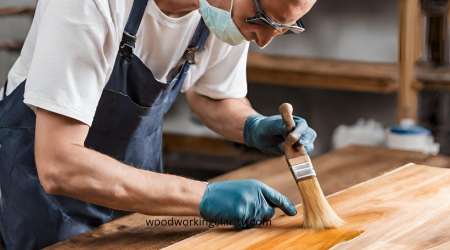
Compared to lacquer, varnish dries more slowly, so you can apply it using a paintbrush.
That also means you will need to leave it for longer to dry completely. Usually, it should take about three hours to dry.
Unlike lacquer, you will need one or two coats of varnish because it’s thick. Inspect the surface to ensure it has no bumps or noticeable imperfections once dry.
Then use fine 320-grit sandpaper to lightly sand the varnished surface and make it completely smooth to the touch.
After wiping the sanding dust, add one more coat of varnish and leave it to dry.
Whether you use a lacquer or varnish, always sand by hand; a sanding sponge should give the best sanding results.
Finally, let the lacquered or varnished wood dry for an additional one day before sanding it again with finer 400-grit sandpaper.
Read also: Is varnish the same as polyurethane?
Step 4: Wet-sand the finished surface
Wet sanding is essential whether you use two or more varnish coats or several lacquer coats. It produces a flat but smooth surface.
After wet sanding, the surface is ready for buffing with ultra-fine abrasives to achieve a polished, high-gloss finish. Wet sanding is an effective way to remove all the minor scratches likely to remain during normal sanding.
Saturate a fine silicon carbide sandpaper with water and rub the entire surface. Start with 400-grit sandpaper, then switch to 600-grit and 800-grit sandpaper for your wet sanding.
You can go as fine as 1000- to 1200-grit if you wish to. This is the final sanding to be followed by polishing, so you can sand it as smooth as possible.
The idea is to keep sanding until you feel no roughness on the wood. Since you will be sanding by hand, it’s best to go with the grain rather than sand in circular motions.
Step 5: Buff it up
Sanding, filling, and finishing your wood will level and smoothen it. However, to get that professional-grade, mirror-like finish, you must polish the finished wood surface.
Polishing involves rubbing the surface with a powdered abrasive such as pumice and rottenstone using a cotton cloth.
Sprinkle some 4F pumice on your sanded wood surface, saturate it with some rubbing oil or water, then use a cotton buffing cloth to buff it up.
While the cotton cloth will do the job, we recommend a power buffer for a completely mirror-like sheen. Using a power buffer instead of hand-buffing is also faster and more effective.
Aside from 4F pumice, you can use any polishing compound such as rottenstone to buff the wood and achieve the desired sheen. Pumice is the most used and offers excellent results.
Even if you opt to use a power buffer, you can still finish it by hand buffing using a cotton buffing cloth and a lubricant such as rubbing oil.
Can you get a Mirror Finish with Spray Paint?
Yes, you can get a mirror-like finish with spray paint by first cleaning the surface and sanding it to an ultra-smooth sheen. Once you achieve that sheen, spraying it evenly with a “glossy” listed paint will give you the desired mirror finish.
Consider using an enamel paint primer for your piece before applying at least two coats of high-gloss paint to give you the shiniest finish. You may also lock in the glossy color with a clear coat of gloss finishing spray.
Even better, you can also make any matte paint glossy with the right techniques.
What is the Best type of Gloss for a Shiny Mirror Finish on Wood?
Various clear finishes will bring out a shiny mirror finish on wood, but our best choice is Minwax’s Polycrylic. It’s easy to use, fast-drying, and dries completely clear.
This water-based product will also not yellow over time, making it an excellent way to preserve a high-gloss finish.
Read also: Best finish for workbenches
Tips and Tricks for Achieving and Maintaining a Mirror-like Finish on Wood
It takes a bit of elbow grease to get that mirror-like finish on wood, so how do you ensure the finish will last? This section provides insights to help you achieve and maintain a high-gloss finish on the wood.
Do not skimp on sanding
You may have noticed that creating a high gloss finish on wood requires lots of sanding. If you are a DIYer, you might be tempted to take the quicker way to finish the work by sanding less. Don’t.
Sanding is an essential part of the process of achieving a smooth finish. It helps remove all the surface inconsistencies and creates a level surface. Applying the finish and polishing it with a buffer is only a fraction of the work; sanding takes up the lion’s share.
Ensure you use the correct sandpaper grit and approach the work progressively by switching from coarser to finer sandpaper grits.
You also want to use the right sanding equipment; for instance, start with a power sander followed by a large sanding block. Additionally, ensure you follow the direction of the wood grain to disguise any marks left while sanding.
Always switch to hand sanding to cover areas that your power sander cannot reach instead of skipping those areas altogether.
After sanding, ensure you inspect the entire surface by shining a light on them to see if any rough areas remain. The more you sand, the better the results will be.
Follow the manufacturer’s instructions when using every tool
Like any product, sanding tools come with specific usage instructions. Always take a moment to read these instructions to use them correctly.
This will influence your outcomes by ensuring you are approaching the work well. Using power tools incorrectly can cause injury, which may affect your work.
So always wear full safety gear, including protective hand gloves and safety goggles for your protection.
Choose the right applicator for your finish
The quality of your brush will affect your finish and its durability. If you choose to varnish, consider applying it with a high-quality natural bristled brush instead of a synthetic one.
Natural brushes carry more of the finish than their synthetic cousins. This allows you to lay on more of the varnish with each brushstroke and maintain a wet edge throughout the project.
You should always use a sprayer for lacquer if you are a DIYer. Spraying is quicker and allows you to maintain a wet edge with ease and create even coats with better coverage.
You can also use a brush to apply lacquer, but you won’t have enough time to create a perfect finish. The fast-drying quality also makes it difficult to maintain a wet edge and achieve the desired coverage.
Use wood conditioner
Wood conditioner helps the wood finish stick better, but it can also make it more durable. This is particularly essential when working with a wood stain or paint.
When using lacquer or varnish, focus instead on applying multiple layers after using a suitable wood grain filler. More layers will create a solid and durable film on the wood surface.
Read Also: How to Finish Poplar Wood
FAQs
How do I get a high gloss finish on wood?
The best way to get a high gloss finish on the wood is by using lacquer or varnish. You can spray the lacquer onto the wood surface after preparing it. If you choose to varnish, you can choose whether to spray it on or apply it with a high-quality natural bristled paintbrush. Start by sanding the surface to make it smooth and even. After that, consider applying a grain filler before finishing it with lacquer or varnish. In any case, spraying the finish should take less time but create excellent coverage with either product.
What is the shiniest clear coat for wood?
The shiniest clear coat for wood is polyurethane. The application process may be time-consuming to get the finish as smooth as possible, but it’s easy and doesn’t require any special skills or equipment.
How do I get a high gloss finish with polyurethane?
To create a high-gloss polyurethane finish on wood, apply only one thin coat. Then, use 1,500-grit sandpaper to remove any dust nibs. To finish the project, use a soft cotton rag or polishing pad to buff the finished surface with pumice to a mirror-like sheen. You could also add automotive paste wax with fine abrasives to further polish the finish.
Now, see our article to find out the difference between semi-gloss polyurethane and satin.
How do you apply high gloss paint?
The most important part of applying a high gloss paint is the surface preparation. The surface must be flawless and spotless to achieve the kind of gloss you want. Then, ensure that you apply a compatible primer before the paint as an essential step. After applying the primer, sand it with ultra-fine sandpaper before the paint coat, then don’t forget to clean the surface to remove every bit of dust. Finally, apply multiple thin coats of high-gloss paint with a brush or sprayer to achieve a smooth, glossy sheen.
Conclusion
High gloss finishes on wood can be spectacular and highly durable. However, you must use the right tools and follow the correct procedure to achieve a durable, high-quality glass-like finish on wood.
Start by leveling the wood surface by proper sanding and then polish it by buffing after applying your preferred finish.
Whether you are a first-time DIYer or a seasoned woodworker, following the simple steps in this guide should help you get a silky-smooth finish on your wood any time.
Please let us know your thoughts or observations in the comments section below.
There is one thing I highly recommend when it comes to wet sanding. When it comes to an oil based “varnish” like polyurethane use mineral spirits/ paint thinner when wet sanding. The end result is a lot better. A water based finish of course requires wet sanding using water.
It takes longer than 3 hours for “varnish” to dry as well if we’re talking something like oil based polyurethane. Thinning it with paint thinner or mineral spirits will let each coat to dry faster and actually makes the finish more durable. It seems to aid in a higher gloss sheen as well. Paste finishing wax buffed out as a last step brings out a higher gloss sheen and fills in light scratches that may be in the finish as well.