Learning how to glue wood together without clamps is an ace up the sleeve of every seasoned or newbie woodworker. As an experienced woodworker, I attest to the sentiments that “you can never have too many clamps.”
You will need this tip when you need one more clamp than you already have, or your wood is tiny, such that clamping is not a viable option. You could also be starting as a woodworker, and clamps are heavy on your budget.
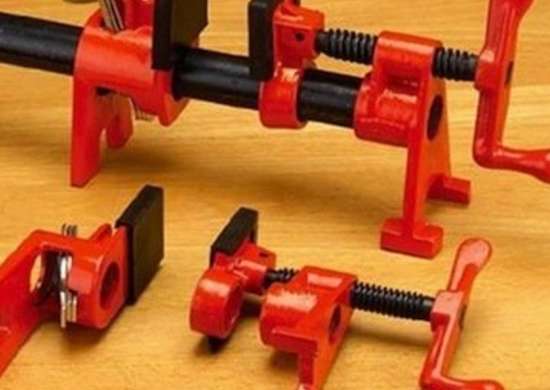
Clamps are the best for clamping glued wood. However, that’s not to say it is the only method available; you can always improvise with other materials around you. The idea is to tightly secure wood while the glue dries.
This article will give you some ideas to help you get started. Let’s find out the details.
How To Glue Wood Together Without Clamps
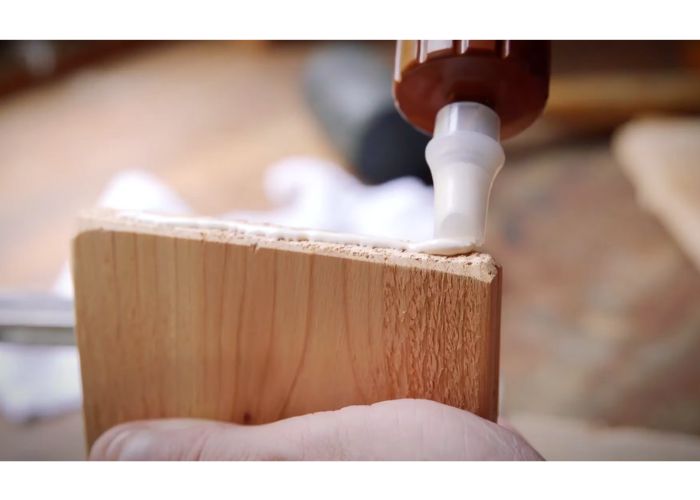
To securely bind wood without clamps, evenly spread the wood glue over each surface in small amounts with slight gaps of separation between each dab. For a sturdy and secure bond, apply superglue to the connecting spaces before pressing the wood pieces together. Firmly press the wood together for a few moments. The superglue will bond the wood pieces together quickly, providing a secure hold while you wait for the wood glue to dry.
How to Glue Wood Together Without Clamps
There’re various practical ways you can glue wood without clamps, as we shall address them shortly. These tips are the alternative methods for store-bought clamps such as the C-clamp, F-clamp, steel bar clamps, hand screw clamp, etc.
Depending on the method you choose, you will need one or two items from the list of tools and materials below. Always wear gloves and a mask before you begin working. Also, remember to remove wood glue in excess.
Tools and Materials
- Wood glue
- Superglue
- Masking tape
- Heavy objects
- Bungee cords/ropes
- Ratchet straps
- DIY clamps
- Kreg pocket-hole screw
- Brad’s nails
- Caulking gun
- Rubber bands
- Windlass
- Carjack
- Dispenser (here is the best wood glue applicator that I recommend)
- Gloves
- Mask
Gluing Wood Using Superglue
Can you use super glue on wood? Super glue is a versatile product and quite effective for holding together intricate joints without clamps. In addition, it is super easy to use, and you most likely have it in your house already. Here’s how to use it.
The Steps
Step 1: Lay the pieces of wood that you want to glue together. Have wood glue and super glue ready as well.
Step 2: Apply the wood glue on the wood. Contrary to the usual way of spreading the wood glue all over the wood edges, leave small gaps in-between wood glue dabs.
Step 3: Apply a few drops of superglue to the small gaps you left earlier.
Step 4: Press and hold the two pieces of wood together for a few seconds.
Superglue sets pretty fast. Therefore, the few seconds mentioned are enough to hold the wood for long enough until the wood glue dries.
Ignore the thought that might trick you into using super glue alone to glue wood together. Superglue sets fast, but it’s easy to break.
Gluing Wood Together Using Masking Tape
Masking tape can make a good substitute for wooden clamps: especially if you want to glue small pieces of wood without clamps. This might not give your wood that much of a tight hold, but it will apply enough pressure needed to make a good joint.
The steps
Step 1: Lay your wood pieces, masking tape, and wood glue.
Step 2: Spread a good amount of glue on one side of the wood.
Step 3: Position and press the other piece of wood on the glued joint.
Step 4: Rip up enough masking tape and tape the two blocks of wood together. Wrap the tape tightly, then let the wood glue dry for as long as it takes.
Read also: How to get tape residue off wood.
Gluing Wood Using Heavy Objects
Here’s another brilliant tip we can use to glue wood without clamps. Heavy objects, in this case, can include; books, bottles filled with either sand or water, weights, paint cans, cement blocks, or anything you have at your disposal. You get the idea, right?
The steps
- Step 1: Lay down your pieces of wood. Ensure you set it on a flat and stable surface.
- This is especially so if you are working with larger and wider pieces of wood. Also, have your wood glue and the heavy object of your choice.
- Step 2: Spread enough wood glue on the first piece of wood.
- Step 3: Place the other piece of wood on the glued surface. Ensure the edges are correctly aligned.
- Step 4: Place the heavy object on the upper piece of wood. Try to distribute the weight of your heavy objects on the entire wood surface to avoid unevenly glued wood.
Gluing Wood Using Brad Nails
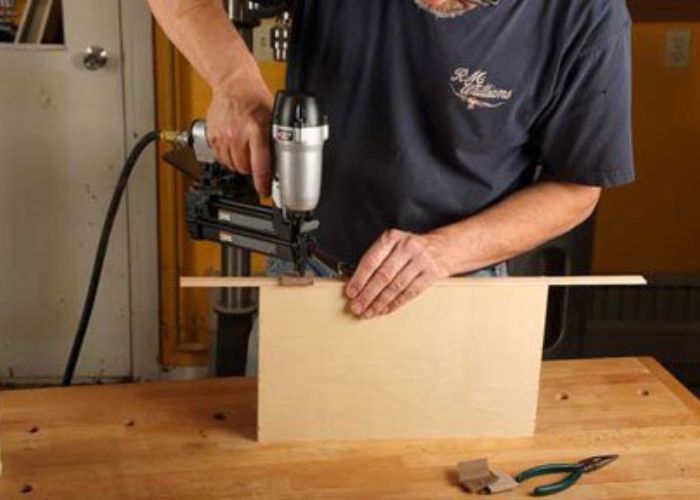
This method will only make sense if you have a Brad nailer. If you don’t have one, you could buy it from a hardware store or click here. You could also skip this method and use a more practical one for you.
Besides this being an easy method, you can also work pretty fast and even move your wood and set it aside while the wood glue dries.
If you think you can hammer the brad nail, go for it if you are an expert. Otherwise, you will only wiggle the nail and the wood too much and end up with a messy job.
The steps
- Step 1: Lay your wood on a steady surface.
- Step 2: Apply wood glue and spread it evenly on the wood surface.
- Step 3: Place the other piece and press to align the wood together.
- Step 4: Nail the two pieces of wood together and set them aside to cure fully.
- The nails will remain permanently in the wood, so keep this in mind when you consider this option.
Related: How To Remove Buried Nails from Wood
Gluing Wood Using Bungee Cords
Say you are putting together a huge structure, and for one reason or the other, you don’t have big clamps to hold the structure in place. Bungee cords are what you need to hold your glued structure together without clamps. Ensure the bungee cords don’t get glued up to the wood.
The steps
- Step 1: Apply and spread the wood glue evenly on the parts of the wood you want to glue together.
- Step 2: Hold the wood pieces together and press them firmly.
- Step 3: Align the edges together, wrap the bungee cord or rope around your wooden structure.
- Step 4: Stretch the elastic cord and tighten it around the wood structure. Do the same if you are using a rope. Ensure you secure a tight knot that will hold your structure in place while the wood glue dries.
Gluing Wood Using Ratchet Straps
Ratchet straps can be used the same way as bungee cords/ropes. The only difference is, ratchet straps have a ratcheting feature that helps apply pressure to the glue joint.
Be cautious when using this option on softwood. If you over-tighten the joints, you may dent the wood or buckle the structure. You don’t want that.
You can also use this technique to join two pieces of wood at a 45-degree angle.
The steps
Step 1: Apply the glue and spread it on the joints you want to put together.
Step 2: Ratchet your pieces of wood together. Go slow when wrapping the wood together and apply enough pressure to hold the joints together.
Another item you can improvise with is a belt. This would work well on small wood pieces. Find a belt you can punch several holes in, and then size it as you wish.
Gluing Wood Using DIY Clamps
Here’s another easy tip to help you glue wood without clamps: make your wood clamps. To make a DIY clamp, you will need some scrap pieces of wood, some nails or screws, and a nail gun or hammer. (Read our guide to find out the best nail gun for baseboards.)
Begin by cutting the scrap wood into a wedge-shaped piece and another “main clamp” piece. Make them in sizes larger than the wood and joints you want to glue up. Then screw or nail the wood pieces together.
The steps
Step 1: Spread the glue on one joint of the wood.
Step 2: Place the other piece of wood on the glued joint.
Step 3: Place the glued joints in the clamping board you made.
Step 4: Use a mallet to gently tap the wedges until they fit tightly between the glued joints and the scrap wood.
Step 5: Let the joints bond with the glue as they dry up.
To avoid any mistakes, confirm how long does it take for wood glue to dry?
Gluing Wood Using a Windlass
Here goes another method to glue wood without clamps. Using a windlass involves a rope and two or more sticks to pull together wooden structures standing on opposite sides.
To use it, you need to wind the rope around two sticks on either side of your glued joints. Then insert the third stick into the length of the rope and twist it. This will apply enough pressure to hold the pieces together while the glue dries.
Gluing Wood Using PVC Pipe
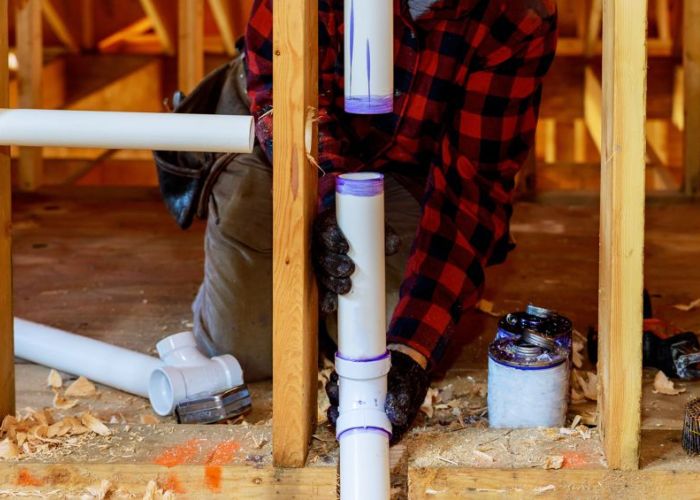
PVC pipes are a fantastic option for gluing wood without clamps. First, cut the PVC pipes into a quarter or half-inch thick. Next, slice around the pipe so you end up with c-shaped pieces. Then go ahead and glue your pieces of wood and clamp them with your improvised C-clamp.
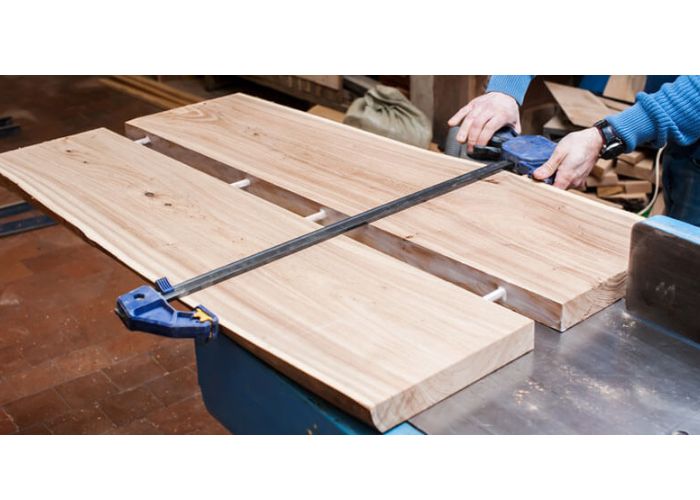
Gluing Wood Using Pipe Clamps
This is an example of long clamps. If your woodworking project calls for it, you can get one that’s several feet long. It’s an excellent idea to use a long piece of timber between the block and your glued wood joints: to prevent it from crumbling under pressure.
Also Read: What is the Strongest Joint in Woodworking
Gluing Wood Using a Caulking Gun
This tip is for you if you’re in a scenario where you only have one free hand. First, be sure that the gun’s cartridge isn’t loaded. Next, use the two faces of a caulking gun to clamp the edges of your glued wood.
Finally, if the wood is soft, place a thin scrap piece of wood between the jaw and the wood to avoid damaging your piece. Works best when gluing plywood together.
Gluing Wood Using Carjack
Consider this method if you need to apply downward pressure to your glued wood. You would be using a big flat clamp, but similarly, carjacking your glued woodworks. First, make sure the two pieces of glued wood are aligned before you clamp them. Then, use a block of wood to distribute the clamping pressure of the carjack and not damage the clamping site.
Gluing Wood Using Rubber Bands
This tip is best suited for small wood projects. First, glue wood and spread it evenly. Then place the other piece of wood on the glued surface. Rub them together for a few seconds before wrapping the rubber bands around the glued joints. Use more rubber bands for extra support.
Gluing Wood Using Kreg Pocket-hole Screws
Pocket hole screws, also known as Kreg Jig screws, can be used to how to join two boards side by side while the wood glue dries. You will need to drill screw holes in one of the boards.
Then hold the joints together and drive the correct screw into the hole. Set aside your clamped boards for the wood glue to dry.
What is the Best Wood Glue for your Project?
Choose the best wood glue for your project depending on its curing time, the type of project you’re constructing, and its intended purpose.
Most wood glues are classified into five types: Polyurethane glue, Epoxy-based, Hide glue, Cyanoacrylate (CA), and Polyvinyl acetate (PVA). Polyvinyl acetate and polyurethane glue are waterproof glue suitable for both interior and exterior projects. Epoxy and CA glue are excellent for small projects. Finally, hide glue is the best glue for fixing antiques.
Read our article on how to separate glued wood.
FAQs
What is a good substitute for clamps?
There’re several excellent substitutes for clamps. They include but are not limited to; Lightweight spring clamps, Caulking guns, Weights, masking tape, superglue, carjack, bungee cords, ratchet straps, rubber bands, Kreg jig, PVC pipes, pipe clamps, windlass, DIY clamps, brad nails.
What natural adhesive holds wood together?
Hide glue is the natural adhesive that can be used to hold wood together. It’s mainly made of boiled animal collagen. Hide glue comes in either liquid or solid crystals forms. The solid crystals are then melted in a hot water bath. Afterward, it can be applied with a brush on wood furniture that needs to be repaired.
Recommended Reading: How to join two boards lengthwise
Can you use wood glue without clamps?
Gluing wood without clamps is effortless. Note that you can use superglue as an alternative. First, apply the wood glue in dabs and leave small gaps in between. Next, add super glue to the gaps between each wood glue dab. Finally, hold the wood pieces together for the superglue to set and hold the joint in place while the wood glue dries.
What can I use if I don’t have wood clamps?
Good quality masking tape is an excellent alternative for wood clamps: especially if you’re gluing smaller pieces of wood together. First, apply the wood glue, spread, and press the wood together. Then rip a piece of tape long and wide enough to wrap around the wood adequately. Wrap tightly, then let the clamped joint cure.
Conclusion
I hope this article has inspired you with creative ideas on how to glue wood together without clamps. Even though woodworking clamps come in different types, shapes, and sizes, you aren’t always guaranteed to find a suitable one for your project.
Woodworking is a creative field. More often than not, you need to improvise here and there to deliver excellent work. So allow your mind to go wild with imagination and let us know some of the items you would use in place of wood clamps.
Happy woodworking!
Useful article, but I have to say I expected something else. What about draw bored mortise and tenons? That’s a perfect classic technique that requires 0 clamps, and in my opinion looks nice as well. There are a few other old school techniques that I’m totally forgetting, but I just woke up.
In any case, nice work!
Very useful! Thanks!