Imagine how many wooden pieces you can preserve or restore by learning how to harden wood! Wood is a versatile material and can transform into any structure you envision.
However, its existence is threatened by water, moisture, wood pests, and harsh elements. So you don’t have to sit by, watching wood waste away.
In this blog post, I’ll guide you through the various methods of hardening wood using traditional, modern, and natural methods.
Let’s dive right in.
How to Harden Wood
Here’s how to harden wood using Polycryl
- Clean the wood surface.
- Prepare a Polycryl fortifier.
- Apply the Polycryl.
- Let it dry.
- Check the wood for desired hardness.
- Apply a protective finish.
How To Harden Wood Using Six Different Methods
Whether a piece of wood is too old, a little softened, or rotten up, you can harden it and make it usable instead of disposing or turning it into firewood. Follow these DIY tips to learn how to harden soft wood like a pro.
Method 1: Hardening Wood with Polycryl Wood Fortifier
Polycryl is also known as a wood stabilizer or a fortifier. It’s an excellent adhesive that forms strong chemical bonds on the wood surface, not on wood fibers beneath.
In addition, it is affordable and user-friendly. Consider it the perfect choice for beginners and DIY-ers.
Here’s what you’ll need for this method:
- Polycryl wood fortifier
- Water
- Bowl
- Old paintbrush
- Gloves
- The Steps
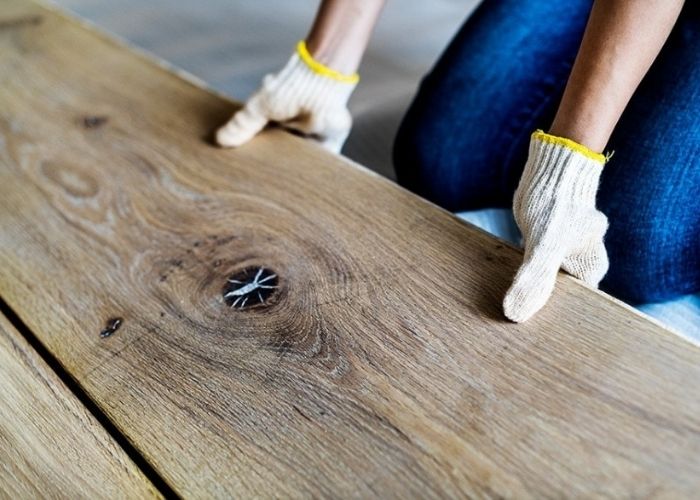
Step 1: Clean the wood surface
Clean the entire wood surface to get rid of loose debris, dirt particles, and stains. Surface preparation is crucial to ensure an even surface and prevent unwanted particles from sticking to the wood.
In addition, protect your floor and walls from spills. Ensure the surface is completely dry before proceeding to the next step.
Step 2: Prepare a polycryl fortifier
Polycryl fortifiers are often very concentrated, and you will need to dilute them first. To dilute, ensure you follow the manufacturer’s recommended ratio of Polycryl to water.
Prepare the mixture in a bowl and stir well to form a thick liquid that you can easily apply.
Step 3: Apply the polycryl
Apply a generous coat of Polycryl and spread evenly on the surface. You don’t need to focus on the soft spots; you can coat the entire wood surface to reinforce its rigidity.
We recommend using an old, clean brush you don’t mind disposing of afterward.
Step 4: Let it dry
Leave the coated piece of wood to dry in a cool and dry place for around 5 hours.
Step 5: Check the wood for desired hardness
Check your piece of wood after the 5 hours to see if it has hardened enough. If you want to achieve a super-tough finish, reapply more coats of Polycryl wood fortifier.
Step 6: Apply a protective finish
Seal and protect the hardened wood using lacquer or varnish. Either of these finishes protects the wood against water and UV rays damage. In addition, it also keeps your Polycryl working for longer and prevents further damage.
Read Also: How to Join 45 Degree Corners With Screws
Method 2: Hardening Softwood with Epoxy Resin
Epoxy treatment is a popular method for hardening softwood. Epoxy resin strengthens the wood surface and keeps the loose wood fibers intact.
Epoxy resins come in different types and sizes and have varying strengths. We recommend using the strongest formulation to harden soft, brittle wood.
You may want to read our review of The Best Deep Pour Epoxy and Best Epoxy Resin for Wood River Table for inspiration.
What you’ll need:
- Putty knife
- Water
- Epoxy
- Applicator brush or a bristle brush
- Safety masks and gauntlets
CAUTION: Epoxy can produce toxic fumes. When applying Epoxy, work in a well-ventilated area and wear your safety mask and gauntlets.
Step 1: Clean the wood surface
Get rid of all the debris, dust, and other contaminants from the wood surface. Use a putty knife to scrape off all loose wood fibers from crevices. If you ignore them, loose wood fibers will prevent Epoxy from bonding well with the wood.
Step 2: Mix the epoxy
Some Epoxy mixes well with water, while others are a two-part system –one-part Epoxy to one-part hardener.
Whichever formulation you’ve chosen, ensure you follow the instructions and mixing ratio for the best results. Stir the Epoxy well to get a thick mixture.
Step 3: Apply epoxy to the softwood surface
Pour a good quantity of the epoxy mixture on the surface you want to harden. Then, use an old paintbrush to spread the mixture on every affected wood surface.
Since Epoxy has a thick consistency, ensure you distribute an even coat on the surface. You can use a plastic putty knife in place of a paintbrush.
Step 4: Drill a hole to harden the wood from the inside
If the wood you want to harden is too soft or thick, drill a hole in the middle of the wood and pour a strengthening epoxy mixture. This will harden and strengthen wood from the inside, giving you even better results.
Step 5: Wait for the epoxy to dry between layers
Wait for at least 3 to 4 hours for the first epoxy layer to dry. Refer to instructions on your specific product for drying times. The waiting time ensures the first layer can take the second and more if need be.
Remember, the size of a filled spot on wood determines how fast it will dry. A small surface will dry sooner, while a larger area will need more hours. Be patient.
Step 6: Apply more layers
Repeat steps 3 to 5 for subsequent epoxy layers. If the drilled holes can take more Epoxy, fill them up. Remember to smooth the resin using a brush between coats to avoid bubbling.
Apply 3 layers of Epoxy to seal your hardened wood from moisture and other elements.
Step 7: Let it dry and cure
Epoxy takes at least 3 days to cure completely. Next, leave the wood in a cool and dry place. Once the set days have gone by, your hardened wood will be ready to get to work.
Method 3: Hardening Rotted Wood Using Wood Hardener
Using a wood hardener is one of the easiest and most effective ways to strengthen rotten wood. The chemical treatment penetrates deep into the pores, sets and makes brittle wood fibers rigid.
Wood hardeners stop further deterioration of old wood and make them tougher, more durable, and usable. In addition, you can stain, paint, and varnish surfaces restored with wood hardener.
Remember to wear your gloves and a face mask and work in a well-ventilated area.
Here’s what you’ll need:
- Soap
- Water
- Putty knife or carving knife
- Gloves
- Face masks
- Wood hardener
- Rotting wood
- Pressure sprayer or paintbrush
Step 1: Prepare the wood; clean and dry, chop off extremely rotten pieces
Use a carving knife or putty knife to scrape off the loose and decayed part of the affected wood. Then clean the surface with soap and water to remove debris, oil, and grease.
After cleaning, leave the wood to air dry. Otherwise, wood hardeners won’t work if the surface is damp or dirty.
Step 2: Prepare the wood hardener
Wood hardeners come in bottles and cans. To prepare, stir or shake the product well to mix the contents.
Step 3: Apply wood hardener
Apply a thin layer of wood hardener on the affected surface using a pump sprayer or an old paintbrush. Choose a suitable method of application depending on the size of your project. Spread the hardener until the entire wood surface is saturated.
Step 4: Let the wood dry and then reapply more coats
Wait an hour or two for the first coat to dry. Then, repeat the same procedure for the second layer or the third. You can apply up to 5 layers of wood hardener if you want a stronger and lustrous finish.
Step 5: Let it dry fully after the final layer
After the final layer, leave the hardened solid wood to dry for at least 5 to 12 hours.
Step 6: Scrape off excess hardener using a wire brush
Scrape gently using any of the best wire brush for paint removal. After that, you can fill and refinish the hardened piece.
Method 4: The Fire Hardening Method
Fire hardening wood is one of the traditional yet effective methods of strengthening wood. It may sound counter-intuitive to heat up soft wood, but that’s how this method works.
The heat from the fire extracts excess moisture from the wood grain, tightens wood fibers, and reinforces the weak parts.
Safety precautions
- Be careful not to burn yourself.
- Avoid over concentrating a single wood spot on the fire; it might burn.
- Have a bucket of water nearby if you need to put off the fire.
- This method is suitable for small projects. Use a different method to treat larger woods.
What you’ll need
- Heavy-duty safety gloves
- Safety goggles
- Charcoal or wood
- Lighter
- Wood you want to harden
Step 1: Prepare a fire pit
Prepare your fire pit or use a kiln. If you have neither, dig a hole in the ground about half a foot deep and 2 feet wide in an open area where you can operate well. Place some rocks around the fire hole.
Ensure your fire pit is easily accessible but away from flammable objects.
Step 2: Ignite the fire
First, fill the fire pit with firewood and charcoal. Next, use a lighter to ignite the fire. Let the flame grow to produce a decent amount of heat.
Keep adding more charcoal or firewood until the fire stabilizes – about 6 inches high and has a blue center.
Step 3: Start heating the wood
Hold the wood piece you want to harden at about 3 inches above the flame. This allowance minimizes the risk of burning yourself or the wood.
Step 4: Keep moving the wood through the fire
Keep turning the piece of wood every few seconds above the flames. Do not let a part of the wood absorb heat for more than a minute –it might burn. If it scorches, remove the wood immediately and assess the damage.
Step 5: Check at regular intervals to avoid overheating or burning
Remember, the main goal is to make wood stronger and not burn it. So, keep checking your soft piece of wood every few minutes.
If the wood looks dull and feels tough, all the moisture has evaporated, strengthening the wood. Then, let it cool for 5 minutes.
Step 6: Repeat steps 4 and 5 if necessary
If the wood is fully dry and hardened, you can use it how you want. But, if it isn’t and you feel like it needs more heat, repeat the whole process.
The fire hardening method requires patience to achieve the desired hardwood.
Method 5: Infusing Wood with Resin to Harden It
Acrylic resin is a water-based coating made of hard polymer emulsions. They stabilize, strengthen, and harden soft wood from the core.
It’s easy and safer to infuse wood with resins, plus it has no harmful chemicals. However, the preparation process involved may discourage people from using this method.
Tools and materials
- Vacuum pump
- Vacuum chamber
- Softwood
- Stabilizing Resin
- Standard shop Oven
- Aluminum foil
- Gloves, goggles, and nose mask
Step 1: Dry the wood in an oven
Dry the piece of wood in an oven by baking it in a standard oven at 250 degrees Fahrenheit for 8 hours. Smaller pieces may need about 2 hours to dry.
Let the wood dry slowly over a steady temperature to avoid burning it. Ensure the wood is completely dry. Note that the resin won’t work if there’s any trace of moisture content in the wood.
Step 2: Remove the baked wood and let it cool
Put the wood in zip-lock bags and let them cool at room temperature. If you notice some vapor in the bag, put the wood back in the oven to dry some more.
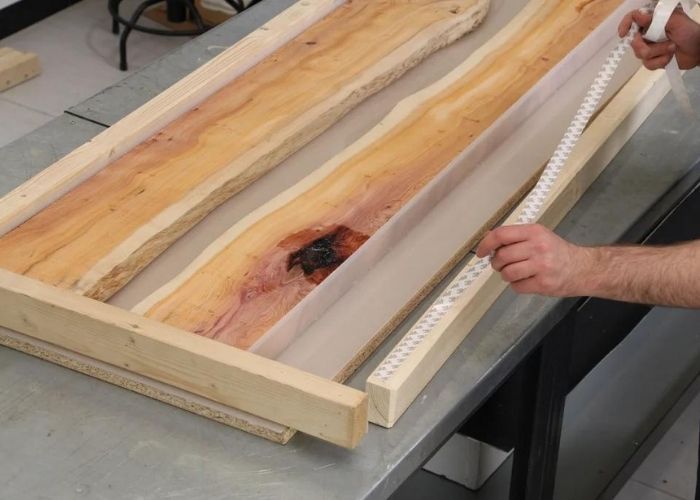
Step 3: Place the dry wood in the vacuum chamber
Put the dried wood in the vacuum chamber and leave enough spaces between them. You can use a mesh grid to hold the wood in place.
Ensure your vacuum chamber is big enough to accommodate your pieces of wood.
Step 4: Pour resin into the vacuum chamber
Pour the resin until the entire piece of wood is submerged. Ensure it stays drowned throughout the stabilization process. Start extracting air from the vacuum chamber to create a vacuum seal.
You will notice some bubbles and foaming in the resin as the air escapes the wood. The foaming will subside as more air leaves the wood. This process might take anywhere between 30 minutes or a few hours, depending on the thickness of the wood.
Once there are no more air bubbles in the vacuum chamber, the wood has fully absorbed the resin. The first step of wood stabilization is complete.
Step 5: Allow the infused wood to rest
Let the wood sit for a few minutes. Then remove and dry the resin off the wood surface using paper towels. Close the vacuum chamber valve and then switch it off.
Avoid opening the chamber randomly, especially if the room isn’t well-ventilated. Trans fill the leftover resin into an airtight container for future re-use.
Step 6: Bake the wood further
Wrap each piece with an aluminum foil; ensure the shiny side of the foil touches wood while the matte side faces away. Preheat the oven between 150 and 200 Fahrenheit (71 to 93 degrees Celsius).
Bake the wood in the oven for about an hour or two. It might take longer if the wood is too thick. Too much time won’t harm the wood as long as the temperature remains constant.
Step 7: Remove the baked wood and let it cool
Once the set time elapses, remove the wood and let it cool while wrapped in the aluminum foil. When it’s cool down to room temperature, rip off the aluminum foil and wipe off the excess resin.
There you have a perfectly strengthened wood piece.
Method 6: Hardening Wood with Natural Oils
Another reliable method of hardening soft piece of wood involves using natural oils. Saturate the wood pores using either Tung oil or linseed oil and let it cure slowly –it may take a month plus.
These oils will react with oxygen and form a hard polymer inside the wooden object. As a result, the hard oil polymer creates a moisture and water-resistant barrier, keeping the wood hardened for longer.
Benefits of Hardening Wood
One of the benefits of hardening and reinforcing weak wood is to help extend its lifespan. However, you should consider other advantages before tossing that wood into the fireplace.
First, hardening wood helps you restore wood with excess internal moisture content or slightly rotten. You may also be able to re-use wood that’s well-preserved but a little soft and finish your woodworking project.
Additionally, hardening wood can help make it stronger and more resilient, consequently increasing a wooden object’s durability.
However, wood hardening is limited to wood at the onset of softening or rotting. Therefore, it won’t salvage wood pieces that are too wasted and breaks off easily, smells awful, or are infested by animals.
Tips on How to Keep Your Wood Hard and Protect it from Going Soft
These tips apply to hard wood and untreated wood. With these practices, you guarantee a prolonged lifespan for your wooden materials.
Store it properly
Using the best lumber rack is an effective way to store your spare wood and keep it in good shape over time.
Store your wood in a dry and cool place where it is lifted off the ground and kept apart using a rack.
By using a high-quality lumber rack, you can help prevent warping, bending, and other damage that can occur from improper storage.
Covering the racked wood with protective fabric, particularly during winter, can further reduce the extent of wood expansion, helping to answer the common question: “Does wood swell in the winter?”
Taking these steps can help ensure that your spare wood remains in good condition and is ready for use in your future projects.
For more detailed information on how to keep wood from warping when stored outside, we invite you to explore our comprehensive article on this topic.
Apply a protective coat
Use a protective coat like polyurethane, varnish, stains, paint, or other treatment to keep wood from absorbing moisture.
Interesting read: What is the difference between polyurethane and epoxy?
Seal the wood ends
Wood absorbs moisture through its ends where the wood grain is in contact with the surface. Use strengthening epoxy, wood glue, or penetrating sealants to seal the ends.
Dry the wood
Drying wood draws out excess moisture from the wood. You can kiln dry wood in an oven at home or in an industrial setting. This, in turn, keeps wood strong and free from softening or warping.
Use treated wood for exterior projects
Elements like rain and sunlight compromise the integrity of the wood. Use industrial treated wood to offer extra protection and keep the wood strong and water-resistant over time.
Also Read: How to Join Two Boards Lengthwise
Can You Reinforce the Wood to Keep It Strong?
Absolutely! Here are several methods to reinforce and strengthen old and worn-out wood.
Using wood glue
Like resin, wood glue dries to form a hard shell that helps strengthen the wood. This is especially perfect for sealing wood ends and keeping them dry. Wood glue also protects rotten wood and can bind pieces of wood together.
Using metal plates
You can reinforce weak, rotten and soft wood spots using metal plates. It is a bit crude but efficient. Screw the metal plates on solid wood, joining the good pieces of wood and eliminating the weak spot.
Using braces
You can use braces to strengthen weak wood. Attach a good piece of wood to the back of a delicate piece. The backing brace will remain hidden while giving structural strength to the outward-facing wood.
Read: How to dry out wood slices
FAQs
Can you use wood hardener on new wood?
Yes, you can—brush generous coats of wood hardener on new wood. Hardener will protect wood surface from warping and absorbing moisture. In addition, hardening new wood will spare you the expense of replacing worn-out wood boards.
How do you make a homemade wood hardener?
Here’s a fun salt-paste, DIY wood hardener you can make. You will need salt, water, cornstarch, and one egg white.
- Pour a liter of water into a container.
- Next, add 350g of salt and stir to dissolve fully.
- Then add corn starch and continue stirring the mixture until you get a thick paste.
- Finally, add egg white and continue stirring. The paste should be ready.
- Spread the paste on the entire surface using an applicator brush.
How to harden pine wood
- Dry pine wood in the oven.
- Remove the baked wood and let it cool.
- Place the dry pine wood in the vacuum chamber.
- Pour resin into the vacuum chamber and let it infuse.
- Allow the infused pine wood to rest.
- Bake the infused pinewood further.
- Remove the baked wood and let it cool.
How to harden rotted wood
- Prepare the wood; clean and dry, chop off extremely rotten pieces.
- Prepare the wood hardener.
- Apply the hardener.
- Let the wood dry, and then reapply more coats.
- Let it dry fully after the final layer.
- Scrape off excess hardener using a wire brush.
How to make softwood harder
- Clean the wood surface.
- Mix the Epoxy.
- Apply Epoxy to the soft wood surface.
- Drill a hole to harden the wood from the inside
- Wait for the Epoxy to dry between layers.
- Apply more layers.
- Let the now, hard wood dry and cure.
How to harden wood with fire
- Prepare a fire pit.
- Ignite the fire.
- Start heating the wood.
- Keep moving the wood through the fire.
- Check at regular intervals to avoid overheating or burning.
- Repeat Steps 4 and 5 if necessary.
How does wood hardener work?
Wood hardener has a thin consistency that penetrates deep into the wood pores and seals the surface from moisture and water. Its resins bind the decayed and softwood fibers into a hard solid form. As a result, the wood hardener restores the structural integrity of the wood.
Best wood hardener alternative
Epoxy makes an excellent alternative for wood hardeners. With Epoxy, you can bind wood fibers and seal the wood surface, therefore preventing damage from water, rot, and elements. You can use epoxy resins or epoxy glue.
What is wood hardener made of?
Wood hardener is made of acrylic resin, which is often dissolved in a solvent. The solvent used is responsible for pushing the acrylic resins into the wood pores. The resins then bind together damaged wood fibers.
Final Thoughts
Out of the several methods of how to harden wood, using Epoxy is by far my favorite. With Epoxy, you can turn any damaged wood into a decorative water table and so much more.
Before tossing out that damaged wood, find out if you can restore it before considering a replacement. Then you can harden it using any of the methods we’ve discussed.
What is your favorite wood hardening method from our list? Leave a comment below.