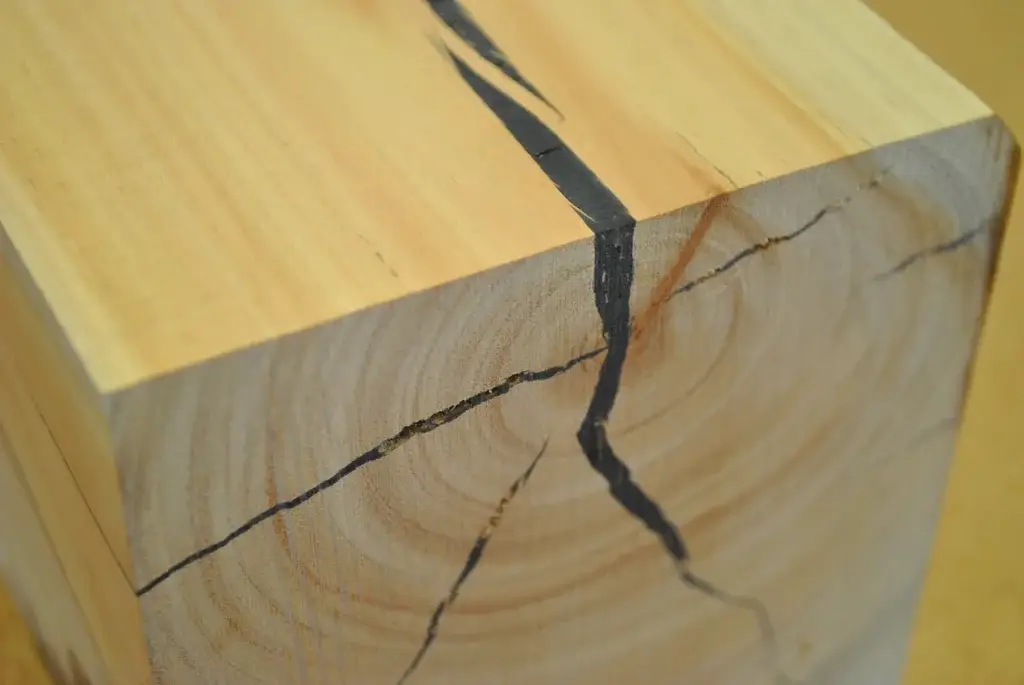
No woodworker loves to see their wood projects or boards split. But, unfortunately, it’s the nature of life. Wood fibers will always crack and tear under pressure, resulting in splitting.
The good news is you can take several steps to reduce the risk of splitting and prevent cracking altogether in some instances. This guide explains several ways to keep wood from splitting.
How to Keep Wood from Splitting
The easiest way to keep wood from splitting is by applying a stabilizer or sealant. Applying salt paste, varnish, and paintable wax are other methods you can use to prevent wood pieces from splitting or wood cracks from becoming bigger.
Wood Cracking Basics: Why Wood Cracks and Splits
Generally, wood cracks when wood fibers (found in the wood grain) expand or contract beyond a specific limit and ultimately separate or break. The expansion or contraction often results from;
Moisture content changes
Wood stores water/moisture in pores found in the wood fibers. Unfortunately, these pores are highly rigid structures that break easily if suddenly stretched beyond a certain limit.
For this reason, a sudden drop or rise in humidity can cause splitting. As the tree naturally loses moisture during low humidity, the pores suddenly shrink and may break. Similarly, too much moisture causes pores to expand significantly, leading to breakage.
This phenomenon is most common in porous wood types, readily absorbing or releasing moisture.
Direct impact
Wood fibers can also break due to direct impact from nailing or screwing fails or if you drop the item from a significant height.
Cracks from screws and nails are common if you use larger than ideal sizes, drive the nail/screw too close to the end grain, or if the wood is too dense.
The nail or screw creates a wedge between wood fibers in all three cases. This is problematic because trees rely on tightly packed wood fibers to maintain their shape and other physical properties. The bigger the wedges, the higher the internal stress.
One way logs release the building stress is to allow the originally tightly packed wood fibers to go separate ways, which essentially means cracking or splitting.
How to Store Wood Pieces Properly
The first step to preventing wood splitting is ensuring proper dry and green wood storage. The following are several wood drying tips to consider;
- Avoid direct sunlight: Sunlight causes sudden moisture loss, which can cause cracking. Moreover, drying freshly cut wood in direct sunlight usually results in uneven drying. The wood surface facing the sun will dry faster than the stack-facing surface. This can cause warping and, ultimately, cracking.
- Store wood boards, not logs: Logs are more likely to crack because of the greater risk of uneven drying. Additionally, boards reduce the total loss if the wood cracks.
- Ensure the boards don’t touch the ground: The ground is a source of mold and rot-causing microorganisms, which increase the risk of splitting. Consider treating the wood with an anti-fungal.
- Ensure proper ventilation: Stored wood dries by releasing moisture into the surrounding air. Therefore, poor airflow can cause uneven drying. The surfaces with proper airflow will dry faster than those without. This can cause cracking.
To learn more about proper wood storage techniques, including how to store lumber outside to prevent warping, we encourage you to read our detailed article on this topic.
How to Prevent Wood from Splitting
You should take even more steps to prevent splitting after the drying process. Consider the following;
Method 1: Seal with a Sealant or stabilizer
Sealants and stabilizers are some of the best remedies for poor drying and wood shrinkage. They block outside air from entering the wood and inside air from leaving, greatly reducing the likelihood of cracking or splitting.
Requirements
- Wood sealer
- Paintbrush
- Protective gloves
Step-by-step process
- Find the right sealant: We recommend an anchor seal for green wood and lacquer or polyurethane finish sealant for finished wood products, such as furniture.
- Clean the wood: Never apply protective sealant on dirty wood pieces, as it often causes blotchiness. Moreover, it results in an uneven wood surface. So, clean it thoroughly with a wet rag and allow the boards to dry.
- Sand the wood: We recommend 220-grit sandpaper. A rougher sand grain can damage the surface, while softer sandpaper may not give you the desired smoothness. When you’re done, clean the wood using a rag or damp cloth to remove the sawdust. Then allow it to dry overnight.
- Apply the sealant: Use the paintbrush to apply a thin coat of sealant over the boards, covering the wood completely. Then leave the wood to dry for 48 hours before applying the second coat. Two sealant coats are sufficient.
Method 2: Apply boiled linseed oil or wood stabilizer
You’re likely aware of the wood beautifying properties of boiled linseed oil. However, natural linseed oil does much more than beautify your furniture and other workpieces.
For instance, a proper coat of boiled linseed oil fiercely guards the underlying wood surface against sunshine and other external elements, ensuring gentle drying without dramatic shrinkage or swelling.
Requirements
- Boiled linseed oil product
- Sandpaper
- Paintbrush
- Old cloth or rags
Applying Linseed Oil: Step-by-Step Process
- Sand the wooden item: Sanding smoothes the item, creating the perfect conditions for linseed oil adhesion. It also removes surface imperfections and evens out dents and scratches. Use 250 grit sandpaper, then follow up with 22- grit sandpaper.
- Clean it: It’s time to get rid of the sanding dust. Use a vacuum cleaner for large boards. Alternatively, wipe down the surface with a wet or dry rag. If you wet-clean the surface, allow it to dry overnight before moving to the next step.
- Apply linseed oil: Use a paintbrush to apply thin coats of linseed oil over the wood surfaces, covering every inch of the board. You need 2-3 coats as the wood absorbs almost all the oil from the first coat. Allow each coat to dry completely before applying the next one. But don’t use raw linseed oil as it takes too long to dry.
- Allow to dry: We recommend natural air drying. However, don’t dry the wood in direct sunlight. It encourages uneven drying.
Method 3: Seal wood with paintable wax
Applying paintable wax is another way to make wood boards split-resistant. The wax shields the wood surface from external elements (including heat and humidity).
It also prevents the loss of the wood’s natural moisture. The procedure works exceptionally during wood carving and when making other tiny wood items.
Requirements
- Wax
- Paintbrush
- Paint thinner
- Canning jar
- Melting pot
- Heat source
Step-by-step process
- Get some wax: You have two options here. The easier option is to purchase wax from your local hardware store. Alternatively, put some wax candles in plastic wrap and gently crash them with a hammer until they turn into tiny bits.
- Prepare the wax: Melt it in a melting pot and, as it melts, put a little paint thinner in the canning jar. You need about one gram of paint thinner for every four grams of wax. Add the melted wax to the canning jar and shake well to mix the two thoroughly. The paint thinner makes the wax paintable, so you can easily paint the surface in the future.
- Apply the wax: Allow the thinner + wax mixture to cool, then use your paintbrush to apply thin coats of the mixture onto the desired surface. It dries very fast. So, you must be quick. Ensure to cover every inch of the workpiece.
- Allow to dry: Paintable wax dries quickly, typically within 10 minutes or less. More importantly, you only need one coat to seal the wood surface completely.
Method 4: Seal with a varnish
Wood varnish prevents moisture loss. It also sits over the wood, shielding the surface from sunshine, UV, and external humidity. Moreover, you can easily paint over a varnished wood surface.
Here’s how to seal a wood piece with varnish;
Requirements
- Wood varnish
- Paintbrush
- Dry rags
- Wood glue
- Sandpaper
Step-by-Step Process
- Prep the wood surface: Begin by sanding it with 180-220 grit sandpaper to remove any imperfections. Then follow up by cleaning the surface to eliminate the sanding dust and other dirt and debris. You can wipe it with a wet or dry rag. Allow it to dry if you opt for wet rag cleaning.
- Prepare the varnish and sealer: Pour equal proportions of wood varnish and transparent paint into a mixing bucket and stir thoroughly. Then quickly prepare the sealer by mixing wood glue with warm water and stirring vigorously. Put enough warm water to prevent the solution from hardening.
- Apply the varnish: Use a paintbrush to evenly apply the varnish mixture all over the wood surface. The number of required coats depends on the condition of the food surface. However, 2-3 coats are usually sufficient. Wait for each coat to dry fully before applying the next one.
- Apply the sealant: Wait for the final varnish coat to dry fully. Ideally, you want to leave it overnight. Then apply the sealant, ensuring it covers every inch of the board or wooden item. Sealers serve as extra protection, preventing moisture evaporation from the wood surface.
Method 5: Treat with salt paste
Finally, you can treat the wood with a salt paste to gradually absorb the wood’s moisture content, thus preventing an uneven or poor drying process.
The best part is that this method doesnt involve harsh chemicals. So, you can use it for dining tables and even kitchen items.
Requirements
- Salt
- Eggs
- Cornstarch
- Mixing bucket
- Paintbrush
How to use salt paste for drying wood: Step-by-step process
- Prepare a salt solution: Put a few tablespoons of salt in the mixing bucket and add cold water. You can also use warm water, then allow the mixture to cool down. More importantly, make sure the salt completely dissolves in the water. Then allow the solution to settle for about four hours.
- Add some cornstarch: The amount of cornstarch you need depends on the salt and water used in the previous step. Generally, you need to put enough cornstarch to create a light paste.
- Add eggs: We recommend an egg for each tablespoon of salt. Break the eggs in the mixing bucket and mix thoroughly until the eggs are not identifiable. You’ll be left with a slimy paste.
- Apply the paste: Use the paintbrush to apply the salt paste over the wood surface gently. You only need one coat, which dries to a hard layer tharemovesut dirt and weather elements. Moreover, it prevents uneven moisture loss.
- Allow to dry: The salt paste gradually absorbs the wood’s moisture while preventing interference from external humidity conditions. As a result, the wood board dries uniformly.
Method 6: Pick the right type of wood
Besides the methods listed above, you can also reduce the risk of splitting by choosing the right type of wood.
For instance, older woods are less likely to crack or split. Similarly, woods with thicker cell walls are not very likely to crack. Knotty and exotic burl woods also resist cracking due to uneven, gnarly, or crooked grains. On the other hand, straight-grained woods readily crack.
However, tracking all these physical differences can be difficult, so it helps to keep a go-to list of naturally split-resistant wood. The best candidates are;
- Redwood
- Port Orford Cedar
- Cypress
- Pine
- Douglas Fir
Other popular woods that don’t split or crack readily are yellow poplar, cherry, walnut wood or oak.
In addition to natural properties, consider moisture-treated boards. Timber yards typically use linseed or tung oil, a sealant (polyurethane, varnish, or lacquer), or a stain-sealant combo to moisture-treat wood.
Here is an article to show you the difference between Douglas fir and pine wood.
Additional Tips to Prevent Wood From Splitting and Cracking
Still having problems? The following are other methods to prevent wood splitting in special circumstances.
How to Stop Wood from Splitting when Drying
The most important tip to prevent splitting when drying wood is not to dry the wood too fast. Sudden moisture loss causes sudden contraction of the wood’s cells, often resulting in broken cell membranes, thus splitting. Air drying is the best approach, as it takes weeks or months for the wood to dry completely.
In addition, seal the board ends using proper wood sealant to prevent uneven drying, which can cause warping and eventual splitting.
How to Prevent Wood from Cracking While Drilling
A foolproof way to prevent cracking when drilling wood is first to create a pilot hole. Doing so allows the drill bit threads to cut into the hole’s walls instead of forcing apart the wood fibers.
Additionally, pilot holes help you drill in a straight line, reducing the risk of splitting. Another important tip is choosing the right wood boards for the project ant drilling points.
How to Stop Wood From Splitting When Screwing
Screwing is not dissimilar to drilling. To prevent splitting, begin with a pilot hole. Pilot holes serve as guides, reducing the risk of slanted screw holes. Additionally, pilot holes reduce the risk of rupturing wood fibers.
Besides a pilot hole, choose the right screws and tools for the job. For instance, a screw too large for the wood or inappropriate thread patterns can cause cracking and splitting.
How to Prevent Wood Furniture From Cracking
A simple solution to prevent wood furniture from cracking is ensuring optimal humidity around the furniture. Experts recommend relative humidity levels between 50% and 55%. This applies to indoor and outdoor furniture.
For instance, you need a humidifier during dry cold weather and a dehumidifier during the sweaty summer weather. In addition, always bring outdoor furniture inside during extreme weather, such as storms or the snow season.
You must also protect your furniture from direct sunlight.
How to Prevent Wood Rounds From Splitting
You can prevent wood rounds from splitting in two ways.
First, seal the wood pieces with a salt paste. A salt paste comprises a solution of salt and water, eggs, and cornstarch. Use a paintbrush to apply the sealer all over the wood pieces.
Alternatively, to preserve wood slices, soak them in a stabilizer solution.
Excellent stabilizers are pentacryl (for freshly cut slices), wood sealer (for partially dried wood), and denatured alcohol (for wood slices thinner than one inch thick).
Find a plastic or stainless steel container that fits the wood rounds, place wood slates at the bottom of the container, and the wood rounds over the slats. Then fill the container with the stabilizer and allow the boards to soak for 24 hours.
How to Repair Cracked Wood
Unfortunately, wood cracks sometimes occur even with the best split prevention efforts. So, you must be prepared to repair the split sections.
The following are three straightforward methods to consider;
1. Fill with wood sealer/epoxy
We already saw that you could use wood sealers to prevent splitting. The same sealer or epoxy can also help repair cracked or split wood. Here’s how to proceed;
- Wear PPE: You need gloves and a respiratory mask to protect your hands and prevent inhalation of toxic epoxy fumes.
- Cover one side of the crack with masking tape: This is only necessary if the crack goes to the other end of the wood surface.
- Mix the epoxy components: Epoxy comes in two parts – the resin and hardener. Squit equal proportions of each in a small bowl and mix thoroughly with your hands. Be quick as epoxies dry fast.
- Add wood-colored dye: This is not mandatory. However, it helps maintain a uniform wooden surface. Mix it thoroughly into the epoxy + hardener combo.
- Apply to the crack: Use a mixing stick or spoon to add some of the mixtures to the cracks. Then add more until epoxy fills the crack. After that, leave it overnight for the epoxy to dry.
- Level the surface: Cut away the excess epoxy using a putty knife. Then sand the area to level the surface.
2. Use wood glue + sawdust
Wood glue and sawdust are sufficient if you don’t have wood epoxy on hand. You don’t need a mask or gloves for this process. However, feel free to wear them. Then proceed as follows;
- Get the right sawdust: You need the right quality and quantity of sawdust. For instance, it must match the color of the furniture. Fortunately, you can easily purchase sawdust from your local hardware store.
- Squeeze wood glue into the crack: Use a syringe for smaller cracks, ensuring the glue fills up the cracks.
- Sprinkle sawdust over the glue: The idea is to conceal the wood glue with sawdust for an even, consistent wood surface. Then allow it to dry overnight.
- Sand to level: Start with rougher sandpaper grits, such as 120 grit, and work your way up to 220-grit sandpaper for a smooth, even finish.
3. Use wood putty or filler sticks
Finally, you can fill wood cracks with wood putty or filler sticks purchased from the hardware store.
- Source for a filler compound: You want a filler compound in the color of your wooden item. Alternatively, make sure it’s stainable or paintable.
- Insert the filler into the cracked wood: Using your finger, you can easily rub filler sticks into the crack. However, use a putty knife or chisel for wood putty. It’s best to overfill the crack to obtain an even surface after sanding.
- Smooth the section and allow it to dry: Use a putty knife to cut out the excess putty compound or filler material. You can also use a dry rag. Then allow it to dry for eight hours.
- Sand away the excess material: Start with 120-grit sandpaper to wear down the excess material. Then work your way up to 220-grit sandpaper for a smooth, even surface.
FAQs
Will polyurethane keep wood from splitting?
Yes, polyurethane keeps wood from splitting. As long as you apply it correctly, it becomes an effective barrier against splitting wood. In addition, this versatile substance prevents moisture from seeping in, which can cause the wood to split or cause everyday wear and tear.
Will linseed oil stop wood from cracking?
Yes, linseed oil stops wood boards from cracking. It guards the surface by preventing moisture from reaching the wood and potentially causing it to expand or contract. It’s best to use boiled linseed rather than raw linseed oil.
Will epoxy stop wood from splitting?
Yes, epoxy stops wood boards from splitting. While it’s mostly used for filling projects, epoxy resin is also a good adhesive, preventing the wood from splitting. In addition, it holds the cracking sides to avoid intense damage. Remember, it’s a tough glue-like adhesive that hardens once you apply it.
How to keep wood slices from splitting
You can keep wood slices from splitting by applying a sealant. Moisture enters and evaporates from the wood, making it shrink and split. Therefore, applying a sealant forms a moisture-repellent coating, so it’s not likely to split. Examples of such sealants are polyurethane, varnish, and olive oil.
How to keep green wood from splitting
The first step to keeping green wood from splitting is storing the boards in a warm and well-ventilated area. You can also seal the wood with a sealant or a stabilizer designed to keep it fresh from splitting as it dries. You’ll find quality wood sealers at woodworking supply stores, hardware stores, or online ordering.
Why does wood crack?
Wood can crack for many reasons. For instance, wood can crack as it shrinks when drying. Additionally, wood can crack due to broken fibers occasioned by nailing and screwing fails. Finally, stresses due to poor storage or tensile forces when you drop the wood can also cause cracking and splitting.
How to dry wood fast without cracking?
To dry wood fast without cracking, lean it against a wall or air it in a warm and well-ventilated place. Then let it dry slowly and evenly for a week. Unfortunately, placing the wood in direct sunlight causes sudden and uneven moisture loss, often causing splitting and cracking.
How to dry cedar wood without cracking?
You can dry cedar wood without cracking by applying a coating of varnish or polyurethane to it. The application prevents the wood from absorbing water or evaporating moisture which is the main cause of cracking. Remember to keep the wood from dry air as it is a major source of cracking in cedar.
Why does wood split?
Wood primarily splits while drying. This is because while it’s drying, the rings shrink as they lose moisture. This differential shrinking creates stress within the wood; eventually, the weakest point will give way, causing the wood to split. It’s important to note all woods shrink when they dry and rarely because of structural issues.
Next, read on: How to strengthen wood.
Summary
Wood splitting is a challenge every woodworker grapples with. Unfortunately, it’s impossible to stop the problem because some cracks and spits are due to natural reasons.
However, you can reduce the risk of splitting in dried or freshly cut wood by treating the boards with a stabilizer, linseed oil, paintable wax, or a salt paste, among other products.