So you have settled on acrylic paint as your wood paint choice? That’s great. After all, there are tons of reasons why acrylic is a perfect wood painting option, one of which is the ease of painting.
However, you should know that you will have to “prime” the wood you want to paint before you can actually commence painting for the best painting results.
Unfortunately, many don’t know how to prime wood for acrylic painting. Anyway, you’re in luck, as we will detail all the steps you need to know here. Read on!
How to Prime Wood for Acrylic Painting
The first thing to do is to sand the piece (or pieces of wood you’re working on). Following that, you apply at least two coats of sealer followed by two coats of primer. That’s all; the wood is now effectively primed and paint-ready.
Priming a wooden surface before using acrylic paint is very important to get the remarkable painting result that you want. Fortunately, it’s also pretty straightforward, and this article will address it in detail.
Primer or Sealer: What You Should Know Before You Start?
If you’re relatively new to painting or have been around a while, you will have come across “sealer” and “primer” multiple times.
Some people use these terms interchangeably, assuming they mean the same thing, but that couldn’t be further from the truth. Although both substances are associated with the wood priming process, they actually have different functions.
A sealer is usually applied before the primer to serve as a thin layer of protection that prevents the wood from soaking in paints and ensures it is not affected by other environmental factors.
On the other hand, the primer is applied to ensure that your paint will adhere strongly to the wooden surface you’re painting on, so you won’t have to deal with peeling, cracks, or running paint issues.
What is the Best Wood Primer for Acrylic Paint?
There are several wood primer options available for sale that you can use to achieve excellent priming results, so it may be tricky to identify one as the best option for acrylic paint.
Most important is to identify the compatibility with acrylics, for instance, can you shellac over acrylic paint? Plus, you will want to ensure that whatever primer option you select offers excellent adhesive properties.
You will also want to opt for an oil-based wood primer option if the wood you want to paint will be kept outdoors or a water-based one for indoor use.
Acrylic Paint Primer
As earlier mentioned, there are several acrylic paint primer options available for sale, so if you are still unsure of which paint primer to go for, here are some recommendations for you:
1. The RUST-OLEUM Bullseye Water-Based Primer

- Use to prime exterior or interior surfaces including porous or glossy items
- Water-based formula has zero VOCs while still providing excellent stain and odor sealing/blocking
- Dries to the touch in 30-45 minutes and covers up to 100 sq. ft. per quart
This wood primer option is one of the best water-based wood primers around. It is an excellent water-based primer formula that you will be able to use to prevent stains on and seal the wood you’re working on.
In fact, you will be able to use it to prime both interior and exterior wood surfaces, including porous ones. For starters, it has excellent odor-blocking properties.
Also, it prevents tannin bleed, which is a problem that occurs when you use acrylic mediums on wood. Furthermore, the RUST-OLEUM Bullseye water-based primer dries quickly, so you won’t have to spend long hours waiting before you can paint.
Overall, if what you’re after is a primer for painting indoor furniture, this is one of the best options around.
2. The INSL-X Prime Lock Acrylic Bonding Primer
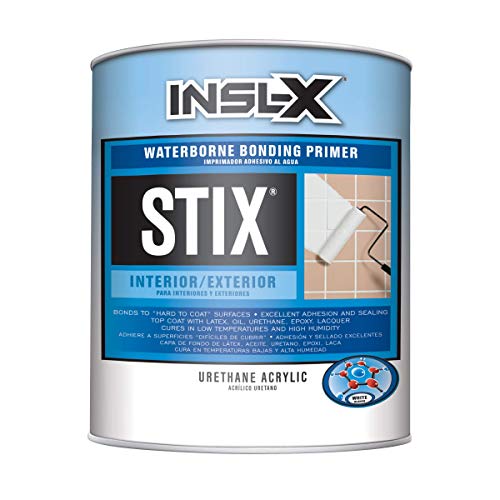
- Premium-quality, acrylic-urethane bonding primer-sealer with unparalleled adhesion to the most challenging surfaces, including glossy tile, PVC, vinyl, plastic, glass, glazed block, glossy paint, pre-coated siding, fiberglass, and galvanized metals.
- Bonding primer for drywall, plaster, ceiling, acoustical tile, wood trim and doors, Formica, ceramic tiles, glossy surfaces, PVC plastic, masonry walls, wood, trim, shutters, masonry, stucco, concrete, cement block, galvanized metal, aluminum, and other challenging surfaces.
- Bonds to "hard-to-coat" surfaces and can be top coated with almost any product.
The INSL-X Prime Lock wood primer is an excellent oil-based acrylic painting choice. Why? Firstly, it has very high adhesive properties that make it a perfect primer option for those “hard to coat” wooden surfaces.
Then, this primer is ideal for painting wooden furniture you intend to keep outdoors. However, you will also be able to use it for painting furniture for indoor use as well.
Additionally, it dries quickly, so you will be able to move swiftly on to the next phase of your wood painting exercise.
If you’re looking for an acrylic paint primer with an excellent stain blocking property, perfect for outdoor use, and excellent adhesive properties, you can’t go wrong with the INSL-X Prime Lock wood primer.
Tools for Priming Wood for Acrylic Painting
There are a couple of tools you will need for your wood priming exercise before you can begin priming. These wood priming tools include the following:
- A sander machine or wood sandpaper for smoothening out the wood’s surface (sanding).
- A tack cloth for cleaning the wood after sanding.
- Brushes for applying your primer and sealer.
- A sealer
- A primer
- Palette knife
How to Prime Wood for Acrylic Painting
Once you have selected your primer and sealer and also gotten every other tool you need ready, you can now start the wood priming process.
The wood priming process is very easy. Below are the steps that will guide you in effectively priming your wood furniture.
Step 1: Prepare your wood panel
First and foremost, prepare the wood panels you want to paint. This particular process is important, especially if the wood panels are dusty or dirty, as all these unwanted “impurities” could interfere with your priming results.
To prepare your wood panel, wipe it down with a clean, dry, or slightly damp cloth to get rid of any dirt, dust, or debris on the surface of the wood.
If the raw wood panel is very dirty or dusty, you can use a vacuum or air pressure cleaner/blower to clean it instead of a cloth. You can also use a vacuum for extensive wood panel areas.
Step 2: Set the wood
This is one of the more overlooked steps to priming wood. Seriously, any unplanned movement of the wood panel when painting can mess with the entire painting process.
This makes it all the more surprising that people just ignore this stage. After cleaning and preparing the wood surface, set the wood. Proper wood panel placement significantly impacts the ease of your priming process and the quality of the results you get.
You should ensure to properly “prop up” your raw wood before priming. The placement option you choose should allow for easy sanding and coating of the entire surface of the wooden panel.
Also, if you’re working with a relatively large wooden panel, you should consider bracing the back of the raw wood with a few wood strips. This ensures it doesn’t distort or warp while you’re working.
Step 3: Sand the wood
Now that you have cleaned every dust and debris from your raw wood and you have it properly set up, the next thing to do is sand it.
If you run your fingers over the surface of the wood canvas you want to prime, you will discover that it is rough and gritty (if it hasn’t been previously sanded).
If you proceed to apply your sealer and primer like this, you will likely end up with less than satisfactory results.
You can sand down your wood using a wood sander machine or, where that is not available, a sanding sponge or sandpaper of 140- or 280-grit.
While you’re sanding down the wood surface, make sure you are working “along the grain.” This is essential because sanding against the wood grain can cause the wood to break, which only complicates matters.
Note that it is important not to use colored sandpaper, that is, sandpaper coated with colors different from natural wooden color. This is because these sandpapers may stain the wood while you’re sanding down.
Step 4: Clean the wood
The next step: clean the wood. Yes, we know you’ve done this before, but you have to do it again. This is due to the dust and wood particles that will be on the wood after sanding.
This makes the wood panel’s surface quite rough again. Therefore, you will have to wipe them off to ensure a smooth surface before painting.
It is recommended to soak a lint-free cloth or wiper in paint thinner instead of water and use it to clean off any present wood sand.
This will ensure you don’t have to start removing lint from the surface of the wood panel wherever they might have snagged on.
The cloth will also be sufficiently humidified, which ensures that you are actually able to remove all wood sand present. After cleaning, give sufficient time for your wood surface to dry before moving to the next stage.
Step 5: Seal the wood
The next stage is sealing the wood panel. Sealing is crucial for acrylic painting because woods usually contain natural substances that can interact with the clear acrylic layer and discolor it.
Also, there may be the problem of support-induced discoloration, which can clear off the paint layer. Whichever way, the result is an uneven, poor-quality painting finish.
The role of sealers in wood priming is ensuring all of these “contaminants” are “sealed up” in the wood so they won’t interact with your acrylic paint.
To properly seal the wood panel you’re working on; you need to apply at least two coats of sealer, one after the other. After applying the first coat, wait for the sealed wood to dry and apply the second coat.
If you feel the wood panel isn’t smooth enough after applying the first coat, you can simply lightly sand it down with a 220-grit sanding sponge and then apply the second layer of sealant.
Alternatively, you can always sand before applying the next coat. However, ensure the surface is clean before applying other coats.
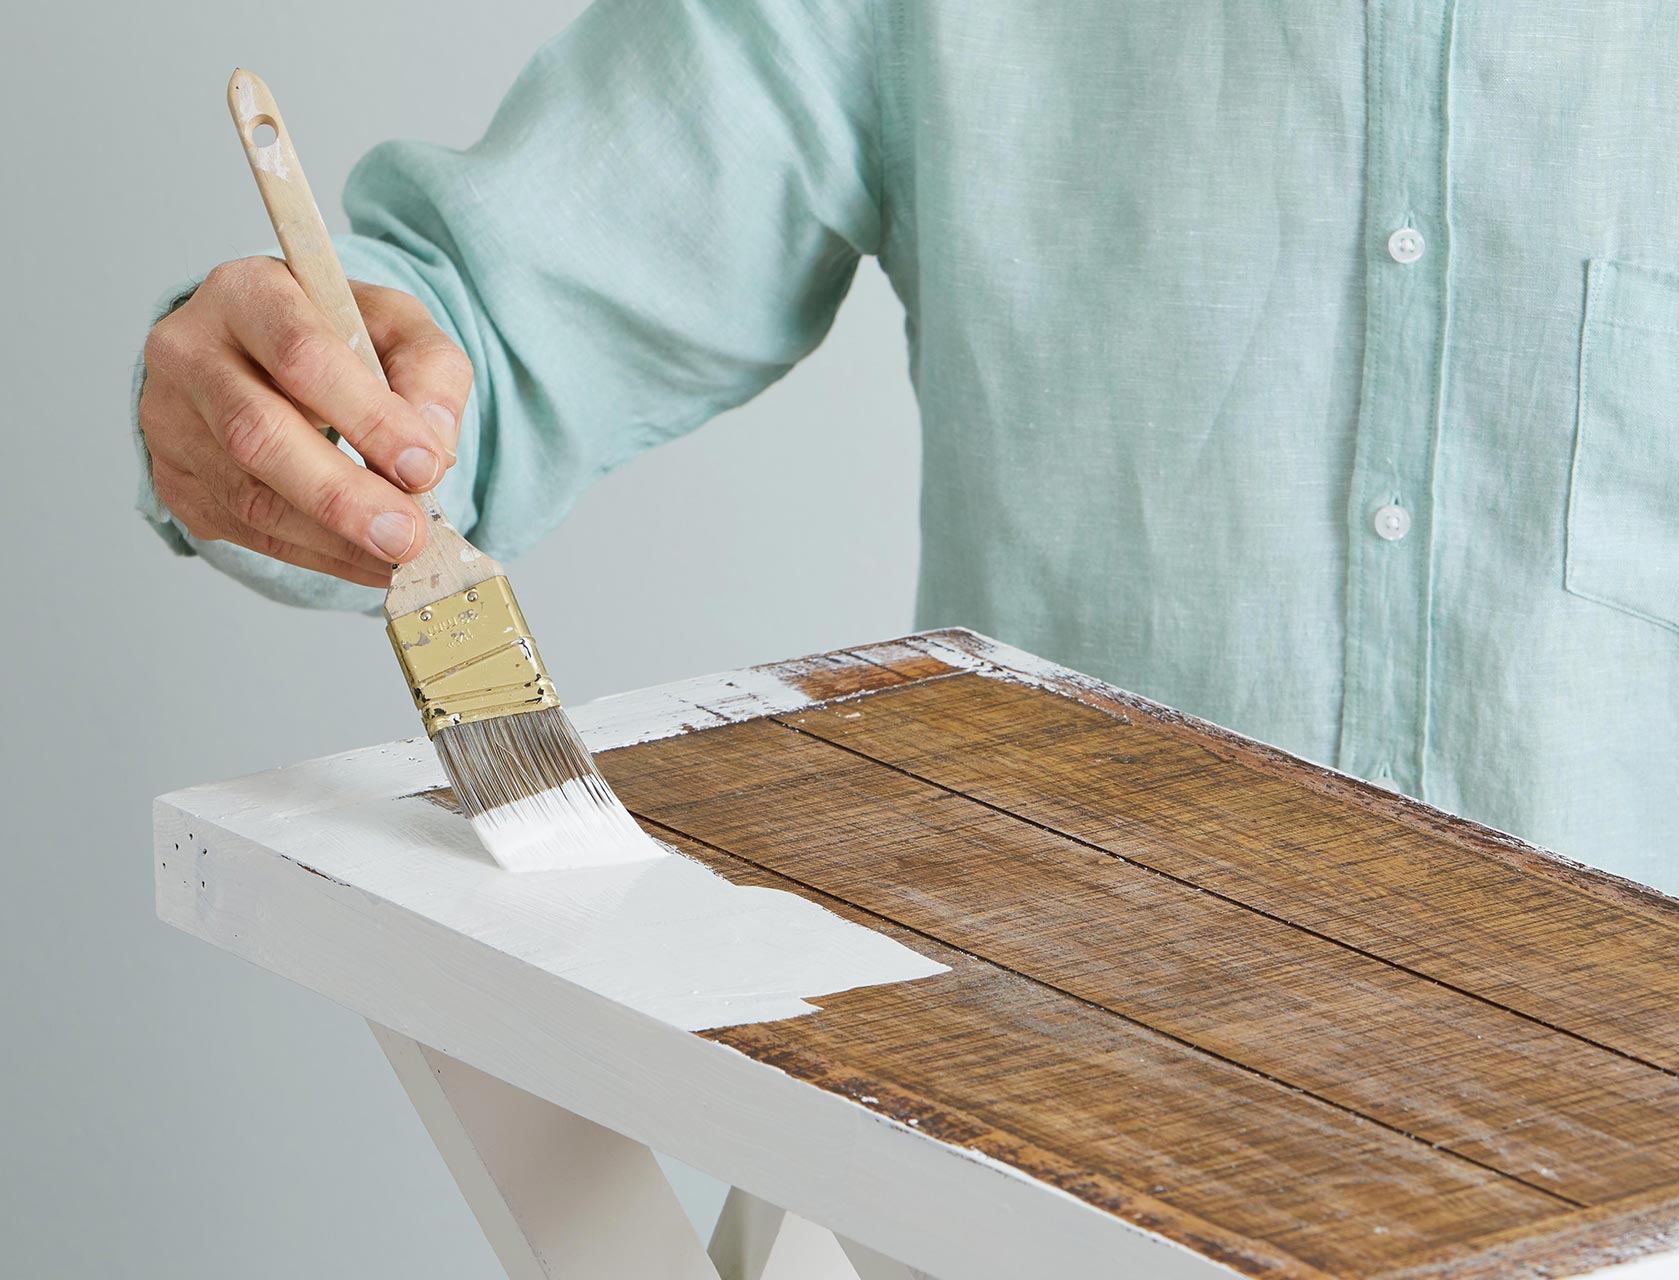
Step 6: Apply a primer
Now that you have carefully cleaned and sealed your wood panel, you are finally ready to apply your primer! Like with the sealer application, you will need to apply at least two layers of acrylic wood primer for excellent wood priming results.
When priming your wood panel, it is recommended that you start with the front and sides of the wood panel before moving on to prime the back.
Also, after you’ve applied the first coat, you should wait until the primer is completely dry before you apply the next layer of primer.
Again just like when you were applying the sealer, it is advisable to sand the wood surface after applying the first primer layer before applying another layer.
Make sure that the second primer layer is also completely dry before you begin using your acrylic paint.
Read also: How to cut wood paneling
Importance of Priming Before Applying Acrylic Paint
You may have heard several people say priming is not necessary before applying your acrylic paint to the wood surface you are working on.
That is untrue. Not priming wood before applying the acrylic paint usually causes post-painting defects like paint cracks and running paint.
Priming is crucial because it will ensure your acrylic paint does not get stained by contaminants that may be present in the wood you’re working with.
It also helps to ensure optimum paint adhesion to the surface of the wood, so you won’t have to deal with running paint.
What Wood Surfaces Can Be Painted With Acrylic Paint?
One great thing about using acrylic paints for your wood painting activities is that you can actually use them to paint all kinds of wood surfaces in addition to the glossy finish it provides. This includes medium-density fireboard (MDF) and plywood.
You will even be able to use it on wooden surfaces that have been painted before. However, you will have to ensure that you properly prime it before painting so that you can achieve excellent priming results.
FAQs
Do you need to prime wood before acrylic painting?
Yes, it is recommended that you apply primer to any wood you intend to work on with acrylic paints. This is because acrylic paints are somewhat sensitive to tannins and other substances present in the wood. If you want to ensure you get that perfect painting result you envision, you should ensure to prime when working with acrylic paints.
What do you prime wood with before acrylic painting?
Wood priming is a process, so there are several things you will need to do before painting. However, the main materials you will need to prime the wood you want to work on are a sealer and a primer. The primer can either be water-based (for indoor furniture) or oil-based (for outdoor furniture).
Can you paint acrylic directly on wood?
Yes, you can apply polymer acrylic paint directly on wood if that is what you want. However, you should note that this isn’t recommended. This is because, asides from the fact that you are very likely to get unsatisfactory results, you will likely have to repeat the entire process in a few weeks or months because of paint cracking or other effects that result from not using a primer. (Here is how to get acrylic paint off wood since you’ll need to strip off the old paint first).
How do you prepare a board for acrylic painting?
To prepare a wood board for acrylic painting, you will have to follow the steps below:
- Clean it to ensure there is no dirt or debris that can interfere with the painting process
- Sand it down (with a sandpaper or sanding sponge) to even it out and ensure it is smooth
- Clean again to remove wood sand and any other contaminant.
- Then you simply apply your sealer and primer
What is the best wood sealer for acrylic paints
There are several excellent wood sealers for acrylic paint, so it may be difficult to single out one of them as the best. However, the sealer you opt for depends on the “look” you’re going for. If you intend on using a glossy acrylic medium, you should opt for a polyacrylic sealant. For a flat finish, a polyurethane sealant is your best option.
Conclusion
So every time you work with or intend on working with acrylic paint on wood surfaces, you should always make sure that you properly seal and prime it before finally painting it.
This is because the difference between an excellent acrylic paint job and a shoddy one usually comes down to if the wood was well-primed or not.
Also, remember that you should use water-based sealants and primers on wood that you intend to use indoors and oil-based ones for wood that you intend for outdoor use.