Wood sealer is like sunscreen for your painted wood projects. It protects the paint from sun damage and fading while also repelling water, dirt, and mildew.
Learning how to seal painted wood for outdoor use is a simple process that will extend the life of your project. Whether you’re sealing a deck, mailbox, or patio furniture, we’ll show you how to do it in just a few steps.
Let’s get started on the journey to protect painted wood!
How to Seal Painted Wood for Outdoor Use
- Choose the right sealant
- Clean painted wood
- Prepare the sealant
- Lightly sand painted wood and clean
- Apply sealant on painted wood
- Sand lightly and reapply the sealant
- Dry wood
How to Seal Painted Wood for Outdoor Use – (Step by Step Process)
First, choose the right sealant to seal painted wood for outdoor use. Then, prepare the wood for sealing by cleaning and lightly sanding.
Apply sealant on painted wood with a brush, roller, or sponge. Sand the wood and reapply the sealant. Always ensure your wood is dry before and after sealing.
Before commencing the sealing process, you need to get your tools and materials ready. They are outlined below.
Tools and materials for sealing painted wood
As you get ready to seal painted wood, the following are necessary tools to set up your workspace.
- Protective gear and eye protection
- Fresh rags or a tack cloth
- Sandpaper
- Quality paintbrush, roller, or sponge
- Sealer for outdoor wood furniture
Steps on sealing painted wood for outdoor use
Let’s go into more detail on the steps involved in sealing painted wood for outdoor use.
Step 1: Choose the right sealant
Choosing the right sealant is perhaps the most important step in sealing painted wood.
The type of paint coat on the bare wood surface will determine the sealant type you will work with. For example, oil-based paint will naturally go well with an oil-based sealant.
There are plenty of wood sealants in the market, but we have narrowed it to the three listed below.
Polyurethane
When we talk about sealant types, a major example is a polyurethane. Polyurethane is a long-lasting clear coating that comes in two forms: oil-based polyurethane and water-based polyurethane.
- Oil-based polyurethane
Oil-based polyurethane is also known as solvent-based polyurethane.
This form of polyurethane sealant contains a higher percentage of Volatile Organic Compounds (VOCs), making it more durable than water-based ones.
Another plus for oil-based polyurethane is that it is cheaper. It also provides a glossier appearance; however, it may darken and turn yellow with time.
A major reason, however, that might discourage your use of oil-based polyurethane is that it requires a long curing time resulting from its significant amount of VOCs.
These VOCs are harmful to the body; hence enough time must be allocated for the toxic fumes to be released.
- Water-based polyurethane
Though both polyurethane forms give off an odour, water-based polyurethane is less smelly due to its lower percentage of VOCs, which is great.
What’s even better is that this reduced quantity of VOCs in water-based polyurethane makes it less harmful to humans and is, therefore, requires a shorter time for it to dry completely.
Finally, water-based polyurethane remains clear with time, and it is useful for acrylic and latex painted finishes.
Keep in mind that a clear polyurethane topcoat not only seals exterior paints, thereby extending the duration of the paint but also giving the painted wood a shiny appearance.
Polycrylic
A Polycrylic sealant is similar to water-based polyurethane. Polycrylic contains polyurethane resins which serve to protect the painted wood from sunlight, moisture, and extreme weather conditions.
It is clear, less smelly, and has a low percentage of VOCs, therefore less toxic. It is also very suitable for use with flat latex paint and very easy to clean. You can get different forms of paint finishes with polycrylic: clear, satin, or high gloss.
Polycrylic, however, is not as durable as polyurethane. Another disadvantage is that it will not bond with oil-based paints; there will most likely be adhesion problems as Polycrylic is water-based.
Paint Sealer combos
Recently, products known as sealer combos have appeared in the market. Sealer combos are an innovative combination of paint and sealant in a can. In addition, these products do not require any topping with additional coats.
They also do not stain as they have a clear coat and are less prone to discolouration; hence, they are suitable for painting and sealing white furniture or outdoor woods of light colour.
Furthermore, sealer combos come with specific instructions from the manufacturers for their preparation and application, so do well to read and follow these before use.
Epoxy
Epoxy is another suitable example of a wood sealant. Epoxy provides a long-lasting finish for outdoor furniture due to its hard, protective film. This non-porous coating and, as such, extremely water-repellent can last for 5-10 years.
Boatbuilders use Epoxy for this reason. Epoxy coatings are available in two forms: either clear or coloured. Also, Epoxy can be used in combination with exterior varnish.
Epoxy provides the hard, protective covering and the exterior varnish serves as protection against the UV rays from the sun. Even still, you can paint on a varnished wooden surface with careful consideration and appropriate preparation.
Exterior Oils
Naturally occurring oils can be used to seal the wood. Linseed oil, Tung oil, Coconut oil, and Walnut oil are popular examples.
However, in recent years, companies have manufactured different blends of these oils. Usually, linseed oil and tung oil, mineral spirits, and other components are used to create products with improved wood sealing activity.
Danish oil, a blended product, gives a lustrous or glossy finish. Another example of a blended product is teak oil, and which gives a slight sheen appearance that is more durable.
Step 2: Clean painted wood
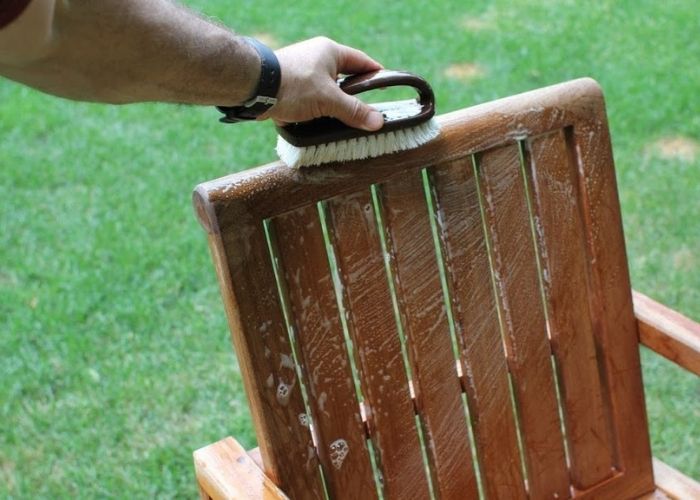
Before sealing painted wood, ensure the wood surface is clean, clear of any dust, dirt, or grime, and the surface is dry.
Unremoved dirt, oil, or other heavy residues on the wood will prevent the bonding of the clear polyurethane or polycrylic sealants to the paint. For this cleaning, use one-half cup of trisodium phosphate (TSP) mixed with warm water.
While wearing rubber or latex gloves, wipe down the wood with a rag soaked in the TSP solution. However, ensure you don’t soak the surface of the painted wood.
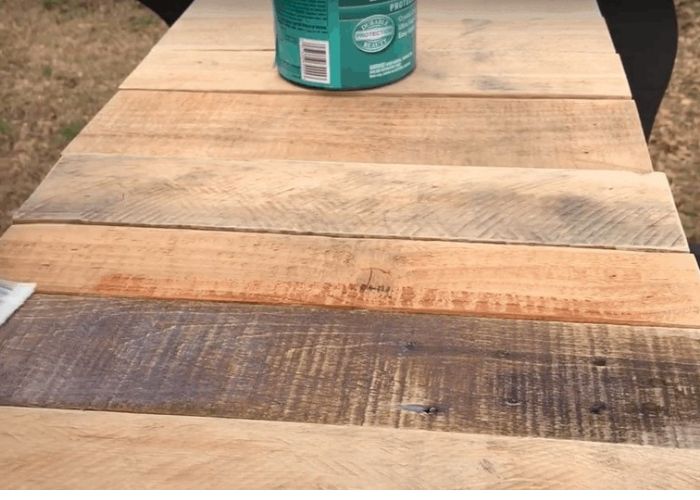
Step 3: Prepare the sealant
You must prepare the sealant before applying it. To do this, mix the binders and pigment thoroughly by stirring with a long, clean stick. To prevent separation, ensure all the components are well blended. Also, stir gently to avoid bubbles.
Sealer combos usually contain specific instructions on use from the manufacturers. Ensure you read the instructions carefully to ensure a hitch-free sealing process.
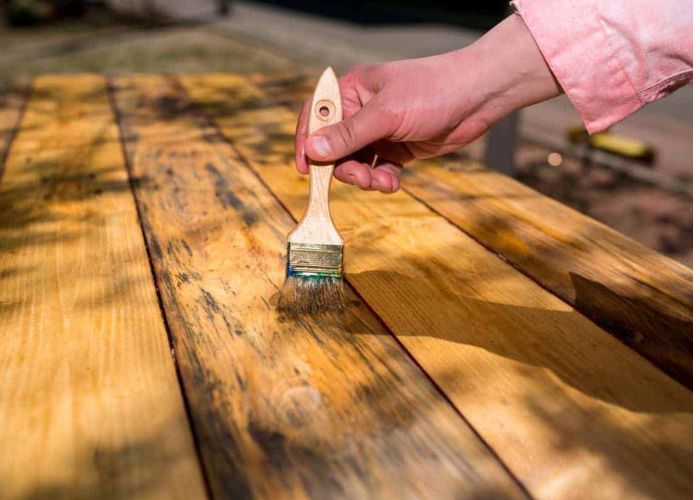
Step 4: Lightly sand painted wood and clean
Start by wearing safety goggles to protect your eyes from sawdust. Next, remove all rough spots on the painted wood surface by lightly sanding with 220-320 grits of sandpaper. If the paint insists, here are some of the best deck stripping products.
Make sure to clean the wood surface with a tack cloth once you’re done.
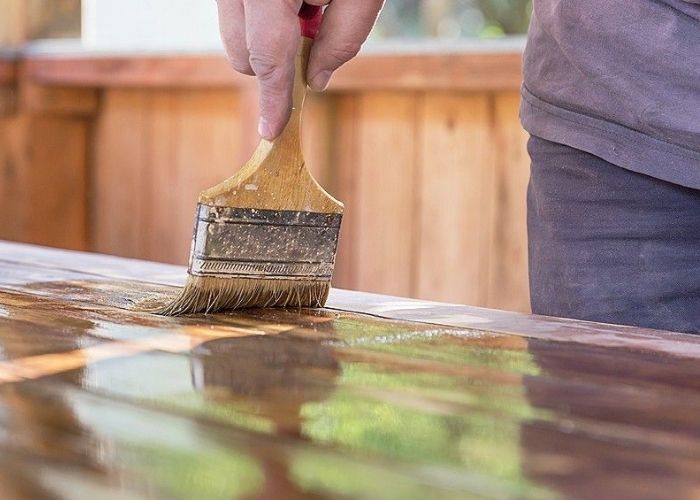
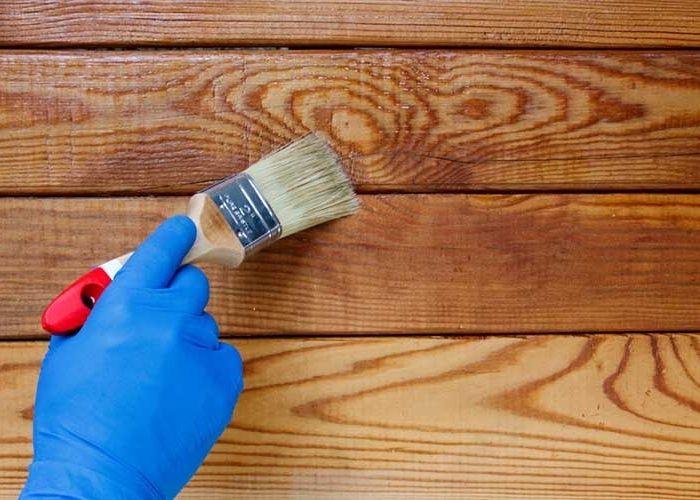
Step 5: Apply sealant on painted wood
Dip the brush into the can of sealant and do not wipe off excess sealant on the edge of the can to prevent the formation of bubbles.
Paint in one direction and apply the wood sealant evenly from edge to edge and in the direction of the wood grain. Aside from making your paint look natural, this technique prevents bubbles from forming.
Note that it is preferable to paint forwards rather than backward. In case bubbles or drips form, immediately smoothen them out with the paintbrush when the coat is still wet.
And allow the wood sealant to dry according to the manufacturer’s instructions. Also, do not brush excessively, as over-brushing can introduce bubbles of air which may ruin your finish. In addition, over-brushing makes your brush sticky.
Step 6: Sand lightly and reapply the sealant
Again sand lightly, and clean the wood surface with a fresh rag or tack cloth to remove all sawdust and residues.
Then, reapply the sealant.
You can apply up to three additional coats of polycrylic or polyurethane wood sealants. However, sand between coatings and let the wood dry before recoating to avoid stickiness.
Step 7: Dry wood
After adding the last coat and sealing the wood, allow the wood to dry.
You either let the finished piece stand overnight or, according to the manufacturer’s instructions, allow for proper drying or curing before it is used.
Read also: Methods of sealing burnt wood.
Why Seal Woods with Exterior Paints for Outdoor Use?
Exterior paint, though extremely useful, is sometimes not enough protection against the extreme weather conditions pieces of outdoor furniture face.
UV rays from sunlight can damage outdoor furniture. Such damage, known as photodegradation, occurs as the pigments on the painted wood absorb the UV rays leading to the breakdown of the bonds holding the paint together.
This breakdown of the bonds in paint leads to fading. The fading of paint on wood makes it lose its pleasant appearance, and while this is bad enough, things can actually get worse.
Another destructive agent can come in when wood loses its paint and water. By itself, water can weaken the wood. Furthermore, the presence of water in wood will encourage the growth of fungi which can further damage the wood.
Alternatively, you can powder coat your wood instead of sealing it with paint. Powder-coating is a more durable, weather-resistant option than paint and offers superior protection for your wood.
When to Paint and Seal Bare Wood Surfaces?
To start with, check the moisture content of the wood. Normally, 15-20% moisture content is considered acceptable, but no more else, there will be a loss of adhesion between the wood and the paint applied.
Next, remove all dried up and oozing sap, then apply a suitable primer to seal off all knots and affected sap areas. Finally, fill in all the cracks and holes using a high-grade filler, after which you can begin to sand the wood with sandpaper.
Ensure you sand in the same direction as the wood grain for a smooth finish, then clean off the sawdust. Now, your wood is ready to be painted and sealed.
Read also: How to paint teak wood?
FAQs
Does exterior paint seal wood?
Exterior paints usually contain chemicals that make wood waterproof and resistant to extreme weather conditions. However, exterior paint finishes sometimes require further protection to shield wood. Wood sealants are used to seal painted wood and increase the durability of the paint.
Read also: Does exterior paint work inside?
What is the best exterior clear coat for the painted wood?
Exterior Polyurethane. Polyurethane provides an excellent, durable clear topcoat for painted wood. It also comes in two forms: water-based polyurethane and oil-based polyurethane. Water-based polyurethane is useful for acrylic and latex painted finishes, while oil-based polyurethane is suitable for oil-based painted surfaces.
Can polyurethane be used outside?
Yes, polyurethane can be used outside. Exterior polyurethane can be used to seal wood for outdoor use, but interior polyurethane is not suitable for outdoor use. Interior polyurethane lacks the additives that protect exterior paint finishes from the degrading UV rays of the sun.
Can you put polyurethane over the painted deck?
Inputting polyurethane over a painted deck, you must consider whether or not the deck wood is stained. Unlike paint, stains and wood sealants are not necessarily designed to adhere to each other. Also, a clear wood sealant like polyurethane can not give any more protection to the deck stain, and this can lead to problems maintaining the deck stain with time.
What is the best paint to protect the wood from weather
Oil-based paints are an excellent choice when it comes to protecting wood from the weather due to the long-lasting finish they give. However, they require a long curing time as they are toxic. Acrylic exterior paints are also very suitable for protecting wood, and they are less prone to cracking, unlike latex paints.
How to seal acrylic paint on wood for outdoors
To seal acrylic paint on wood for outdoors, first, sand the wood lightly with sandpaper, clean it, then apply an appropriate wood sealant and finally allow the wood to dry. You can use polycrylic or water-based polyurethane to seal acrylic paint on wood for outdoor use. These sealers will not damage the acrylic paint on the wood.
Does paint protect wood?
Yes, paint protects the wood. Paint is formulated with chemicals that help improve the overall appearance of wood and protect it from moisture, mold growth, rot, stains, and photodegradation due to sunlight. Ensure you sand wood properly, clean and prime it before painting.
Read also: Pressure Treated Wood Sealer for Cut Ends.
Conclusion
Sometimes, exterior paint alone is not enough to protect outdoor wood furniture from the damaging effects of sunlight, water, and extreme weather conditions.
Sealing painted wood for outdoor use is a way of giving it an extra protective coating. Wood sealants used in sealing can protect the paint on wood and improve its appearance. They are also durable and affordable.
Use protective gear, especially safety goggles, gloves, and a mask while working. Also, ensure you work in a well-ventilated place, preferably an open space like your yard. Have fun.
Further more, you can learn How to Seal MDF from Moisture.