Of all the woodworking skills, wood carving looks the hardest. Anyone can cut up some wood, make a chair, stain and finish a floor, or paint a house. But to turn an ugly log into a flower, an animal, or even a person is nothing short of magical!
As difficult as it might seem, wood carving is just like any other skill. With the right tools and a bit (a lot) of practice, you too can not only learn how to start wood carving but also become excellent at it, and your journey begins by understanding the different wood carving techniques.
Types of Wood Carving
1. Whittling
Whittling is what comes to mind when most people think about wood carving. Whittling is the art of carving objects out of wood by only using a wood carving knife. And here is the best whittling knife that I recommend.
Traditional whittling does not involve any other hand tools, not even a chisel, gouge, or v-tool, and definitely no power tools.
You’re also not supposed to use sandpaper when you whittle. When you’re done carving up the wood, you should be able to see the knife strokes.
While any knife can technically be used for this type of carving, nothing is better suited than whittling knives. These tools either have a fixed handle like the Beaver Craft sloyd knife or a folding pocket knife like the Flexcut whittling jack.
Five cuts used in whittling
Straightaway rough cut
This is the first step for any whittling project, and it involves making neat cuts to remove the excess wood and get the shape of your design.
To achieve this, you hold the wood firmly in your supporting hand and use your strong one to make long outward cuts (away from your body). You get a better result when you cut with the grain.
It is called a rough cut because you’re not trying to make the figure smooth just yet.
Push cut
Similar to the straightaway rough cut, this is a whittling stroke away from the body. However, a push cut is more controlled. Instead of moving the knife with the force of your wrist, you place the blade where you want to cut and push it with your alternate thumb.
So, if you’re holding the whittling knife with your right hand, you’ll push the blade with the thumb on your left hand. The push cut is also called a levering cut or push-away cut.
Pare cut
The pare cut is also known as a pull cut, and it involves a similar technique as when you’re peeling apples or potatoes with a knife. It is the most common cut used in whittling. However, because you are pulling the knife towards you, you have to be more careful, giving greater control over the design.
Stop cut
The stop cut is when you cut a deep line across the wood to prevent a push cut or pull cut from going beyond it. This will generally be employed after a straightaway rough cut when you need precision in your cuts.
V-cut
This is similar to the stop cut in that there is a fixed point you want to get to, so you cut upwards to the imaginary point, then downwards to make a v-shape.
2. Chip Carving
This is another type of wood carving in which the hand tools needed are named after the style. Chip carving involves making several cuts or chips from wood to create a pattern.
These patterns could be free form, although they are usually geometric shapes such as triangles, circles, rectangles, or curves. (Here’s an article on how to curve wood with water.)
Chip carving is elegant, minimalist, and challenging. However, to remove these wood chips properly, you need solid hand-eye coordination and you need to invest in the right carving tools.
You can either buy individual knives or purchase a chip carving set. Flexcut has a three-piece knife set made from carbon steel, so you can use it on various wood carving projects.
Some of the cuts you’ll need for chip carving are different from whittling. Here is a detailed tutorial that shows how to cut simple wood chips as a beginner.
Related read: Best brand for hand tools.
3. Relief Carving
Getting into slightly trickier territory, we have relief wood carving. This wood carving technique involves carving a design out of a flat back panel, so the object seems to hover over the piece of wood.
Therefore, instead of carving around the wood, you are carving into it, thus creating a three-dimensional figure. Relief carving is like chip carving on steroids. Instead of straight lines and gentle chips, you have deep gouges and lots of curves.
Relief carving falls into two main categories: high relief and low relief. Each one refers to how deep the carving is – low relief is up to ½” while high relief is anything beyond that.
However, some people also include deep relief, which refers to depths beyond 2”. Depending on how large the project is or how deep you have to burrow, electric wood carving tools may come in handy.
More commonly used carving tools are gouges, chisels and mallets, and a v-tool. Relief carvings are usually hung and are often used for ornamental figurines, scenes, and caricatures.
While there aren’t any special cuts, relief carving relies heavily on a person’s ability to hold and manipulate different tools.
Therefore, if your goal is to be an expert at relief carving, you may first need to master some of these other techniques, especially the next one on our list.
4. Carving in the Round
Carving in the round refers to a completed three-dimensional project that involves carving around a piece of wood to make life-like designs.
This type of wood carving requires a more aesthetic finish that may include staining, painting, or even burning. This type of carving is smoother and more detailed than whittling and does not have a flat back panel like relief carving.
To accomplish this look, carving in the round utilizes more tools and of different sizes than other carving techniques. It may also need power tools to finetune certain elements.
There is no limit to the size, content, or finish that can be created with this carving technique. This makes it perfect for beginners who want the freedom to express themselves.
The most common tools used for carving in the round are carving knives, chisels, and gouges. Trying to get all the tools you need at the same time might set you back a few hundred dollars, so it is best to grow your collection over time.
However, before you get ahead of yourself, here are the things to prioritize.
How to Start Wood Carving and Tools Needed?
Now that we have covered what wood carving is, it’s time to discuss the tools you need in a bit more detail. As we mentioned earlier, each technique requires a particular set of tools.
They also work on slightly different types of wood and require different safety measures. It is worth mentioning that there are other wood carving techniques such as pyrography and chainsaw carving.
However, they are not as common for beginners, so we will not be discussing the tools needed for those. So, what’s the first thing every woodcarver needs? Well, the one thing you can’t do without – wood.
The best wood for carving
Nobody learns how to drive with a Rolls Royce. Even though it might give the best driving experience, the risk of damage is too great. In the same way, it is always best to start learning how to carve with greenwood.
Green wood refers to wood that hasn’t been dried. It could be a branch you cut or an already felled log lying on the forest floor. This is because it is softer than processed wood, so it is easier to carve. Plus, it’s free.
If you don’t have access to green wood, the next best option is basswood. Basswood is a light-colored hardwood, but many people mistake it for softwood because of its texture. Basswood is known in Europe as lime or linden.
This wood is so common with beginner woodcarvers that it is included in many wood carving kits, such as the S16 kit from Beaver Craft. Basswood is also recommended for beginners because it has a fine grain, so it can be sanded, stained, or painted easily.
Hardwoods are generally not recommended for beginners, but basswood, balsa wood, and butternut (also called white walnut) are the exceptions. So, after green wood and basswood, we recommend you use any of these softwoods:
- Pine
- Cedar
- Aspen
When you’re comfortable with these, you can move on to hardwoods like birch, apple, maple, and black walnut.
Woodcarving tools for beginners
Once you have your wood ready, it’s time to get the right tools for the job. Assuming you’re going to try out a few techniques, these are the most common wood carving tools.
There are four main groups of wood carving tools used for cutting or shaping wood:
- Knives
- Chisels
- Gouges
- Power tools
There are other rudimentary or common tools you’ll always need, which we will discuss afterward.
Wood Carving Knives
Knives are the primary tool for whittling, chip carving, and carving in the round. There are different types of knives, with the most common ones being:
- Chip carving knife – this is a short-bladed knife usually no longer than 1.5 inches and is ideal for cutting chips and triangles into wood. The curved shape allows you to cut into a flat surface easily.
- Sloyd knife – this is the most common type of knife and may be referred to as a carving knife. It has a long blade of 2 to 3 inches and a rounded handle for easy holding. This knife can quickly remove large chunks of wood, making it great for rough carving and whittling.
- Bench knife – once you’re done rough carving with a sloyd knife, you need a smaller, more precise tool for finer details. It is only 1 to 2 inches long, so it gives you more control over your whittling projects.
- Hook knife – this is a carving knife with a rounded bottom, which allows you to cut curves or scoop into the wood. Given its shape, it is more commonly used for making spoons. As a result, they are also referred to as spoon knives.
- Skew knife – a skew knife or micro skew comes in handy when you are working on a really small piece, and you need something even more detailed than a bench knife. A skew knife is used for vertical cuts when the surface area is limited.
There are other knives you may use for whittling and carving, such as a pelican knife and specially made tools, but chances are these five will cover all you need as a beginner.
If you are interested in whittling or chip carving, you need to go no further. However, if you’re a fan of relief carving or carving in the round, you will get a kick out of what comes next.
Wood Carving Chisels and Mallet
Chisels are extremely efficient tools and are perfect for large wood carving projects. They can lop off large chunks off wood with one hit, thus speeding up what is typically a very long process.
Chisels are also very common with woodworkers, so it is likely you already have one. The two types of chisels used for wood carving are regular carpenter’s chisel (also called #1 sweep chisel) and skew chisel (also called #1S sweep chisel).
A skew chisel also has a flat cutting edge, but this is slanted or skewed and is called a #1S skew chisel. Both types of chisels are used on the edge of the wood and never on a flat surface.
The benefit of the #1S skew chisel is that it can be used to cut into corners. Chisels and gouges come in three main sizes – palm-size, mid-size and full-size.
Ideally, you would need at least one of each or get a beginner set like the VonHaus 16pc, which also comes with a wooden mallet. If you prefer to work quietly when you carve wood, you would be better off with a rubber mallet, like the 16oz Tekton.
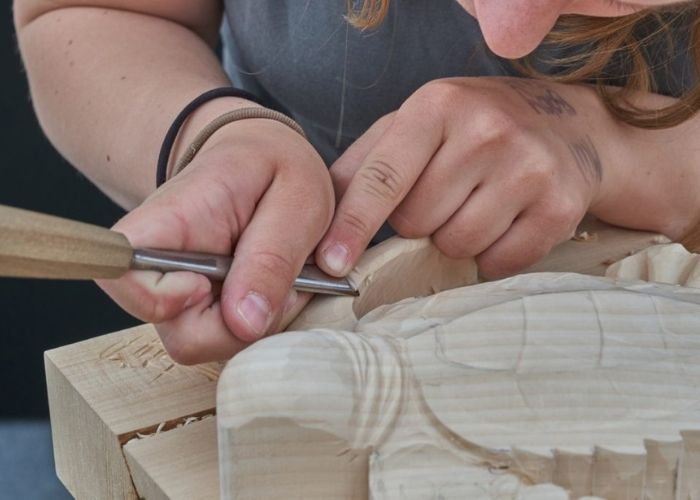
Wood Carving Gouges
Besides knives, gouges are arguably the second most important group of wood carving tools, especially if you do relief carving.
Gouges have the edge over chisels because you can use them on a flat surface, and some gouges can handle some of the work done by chisels.
Gouges are defined by the depth of their curve or sweep. The gouge with the slightest curve is called a #2 sweep.
After this, you have a #3 sweep, #5 sweep, #7 sweep, #9 sweep, and the #11 sweep, which has the deepest curve and is also called a veiner. Even though a gouge has a similar form to a chisel, you don’t need a mallet to use it.
V-tools
In the same bracket of chisels and gouges is a v-tool. As the name implies, it is a v-shaped cutting tool used to make stop cuts, sharp definitions, and add texture.
The shape can be at a 45, 60, or 90-degree angle. V-tools are described as parting tools. However, depending on which professional you ask, some might argue that the v-tool is, in fact, a chisel.
Power tools for wood carving
As fun as it is to carve wood with a small blade, it can be time-consuming, and it may not be as smooth as you like. Or, if you carve wood for hours nearly every single day, your hand will get tired and form blisters.
In those instances, power tools come in handy.
i. Rotary tool
The most common power tool for wood carving is a rotary tool. It has a flexible shaft connected to a motor and has a cutting bit for precise detailing.
In addition, rotary tools have an array of bits and carving burs for a wide range of wood carving projects.
The most popular brand that has the best Rotary tool for wood carving is Dremel. The Dremel 3000 comes with 28 accessories and is built for grinding, sanding, engraving, routing, and polishing.
Recommended reading: Ways of cutting sheet metal with Dremel.
ii. Sanding tools
Another common power tool for wood carving is a palm sander. This is great when you need to remove the kinks from a large project.
However, they can be quite bulky and can’t get into tight spaces, so many carvers either use sandpaper or a Dremel for their sanding.
Non-cutting tools for wood carving
Cutting tools or sharp tools get all the attention for wood carving, but no project can be completed without non-cutting tools. So, before you begin to carve wood, here are some extra tools you’ll need:
- Carving glove – this is a protective glove that will prevent you from slicing off your fingertips. They are worn on your supporting hand while you wrap a safety tape around the thumb of your cutting hand. Here are the best wood carving gloves to choose from.
- Pencil – pencils, pens, and markers are critical to success. Even professional carvers with muscle memory still use pencils to mark their work. You would also need a pencil for every chip carving project. (Here’s a list of the best paint pens for wood and rocks).
- Sharpening stones – carving wood without a sharp knife is difficult. You need a 400 to 600-grit sharpening stone to shape the cutting edge of your carving knives and an 800 to 1000-grit stone to refine the edges.
- Leather strop – after sharpening, you need a leather strop to remove the rough grinds and polish your knives to a buttery smooth finish. Some people use diamond plates or 2,000 grit stones instead, but nothing beats a leather strop.
- Sandpaper – if you are going to be carving in the round, you will need different grits of sandpaper to make your work smooth.
There are some other tools you may need, such as a dust collector (if you work with power tools), rulers, safety goggles, dust masks, and wood rifflers, but these are the most important ones for you to own.
Fortunately, most of these items come in different starter kits, so you don’t have to buy them individually.
Is Wood Carving Difficult to Learn?
Now that you have learned about the different techniques used in wood carving, the best wood for beginners, as well as the tools, you might be wondering if and when you’ll be able to master all of these.
Fortunately, wood carving is easy to learn. The best place to start as a beginner is whittling. Not only do you need the fewest tools, but you also don’t have to make the work perfect.
There are also loads of free templates on the internet with detailed tutorials that make it look easy. But, just like everything in life, you will only be as good as the amount of time you spend practicing.
What Should I Carve as a Beginner?
You can carve many great things as a beginner, but perhaps the easiest is a wooden spoon. You can complete it in under two hours, and you only need a whittling knife and a hook knife.
Carving letters in wood can also help boost your confidence as a beginner and is not as difficult as it seems.
So, pick up any spare chunks of wood you have lying around or logs you find outside and start whittling away. I
The Secret to Wood Carving Success
Being a successful woodcarver is all about knowledge and practice. You don’t have to master all four wood carving techniques; use every tool or practice on every type of wood.
Just pick some things you like and keep experimenting until you perfect them. As you practice over and over again, you will soon find yourself teaching others.
Now that you know how to start wood carving, here are some easy wood carving projects for beginners.