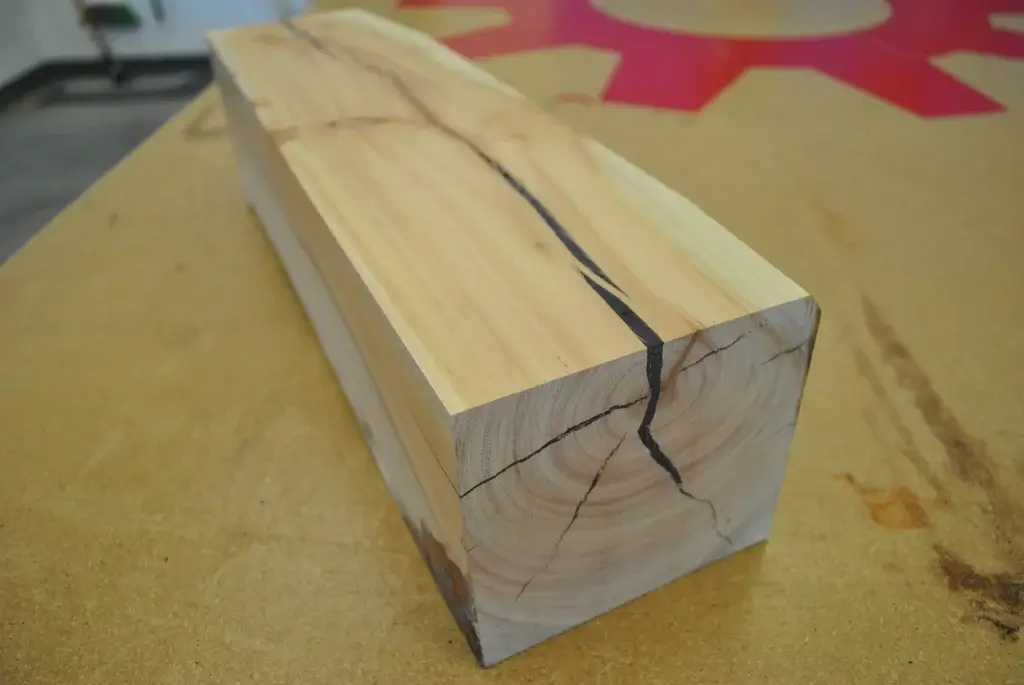
Wood, unfortunately, does not last forever. With time, wood tends to crack due to aging and moisture. The cracking of wood is horrible and totally disfigures the wood, especially when it spreads all around the wood.
However, you do not have to dispose of the whole furniture because of cracking. There are ways how to stop a crack in wood from spreading and shield it from further damage.
We have highlighted some of these methods below. Let’s get started!
How to Stop a Crack in Wood From Spreading
Using a wood filler, prepare the wood surface by cleaning off all debris before applying the wood filler. Overfill the cracks and scrape off the excess filler. Finally, sand and clean the wood, then allow it to dry. Alternatively, first fill the crack with wood glue, cover it with sawdust then smoothen the wood surface after allowing it to dry.
Methods on Stopping Cracks in Wood From Spreading?
Two methods to stop cracks in wood from spreading are;
Method 1. Using Wood Putty and Wood Filler
Tools
- Wood filler or wood putty
- Sandpaper
- Tack cloth
- Putty knife
- Mask
- Safety goggles
- Gloves
Steps for using wood putty and wood filler
Wood putty and wood filler can both be used to fix minor damages on wood. However, the difference in their composition dictates how suitable they are for use.
Wood putty is best for finished surfaces as it contains chemicals harmful to naked wood. However, fillers, though suitable for any form of wood, are not as durable.
Below are the steps involved when using wood fillers to fill cracked wood and prevent cracks from spreading.
Step 1: Pick the wood filler to use
Wood fillers come in two types; water-based and solvent-based. The type of filler you get can be identified by the type of solvent listed in the instructions for use when cleaning, either water or acetone.
Water-based wood fillers are much easier to clean and non-toxic compared to solvent-based wood fillers. However, water-based fillers are not suitable for use with outdoor furniture as they are prone to changes in temperature.
Another factor to consider is the project type. If you’re filling cracks in hardwood floors, then you’ll need a wood filler for hardwood floors.
Step 2: Use protective gear
You should protect yourself, especially when working with solvent-based wood fillers.
While you might not require a respirator when working with wood fillers, you can prevent unnecessary inhalation of harmful chemicals in the filler compound by wearing a dust mask.
Wear safety goggles as these chemicals can cause severe damage to the eyes. Also, ensure you completely cover your body as much as possible by wearing gloves and long-sleeved clothes.
Step 3: Prepare the wood surface
To prepare the wood surface, clean it and allow it to dry completely. Avoid introducing debris after cleaning to ensure proper bonding of filler on wood.
Also, this makes it easier for you to assess the extent of the crack on the wood. If the crack goes all the way through to the other side, cover it up with some masking tape to prevent the filler material from leaking out from underneath.
Step 4: Apply the wood filler
Usually, mixing is not necessary when using wood fillers. However, ensure you stir the wood filler with a putty knife before applying. When working with solvent-based wood fillers, you need to work fast as they dry fast and harden quickly.
On the other hand, water-based wood fillers stay wet for a longer period of time.
Step 5: Overfill the crack
Next, deeply overfill the entire crack and scrape off all the excess filler with your putty knife. You can also use your fingers to wipe off excess wood filler and clean your hands with a dry cloth.
To clean any residue off your putty knife, use water or any petroleum product, depending on the type of wood filler used.
Step 6: Smoothen the surface
After applying the filler, wait for about one hour for it to harden, and then sand the wood. Use 220-grit sandpaper and make sure to sand the wood in the same direction as the wood grain.
If all the filler has dried so hard that sanding it with fine-grit sandpaper in your hand is tough, use an oscillating sander. Start with medium-grit sandpaper and follow with fine 180 or 220-grit paper.
Step 7: Dry and clean
Clean the wood by wiping it off with a tack cloth to remove sawdust and debris. Ensure the wood is even and flat. Finally, leave the wood to become completely dried. This drying process of wood filler can take up to 24 hours.
After cleaning, your entire piece would have its pleasant appearance again, free of any visible cracks.
Method 2. Using Sawdust and Wood Glue
Tools
- Sawdust
- Wood glue
- Putty knife
- Sandpaper
- Tack cloth
Steps for using sawdust and wood glue
This is an easy, cost-effective way of stopping cracks on wood. You can effectively fill wide, shallow cracks and keep them from spreading using sawdust and glue.
Below are the steps involved when using this method:
Step 1: Get wood glue and sawdust
First, buy any glue of your choice, preferably white glue, as it is best for color matching. You can also get a bag of sawdust or create your own sawdust for use by sanding scrap or new wood.
Use an old newspaper to collect the sawdust you make and ensure it doesn’t mix with sand or dirt.
Step 2: Fill the crack
Next, fill the crack with glue and use a putty knife to scrape off the excess glue. Ensure you work fast as the glue hardens in ten minutes or less.
An alternative way is to make a mixture of wood glue and sawdust in a paste-like form and use this to fill the wood cracks. You can use a syringe to apply glue to small cracks.
Step 3: Apply sawdust
After filling the wood crack with glue, applying sawdust is the next step. Ensure you press down on it hard so it can stick well and cover the glue.
Another way is to apply wood glue and sawdust alternatively. First, fill up the crack halfway with glue, cover it with sawdust, add more glue, and finally cover it again with sawdust.
Step 4: Dry
Although glue fills harden very quickly, you must wait for it to dry. The type of wood glue used, manufacturer’s instructions, and even the weather can determine how long it will take wood to dry. Usually, however, 24 hours is enough for wood to cure fully.
Step 5: Smoothen the surface
Once the wood is completely dry, you can smoothen the treated wood surface. Sand the filled crack with a piece of fine-grit sandpaper till it becomes smooth, even, and flat.
However, make sure not to apply too much pressure when sanding so as not to gouge the filled crack.
Why Do Cracks Spread in Wood?
Wood cracking is a natural phenomenon. It may result from the wood shrinking as it dries over time. It can also occur due to how the wood was processed after cutting.
Simply, water content, humidity, and age play a major role in determining how fast wood cracks. These cracks spread when the wood is not well treated.
There are many ways to keep cracks from growing bigger, either by using wood fillers/wood putty, sawdust, and wood glue.
FAQs
Can you stop cracks from spreading in wood?
Yes. There are ways to stop cracks in wood from spreading. A good solution is to use wood filler or wood putty to fill the cracks or use sawdust and wood glue. You can also use epoxy resin to fill cracks in wood from getting bigger.
What causes wood cracks?
Wood cracks as a result of age. It also cracks due to the shrinking it undergoes when it dries. Some environmental factors such as humidity, tree wounds, and bacteria can also cause wood to crack. Finally, wood warps as a result of wood processing lead to cracking.
Can wood putty stop cracks from spreading?
Wood putty typically has no adhesive activity. However, it is very suitable for filling small cracks on wood. Also, it can be stained to match the color of the treated wood; hence it is highly effective in hiding long, thin cracks.
Can you use sawdust and glue to stop cracks from spreading on wood?
Yes. Sawdust and wood glue can be used to fill cracks on wood and stop the cracked area from getting wider. The wood glue not only serves as an adhesive but can be matched to be the same color as the wood. White glue is the best for color matching.
What can prevent wood cracks from occurring in wood?
Applying boiled linseed oil to wood is known for preventing cracks. Also, the use of Anchorseal, a sealant, is very effective in preventing wood cracking. The downside to using Anchorseal is that it is expensive. Another way one can protect the wood from cracking is to air-dry it. Here’s more on how to keep wood from cracking.
How to fill cracks in wood
You can fill a crack either by using wood fillers or putty, sawdust and wood glue, or deep cast epoxy resin. Wood fillers are best used for a long crack, while sawdust and wood glue is better for shallow, wide cracks. Epoxy resin is more suitable for large cracks.
See also: How to use bleach to combat wood rot.
Conclusion
When it comes to wood cracking, moisture, humidity, and age play a major role. However, the presence of cracks on wood does not mean that you have to throw out your furniture.
It is possible to fill these cracks and keep them from spreading further. There are many methods to do this, including wood fillers, sawdust and wood glue, and also epoxy resin.
If you are working indoors, work in a well-ventilated area and ensure you wear protective gear. However, this task would be perfect for a warm, not too sunny day.