Cleaning and sanding the surface is always essential when you want to refinish a piece of furniture or some other home improvement project.
Unfortunately, this process can be time-consuming and involves a bit of elbow grease. However, if you know how to use liquid sandpaper, you could eliminate some manual labor and complete the task in less time.
Choosing liquid sandpaper over traditional sanding tools helps cut down the labor and time involved in cleaning and scuffing up a previously finished surface.
This guide walks you through everything to know about liquid sandpaper and how to use it.
What is Liquid Sandpaper?
Liquid sandpaper, commonly known as de-glosser, is a chemical solution that scuffs up the surface of a painted item by removing the glossy sheen.
Removing the lustrous top part of the paint coat allows you to repaint the object (see our article on steps to repaint an old deck) without the new coat peeling off.
The solution is made from various chemicals such as ethyl alcohol, ethyl acetate, naphtha, and a few other chemical ingredients with the ability to strip off the glossy finish instead of removing the entire coat of paint from a surface.
Does Liquid Sandpaper Work?
Liquid sandpaper does an excellent job of scuffing up the surface of a previously painted surface and making it ready to accept a new finish. It is effective in small spaces or ornamental projects where you cannot use regular sandpaper for woodworking.
However, you will need to allow it to dry properly to achieve the best results. So ensure you check the product label for the recommended drying time and abide by it.
How is Liquid Sandpaper Different from Traditional Sandpaper?
Liquid sandpaper usually does the same thing as regular sandpaper by scuffing up the surface of previously finished surfaces to improve adhesion. But that is as far as liquid sandpaper goes.
In contrast to regular sandpaper, a de-glosser cannot smooth the surface or correct imperfections such as scuff marks on a project. Instead, all it does is scuff up the surface to improve adhesion.
Traditional sandpaper usually consists of thick, durable paper with abrasive granules capable of smoothing down a surface. It can abrade a finish beyond the shiny surface, stripping away varnish, paint, or bare wood layers.
By stripping significant coats of the surface material, the sandpaper can level out any imperfections and prepare the surface for a fresh coat of paint, stain, varnish, or other topcoat applied over the existing finish.
This is where liquid sandpaper falls short. Knowing these differences should help you decide whether a de-glosser is right for you or not.
If you are refinishing a sleek surface, liquid sandpaper can be a quick way to remove the glossy top layer and leave the surface ready for a new coat of paint or stain.
However, if the surface has significant scuff marks, choosing a de-glosser over standard sandpaper may not be good.
In any case, read along to learn how you can use liquid sandpaper to roughen up a glossy surface so that you can apply paint or stain on it.
How to Use Liquid Sandpaper
To use liquid sandpaper, you will need to rub it over the object you wish to repaint. Once that is done, wait for the length of time indicated on the product label before wiping it off.
You do not need to exert any physical force or wipe away any dust particles when using this product.
However, knowing how to use liquid sandpaper properly is essential for achieving the desired outcome. So here is a step-by-step guide to help you through your next project.
First things first, here is a list of the supplies you will need:
- A liquid sandpaper
- Dishwashing soap or detergent
- Water
- A soft sponge
- A clean towel or two
- Lint-free cloth
- Safety goggles
- Hand gloves
- Respirator or safety mask
Step 1: Clean and prep the surface

As you may know by now, the liquid sandpaper only removes the glossy sheen. So any foreign object that you leave on the surface while using it will likely affect the new finish.
So start by washing the surface with a soft sponge saturated with a soapy solution. Take your time to remove all the dust, dirt, and grime on the surface.
We recommend using a soft sponge because you don’t want to create scuff marks on the surface. However, a souring sponge may do just that.
You want to be careful to ensure that you remove every bit of dirt on the surface without damaging the surface or creating any physical marks on it.
The soap should help cut through any stubborn dirt without necessarily forcing you to scour it off. Once the surface is clean, wipe it with a clean towel to dry completely, then leave it to air dry for 15 minutes or so.
Ensure the surface is completely dry before you apply the de-glosser to it. Any moisture or dampness on the surface can keep the product from working properly.
Step 2: Apply the liquid sandpaper
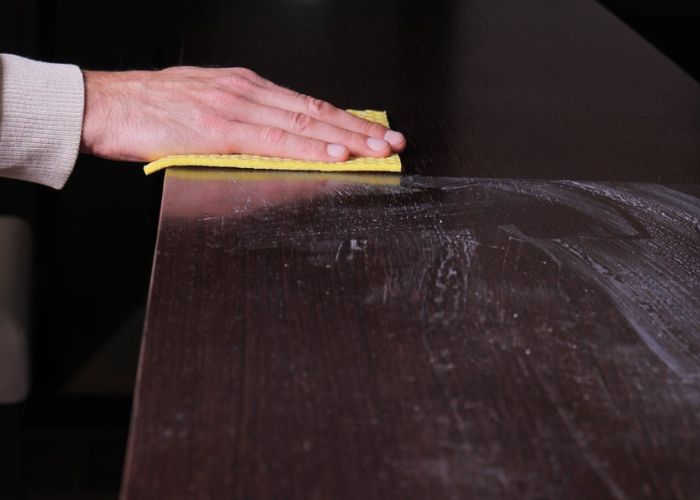
Once the surface is ready, saturate a lint-free cloth with the de-closer and rub it on the entire surface that you want to be scuffed up.
A lint-free cloth is best for this purpose as it leaves no debris or lint on the item. Ensure the product covers every inch of the surface evenly.
Use slow, gentle strokes when applying the liquid sandpaper. This approach ensures even coverage and keeps you from sloping the de-glosser everywhere inadvertently.
It is essential to work slowly to get the sandpaper to reach around the nooks and crannies of the object properly.
Let the liquid sandpaper sit on the surface for the length of time indicated on the label after covering the project with it properly across the entire surface.
Each liquid sandpaper has its specific time required to work through the sheen. The manufacturer will always specify how long to let the product sit on the surface before wiping it off. Ensure you read the instruction and follow it for the correct results.
Step 3: Dry it off
Once you are confident that the recommended wait time has elapsed, use a clean, dry lint-free cloth to wipe the de-glosser. Rub the cloth gently but thoroughly across the surface to dry it off.
Here, you can apply a little pressure to work the sheen. You do not need to apply a lot of pressure to get the desired roughness on your item.
The best thing to do here is read the instructions on the product’s container regarding how to use it for the best results. The manufacturer should specify how to wipe it once it has remained on the surface for the recommended time.
This instruction will come in handy in guiding you through the exercise. It will also likely give you an idea of what to expect of the surface after treating it with liquid sandpaper.
Step 4: Inspect the surface
If you follow the instructions on the product label accordingly, the surface should be ready for repainting at this point.
However, you lose nothing when you err on the side of caution, so we recommend inspecting the surface to be sure it is ready for the new coat of paint.
If you are not happy with the sheen yet, you can repeat the process to get the desired surface texture. However, you will typically need to apply the de-glosser only once.
The single application normally gets the job done as long as you follow the steps correctly.
Step 5: Apply a fresh coat of paint or stain
After achieving the desired surface condition, the next step is to refinish it by applying a fresh coat of your preferred paint or stain.
Depending on the product you are using, you may need to apply a primer first. If you are staining the object, the chances are that you will be using get a stain that typically does not require a primer.
Penetrating stains may not work properly on a previously painted surface because no pores will be left open to absorb the pigment. So the chances are that you will apply a fresh coat of paint.
Some paints consist of a mixture of paint and primer. You will not need to apply a primer separately for such a product. However, if you are using regular standalone paints, you may have to prime the surface first to improve adhesion.
Advantages of Using Liquid Sandpaper
Most woodworkers are familiar with regular sandpapers. And both standard sandpaper and a de-glosser essentially do the same job of prepping a surface for painting or refinishing. So why skip regular sandpaper for liquid sandpaper?
A de-glosser carries numerous advantages that make it a convenient way to scuff up a surface that you want to paint o refinish. Here are some of the main reasons to choose liquid sandpaper over traditional sanding.
Liquid sandpaper is faster
Using sandpaper to scuff up a surface requires meticulousness and patience. Even when using a power sander, you must remain gentle and systematic to do the job correctly. In most cases, it will take a significant amount of time to complete sanding a surface.
Using liquid sandpaper simply requires rubbing the product on the surface with a lint-free cloth and letting it sit for a moment to work through the sheen before wiping it off, and the job is done.
This approach can often allow you to finish prepping a surface for repainting in less time than traditional sanding.
Additionally, you can handle other aspects of the project while waiting for the de-glosser to work through the coat of the previous finish. This alternative can be a godsend if you have a tight deadline where every minute counts.
In traditional sanding, your hands are engaged throughout the project, which limits your ability to multitask and complete the project sooner.
It is easier to use
One of the main reasons for choosing liquid sandpaper over traditional sandpaper is its relative ease of use.
While regular sanding involves expending a lot of manual labor, using liquid sandpaper simply requires saturating a cloth with the product and applying it to the surface.
Once applied, you do nothing else but wait for it to do the rest. After the de-glosser has worked through the coat of paint, you need to wipe it gently with a clean, lint-free cloth.
None of these steps involves exerting yourself as you would when using an orbital sander or sanding pad. This aspect makes the liquid sandpaper approach much easier than standard sanding.
Liquid sandpaper produces no dust particles
Since using a de-glosser eliminates the need for traditional sanding, it produces no sanding dust. You do not scour the surface; instead, the liquid sandpaper works its magic itself.
This makes it especially helpful for persons with allergies or conditions like asthma that require avoiding contact with allergens.
Traditional sanding typically produces significant amounts of dust particles which can be dangerous to inhale. This risk doubles if you have allergies, as the dust can trigger allergic reactions.
Even worse, sanding a surface coated with lead paint is even riskier due to the toxic nature of the metal. Inhaling it can cause long-term health complications and even death.
Using liquid sandpaper helps eliminate these risks and ensures your safety. Still, the product is made from chemicals that can release toxic fumes, so it is important to wear a high-quality safety mask or respirator when working with one.
It also helps to work from a well-ventilated area so that any fumes produced do not remain suspended in the air and risk getting inhaled.
Liquid sandpaper is versatile
Since you only need to apply the liquid to the surface of the object you want to be scuffed up, you can use it on various surfaces.
The product can be ideal for irregularly shaped objects that are challenging to sand with a power sander or any other sandpaper. The liquid can also work on hard-to-reach areas of an object, making it convenient to use.
Liquid sandpaper is also a great solution when working with ornate objects that cannot be sanded. Ideally, there is hardly any limit to the number of surfaces you can use the liquid sandpaper on.
It is less messy
While traditional sanding produces lots of sanding dust while can mess up the surfaces around the workstation, liquid sandpaper produces no such messy residue.
This quality makes it less messy to work with compared to using traditional sandpaper. You can actually use a de-glosser without laying down a tarp, which is typically required when using regular sandpaper.
Eventually, there is less mess to clean up when using liquid sandpaper. You will notice that the lint-free cloth carries much of the residue from the surface, eliminating the need to clean the place after sanding.
Liquid sandpaper is ideal for detailed projects
If you are working on a large, detailed project, traditional sandpapers may be unable to remove the intricate details. Handling such intricate details through manual sanding may be ineffective and time-consuming.
On the other hand, liquid sandpaper can do an excellent job removing such intricate details due to the liquid’s ability to reach all the nooks and crannies, including curves, holes, grooves, and more.
Choosing the Right Liquid Sandpaper for Your Project
Not all liquid sandpapers are created equal. So it will help to know what to look for when choosing the product to use.
Reading product reviews should be a good starting point to give you a general overview of the products you have shortlisted based on actual user experiences.
Aside from reviews, consider these factors to identify the product that best suits your needs.
Consider your project
The project you are working on can determine the products you can use. For instance, some liquid sandpapers work best on some surfaces, not others.
Likewise, De-glosser that works best for a metallic surface may not necessarily be the best for wood, and vice versa. Some liquid sandpapers will also work better for specific finishes than others.
So ensure you read the recommended surfaces and finishes to confirm if the product you are buying will suit your project.
Go for an established brand
While the market may have many new players offering great value, you may not have all the time or resources to do the required background checks. This homework is essential when you are exploring new waters.
However, established brands have usually stood the test of time and established their product formulas, making their qualities more reliable. Product development is often an ongoing process in any industry.
And top brands usually have the advantage of years of research and development and a history of developing products. As a result, they have products with the highest quality formulas.
Tips to Remember When Using Liquid Sandpaper
Now that you know how to use liquid sandpaper and how to choose when shopping for one, here are some additional tips to keep in mind when using liquid sandpaper.
Remember, these products are loaded with chemicals; it is essential to approach them correctly for your safety and the best results.
Always protect yourself, your family, and your pets
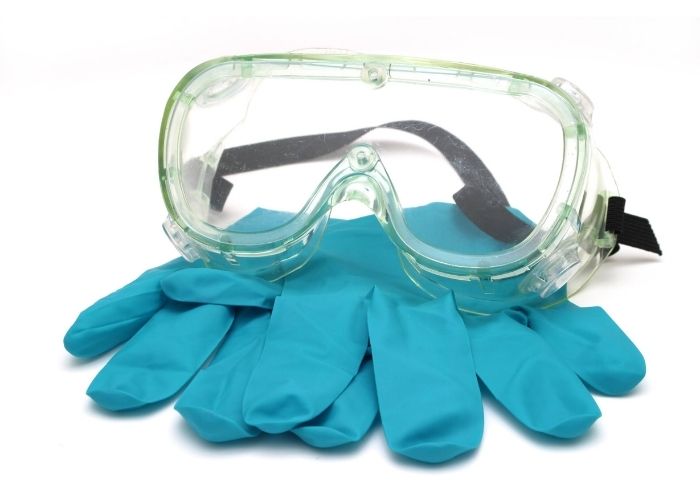
When using these chemicals, you protect yourself by wearing the recommended safety gear. The manufacturer usually specifies what you must wear when handling liquid sandpaper.
Ideally, you will often need to wear eye protection, hand gloves, and a respirator or safety mask to keep you from inhaling the fumes from the product.
Since liquid sandpaper typically contains corrosive substances that react with the finishes, such as paint, to scuff them up, they may emit toxic fumes. Inhaling such fumes can cause health complications, so you need to wear protection.
You also need to work in a well-ventilated area to keep the fumes from remaining suspended in the air. This is the best way to protect your family and pets since you may not know who will walk into the place after you finish the project.
Always read and follow the instructions carefully
Manufacturers always include directions on using their respective products on the label. Often, these manufacturers’ instructions are not just for correct usage of the products but also for safety.
Following them strictly will help you get the desired results and remain safe while at it. So ensure you heed every warning and follow every procedure recommended.
Dispose of any remaining product or used container properly
If any product remains, you may have to take it to a local hazardous waste disposal facility. Such hazardous chemicals and their containers are not to be disposed of alongside other household waste.
Failure to follow the accepted disposal procedure could attract fines depending on the local laws where you live.
Liquid Sandpaper Reviews
All said, here is our editor’s choice of liquid sandpaper to simplify your search.
- Country of Origin:United States
- Package length:8.89"
- Package width:9.65"
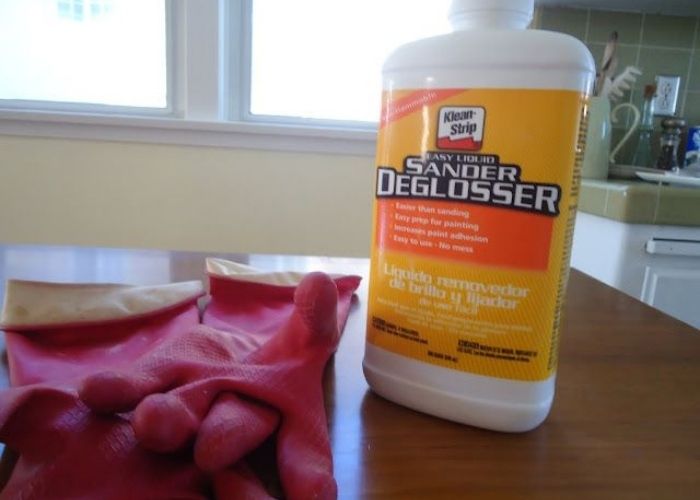
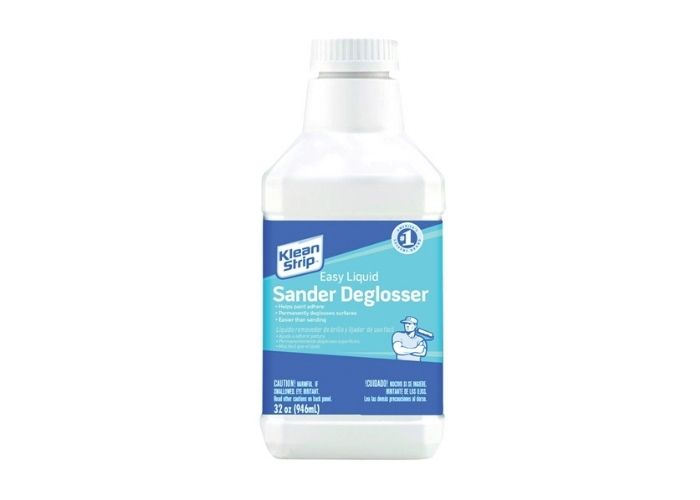
If you are looking to save some time off your project, Easy liquid sander de-glosser is your best bet. It does an excellent job taking the gloss off your old sealant and any grimy build-up on the surface, leaving it ready for a fresh new coat of finish.
The product is easy to use and does not emit any harsh chemical smell. It works great for a wide range of painted surfaces, including kitchen cabinets and furniture.
FAQs
How does liquid sandpaper work?
Liquid sandpaper contains chemical ingredients that react with painted surfaces to remove their glossy sheens. This roughens up these surfaces enough to allow new paint to stick to these surfaces.
How to use liquid sandpaper on cabinets
To use liquid sandpaper on cabinets, apply it onto the cabinets with a lint-free cloth and leave it on for 15 minutes, then wipe off any residue with another lint-free cloth. This will peel off any varnish or glossy finish on the cabinets.
Is liquid De-glosser as good as sanding?
While liquid de-glosser quickly and effectively removes glossy paint and stain from smooth surfaces, leaving them ready for refinishing, it cannot smooth uneven surfaces or fix any inconsistencies as sanding can.
How long do you leave De-glosser on?
You should leave the de-glosser on for 10 to 15 minutes to work through the finish. Some products work faster hence require less time than others; for instance, Jasco Easy Liquid Sander De-glosser should require only ten minutes, while most other liquid sanders take fifteen minutes.
How to use Klean strip liquid sandpaper
To use Klean strip liquid sandpaper, start by wearing chemical splash safety goggles. Shake the product well before saturating a coarse, lint-free cloth with it. Next, apply the de-glosser to the surface by rubbing it with the saturated cloth in a circular motion.
What’s the Best de-glosser for cabinets?
Heirloom Traditions All-In-One Paint Deglosser is the best de-glosser for cabinets. It has the ability to clean and lightly roughen a wood surface. You can use this product from Heirloom Traditions to prep cabinets, furniture, and shelves for painting or staining.
Is there a nontoxic deglosser?
While all de-glossers contain potentially toxic chemical ingredients, some, such as Klean-Strip QWN285 Easy Liquid Sander and Heirloom Traditions All-In-One Paint deglosser, are low VOC deglosser formulas that are non-flammable and environmentally safe.
Conclusion
Knowing the right way to use a de-glosser can give you an excellent alternative way to scuff up a previously finished surface for repainting or refinishing.
It is a great way to make sure that the paint adheres evenly and doesn’t peel or flake. To properly use a de-glosser, it’s important to follow all the manufacturer’s instructions closely.
The surface should be completely clean before application, which means wiping down with a mild detergent and water.
We hope this article was informational and helpful.