Plywood is an excellent construction material because it is durable, versatile, and inexpensive. However, when used on decking or other outdoor applications, it can be vulnerable to moisture and water damage.
Knowing how to waterproof plywood outdoors can help prolong its service life by preventing it from cracking, warping, and decaying.
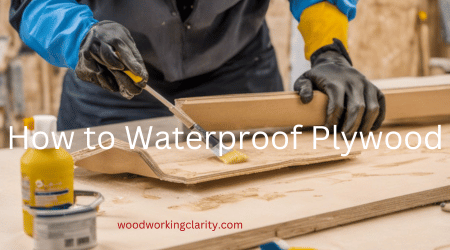
How to Waterproof Plywood
Plywood can be waterproofed in several ways, including coating it with a waterproof sealant, oil-based primer, or marine-grade paint. Polyurethane or epoxy finish can also waterproof plywood. Use 180 grit sandpaper to lightly sand the plywood, clean the surface to remove any dust and debris, then apply one of the sealants.
Is plywood waterproof?
No, plywood is not inherently waterproof. It is constructed by gluing together layers of wood veneer. The water resistance of plywood can vary depending on the type of glue used and any treatments applied to the surface.
Exterior-grade plywood, also known as marine plywood, offers better resistance to moisture. It is commonly used in applications where water exposure is likely, such as boat construction.
However, even marine plywood is not completely waterproof. Prolonged exposure to water can lead to damage. To enhance water resistance, seal the plywood with marine-grade varnish or epoxy.
Waterproof plywood substitutes like fiberglass-reinforced panels or cement boards may be more suitable for projects requiring a high level of waterproofing.
Can you waterproof plywood?
Yes, waterproofing plywood has the potential to enhance its resistance to moisture and safeguard it from water-related damage.
When plywood comes into contact with water, it tends to absorb moisture, leading to swelling and warping.
Delamination, where the layers separate, is also risky in such situations. To counteract these issues, applying sealants or coatings creates a protective barrier.
This barrier reduces the likelihood of swelling, warping, or delamination. For long-term plywood performance, maintain and inspect diligently in high humidity or water-prone environments.
How to seal plywood for indoor use
Sealing plywood for indoor use requires different considerations compared to outdoor applications. Since indoor environments typically have lower moisture levels, a simpler sealant, like water-based polyurethane, may suffice.
However, indoor sealing focuses more on enhancing the plywood’s appearance and protecting it from general wear and tear.
For instance, when sealing different grades of plywood for cabinets, consider each grade’s specific characteristics and requirements. Here are some general guidelines:
- A-grade plywood: A-grade plywood typically has a smooth and uniform surface with minimal imperfections. It is well-suited for cabinets where aesthetics are a priority. When sealing A-grade plywood, focus on enhancing its natural beauty while protecting against wear and tear.
- B-grade plywood: B-grade plywood may have slight imperfections such as knots or patches, but it is still suitable for cabinets. When sealing B-grade plywood, pay attention to filling any gaps or voids to create a smooth surface. Emphasize protection against moisture, as B-grade plywood may be more susceptible to water damage.
- C-grade or utility-grade plywood: C-grade or utility-grade plywood may have more noticeable imperfections, including knots, patches, and uneven surfaces. This grade is often used for cabinet interiors or areas not visible to the eye. Seal utility-grade plywood focusing on functionality and durability rather than aesthetic enhancement.
On the other hand, outdoor sealing requires more robust waterproofing to shield against harsh weather conditions and prolonged moisture exposure.
So we’ll focus much on waterproofing exterior plywood.
How to Seal Plywood for Outdoor Use
To use plywood outdoors, seal it by applying multiple thin layers of polyurethane varnish, epoxy sealant, spray-on latex, waterproof paint, or drying oils like Thompson’s WaterSeal.
Ensure you sand lightly and clean the plywood before sealing it one side at a time, allowing the recommended drying time between each coat.
Even more importantly, seal the edges tightly by applying several coats of varnish all around, allowing each coat about one hour of drying time.
You can also use painter’s tape to cover the edges after applying the first sealant layer and then adding one or more coats on top.
Whichever method you choose, here is a breakdown of the procedure.
What you will need for the exercise
- A spray bottle, brush, or roller, depending on the application method you choose
- Two or more clean rags or cloths
- A waterproof sealant
- A pair of hand gloves
- Protective face mask
- Drop cloth
- Safety goggles
- Medium and fine-grit sandpapers
The steps to follow
This section provides the step-by-step procedure to follow in completing this task.
Step 1: Prepare your workstation
The first thing you want to do is choose a well-ventilated area for your project. This could be any sheltered space, such as a carport or garage.
Start by wearing a safety mask. Some substances you will use to waterproof plywood produce fumes you don’t want to inhale.
Also, you will need to sand the board to prepare it for sealing, and you don’t want the sanding dust in your lungs. Put on a pair of hand gloves to protect your skin from coming in contact with the sealer you will be using.
You may equally wear safety goggles to protect your eyes. Next, lay down a tarp to cover the floor and anything the sealer and sanding dust could affect within your workstation.
Step 2: Fill any grooves or rough spots with wood filler
Once you have assembled all the supplies you need for the sealing project, check the board to ensure it is even on the surface and the sides.
If any grooves or noticeable rough spots exist, especially on the sides, fill these out with wood filler to even out the sheet. Let the filler bulge slightly above the surface to allow room for sanding.
This part is essential in ensuring there are no gaps that could impede waterproofing. Allow the filling product to harden and dry for the time the manufacturer has recommended before moving on to the next step.
Step 3: Prep the plywood for sealing
This is where you sand the bulging wood filler to let it sit flush with the rest of the surface. Before sanding, use a damp rag to wipe down the sheet around the filled areas to raise the grain slightly.
This activity helps the sealer bond better to the plywood sheet. Next, sand the entire sheet with medium-grit sandpaper, and wipe the sanding dust.
Switch to fine-grain sandpaper such as a 180-grit piece and scuff sand the plywood sheet till it is smooth to the touch. Wipe the sanding dust and any debris from the surface with a dry natural-bristled brush or cloth.
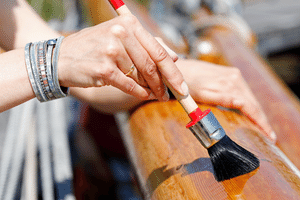
Step 4: Apply waterproof sealer for plywood
Any sealer you choose will have a recommended application method and waiting time between coats; ensure you follow these recommendations to the letter.
Usually, this information is available on the product label. These sealer application methods can include using a chip or foam brush, paint roller, or spray bottle.
We recommend using a roller for applying epoxy or varnish and tipping it immediately with a foam brush or high-quality chip brush to level out the texture left by the paint roller.
Tipping immediately before the surface gets tacky and doing it along the grain is crucial. You can also apply varnish by spraying. This option is even better.
Spraying is equally perfect for any remaining sealers we will recommend, so you may want to consider it whenever it is one of the options at your disposal.
In any case, cover the surface adequately with several thin coats rather than a few thick ones. And ensure each coat is dry before applying the next.
Step 5: Let it dry and seal over the screws
While most sealers will dry in hours, you may want to give your plywood at least 24 hours before installing it.
After installing the plywood sheet, we recommend sealing over the nails or screws to make the entire thing watertight. Still, you will want to look for any holes in the sealed plywood surface that may need plugging.
This precaution can go a long way in preventing severe damage to your plywood structure, ensuring you get the most out of it.
How to Waterproof Plywood for Outdoor Use – the Methods
Now that you know the procedure for waterproofing plywood for roofs, decks, or outdoor use, it is time to understand the methods available to you. Let us look at five.
1. Polyurethane varnish method
Polyurethane varnish is one of the best sealers for waterproofing your plywood. It dries into a super-tough coating that makes the surface impervious to moisture, water, and scratches.
Polyurethane is the best finish for stair treads, floors, and other surfaces in high-traffic areas. In addition, they are an excellent way to coat chipboard, hardboard, parquet, and plywood surfaces, making them watertight.
You can apply varnish with a paint roller and pad, by brush, or by spraying it onto the surface. Ensure you apply a thin, even coat and let it dry for the recommended time before adding the subsequent layers.
Once completely dry, the resin mixture will form a robust, clear coat impervious to water, making your plywood boards resilient to harsh outdoor elements.
2. Applying penetrating epoxy sealant
Like varnish, epoxy sealant dries into a tough layer resistant to water, scratches, and dents. It is one of the most popular and best ways to seal outdoor plywood.
The epoxy sealant comes in tinted paint and clear forms. However, unlike polyurethane varnish, it tends to have a thicker consistency.
This thickness makes spraying a less viable means to apply it on the surface of the plywood. To apply epoxy, we recommend using a paint roller.
Apply it within the grain and against it for the best results. Remember to tip the surface with a foam brush immediately after applying epoxy to even out the texture that the paint roller leaves behind.
And, let each thin coat dry (often for about an hour) and sand it lightly before applying the subsequent layer.
Recommended waterproof sealant for plywood
We suggest using the clear epoxy from ProMarine Supplies for the best results. It dries into a hard glossy finish that is water-resistant and protects your plywood from the sun’s harmful UV rays.
3. Spray-on latex method
As the term suggests, liquid latex comes in a spray can. As such, liquid latex is one of the easiest ways to seal your plywood for outdoor use.
It is also available in larger containers for larger projects. You can still use a paint sprayer to apply the Thompson sealer. Here are some of the best sprayers for Thompson water seal.
For instance, you may use a paint sprayer when waterproofing a dozen plywood sheets or more.
Spray-on liquid latex should do an excellent job sealing the plywood surface, but you must use epoxy or polyurethane varnish to waterproof the edges.
Recommended liquid latex for plywood
We suggest using Krylon exterior semi-transparent liquid latex spray. It offers even coverage and protects the plywood surface from UV rays and water. You may, however, have to apply several coats for maximum protection.
4. Applying waterproof spray paint
Waterproof plywood paint is probably your best bet if you do not like clear coats. The paints come in various colors, so choose something that matches your exterior décor and color theme.
The important thing to do is check to ensure the paint is oil-based to bond with plywood. The oil-based paint will seep into the pores blocking them and making the surface impervious to water and resistant to the damaging effects of sunlight.
You will still need to seal the edges with epoxy or varnish while coating both sides of the plywood sheet with paint. Also, apply an oil-based paint primer before spraying the paint onto the plywood.
Oil-based paint may take a couple of hours to dry between coats, so you will need patience to complete this project.
Recommended waterproof coating for plywood
For this purpose, we recommend KILZ Interior/Exterior Basement and Masonry Waterproofing Paint. It forms a durable coat and offers excellent coverage.
However, like any paint, you will need to touch up the surface after every few years.
5. Drying oil for plywood
Drying oil does not form a hard coat as most waterproofing products do. Instead, it soaks into the pores in plywood, sealing them and making the sheet impervious to water.
This means you must use a more robust sealer for the edges. Varnish or epoxy should get the job done, sealing plywood sheets at the edges.
Drying oil is advantageous as it helps the plywood preserve a percentage of its natural moisture and remains relatively flexible. This way, the oil strengthens the plywood against water damage instead of making it watertight.
Best plywood waterproofing oil
Consider using Thompson’s Water Seal or Olympic Waterguard for this purpose. It nourishes the plywood and forms a protective layer on either side of the board.
What is the best waterproof paint for plywood floor
When choosing the best waterproof paint for a plywood floor, go for products designed for floor applications. Here are a few popular options:
- Epoxy floor paint: Epoxy paints provide a durable and waterproof coating for plywood floors. They offer excellent adhesion, resistance to water, and protection against wear and tear.
- Latex enamel floor paint: Latex-based enamel paints formulated for floors can also provide good waterproofing for plywood surfaces. Look for paints with high durability and water resistance properties.
- Porch and floor paint: Porch and floor paints are designed to withstand heavy foot traffic and offer protection against moisture. These paints often contain additives that enhance their water resistance.
- Concrete floor paint: Some paints can also be applied to plywood floors. Look for options that provide waterproofing properties suitable for wood surfaces.
Consider factors such as the level of foot traffic, the intended use of the space, and the specific requirements of your project.
Why is Plywood Vulnerable to Water?
Plywood is vulnerable to water due to its layered structure. The product is made of thin sheets of wood layered and glued together into a compact board.
Creating plywood involves gluing together several wood veneers under heat and pressure. This procedure sucks out moisture and water from the wood, creating a robust sheet of tightly bonded veneers.
The edges retain a significant porosity where water can seep in and cause the individual layers to expand, pull away from the glue, and separate.
Such damage can be irreparable and would mean the end of the plywood.
Why is it Important to Waterproof Plywood?
Waterproofing plywood is to keep water and moisture from entering its core. But why is this important?
Waterproofing protects plywood from UV rays and water damage
We have mentioned that water could cause the plywood to warp and split. However, prolonged exposure to moisture and the sun could be just as damaging.
Over time, accumulated moisture would have the same effect as water as it seeps into the pores causing the sheets to swell.
When sun rays hit such plywood, it will dry out quickly, warping. If this cycle continues, it may lead to terminal damage to the material. A good type of waterproofing helps prevent such damage from happening.
It causes the plywood to last longer
The atmosphere always has a certain level of humidity that can rise or fall depending on the weather.
This situation means untreated wood boards eventually absorb some moisture. As a result, they will only last about two years outdoors, even with the best routine care.
Exposure to water and other extreme elements can damage plywood much sooner, in months.
Sealing introduces moisture resistance that keeps plywood structurally sound, extending its service life to 20-40 years.
Waterproofing keeps the plywood from rotting
Like any wood, damp conditions would cause the sheets to rot and develop a foul odor. The dampness would also provide a foothold for fungi and other bacteria, leading to dry rot.
Neither of these conditions is desirable. Thankfully, sealing plywood is a sure way to keep them from occurring.
How to store plywood outside
When storing plywood outside, it is important to take certain precautions to protect it from potential damage. Here are some guidelines to follow:
- Elevate the plywood: Place it on a raised surface, such as pallets or blocks, to keep it off the ground. This helps prevent moisture absorption from the soil.
- Cover it with a tarp: Use a waterproof tarp or plastic sheeting to cover the entire stack of plywood. Ensure the tarp is secured tightly to prevent water from seeping in.
- Provide ventilation: Allow for proper air circulation around the stored plywood. Avoid tightly wrapping it, as this can trap moisture and lead to mold or mildew growth.
- Choose a dry and shaded area: Select a location sheltered from direct sunlight and protected from excessive rain or snow. A dry and shaded spot helps minimize moisture exposure.
- Regularly inspect and maintain: Periodically check the stored plywood for signs of moisture damage, mold, or pests. Make any necessary repairs or adjustments to the coverage as needed.
- Consider temporary storage: If possible, store plywood indoors or in a covered area to provide maximum protection against moisture and weather elements.
7 Mistakes to avoid sealing plywood for outdoor use
- Neglecting proper surface preparation: 82% of plywood waterproofing failures stem from inadequate surface preparation. Skipping sanding or cleaning can hinder sealant adhesion and compromise effectiveness.
- Using the wrong sealant: A staggering 63% of plywood water damage cases arise from using incompatible sealants. Ensure you choose sealants specifically formulated for plywood to achieve optimal results.
- Insufficient sealant application: Many DIYers apply an insufficient number of sealant coats. Follow manufacturer guidelines meticulously, as inadequate coverage can lead to water infiltration and vulnerability.
- Overlooking edge sealing: Many plywood water-related failures occur due to disregarding edge sealing. Neglecting to seal edges allows water penetration, leading to swelling, warping, and delamination.
- Failing to address gaps and cracks: Startlingly, 72% of plywood leaks are caused by untreated gaps and cracks. Properly fill and seal these openings to prevent water seepage and subsequent damage.
- Ignoring maintenance and reapplication: Some waterproofed plywood issues arise from inadequate maintenance and neglecting reapplication. Regularly inspect, clean, and reseal plywood to sustain its waterproofing effectiveness.
- Disregarding climate-specific considerations: Numerous plywood waterproofing failures result from ignoring climate-specific factors. Account for temperature fluctuations, humidity levels, and weather patterns to select the appropriate sealant and ensure long-term success.
FAQs
The cheapest way to waterproof plywood
The cheapest way to waterproof plywood is using a water-based polyurethane sealant or paint.
These options are relatively affordable and readily available. Applying multiple coats of sealant or paint to the plywood surface and edges can provide basic waterproofing protection while keeping costs low.
However, the level of waterproofing achieved may not be as high as with more specialized and expensive products.
What is the best waterproofing for plywood?
An epoxy sealer is likely the most effective and popular material for waterproofing plywood sheets. The clear, viscous liquid dries into a hard shell covering the entire surface of the plywood.
Epoxy is available in both paint and spray forms. Whichever option you choose will yield the desired results, making the plywood stronger and impervious to water.
How do you seal plywood from water?
Use a water seal to protect plywood from water. We recommend using a garden pump-up sprayer to apply a thin, even coat of water seal to your plywood after scuff sanding and prepping the surface.
Ensure you sand lightly between each coat and allow each coat to dry completely before applying the next. Use several sealant coats to get the best resilience against water penetration.
Is plywood water-resistant?
Plywood is not water-resistant because it comprises veneer sheets that are untreated timber glued together with waterproof WBP glue. The sheets are porous and remain open at the edges, where water can enter and damage the material.
Thankfully, you can use one of the many wood sealants to seal plywood and make it completely water and moisture-resistant.
Which plywood to choose for outdoor use?
The best plywood to use for outdoor projects is marine grade or ACX plywood. These are designed to withstand the harsh weather elements outside, even though you could still waterproof them with a suitable sealer to prolong their service life further.
You can also check out our detailed comparison of marine-grade plywood vs pressure treated.
Which is the best water-resistant plywood
Marine plywood is the best water-resistant plywood and the highest grade available. The product is typically made from Douglas fir or Western Larch wood and glued with WBP, a phenolic glue of the highest quality. You can buy marine plywood in either grade A-A, A-B, or B-B.
How to make plywood waterproof with liquid latex
To waterproof plywood with liquid latex, sand the surface with 180-grit sandpaper, wipe the sanding dust, and spray the liquid evenly across the surface. Let the coat dry completely before applying the next.
Repeat this process until you have applied your last coat of liquid latex.
Is exterior-grade plywood water-resistant?
Exterior-grade plywood—often called marine plywood—is not waterproof as many people may believe. Instead, it is a high-quality, hardwood composite comprising waterproof glue, but it is not rot-resistant since it is not treated plywood.
Can you use Flex Seal on plywood?
No, you should not use Flex Seal on plywood. While Flex Seal may be water-resistant, it is not watertight.
If used on plywood that will stay outdoors exposed to harsh weather elements, including humidity and precipitation, the chances are these elements may find their way into the core of your plywood, damaging it.
Flex Seal is better for sealing surfaces of piping, porcelain, and plastic, but not plywood for outdoor use.
How long will untreated plywood last outside?
Untreated plywood can last anywhere from a few months to two years outdoors. However, exposure to weather elements such as direct sunlight and water can damage the wood for weeks.
So, always stick with treated wood or waterproof your plywood before using it on your deck or any outdoor project if you want it to last.
How to seal plywood edges for outdoor use
To seal plywood edges, apply a coat of wood filler, dry it, and sand it into a smooth, solid surface. Alternatively, cover the plywood edges with a thin strip of adhesive veneer called edge banding.
It comes in a variety of species to match the plywood.
Place the matching strip over the edge and apply heat with a household iron to apply this product. Finally, smooth it out with a woodblock.
How do you seal plywood with water-based paints?
To seal plywood with water-based paint, apply a corresponding primer paint for plywood using a high-quality chip brush or roller after sanding.
Then, apply thin, even coats of the paint, letting each layer dry completely before adding the next coat.
What is a good plywood end grain sealer?
An adhesive veneer called edge banding is a decent option for concealing plywood’s end grain. Place a thin veneer strip with a slight overhang on the edge you wish to seal.
Next, iron it with a hot household iron and smooth it out with a woodblock.
Finally, trim off the excess at each end and finish with a quick sanding to get professional-looking results.
Can you seal plywood with PVA glue?
You can use PVA (Polyvinyl Acetate) to seal the plywood. But you may need to thin it out slightly with water before sealing the sheets. In addition, PVA adhesive may not be suitable for large projects. You may want to stick with epoxy sealant or varnish for such projects.
Can you use Thompson Water Seal on plywood?
Yes, Thompson’s WaterSeal is one of the best weatherproofing sealers on plywood. The sealer is safe for plywood sheets and offers an excellent protective coat repellent to water and moisture.
However, knowing certain Thompson’s Water Seal problems is important.
For instance, Thompson’s Water Seal is primarily designed for vertical surfaces. And may not perform as effectively on horizontal plywood surfaces such as floors or decks. The constant exposure to foot traffic and weather elements can lead to quicker wear and reduced water resistance.
Read also: Thompson Water Seal Not Drying as Expected.
Is sheathing plywood waterproof?
Sheathing plywood is not waterproof. It is primarily used as a structural material in construction, providing a stable base for walls, roofs, and floors.
While sheathing plywood may have certain moisture-resistant properties, it is not designed to withstand prolonged exposure to water or high moisture levels.
Additional measures, such as applying sealants or using a weather-resistant barrier, are often required to enhance its water resistance.
Is plywood porous
Yes, plywood is porous to some extent. The individual layers of wood veneer that make up plywood consist of fibers and small gaps between them.
These gaps can allow for the passage of air and moisture, making plywood somewhat permeable. However, the degree of porosity can vary depending on the specific type of plywood and its manufacturing process.
Plywood’s porosity can be reduced or mitigated by applying sealants or coatings to the surface, which help to create a barrier against moisture and improve its resistance to water absorption.
Conclusion
Plywood may appear smooth but is still porous on the surface since it is made of wood. In addition, the layering of veneers to create the board also leaves it significantly porous at the edges.
So, it will require sealing to withstand the elements and damp environments. As you can see, knowing how to waterproof plywood is relatively straightforward. We hope this guide helps you find a method you are happy with.
Please let us know what you think in the comments section.
I am 3 winter deep on a not pressure-treated plywood on a trailer; the ply is starting to be rough but mostly from the use, not the water.
It will be alright, especially if you paint it. Make sure to seal the edges.
Yes, it’s safe. What product are you using to waterproof?