When you’re new to woodworking, choosing the right finish can be time-consuming and costly. Deciding what gets the upper hand in lacquer vs poly is even more complicated.
Given their similarities in look and feel, many people erroneously refer to them as the same thing. However, they have some significant differences, making each suitable for diverse applications.
So, to prevent further confusion, we will clear the air once and for all.
What’s covered in this lacquer vs polyurethane finish guide;
- What is Lacquer?
- What is Polyurethane?
- What is the difference between polyurethane and lacquer?
- Types of Lacquer
- When to use Each Finish
Let’s dive right in;
Lacquer vs polyurethane
Polyurethane protects the wood by forming a plastic-like coating, while lacquer is a water-based product. Polyurethane is more durable and less likely to chip or flake than lacquer. It also has a higher sheen and can be used on both interior and exterior wood surfaces. Lacquer is more affordable, but it’s also less durable and doesn’t hold up as well to wear and tear.
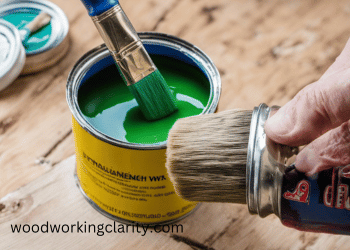
What is Lacquer?
Lacquer has been a fan-favorite of woodworkers for centuries. Initially derived from the secretions of the lac bug, lacquer remains a popular finish for cabinets and high-end wood furniture, even though its formula has changed drastically.
Despite being a very thin finish, it dries hard and is very durable. However, you require a fair bit of skill to get that finish. The best way to apply lacquer is with an HVLP spray gun for woodworking.
There are four main types of lacquer, which we will discuss in detail further.
Lacquer is made by combining different solvents and resins. Depending on the combination, one type of lacquer could be drastically different. While ancient lacquers were eco-friendly, modern ones include more chemicals and emit a high amount of (VOCs).
However, manufacturers are increasingly making the less toxic, water-based lacquers, although there is some debate about whether they should be classified as true lacquers.
What is Polyurethane?
Polyurethane is a durable, water-resistant finish that dries very hard. It can be used on a wide range of wood furniture but mainly on floors, tables, fences, and other surfaces that need protection from water and scratches.
Given how thick polyurethane can be, it is rarely used for high-end furniture. To maintain the quality and extend the polyurethane shelf life, it’s essential to store it properly. Find out more in our article “How to store polyurethane“.
The two main types of polyurethane are:
1. Oil-based polyurethane
It’s long-lasting but takes more time to dry. Because it’s slow drying, expert woodworkers generally prefer lacquer or water-based polyurethane over oil-based polyurethane.
However, water-based poly is less durable than oil-based ones. Even better, it’s heat resistant, so it doesn’t burn or blister. Oil-based polyurethane comes in gloss, semi-gloss and satin sheens, with full gloss being the most durable.
Related read: Semi-gloss polyurethane vs satin.
2. Water-based polyurethane
Water-based polyurethane is a type of polyurethane paint that uses water as the main carrier. In addition to promoting a safe environment for painters, it also has many benefits in reducing waste and producing high-quality results on surfaces such as wood, metal or plastic.
It dries quickly, leaves no odors and is easy to clean up. Since it cannot withstand high temperatures, it is ideal for interior use only.
While oil and water-based polyurethane do the same thing, each has unique advantages and disadvantages. For example, oil-based polyurethane gives a warm glow to wood, and it yellows over time.
On the other hand, water-based poly dries very clear and remains clear.
Both types of polyurethane can be used to protect wooden surfaces for over a decade when applied and maintained correctly raising the question, which is better: water-based or oil-based polyurethane? Find out in our guide.
Polyurethane vs Lacquer: In-Depth Feature Comparison
Maybe I’m an old-timer, but I love wooden projects. But after working for days or weeks on a project, it can be heart-breaking to watch it wilt away in a matter of weeks.
That is why choosing the right finish is critical, most especially when it is a project you were paid to execute.
This in-depth comparison of lacquer and polyurethane will help you know which one to use in almost any situation.
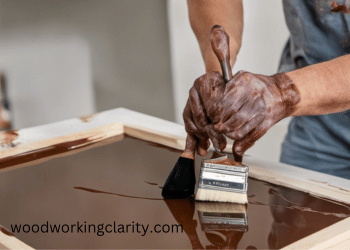
1. Spray lacquer vs polyurethane – Ease of Application
One of the determining factors when choosing a wood finish is how easy it is to apply. After all, it’s better to have an excellent finish with an inferior product than a terrible one with a better product.
Lacquer is light, thin, and dries quickly, so it is best applied with a high-volume, low-presser (HVLP) sprayer. This yields a smooth finish. While lacquer can also be applied with other tools, that is only recommended for much smaller jobs when hiring or buying a sprayer is impractical.
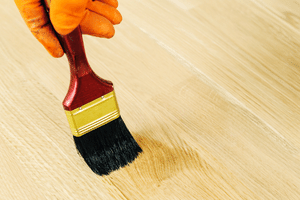
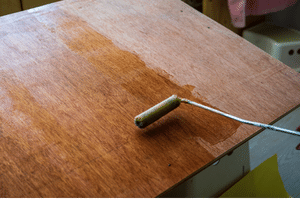
On the other hand, polyurethane is thick, so it is best to apply it with a brush. Of course, you can also apply it with an HVLP sprayer, roller, and cloth depending on the type of polyurethane, but the brush is the recommended tool.
The problem with this is you will often see brush marks and streaks. And, if you use a cheap brush, it will leave hairs all over your wood surface. Other things to watch out for are bubbles, which are very common, and dust nibs.
Another problem when applying polyurethane is the need to sand between coats. Lacquer is its own solvent, so each thin coat melts into the previous one, thus eliminating the need for sanding unless there is a problem with an underlying coat.
All of these make applying polyurethane, as a beginner, a bit challenging to use. But do not worry; there’s an easy way of applying polyurethane using a rag.
Verdict: Lacquer is the clear winner
2. Polyurethane or lacquer – Safety and Toxicity
One thing we hear about constantly is the dangers of household chemicals, and with good reason. Lacquer and polyurethane emit high quantities of volatile organic compounds (VOCs), making them unsafe for people with breathing difficulties.
The bulk of the danger is during the application process. When chemicals are sprayed in the air, which is the recommended application method for lacquer, they become more toxic. That is why you should always use a respirator when applying any chemicals.
The good thing about the VOCs in these products is that they are no longer dangerous when they dry.
To combat these problems, manufacturers have developed water-based lacquer and water-based polyurethane. Some emit minimal quantities of VOCs and are, therefore, relatively safe.
Given that water-based polyurethane is more commonly used, the VOCs from lacquer is a more pressing threat.
Besides the invisible threat, there is the issue of flammability.
Lacquer is highly flammable. Therefore, you must never apply it near any open flame source, and you should only use it in a well-ventilated area.
Polyurethane is also highly flammable, but it is not as sensitive. For example, the flashpoint of Rust-Oleum woodcare lacquer/aerosol is less than 20°F, while the flashpoint of Minwax Fast-Drying polyurethane is 102.2°F, typical for polyurethane.
Verdict – Polyurethane is safer and less toxic.
3. Lacquer vs polyurethane durability
The aim of a wood finish is not just to make furniture look more professional but also to protect the surface from scratches, stains, water, and everything in between. Both lacquer and polyurethane do this excellently.
Lacquer is water-resistant, durable, and provides decent protection from scratches. However, nitrocellulose lacquer does not handle scratches properly.
Besides that, all lacquers offer little protection from heat and chemicals.
On the other hand, polyurethane is scratch and scuff-resistant, water-resistant, stain-resistant, and even heat-resistant. When it comes to outdoor polyurethane, you can also add UV-resistant to that list.
Given the many things polyurethane protects your wood from, it is not surprising that it can handle more abuse than lacquer. But, of course, it also helps that it is thicker than lacquer.
Instead of penetrating the wood, it stays on the surface, making it a lot harder to damage the project, even after several years.
However, if there is no physical or chemical damage, lacquer can last as long as or even longer than polyurethane. But then again, what are the chances of that happening?
Verdict – Polyurethane wins this round.
4. Poly vs lacquer – Drying Time
Here is one overwhelmingly one-sided category.
Despite how durable, versatile, and rich polyurethane is, people despise the long drying time. It is so bad that it has almost single-handedly caused most woodworkers to switch to water-based polyurethane.
Oil-based polyurethane dries to the touch in about 4 to 6 hours but isn’t ready for the next coat in 12 to 24 hours. Given that most projects require at least 3 coats, it could take you three days to apply water-based polyurethane alone.
Water-based polyurethane does a much better job, as it can be recoated in as little as two hours. However, as impressive as this is, it is nowhere close to lacquer.
Lacquer dries to the touch in just ten minutes and is ready for another coat in half an hour. So, you could apply 4 to five coats before you apply the second one of even the fastest drying polyurethane.
Verdict – Lacquer hands down
5. Lacquer or polyurethane – Versatility
Finally, we come to what is probably the most important factor when it comes to picking lacquer or polyurethane.
As mentioned earlier, lacquer is very common for high-end furniture or any wooden surface that won’t see much action. On the other hand, polyurethane is best for high-traffic areas such as floors, tables, countertops, and bars.
Another factor to consider is the size of the project. Given how quickly lacquer dries, it is not suitable for large projects. So, even though you could technically use lacquer on hardwood floors, the drying time makes it impractical.
Polyurethane does not have that problem. Ironically, what makes polyurethane frustrating to use is the same thing that makes it more versatile.
Verdict – Polyurethane wins again.
6. Cost Considerations
When you’re considering using polyurethane for your woodworking projects, it’s essential to factor in both the upfront and long-term costs. Here’s what you need to know:
Initial Poly Purchase:
- Polyurethane comes in various formulations, including oil-based and water-based options.
- On average, a quart-sized can of polyurethane can cost between $10 to $20, depending on the type and brand.
- You might also need brushes or applicators, which can range from $5 to $20.
Long-Term Costs
Polyurethane has its perks when it comes to long-term costs:
- It’s known for its exceptional durability, which means your finished project can withstand wear and tear for many years.
- This longevity can save you money in the long run since you won’t need to refinish or repair your wood surfaces as often.
1. Initial Lacquer Purchase
Now, let’s talk about the initial and long-term expenses associated with lacquer:
- Lacquer comes in various types, such as nitrocellulose and acrylic, with varying price points.
- A quart-sized can of lacquer typically ranges from $10 to $30, depending on the type and brand.
- If you’re using a spray gun, you’ll need to factor in the cost of the equipment, which can range from $20 to $200 or more.
2. Long-Term Costs
Lacquer also has its cost dynamics to consider:
- Lacquer can provide a beautiful, high-gloss finish that may require less maintenance over time.
- While it may need occasional touch-ups or refinishing, it’s generally considered a cost-effective option due to its longevity.
In summary, when evaluating the cost of polyurethane versus lacquer, consider your budget for both initial purchase and long-term maintenance.
Polyurethane might have a slightly lower initial cost, but lacquer’s durability and potential for lower maintenance costs can make it an attractive choice for certain projects.
Ultimately, your choice should align with your project’s specific requirements and your long-term budget.
7. Brushing lacquer vs polyurethane – Yellowing
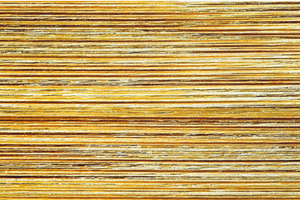
Oil-based finishes have a notorious habit of yellowing or ambering over time. While this can add a nice pop of color to oak and many other types of wood, not everybody is a fan, which is understandable.
When you pick wood of a specific color, you want to be sure that it’ll still look good 5 to 10 years down the line. Unfortunately, neither polyurethane nor lacquer stands the test of time.
Both of these products will yellow, though polyurethane yellows much quicker. However, water-based lacquer and water-based polyurethane will not yellow over time.
So, use non-yellowing exterior polyurethane for your painting jobs. They dry clear and remain transparent.
Given that water-based lacquers are not as common, and some argue they shouldn’t be referred to as lacquer, it is tempting to give polyurethane the edge.
Verdict – Tie
8. Composition and Chemical Makeup
1. Poly Primary Ingredients
Polyurethane, a popular choice for wood finishes, is composed of several key ingredients:
- Polyols: These are compounds derived from petrochemicals or vegetable oils, and they provide the film-forming property of polyurethane.
- Isocyanates: These reactive compounds create the cross-links that give polyurethane its exceptional durability.
- Solvents: These are used to dissolve and disperse polyols and isocyanates, allowing for application.
2. Chemical Properties
Understanding the chemical properties of polyurethane is essential:
- Curing Process: Polyurethane undergoes a chemical reaction during curing, where the isocyanates and polyols combine to form a strong, protective film.
- Resistance: It exhibits impressive resistance to moisture, abrasion, and chemicals, making it an excellent choice for various applications.
- VOC Content: Depending on the type (water-based or oil-based), polyurethane may contain volatile organic compounds (VOCs), which can affect indoor air quality.
1. Lacquer Primary Ingredients
Lacquer, another common wood finish, has a distinct composition:
- Nitrocellulose or Acrylic Resin: This serves as the film-forming component in lacquer.
- Solvents: Lacquer is dissolved in solvents, typically acetone or lacquer thinner, which allow for smooth application.
2. Chemical Properties
Here’s a closer look at the chemical properties of lacquer:
- Rapid Drying: Lacquer is known for its quick drying time, thanks to the rapid evaporation of solvents.
- Clarity and Gloss: Lacquer often provides a high-gloss finish with exceptional clarity, enhancing the wood’s natural beauty.
- VOC Emissions: It’s important to note that some lacquers can have high VOC emissions, so proper ventilation is crucial during application.
Both polyurethane and lacquer have unique compositions and chemical properties.
Polyurethane relies on polyols and isocyanates for its durability, while lacquer uses nitrocellulose or acrylic resin for its quick-drying, glossy finish.
Understanding these elements can help you choose the right finish for your woodworking project based on your specific needs and preferences.
9. Lacquer Finish vs Polyurethane Pros and Cons
Advantages of Polyurethane:
- Durability: Polyurethane is exceptionally durable, offering strong protection against moisture, abrasion, and general wear and tear.
- Versatility: It can be used on a wide range of surfaces, including furniture, floors, and outdoor projects.
- Longevity: A properly applied polyurethane finish can last for many years, reducing the need for frequent refinishing.
- Variety: Available in different sheen levels, from satin to high gloss, allowing you to achieve your desired finish.
Limitations of Polyurethane:
- Application Challenges: It can be trickier to apply evenly compared to lacquer, especially for beginners.
- Drying Time: Polyurethane typically has a longer drying time between coats compared to lacquer.
- Yellowing: Some oil-based polyurethanes may yellow over time, altering the appearance of light-colored wood.
Advantages of Lacquer:
- Rapid Drying: Lacquer dries quickly, allowing for faster project completion.
- Clarity: It provides a crystal-clear finish that enhances the natural beauty of the wood.
- Ease of Application: Lacquer is relatively easy to apply, making it suitable for DIY enthusiasts.
- Repairability: If damaged, lacquer can be easily repaired by applying more lacquer over the affected area.
Limitations of Lacquer:
- Durability: While lacquer offers a beautiful finish, it may not be as durable as polyurethane, making it less suitable for high-traffic areas.
- Toxic Fumes: Some lacquers emit strong fumes during application, requiring good ventilation.
- Moisture Sensitivity: Lacquer can be vulnerable to moisture, which may affect its performance over time.
In conclusion, both polyurethane and lacquer have their distinct advantages and limitations.
Polyurethane excels in durability and versatility but may require more skill to apply.
Lacquer, on the other hand, offers quick drying and a clear finish, making it user-friendly but potentially less durable. Your choice should depend on the specific requirements of your project and your personal preferences.
Different Types of Lacquer
Far removed from its eco-friendly beginnings, modern lacquers are made by dissolving synthetic polymers in lacquer thinner.
Although all lacquer finishes share some of the abovementioned qualities, significant variances give some edge over polyurethane. Learn how to put polyurethane over lacquer.
1. Nitrocellulose lacquer
This is the most common type of lacquer and the one with the most defects. It possesses all of the unsavory characteristics above: it is not heat resistant, is highly flammable, yellows, and is highly toxic.
As a result, it is gradually being phased out of the market in favor of more efficient options.
2. Acrylic Lacquer
First created in the 1950s, acrylic lacquers were made to prevent the yellowing issues common with nitrocellulose lacquer. They are also more durable and scratch-resistant, thus boosting their advantages versus polyurethane.
These added benefits of acrylic lacquer come with the downside of being more expensive than nitrocellulose lacquer.
3. Water-Based Lacquer
Water-based lacquer is another step in the evolution process. While acrylic lacquer solved the yellowing issue, water-based lacquer tackles the toxicity problem. These emit significantly fewer VOCs and are not as flammable.
While this is an improvement, it is not as durable as catalyzed or acrylic lacquers.
4. Catalyzed Lacquer
This is a hybrid lacquer with nitrocellulose resins and urea resins, making it more resistant to water, scratches, and chemicals.
It cures chemically and through evaporation with a chemical compound that can be added before you buy (pre-catalyzed) or do it yourself (post-catalyzed).
Despite the advancements in durability, it will still yellow over time, and the VOC count is still high.
Read: What is the Difference Between Spar urethane and Polyurethane
5. Urushiol Lacquer
This lacquer is versatile, used for creating a wide range of items such as furniture, tableware, and decorative art pieces. Its ability to adhere to various materials, including wood, metal, and ceramics, makes it a preferred choice for artisans and craftsmen.
However, it’s essential to exercise caution when working with Urushiol lacquer, as it contains urushiol, a substance that can cause severe allergic reactions in some individuals, especially those sensitive to poison ivy or poison oak.
Beyond its practical applications, Urushiol lacquer holds cultural significance, particularly in Japan and other Asian countries. It is an integral part of traditional Japanese lacquerware, celebrated for its beauty and craftsmanship.
In summary, Urushiol lacquer is a unique and culturally significant-finish, valued for its stunning appearance and enduring qualities, but it demands respect and care due to its allergenic nature.
How to Use Polyurethane in 5 Simple Steps
Polyurethane is a fantastic choice for protecting and enhancing the appearance of wood surfaces. Whether you’re finishing a piece of furniture or sealing your hardwood floors, follow these five straightforward steps to achieve a beautiful, durable finish.
Step 1: Gather Your Materials
Before you start, make sure you have everything you need:
- Polyurethane: Choose between water-based or oil-based, depending on your preference.
- Stir Stick: To ensure your polyurethane is well-mixed.
- Quality Brushes: Invest in good brushes for smoother application.
- Sandpaper: Typically, 220-grit works well for smoothing the wood surface.
- Clean Cloth: For wiping away dust.
- Well-Ventilated Area: Ensure proper ventilation to minimize fumes.
Step 2: Prepare the Surface
Proper preparation is key for a flawless finish:
- Clean the Surface: Remove dirt and dust. A tack cloth is handy here.
- Sand the Wood: Smooth out imperfections and existing finishes.
- Wipe Down: Use a clean cloth to remove any remaining dust.
Step 3: Apply the Polyurethane
Time to apply the magic! Here’s how:
- Start Thin: Thin coats are better than thick ones. Pour some polyurethane into a container.
- Brush-On: Using your quality brush, apply a thin, even coat along the wood grain.
- Avoid Overworking: Don’t over-brush; this can lead to uneven drying.
- Let It Dry: Allow the first coat to dry for the recommended time (usually a few hours).
Step 4: Sand and Repeat
For a smooth, professional finish, follow these steps:
- Lightly Sand: After the first coat dries, use fine-grit sandpaper to smooth any imperfections.
- Repeat Coats: Apply additional coats, usually 2-3 more, following the same process.
- Sand Between Coats: Always lightly sand between coats for better adhesion.
Step 5: Finish and Enjoy
You’re almost there! Just a few more steps:
- Final Coat: Apply a final thin coat and let it dry completely.
- Cure Time: Be patient; polyurethane can take a few weeks to fully cure.
- Enjoy Your Beautiful Finish: Once cured, your wood surface will be protected and look stunning!
Lacquer Application Process
Step 1: Gather Your Materials
First things first, make sure you have everything you need:
- Lacquer: Choose the appropriate type, such as nitrocellulose or acrylic lacquer.
- Applicator: A quality brush, spray gun, or aerosol can for applying lacquer.
- Sandpaper: Typically, 320-grit or finer for a smooth surface.
- Safety Gear: Gloves, safety glasses, and a well-ventilated workspace.
Step 2: Prepare the Surface
Proper preparation ensures a flawless finish:
- Clean Thoroughly: Remove dust, dirt, and grease from the surface.
- Sand Smooth: Use your sandpaper to even out imperfections and existing finishes.
- Wipe Clean: A clean cloth helps remove any remaining dust or debris.
Step 3: Apply the Lacquer
Now it’s time to apply the lacquer like a pro:
- Start Thin: Apply a thin, even coat, working in the direction of the grain.
- Build Up Layers: Multiple thin coats are better than one thick one. Allow each coat to dry before applying the next.
- Watch for Runs: Be cautious to avoid drips or runs, especially when using a brush.
Step 4: Sand Between Coats
For a super-smooth finish, follow these steps:
- Lightly Sand: After each coat dries, gently sand with fine-grit sandpaper (320-grit or finer).
- Remove Dust: Wipe away sanding dust with a clean, dry cloth.
- Repeat Coats: Apply 3-4 coats, or as needed, following the sanding and wiping steps between each.
Step 5: Final Touches and Enjoy
You’re almost there—just a few more steps:
- Final Coat: Apply a final coat of lacquer and allow it to dry thoroughly.
- Cure Time: Be patient; lacquer can take a few weeks to fully cure.
- Enjoy the Shine: Once cured, your woodwork will have a beautiful, glossy finish that’s both protective and eye-catching.
Use Cases
Lacquer or polyurethane for table top
Lacquer is a better choice for table tops than polyurethane. Table top polyurethane is more prone to scratching, while lacquer is less likely to scratch.
Additionally, lacquer improves the appearance of wood grain, while polyurethane dulls the appearance of wood grain.
Finally, lacquer dries faster than polyurethane, so it’s less likely to cause bubbles or streaks in the finish.
Lacquer or polyurethane for kitchen cabinets
Lacquer will give you the best protection for your cabinets. It forms a hard, glossy finish that is durable and easy to clean. With just two coats of lacquer, your cabinets will be fully protected.
Polyurethane, on the other hand, will also give your cabinets good protection but it won’t be as easy to clean as lacquer.
It’s also important to note that polyurethane can yellow over time, so lacquer is the better option if you’re looking for a finish that will remain colorfast over the years.
FAQs
What’s the Difference Between Lacquer and Polyurethane?
The difference between polyurethane and lacquer is that Polyurethane is a thicker and more durable sealant that takes longer to dry.
Lacquer is a thin and quick-drying finish that penetrates into the wood but it can also chip and crack easily. In short, polyurethane is a curing finish, while lacquer is a drying finish.
What does lacquer do to wood?
Lacquer provides a high gloss finish to your wood furniture or floors. Lacquer also seals and protects the wood from moisture and other environmental factors that could damage the surface or cause it to warp.
Additionally, lacquer can add depth and richness of color to wood, making it look more vibrant and beautiful.
Is lacquer the same as polyurethane?
No, lacquer and polyurethane are not the same. Polyurethane is more like a protective plastic that coats wood surfaces, while lacquer behaves like water as it penetrates the wood.
Lacquer is thin and dries quickly but is not as durable as polyurethane and isn’t recommended for highly trafficked areas.
Is lacquer better than polyurethane?
Depends on what you’re looking for in a finish. Lacquer is a classic choice for furniture and cabinets, and it has a beautiful, glossy sheen. It’s also quite durable and easy to clean.
Polyurethane offers excellent protection against scratches and wears and is best used on floors as they get lots of traffic.
Interesting Read: Wood stain vs varnish
What is lacquer used for?
Lacquer is a finishing agent that is often used on high-end furniture. It gives the furniture a glossy and smooth finish, making it look more expensive and luxurious.
Lacquer is also very durable, so it can help protect your furniture from scratches and other damage.
If you’re looking to add a bit of extra luxury to your home, choosing pieces of lacquered furniture is a great way to do it.
Is lacquer oil-based?
It can be, but it doesn’t have to be. It all depends on the ingredients used in the lacquer. Some lacquers are oil-based, while others are water-based. So it depends on the specific product you’re using.
Recommended Reading: Shellac vs polyurethane
Polyurethane vs Lacquer Finish Verdict
In determining the winner of the duel – lacquer versus polyurethane, there isn’t just one answer. Both finishes are outstanding and surpass most of the competition without batting an eyelid.
While it is hard to draw a firm line between the two, there are instances in which one will outperform the other.
Read also: Sherwin williams paint vs valspar?
When to Use Lacquer finish:
- Working on a project that won’t see a lot of traffic
- You have a short time-frame
- You want an easy-to-use finish
- Working on small projects
Use Polyurethane When:
- Working on high-traffic areas
- You value durability over ease of application
- When working on floors and other large surface areas
On the off chance that you’re not convinced either of these finishes is suitable for you, read our guide on different wood finishes, including varnish, shellac, tung oil, and many more.
I vote for satin poly.
Modge Podge from any craft store will do what you’re looking for. You could also get some 4” packing tape and laminate your drawings with it.