Linseed oil is a popular wood finish used independently or as a basic ingredient in oil-based products.
In either form, the product can protect and nourish the wood, enhancing its aesthetics while also helping prolong its service life.
Because of its beneficial properties, woodworkers commonly use this oil to coat various wooden surfaces, including wooden furniture and wood floors. But is that everything there is to know about using linseed oil on wood decking?
This article examines the various uses of linseed oil and takes you through the process of finishing wood with linseed oil step by step.
Is Linseed Oil Good for Wood?
Absolutely. Linseed oil benefits wood in several ways, making it extremely popular. The use of linseed oil on wood dates back hundreds of years, thanks to its ability to protect and nourish wood. The oil is non-toxic and food-grade, so it is commonly used for coating wooden cutting boards and other kitchen items.
What is Linseed Oil?
Linseed oil is a yellowish to colorless oil obtained from ripened flax seeds that have been dried and pressed to remove the solid mash.
After pressing the dry seeds of the flax plant, a solvent extraction sometimes follows the initial process to obtain the refined oil.
Linseed oil has numerous uses, making it one of the most popular and useful natural finishing oils worldwide.
Raw vs Boiled Linseed Oil
Here is a table comparing raw versus boiled linseed oil. Unlike the name suggests, boiled linseed oil is not actually boiled but processed with chemical additives and hot air to make it dry faster.
| Raw Linseed Oil | Boiled Linseed Oil |
| 1. This is the purest form of linseed oil as extracted from the seeds of the flax plant. | 1. This is a processed form of linseed oil with drying agents like heavy metals or petroleum-based chemicals added to make the oil more feasible for wood finishing. |
| 2. This form of linseed oil has a longer drying time. It can take up to four days to dry when applied to a wooden surface. | 2. Boiled linseed oil has a shorter drying time of about 24 hours, thanks to the solutions, chemicals, or additives in its formula. |
| 3. The oil is ideal for oil-based paints where drying times are not a consideration. It allows the paints to level well and set properly and ensures a smoother finish. | 3. The oil is ideal for finishing wood or coating wooden surfaces, with the faster drying times ensuring quicker recoat times and timely project completion. |
| 4. It contains no chemical additives. | 4. It can contain petroleum-based siccative compounds like mineral spirits, naptha, and dipropylene glycol monomethyl or metals like manganese and cobalt. |
Boiled and raw linseed oils give wood a darker tint, enhancing its grain and natural appearance. They also protect the wood equally, with the only major difference between raw and boiled linseed oil forms being their drying times.
Uses for Linseed Oil on Wood
Here is a rundown of the main uses of linseed oil on wood.
1. Waterproofing wood
Linseed oil has a relatively thin consistency, allowing it to penetrate the wood surface and fill its pores. Being a drying oil, it also forms a thin film on the wood surface, protecting it from the inside out and on the surface.
As such, linseed oil does an excellent job of protecting the wood from water and moisture by blocking its pores and covering its surface.
Notice that the waterproofing qualities of linseed oil and temporary and cannot be used for long-term protection.
2. Finishing food processing surfaces
Since raw linseed oil is food-safe, it is typically the best finish for wooden kitchen tabletops and items like cutting boards and other surfaces that come in contact with food.
3. Conditioning wood before staining
Sometimes, woodworkers mix linseed oil with turpentine and apply it to the wood before staining. The oil is an effective wood conditioner for preparing wooden surfaces that do not typically accept stains evenly.
For instance, when staining wood items made of pine, you can apply some linseed oil to even out the pores and keep the stained surface from appearing blotchy.
To use linseed oil for this purpose, add some turpentine and mix well, then apply it to the wood surface and wipe away the excess liquid.
Once done, you will need to let the wood surface dry for about 24 hours before staining it. This approach will help ensure your stained wood is evenly colored and blotch-free.
4. Polishing some types of wood
If you are working with softer woods such as poplar, you can apply linseed oil daily as a polishing agent. Linseed oil on poplar helps nourish the wood, giving it a deeper, more beautiful hue while prolonging its service life.
When using the oil to polish wood this way, ensure you mix in a little water before polishing the wood with it.
5. Accelerating the drying time of oil-based stain
Boiled linseed oil can help accelerate the drying time of oil-based stains and paints. So, if you are staining wood with an oil stain that might take longer to dry, you can add a small amount to the stain before applying it to your project.
The oil will reduce the drying time and help you complete your stain job sooner.
When Should I Use Linseed Oil on Wood?
You should consider using linseed oil on wood when working on bare wood or previously oiled lumber—preferably meant for indoor use.
While linseed or flaxseed oil can work on interior and exterior wood, it is significantly vulnerable to the elements, making it more suitable for use indoors.
How to Use Linseed Oil on Wood
This section walks you through applying linseed oil to various wooden surfaces. The section also suggests the items you need to complete this process.
Tools and supplies that you will need
- Boiled linseed (flaxseed) oil
- Sanding paper
- Sander
- Respirator or dust mask
- Hand gloves
- Tack cloth
- Plastic sheeting or drop cloth
- Shop vac
- Mineral spirits or ammonia solution
- Rags
Steps to follow
Once you have assembled all the items required to complete this procedure, prepare the workspace by laying down a drop cloth or plastic sheeting.
This will help collect the wood dust from sanding and the spills from your wood stain. Next, prepare and protect yourself by wearing a pair of hand gloves and a dust mask and an apron. If you don’t have an apron here are the best woodworking aprons to choose from.
When sanding, you don’t want to inhale the wood dust, which is where the respirator comes in. The hand gloves will also help protect your hands from staining.
You may also want to wear protective clothing such as coveralls or old clothes that you do not mind getting dirt on.
Step 1: Sand down the wood with coarse-grit sanding paper
Use coarse, high-grit sandpaper such as 60-grit sanding paper to hit any surface inconsistencies on the wood and make it level.
You can attach the sandpaper on a sanding block for a small project and a power sander for a large project, such as a hardwood floor.
Consider rubbing the sandpaper along the wood grain to disguise any lines created as you sand. This initial sanding is essential for wood with a previous finish, such as a layer of varnish, wax, or paint.
Use a shop vac. or dry natural bristled paintbrush to wipe the dust from the sanded wood surface before you proceed.
Next, switch to medium-grit sandpaper, between 100 and 120 grit, for the final part of your sanding. You don’t want to go too fine when prepping the wood surface for linseed oil, as it needs the wood pores fairly open.
Keep the sanding pressure even and consistent to achieve a smooth, even surface as you buff. After sanding, use a dry brush to wipe the sanding dust.
Step 2: Wipe down the wood surface with mineral spirits or ammonia solution
Saturate a clean rag with some mineral spirits, wring it out to remove the excess liquid, and use the damp rag to wipe down the sanded wood surface.
Alternatively, you can mix two-part ammonia with eight-part tap water and use the resulting solution in the place of mineral spirits.
In each case, ensure you wring out the excess liquid, so the cloth is dampened and not dripping with the chosen liquid.
Notice that ammonia can alter the wood color, so you may want to stick with mineral spirits if you want no tint on the wood. Ensure you rub the wood surface until all the grime has come off and the wood is clean and smooth.
Step 3: Dry the wood with a clean rag or cloth
Once you have removed all the grime, use a clean, dry rag to wipe the wood surface to dry it. Work with small circular motions to remove the excess ammonia solution or mineral spirits on your wood. Do this until the wood is dry.
If some sawdust residue remains on the wood after drying, use a shop vac to suck it up and remove it from the cleaned surface.
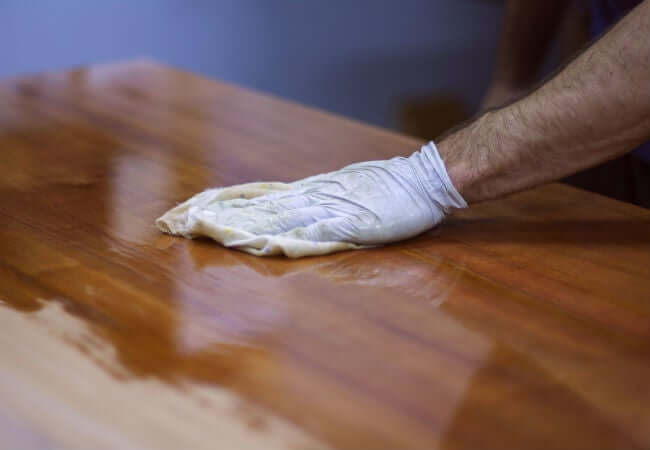
Step 4: Apply the boiled linseed oil to the wood
To apply the oil, pour it directly onto the wood surface and use a clean cloth to spread and rub it into the wood in circular motions.
Work in small, linear sections at a time instead of the entire project. Applying the boiled linseed oil in a small area at a time helps you cover the wood surface more thoroughly for better results.
Also, moving in a linear path will make it easier to track the parts you have oiled. While at it, we recommend following the direction of the wood grain to create an even look.
Step 5: Let it set in for 15 minutes
Once you have covered the entire wood surface with the oil, leave it to soak in for at least 15 minutes. After 15 to 20 minutes, use a clean rag to remove excess oil from the surface.
This waiting time is essential as it allows the boiled linseed oil to soak into the wood and properly adhere to it. After the time has elapsed, you want to remove any excess oil to avoid leaving a sticky mess.
Consider wiping it with long, even strokes to create a smooth finish. After wiping, leave the wood to dry for 24 to 48 hours undisturbed.
Ideally, boiled linseed oil should be dry completely after 24 hours. But you can allow more drying time for good measure.
Step 6: Remove any debris from the dried surface and recoat
Applying a second coat of oil is essential for better coverage and protection. However, dust and debris may be trapped on the wood surface during drying, so you want to wipe that away before applying the second coat of linseed oil.
You can use a dry brush or clean cloth for this part, as either tool can do the job. The aim is to avoid having any specks of dust or debris remaining trapped in your subsequent layers of the oil.
Once all the dirt is gone, apply a second coat of boiled linseed oil the same way you did the first, and let it soak into the wood for 15 to 20 minutes.
After this wait time has elapsed, use a clean rag to wipe off the excess oil the same way you did on the initial coat, and let it dry completely.
Step 7: Safely dispose of the used rags
After completing the project, dispose of linseed oil rags safely inside a plastic bag or sealable metal container. Ensure you tightly seal the container after putting the oil-soaked rags inside before disposing of it into the trash.
You can also fill up the container with cold water after putting the used rags inside it before sealing it with a lid. When disposing of the sealed container, ensure you follow your local guidelines on handling hazardous waste.
Note:
You may need to reapply boiled linseed oil to your project once every three or more weeks. You can tell when it is time to reapply the oil by checking the glossiness of the wood surface.
When the shine is gone, it is time to reapply the boiled linseed oil to continue its protection.
Benefits of Linseed Oil on Wood
- Linseed oil nourishes wood, giving it a deeper shade, deepening the grain, and helping preserve the wood’s natural beauty.
- The oil is water resistant and protects the wood from moisture damage and other weather elements.
- Linseed oil is food safe, making it ideal for use in coating food-handling wooden surfaces like cutting boards and wooden bowls. When using boiled linseed oil, we recommend checking the ingredients to ensure none is unsafe to ingest.
- The oil penetrates the wood and protects it from the inside out without clogging the pores.
- Linseed oil finish tends to be elastic and can withstand weather changes without losing its protective quality on wood.
- This oil is an affordable method of protecting wood.
- It is easy to use, making it ideal for DIYers.
- Boiled linseed oil is fast-drying, which can significantly speed up project completion.
- Linseed oil helps preserve the wood color as it only deepens it without changing it.
Read also: Food safe wood glue cutting board.
Limitations of Linseed Oil on Wood
- Regular linseed oil takes longer to dry, which can prolong the completion of a project.
- Linseed oil wears out quickly; hence it is not ideal for long-term protection. You must reapply the oil after every few weeks to maintain its protective qualities.
- Linseed oil is vulnerable to the elements, so it is not ideal for use on outdoor wood projects.
- Commercially available linseed oil (boiled linseed oil) can contain various additives to speed up drying time. Depending on the manufacturer’s choices, some of these ingredients may be unsafe.
- Linseed oil may leave a sticky finish if the ambient temperatures are unconducive for drying. This means using the oil in a cold environment will be challenging.
- The oil offers no protection against UV damage.
- Removing linseed oil from wood when refinishing can be challenging because it penetrates the wood.
- The oil can encourage the growth of mildew.
FAQs
What does linseed oil do to wood?
The oil penetrates the grain, making the wood waterproof. It also protects the wood surface against scratches. Wood treated with linseed oil has a deeper color with a more enhanced grain pattern.
Is linseed oil good for outdoor wood?
No, linseed oil is not recommended for exterior wood projects due to its vulnerability to the elements. The oil also offers no protection against the sun’s ultraviolet rays and may encourage mold growth on outdoor projects.
How long does linseed oil last on wood?
Linseed oil can last up to a year on wood but will often require reapplication after a few weeks or months if the wood is under constant use. Ideally, the time the oil takes on wood depends on its use.
How long does it take for boiled linseed oil to dry on wood?
Boiled linseed oil dries completely on wood after about 24 hours under optimal temperature conditions but takes longer (up to 72 hours) in suboptimal weather conditions.
Does linseed oil seal wood?
Yes, linseed oil acts as a wood sealer by soaking deep into the pores, making the surfaces highly resistant to water and moisture.
How many coats of boiled linseed oil do you need?
Three coats of boiled linseed oil applied at 12 to 24-hour intervals are typically sufficient. You may need to polish the wood surface lightly by hand to enhance the finish and make it satin and smooth as desired.
Does linseed oil protect wood?
Absolutely. Linseed oil soaks the wood and protects it against moisture damage and light scratching.
Does linseed oil darken wood?
Yes. Linseed oil carries a golden-brown hue that it transfers to wood when applied. It also tends to yellow slightly over time. So you may not want to use the oil on light-colored woods like ash and maple and use pure tung oil instead.
Related reads:
Boiled linseed oil vs danish oil
Is varathane polyurethane food safe?
Final Thoughts on Finishing Wood with Linseed Oil
Using boiled or polymerized linseed oil over polyurethane on wood can be an affordable way to protect your wood from damage related to humidity changes and light scratching.
The superior-quality oil is also easy to use, making it ideal for beginner woodworkers. However, prepare to refinish the wood every once or twice a year to maintain the oil’s protection on your wood project.
With this knowledge, you’re armed to decide whether or not you should use linseed oil on any future projects.
That’s why it’s invaluable to take some time to explore the danish oil disadvantages and advantages related to your particular project before making any decisions so you can have confidence in your results.