
You’ll be glad to know that you can build hundreds of things with wood and sell at reasonable profits to make extra cash to weather the tough economic times.
The best part is that many projects rarely require professional-level technical expertise. Instead, all you need is a willingness to learn how to start building things with wood.
Marketing the items is also not as difficult as most people fear. Your local community and social followers will scramble for them if you make quality items.
Read on to learn some of the most profitable woodworking projects you can start today, how much money you can expect to make, and some of the challenges you need to prepare for as you set off on your newfound project.
In a hurry, don’t worry; here is a list of all the woodworking ideas to make money.
Most Profitable Woodworking Projects to Build and Sell?
- Wooden picture frames
- Coffee tables
- Wooden toys
- Wooden storage beds
- Wine racks – easy furniture to build and sell
- Cutting board – top-selling wood item
- Knife block
- Bedside box
- Raised garden beds – easy money making wood projects
- Wooden egg holders
- Bathtub caddy
- Jewelry organizer
- Wall signs
- Wooden candle holders
- Wooden shelves
- Coat rack
- Headboard and bed frames
- Wooden game boards
- Wooden soap dishes
- Wooden utensils – wood carving projects that sell
- Console tables – best-selling woodworking projects
- Wood coasters – popular woodworking projects to sell
- Wooden Business Card Holders – best selling wood crafts
Best Woodworking Money Makers
Once you have the above tools and materials, you’re ready to start making and selling wooden items for profit. The following are 43 of the best-selling wood projects for beginners to consider.
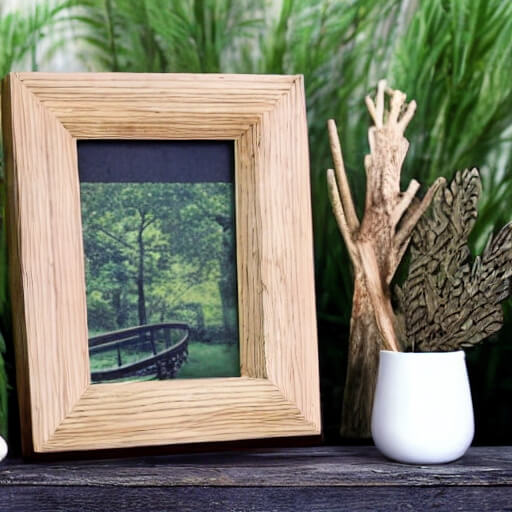
1. Wooden picture frames
Wooden picture frames are a timeless classic, offering a touch of warmth and character to any
photograph or artwork. The beauty of crafting your own frames lies in the ability to tailor them
to any style or size. For beginners, simple designs with clean lines are perfect for honing their
skills. More experienced woodworkers can experiment with different stains, finishes, and even
add decorative elements like carvings or inlaid details.
- Difficulty: Beginner
- Time Required: 1-2 hours per frame
Materials Needed:
- Wood boards (hardwood or softwood)
- Miter saw or miter box and hand saw
- Wood glue
- Clamps
- Sandpaper
- Wood finish or paint (optional)
- Backing board
- Glass or acrylic (for finishing)
- Picture frame hanging hardware
Steps:
- Design and Planning: Begin by determining the size and design of your picture frame. Sketch a plan with precise measurements for the frame and the picture opening.
- Cutting Wood: Using a miter saw or a miter box and hand saw, cut the wood into four pieces at 45-degree angles. Two pieces will be the longer sides (top and bottom), and two will be the shorter sides (sides of the frame).
- Assembly: Apply wood glue to the mitered edges and join the pieces together to form the frame. Use clamps to hold the corners tightly while the glue dries. Ensure that the corners are perfectly aligned.
- Sanding: Once the glue is dry, sand the frame to smooth out any rough spots and create a clean, even surface. Pay attention to the corners to ensure they are seamless.
- Finish: If desired, apply a wood finish or paint to enhance the frame’s appearance and protect the wood. Allow the finish to dry completely
2. Wooden toys
- Difficulty: Beginner to Intermediate (varies with complexity)
- Time Required: Varies greatly depending on the toy’s complexity
Steps
- Design & Materials: Based on the project’s requirements, begin with a toy design and gather the necessary wood, such as hardwood or pine.
- Cutting & Shaping: Use saws, chisels, and sandpaper to cut and shape the wood into the desired toy form. Ensure smooth edges and surfaces.
- Assembly: Assemble the toy’s parts, securing them with non-toxic wood glue or screws. Ensure all joints are strong and safe for children.
- Sanding: Thoroughly sand the toy to remove sharp edges, splinters, or rough spots. This step is crucial for child safety.
- Finish: Apply a child-safe finish, like non-toxic paint or natural oils, for protection and an attractive appearance.
- Safety Checks: Inspect the toy for any potential hazards or defects, addressing them before sale.
So, if you’re looking for great woodworking projects for kids, you’ve found a winner.
3. Coffee tables
- Difficulty: Intermediate
- Time Required: 8-12 hours
Materials Needed:
- Wood (commonly hardwood like oak or softwood like pine)
- Screws, wood glue, or dowels for assembly
- Sandpaper
- Wood finish or paint (optional)
- Table legs or hairpin legs (if not making custom legs)
- Tools like saws, drills, and clamps
Steps:
- Design & Planning: Start by designing your coffee table, considering size, shape, and style. Make a detailed plan with measurements.
- Wood Selection & Cutting: Choose quality wood and cut it to the required pieces for the tabletop, legs, and other components. Sand edges for smoothness.
- Assemble Tabletop: Join the tabletop pieces together using dowels, screws, or wood glue. Ensure a flat and level surface.
- Attach Legs: Attach the table legs or hairpin legs securely to the tabletop’s corners or center, depending on your design.
- Sanding & Finishing: Sand the entire table to remove imperfections and create a smooth surface. Finish the wood with paint, stain, or a clear finish to protect and enhance its appearance.
- Quality Check: Inspect for any flaws or loose connections, making necessary adjustments.
4. Wooden storage beds
Wooden storage beds are a dream come true for space-conscious homeowners. They combine the
timeless elegance of wood with the functionality of built-in storage, creating a beautiful and
practical centerpiece for any bedroom. The beauty of building your own storage bed lies in the
complete customization.
Design beds with drawers at the footboard for blankets and extra linens, or create platform beds
with built-in cubbies or shelves for clothes and personal belongings. Consider incorporating
hidden compartments or lift-up ottomans for maximizing storage capacity. Don’t forget
aesthetics! Choose hardwoods for a touch of luxury, or go for a rustic look with reclaimed wood.
- Difficulty: Intermediate to Advanced
- Time Required: 20-30 hour
Materials Needed:
- Wood (commonly hardwood for strength)
- Screws, wood glue, or dowels for assembly
- Plywood or slats for the mattress base
- Drawer slides for storage drawers. Also, read on how to make drawers slide easier.
- Sandpaper
- Wood finish or paint (optional)
- Tools like saws, drills, and clamps
Steps:
- Design & Planning: Create a detailed plan that includes measurements, storage drawer specifications, and any design features.
- Cutting & Preparing Wood: Cut the wood into the necessary pieces for the bed frame, headboard, footboard, and storage drawers. Sand the edges for smoothness.
- Assemble the Frame: Begin by constructing the bed frame, ensuring it’s sturdy and level. Use screws, dowels, or wood glue for assembly.
- Build Storage Drawers: Craft the storage drawers, adding handles or pulls for easy access. Attach drawer slides to the drawers and the bed frame to ensure smooth operation.
- Add Mattress Base: Install plywood or slats to support the mattress.
- Sanding & Finishing: Sand all surfaces to achieve a smooth finish. Apply a wood finish or paint to protect and enhance the wood’s appearance.
5. Wine rack – easy furniture to build and sell
The key to a successful wine rack lies in its ability to marry form and function. Here’s where
your creativity can shine! Design wall-mounted wine racks that maximize storage in small
spaces. Create freestanding wine racks with a modern, minimalist aesthetic. Don’t be afraid to
experiment with different wood types, stains, and finishes to create pieces that complement a
variety of home décor styles.
- Difficulty: Beginner to Intermediate
- Time Required: 2-6 hours, depending on design
- Wine Cellar HQ has some great inspiration for different types of wine racks.
Materials Needed:
- Wood (commonly hardwood for durability)
- Screws, wood glue, or dowels for assembly
- Sandpaper
- Wood finish or paint (optional)
- Tools like saws, drills, and clamps
Steps:
- Design & Planning: Begin by designing the wine rack, considering the number of bottles it will hold and its style. Create a plan with measurements.
- Cutting Wood: Cut the wood into the necessary pieces for the wine rack components, such as the shelves, sides, and dividers. Sand the edges for a smooth finish.
- Assemble the Frame: Construct the frame of the wine rack, ensuring it’s stable and level. Use screws, wood glue, or dowels for assembly.
- Add Shelves & Dividers: Attach the shelves and dividers according to your design, creating spaces for wine bottles. Make sure these components are securely in place.
- Sanding & Finishing: Sand the entire wine rack to remove any rough spots and create a polished appearance. Finish the wood with paint, stain, or a clear finish for protection and aesthetics.
6. Cutting board – top-selling wood item
- Difficulty: Beginner
- Time Required: 1-2 hours per board
Materials Needed:
- Wood (commonly hardwood like maple or cherry for durability)
- Food-safe wood finish (such as mineral oil or beeswax)
- Sandpaper
- Tools like saws, planes, and sanders
Steps:
- Design & Planning: Start by designing the cutting board, considering the desired dimensions and shape. Create a plan with precise measurements.
- Wood Selection & Cutting: Choose quality hardwood and cut it to the appropriate size and shape for the cutting board. Ensure smooth edges and surfaces.
- Assembly: Arrange the wood pieces in the desired pattern, ensuring a tight fit. Glue the pieces together and clamp them until the glue dries.
- Sanding: Sand the cutting board to remove any rough spots, achieving a smooth and even surface.
- Food-Safe Finish: Apply a food-safe wood finish, such as mineral oil or beeswax, to protect the wood and enhance its appearance. Apply multiple coats, allowing each to dry before the next.
7. Knife block
- Difficulty: Intermediate
- Time Required: 4-6 hour
Materials Needed:
- Wood (often hardwood for durability and aesthetics)
- Screws or wood glue for assembly
- Sandpaper
- Wood finish (optional but recommended)
- Tools like saws, drills, and clamps
Steps:
- Design & Planning: Begin by designing the knife block, considering the number and size of knives it will hold. Create a detailed plan with measurements.
- Cutting Wood: Cut the wood into the necessary pieces for the knife block, including the sides, bottom, and dividers. Sand the edges for a smooth finish.
- Assemble the Block: Construct the knife block by joining the sides, bottom, and dividers together. Use screws or wood glue to ensure a stable structure. Clamps can help hold the pieces in place as the glue dries.
- Sand & Finish: Sand the entire knife block to remove rough spots and achieve a polished appearance. Applying a wood finish not only enhances the wood’s natural beauty but also protects it from moisture and wear.
8. Bedside box
- Difficulty: Beginner
- Time Required: 2-4 hours
Materials Needed:
- Wood (commonly hardwood or softwood)
- Screws, wood glue, or nails for assembly
- Sandpaper
- Wood finish or paint (optional)
- Tools like saws, drills, and clamps
Steps:
- Design & Planning: Begin by designing the bedside box, considering its size, shape, and any desired features. Create a plan with precise measurements.
- Cutting Wood: Cut the wood into the necessary pieces for the box components, including the sides, top, bottom, and any dividers or shelves. Sand the edges for a smooth finish.
- Assemble the Box: Construct the box by joining the sides, top, bottom, and dividers together. Use screws, wood glue, or nails to ensure a sturdy structure. Clamps can help hold the pieces in place as the glue dries.
- Sanding & Finishing: Sand the entire box to remove any rough spots and achieve a polished appearance. Applying a wood finish or paint can enhance the box’s aesthetics and protect the wood.
9. Raised garden beds – easy money making wood projects
- Difficulty: Intermediate
- Time Required: 6-8 hours
Materials Needed:
- Wood (usually untreated cedar or redwood for durability)
- Screws or corner brackets for assembly
- Weed barrier fabric (optional)
- Soil and plants
Steps:
- Design & Planning: Begin by designing your raised garden bed, considering its dimensions and depth. Sketch a plan with precise measurements.
- Wood Selection & Cutting: Choose quality wood and cut it into the necessary pieces for the bed’s sides. Depending on the size, you may need multiple boards for each side.
- Assemble the Bed: Construct the raised garden bed by attaching the sides together. Use screws or corner brackets to ensure a sturdy and stable structure. If you want to prevent weeds, consider laying weed barrier fabric at the bottom before filling it with soil.
10. Wooden egg holders
- Difficulty: Beginner
- Time Required: 1-2 hours per holder
Materials Needed:
- Wood (commonly softwood like pine)
- Saw
- Sandpaper
- Wood finish (optional)
- Tools like a saw and sandpaper
Steps:
- Design & Planning: Start by designing your egg holder. You can choose between various designs, from basic trays to more intricate, decorative options. Create a plan with measurements.
- Cutting Wood: Cut the wood into the necessary pieces for your chosen design. Sand the edges for a smooth finish.
- Assemble the Holder: Assemble the pieces according to your design, ensuring that they fit together securely. You can use wood glue and screws to create a sturdy structure.
- Sanding & Finishing: Sand the entire egg holder to remove any rough spots and achieve a polished appearance. Applying a wood finish, such as oil or varnish, can enhance the wood’s natural beauty and provide protection.
11. Bathtub caddy
- Difficulty: Intermediate
- Time Required: 4-6 hours
Materials Needed:
- Wood (commonly hardwood for durability, like teak or oak)
- Screws or wood glue for assembly
- Sandpaper
- Wood finish or waterproof sealant
- Tools like saws, drills, and clamps
Steps:
- Design & Planning: Start by designing your bathtub caddy, considering its length, width, and features like slots for holding a book or wine glass. Create a plan with precise measurements.
- Wood Selection & Cutting: Choose quality wood and cut it into the necessary pieces for the caddy’s surface and sides. Sand the edges for a smooth finish.
- Assemble the Caddy: Construct the bathtub caddy by attaching the side pieces to the surface. Ensure it’s wide enough to span the bathtub and stable enough to hold items securely. Use screws or wood glue for assembly.
- Sanding & Finishing: Sand the entire caddy to remove rough spots and achieve a polished appearance. Apply a wood finish or waterproof sealant to protect the wood from moisture damage.
12. Jewelry organizer
- Difficulty: Intermediate
- Time Required: 3-5 hours
Materials Needed:
- Wood (commonly hardwood for durability)
- Screws, wood glue, or nails for assembly
- Sandpaper
- Wood finish or paint (optional)
- Small hooks or dowels
- Tools like saws, drills, and clamps
Steps:
- Design & Planning: Begin by designing your jewelry organizer, considering its size, shape, and the number of hooks or dowels needed. Create a plan with precise measurements.
- Wood Selection & Cutting: Choose quality wood and cut it into the necessary pieces for the organizer’s backboard, shelves, and any additional compartments. Sand the edges for a smooth finish.
- Assemble the Organizer: Construct the jewelry organizer by attaching the shelves and compartments to the backboard. Ensure they are securely fastened, and use screws, wood glue, or nails for assembly. Add hooks or dowels for hanging necklaces and bracelets.
- Sanding & Finishing: Sand the entire organizer to remove rough spots and achieve a polished appearance. Applying a wood finish or paint can enhance the organizer’s aesthetics and protect the wood.
13. Wall signs
- Difficulty: Beginner to Intermediate (varies with design)
- Time Required: Varies depending on complexity
Materials Needed:
- Wood board (plywood, pine, or other suitable wood)
- Saw
- Sandpaper
- Paints or wood finish
- Brushes or sponges for painting
- Stencils or vinyl lettering (optional)
- Hanging hardware (sawtooth hangers, D-rings, or wire)
Steps:
- Design and Planning: Decide on the size and design of your wall sign. Consider the message, style, and any graphics or decorative elements you want to include.
- Wood Preparation: Cut the wood board to your desired dimensions using a saw. Sand the edges and surfaces to create a smooth and even canvas for your design.
- Paint or Finish: Apply a base coat of paint or wood finish to the wood surface. Allow it to dry completely. You can choose to paint the entire sign or leave areas unpainted for a rustic look.
- Design Application: If you’re using stencils or vinyl lettering, carefully apply them to the sign’s surface. This will help you create precise and neat lettering or graphics. If you’re freehand painting, use pencil or chalk to lightly sketch your design before painting.
- Painting or Decorating: Use brushes or sponges to paint your design onto the sign. Acrylic paints are commonly used for this purpose. Allow each layer of paint to dry before adding details or additional colors.
- Detail Work: Add any additional details or accents to your design. This could include shading, highlights, or small decorative elements.
- Sealing: Once your paint is dry, seal the sign with a clear wood finish or sealant. This step protects the paint and gives the sign a professional, finished look.
14. Wooden candle holders
- Difficulty: Beginner
- Time Required: 1-2 hours per holder
Materials Needed:
- Wood blocks or logs
- Saw
- Sandpaper
- Wood finish (optional)
- Drill with spade or Forstner bit
- Candles or candle inserts
Steps:
- Design and Planning: Decide on the design and size of your wooden candle holders. You can choose to make single candle holders or multi-candle designs.
- Wood Selection: Select suitable wood blocks or logs for your project. Hardwoods like oak, maple, or cherry are good choices due to their durability.
- Cutting: Use a saw to cut the wood into the desired lengths, depending on the height of the candle holders. Ensure that the tops are level and flat for the candles to sit securely.
- Sand and Smooth: Sand the surfaces of the wooden pieces to remove any rough spots, splinters, or imperfections. You can start with coarse-grit sandpaper and progress to finer-grit for a smooth finish.
- Hollow Out: To create space for the candles, use a drill with a spade or Forstner bit that matches the size of your candles. Drill holes into the tops of the wooden pieces to the desired depth. Test the fit with your candles to ensure a snug fit.
15. Pet houses for pet owners
- Time Required: 10-16 hours
- Difficulty Level: Intermediate
Materials Needed:
- Plywood or suitable wood for construction
- Saw
- Screws or nails
- Hinges and latches (for doors)
- Roofing materials (e.g., shingles)
- Insulation (optional, for cold climates)
- Paint or wood finish (optional)
- Cushions or bedding (for interior comfort)
Steps:
- Design and Planning: Start by designing the pet house based on the type of pet and its size. Consider the dimensions, style, and any additional features you want to include, such as doors, windows, or a porch.
- Wood Selection: Choose the appropriate wood for the pet house, typically plywood or similar materials. Ensure it is safe for pets and resistant to weather.
- Cutting and Assembly: Cut the wood into panels and pieces based on your design. Assemble the pet house using screws or nails. Ensure the structure is sturdy and secure.
- Ventilation and Insulation: If needed, add ventilation holes to ensure air circulation. In cold climates, you can insulate the walls and roof to keep pets warm during winter.
- Roofing: Install roofing materials such as shingles to protect the pet house from rain and other elements. Make sure the roof is sloped to allow water runoff.
- Paint or Finish (Optional): If desired, apply paint or a wood finish to protect the wood and enhance the appearance of the pet house. Use pet-safe, non-toxic finishes.
- Doors and Latches: If your design includes doors, attach hinges and latches for easy access. Ensure that doors can be securely closed.
- Quality Check: Inspect the pet house for any sharp edges, loose parts, or potential hazards. Make any necessary adjustments or fixes.
- Interior Comfort: Add cushions, bedding, or other comfortable materials to the interior to provide a cozy space for pets.
16. Wooden bench
- Difficulty: Beginner to Intermediate (depends on design)
- Time Required: Varies depending on size and complexity, typically 4-8 hours
Materials Needed:
- Wood boards (usually hardwood or softwood like pine)
- Screws or wood glue
- Sandpaper
- Wood finish or paint (optional)
Steps:
- Design and Planning: Start by deciding on the size and design of your bench. Sketch a plan, including measurements and a list of materials you’ll need.
- Cutting Wood: Using a saw, cut the wood pieces according to your design. You’ll typically need two long pieces for the seat and two shorter pieces for the legs.
- Assembly: Assemble the bench by attaching the seat boards to the leg boards. You can use screws and wood glue for added stability. Make sure the legs are perpendicular to the seat for balance.
- Sanding: Sand all the edges and surfaces of the bench to smooth out any rough spots and ensure a clean finish.
- Finish: Apply a wood finish or paint if desired. This step adds both protection and enhances the bench’s appearance.
- Quality Check: Inspect the bench for any imperfections or loose parts. Make any necessary adjustments or fixes.
- Final Touches: Add any additional details or design elements to make your bench unique, such as carved patterns or decorative paintwork
For woodworking, the ideal woodworking bench height is generally considered to be at wrist height when standing upright with arms relaxed at your sides.
17. Wooden shelves
- Difficulty: Beginner to Intermediate (depends on design)
- Time Required: Varies depending on size and complexity
We’ve already mentioned a few wooden storage projects you can build and sell. Wooden shelves are another option. You can build various wood shelves, from floating shelves to bookshelves, and sell them for neat profits.
However, if you want to truly separate yourself from other woodworkers, you should focus on making durable shelves from solid wood. Laminate wood is a convenient solution for those looking for a quick fix.
However, they don’t last very long. A solid wood shelf is much more durable and lasts much longer. The good news is that most shelves are basic box frames that don’t take much time to build.
Only the height and widths differ. Always build your shelves with mobility in mind, though. You don’t want to struggle too much to relocate them to the customer’s location.
18. Coat rack
- Difficulty: Beginner to Intermediate (depends on design)
- Time Required: Varies depending on size and design
Materials Needed:
- Wood board or plank
- Hooks (metal or wooden)
- Screws
- Wall anchors (if needed)
- Sandpaper
- Wood finish (optional)
- Saw
- Drill
- Measuring tape
- Level
Steps:
- Design and Planning: Determine the size and style of your coat rack. Consider the number of hooks and their placement. Sketch a plan with precise measurements.
- Wood Selection: Choose a suitable wood board or plank for your project. Common choices include pine, oak, or walnut, depending on your preferred aesthetic.
- Cutting: Use a saw to cut the wood to the desired length. Sand the edges and surfaces to create a smooth finish.
- Hook Placement: Measure and mark the locations for the hooks on the wood. Ensure even spacing between hooks. Use a level to make sure the hooks are straight.
- Pre-drilling Holes: To make it easier to attach the hooks, pre-drill small holes at the marked locations.
- Attaching Hooks: Screw the hooks into the pre-drilled holes securely. Ensure that they are fastened tightly.
- Sanding: Sand the entire coat rack to remove any rough spots, creating a polished appearance.
19. Kitchen table
- Time Required: 12-18 hours
- Difficulty Level: Intermediate
The farmhouse style is a popular indoor decor style in the US and elsewhere. Most people like it because it allows you to bring almost anything into the home without making too many changes. Moreover, the farmhouse and rustic styles are low-maintenance.
You don’t need to change your chairs because the old style has gone out of fashion. If you’re a fan, a farmhouse-style kitchen table can be an excellent DIY woodworking project to build and sell.
It’s very easy to build, and you’ll have double the motivation knowing that your customers depend on the tables to enjoy family meals and make memories.
Most importantly, a single kitchen table can bring you a few hundred dollars. The only downside is that tables take more time to build and occupy more space than smaller woodworking projects.
20. Headboard and bed frames
- Difficulty: Intermediate to Advanced
- Time Required: 20-30 hours
The need for a place to sleep is universal. So, you can never go wrong making bed frames to sell. The best part is that bed frames are almost standard.
Typical sizes range from three feet wide to six feet wide, and the standard length is six feet. You don’t need to be too crafty when starting. Simply make rectangular beds in the standard sizes and display them for everyone to see.
However, you can add unique styles along the way. For instance, king-size beds are very popular and can earn you handsome returns.
Alongside bed frames, you should also consider building and selling headboards. Rustic headboards are particularly in demand though you also have a ready market if you specialize in modern styles.
21. Wooden game boards
- Difficulty: Intermediate
- Time Required: 4-8 hours
Board games, such as Betrayal at House on the Hill, Pandemic, monopoly, Cluedo, and Scrabble, are popular. Families use the games to wind down the clock and strengthen bonds.
Treasured classics, such as chess, are also a form of entertainment and education. Rarely will a family miss one of these games. To this end, you can make it your responsibility to build board games for your local community.
Of course, it takes significant effort to build detailed games like Cards Against Humanity. However, the crafts pay handsomely. Some of the game packages can fetch you over $200.
Don’t forget to make board games that are easy to store. For example, a hook or small hole at a corner of the board makes it easy to hang the game on the wall after playing.
22. Wooden planter boxes
- Time Required: 4-6 hours
- Difficulty Level: Beginner to Intermediate
Box planters are also in high demand, especially in spring and summer. You can build basic wooden boxes which homeowners can decorate and place or hang outside their homes on the porch or deck.
Alternatively, you can even build wooden planter stands to hang in the entryway. However, once you’re experienced enough, you can build wall planters for home gardening in homes where space is tight.
Wall planters don’t take any space on the ground and can be easily relocated. We recommend building these with pressure-treated wood for longevity. Also, ensure to finish them properly so they can withstand weather elements.
If you’re wondering about the right size for a wooden planter box, anything below one cubic foot will get plenty of customers. But, mostly, you’ll need smaller boxes.
Always pick the best wood to use for planter boxes for great results.
23. Picnic table
- Time Required: 10-16 hours
- Difficulty Level: Intermediate
As more people spend time outdoors, picnic tables are becoming more and more fashionable. It allows parents to spend more time with kids and gives kids somewhere to play with their friends.
If you want your child to explore their creativity in woodworking, consider checking out wood building kits for 10-year-olds that can help kickstart their journey.
24. Wooden soap dishes
- Difficulty: Beginner
- Time Required: 1-2 hours per dish
Another DIY woodworking project that will easily earn you money is making and selling wooden soap dishes. You may have realized that most soap dishes are made from plastic.
25. Birdhouses and feeders
- Time Required: 2-4 hours (for each)
- Difficulty Level: Beginner
You can also build and sell birdhouses to make money. The average birdhouse fetches $30, and you can make several in a week. So, you can make several hundred dollars in a week if you take the job seriously.
You can even make a few units that sell for $200 or more. The most important thing is to know the types of birdhouses to make and how to price them.
26. Coffee cup racks
- Time Required: 2-4 hours
- Difficulty Level: Beginner to Intermediate
Finding a way to store and organize coffee mugs is rarely a simple task. You’ll regularly find coffee mugs littering the entire kitchen and even living areas. Users don’t know where to put them after they’re done.
27. Wooden utensils – wood carving projects that sell
- Difficulty: Beginner to Intermediate (depends on carving complexity)
- Time Required: Varies depending on the number and type of utensils
Wooden utensils are another trending woodworking projects that you can build and sell for good profits. For instance, you can make spoons and scoops and display them in your store while advertising the same on social media.
28. Console tables – best-selling woodworking projects
- Difficulty: Intermediate
- Time Required: 10-15 hours
The next popular woodworking project to build and sell is console tables. Console tables are versatile furniture pieces that you can use in narrow spaces.
For instance, you can put one in the entryway so your guests have somewhere to put their bags and other items as they make their way into the house.
29. Lampstands
- Time Required: 2-4 hours
- Difficulty Level: Beginner
A wooden lampstand is standard in many homes. It provides a safe place to locate the bedside lamp or even living room lamps. Of course, lampstands are also decorative items that accentuate indoor decor.
30. TV stands
- Time Required: 8-12 hours
- Difficulty Level: Intermediate
TV stands are another best-selling woodcraft. It can be as simple as a rectangular frame with legs and a flat top where the TV stands. Or you can build something more elaborate with storage and shelves.
31. Wood coasters – popular woodworking projects to sell
- Difficulty: Beginner
- Time Required: 2-4 hours for a set
Finally, if you’re looking to start small, you can also begin by building and selling wooden coasters. Wood coasters are simple to make and help users hold drinks and protect other surfaces.
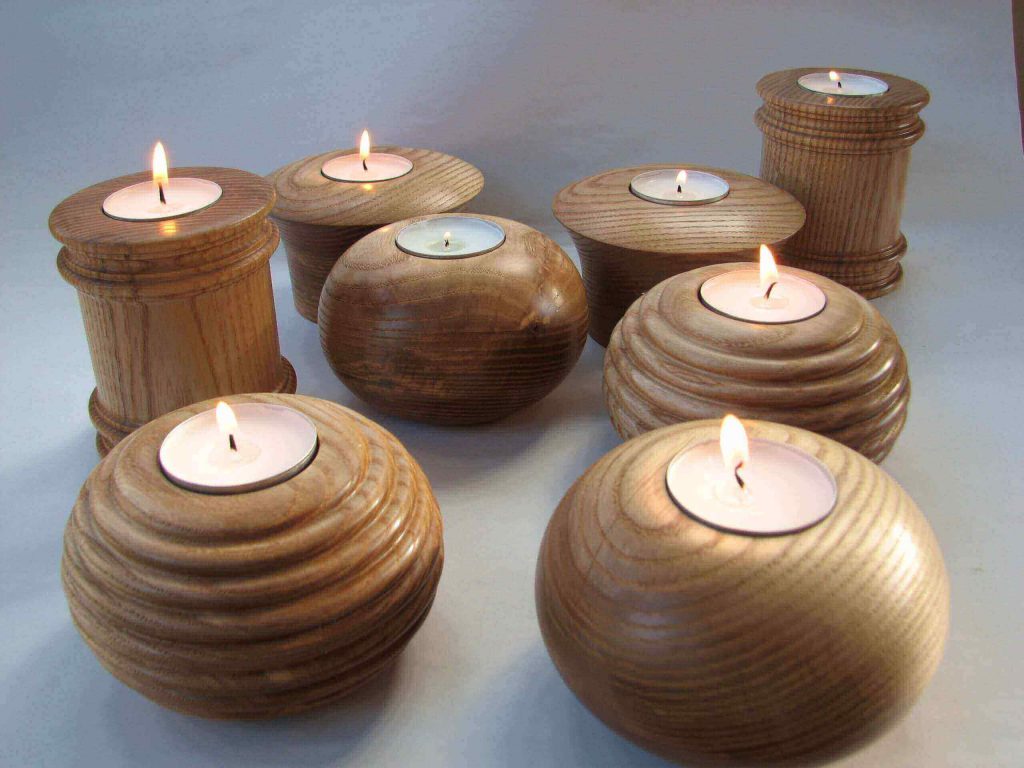
32. Wooden Tealight Holders
- Time Required: 1-2 hours (for each)
- Difficulty Level: Beginner
Making these tealight holders is such an easy task. You can make a set of them in an afternoon, using just a few basic woodworking tools. These make great wooden gifts for moms, friends, and family, and they’re also perfect for selling at craft fairs and markets.
You’ll only need tealight candles, a drill, wood glue, clamps, sandpaper, and some paint or a sealant of your choice to finish them.
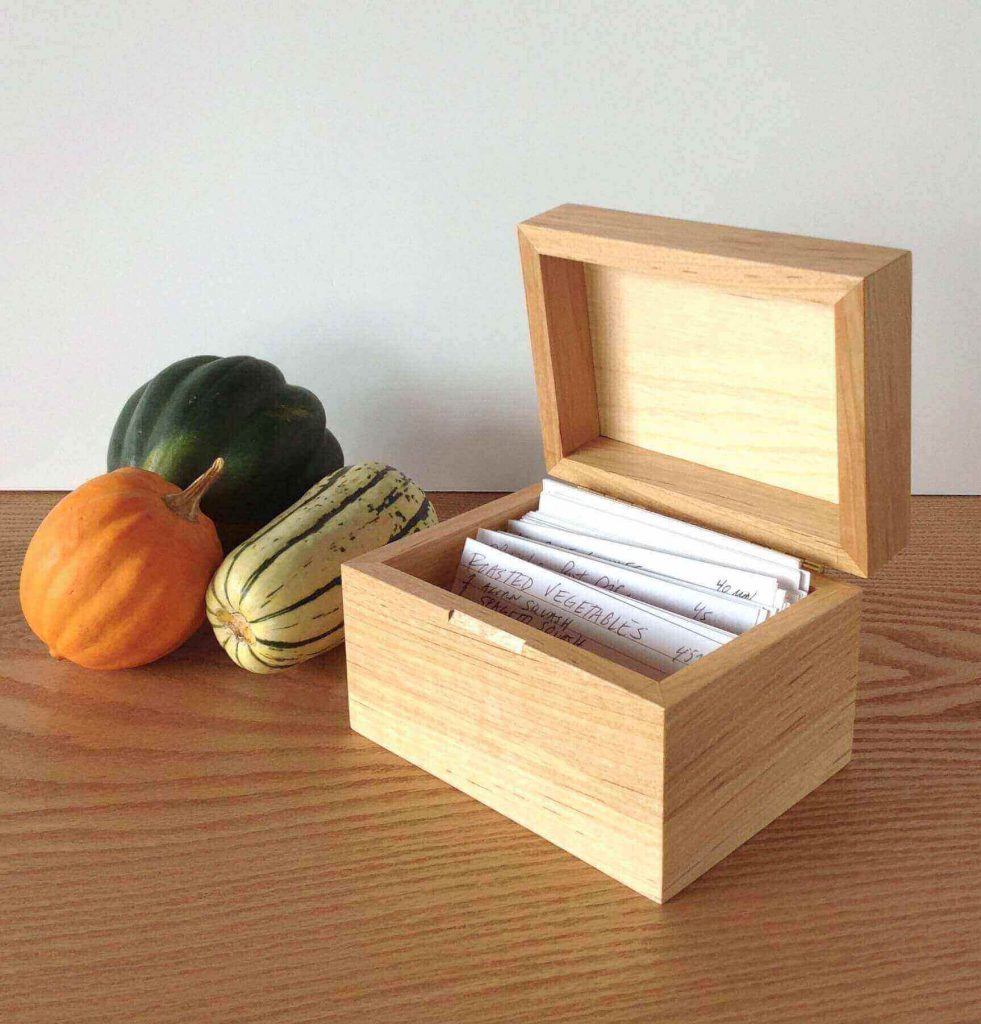
33. Wooden Recipe Box
- Time Required: 3-5 hours
- Difficulty Level: Beginner to Intermediate
This is another quick and easy woodworking project that you can make on a weekend. A recipe box is a great gift for anyone who loves to cook, and it’s also a perfect way to organize your own recipes.
After selling them, you’ll end up with a good profit and some extra storage in your kitchen.
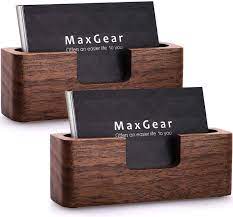
34. Wooden Business Card Holders – best selling wood crafts
- Difficulty: Beginner
- Time Required: 1-2 hours per holder
If you’ve ever been to a trade show or business conference, then you know that everyone loves freebies. What better way to promote your woodworking business than with a wooden business card holder?
You can find these holders for as low as $1 each and sell them for $5 each, so you’ll definitely make a profit. Making them is also a quick and easy process.
35. Wooden iPhone Docks and Stands
- Time Required: 2-4 hours (for each)
- Difficulty Level: Beginner to Intermediate
With the release of the new iPhone, there’s been a surge in demand for wooden iPhone docks and stands. These are perfect for selling at trade shows, conventions, and corporate clients.
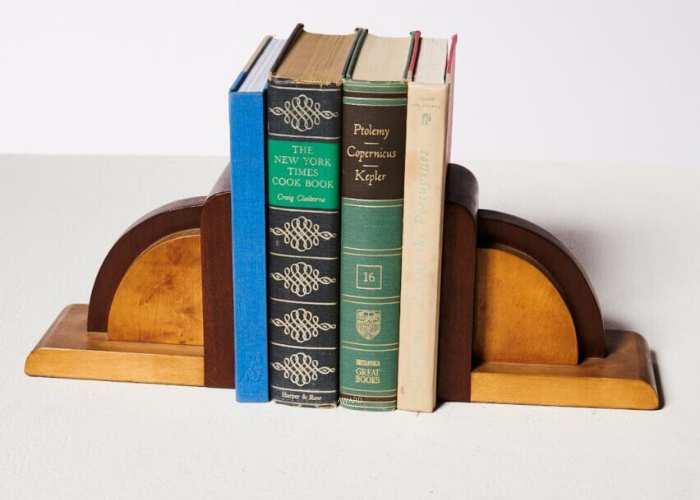
36. Wooden Bookends
- Time Required: 2-3 hours (for a pair)
- Difficulty Level: Beginne
Bookends are always a popular item, and they make great gifts for book lovers. You can find wooden bookends at most home stores, but they’re usually quite expensive.
Making your own bookends is a great way to save money and show off your woodworking skills. Plus, you can personalize them to match the recipient’s taste, and make a big profit out of the sales.
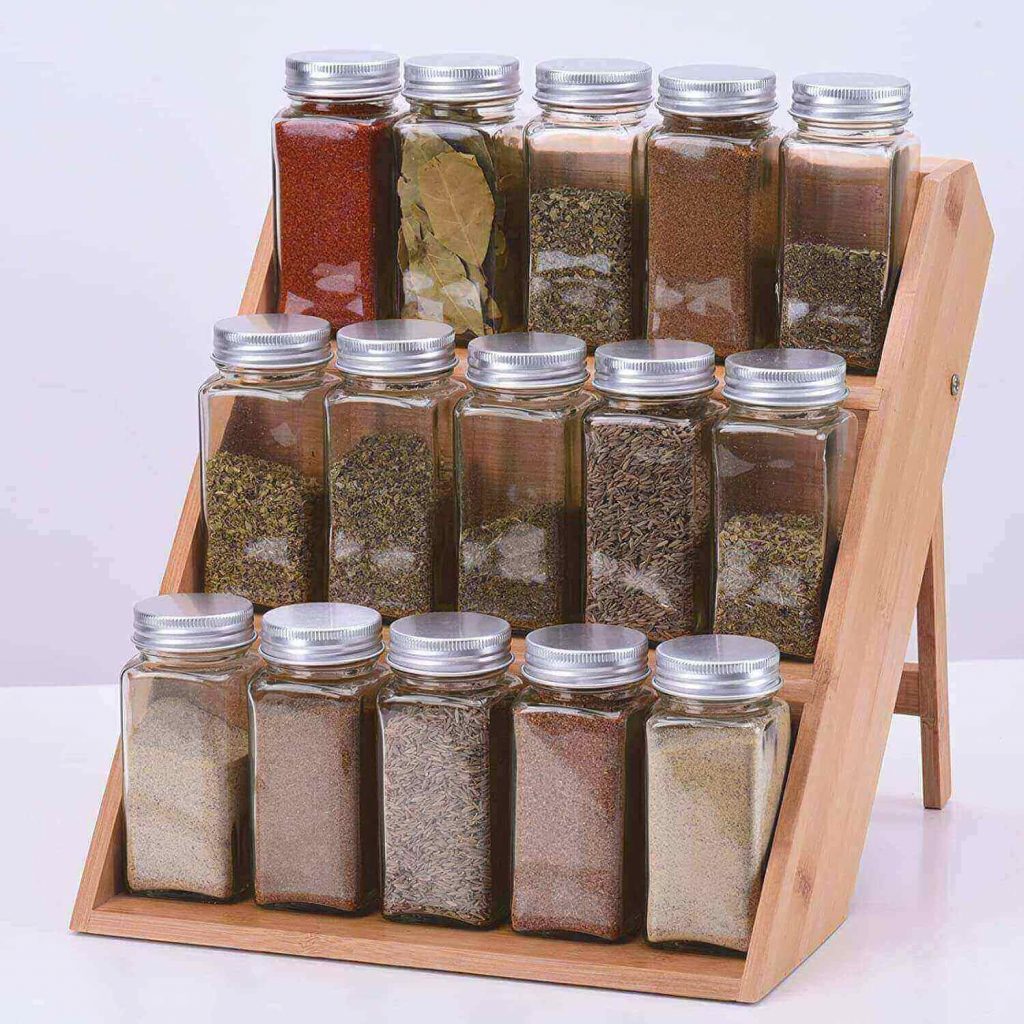
37. Wooden Spice Rack
- Time Required: 4-6 hours
- Difficulty Level: Beginner to Intermediate
You can never go wrong with making spice racks. They’re always in demand, and they make great gifts for anyone who loves to cook. You can find numerous designs online, or you can come up with your own original design.
This quick and easy project doesn’t require a lot of wood smother machines. Just be sure to sand and finish the wood before selling it.
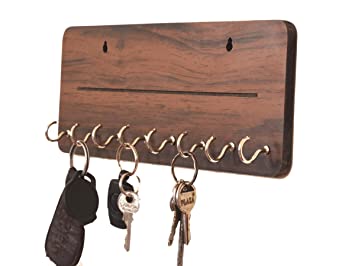
38. Wooden Keychain Holder
- Time Required: 1-2 hours
- Difficulty Level: Beginner
A keychain holder is a small and practical item that you can make out of wood. It’s perfect for selling at trade shows, corporate events, and conventions. You can also give them away as promotional items for your business.
This project requires very little time and effort, and you can easily make a few keychain holders in an afternoon.
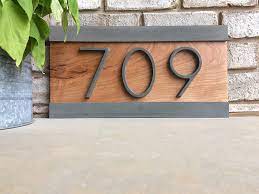
39. Wooden House Number Signs
- Time Required: 2-3 hours
- Difficulty Level: Beginner to Intermediate
This one of the best woodworking items to sell. Making wooden house number signs is a great way to personalize them for each client. You can find the address numbers at any home store, and then you just need to add your own unique touch.
This project is quick and easy, and you can make a profit of $10 or more per sign.
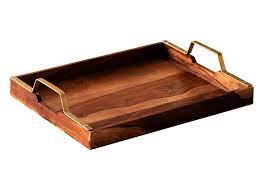
40. Wooden Serving Tray
- Time Required: 3-5 hours
- Difficulty Level: Beginner to Intermediate
A serving tray is a great addition to any kitchen and is perfect for entertaining guests. You can find wooden serving trays at most home stores, but they’re usually expensive.
Making your own serving tray is a great way to save money and show off your woodworking skills. Plus, you can personalize them to match the recipient’s taste.
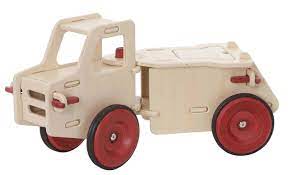
41. Wooden Ride-on Car
- Time Required: 10-15 hours
- Difficulty Level: Advanced
This is a great project for kids, and it’s perfect for selling at craft fairs and markets. You can find the wooden cars online or at most home stores. All you need to do is add your own paint job and wheels.
This project can fetch you a profit of $30 or more, so it’s definitely worth your time and effort.
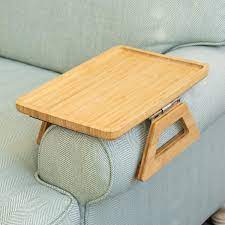
42. Sofa Arm Table
- Time Required: 3-5 hours
- Difficulty Level: Intermediate
Another best selling wood furniture is Sofa arm table. A sofa arm table is a great addition to any living room, and it’s perfect for holding drinks, snacks, and remote controls. Making a sofa arm table is a quick and easy project that doesn’t require many tools or materials.
You can find the wood for this project at most home stores, and you can easily make a profit of $10 or more per table.
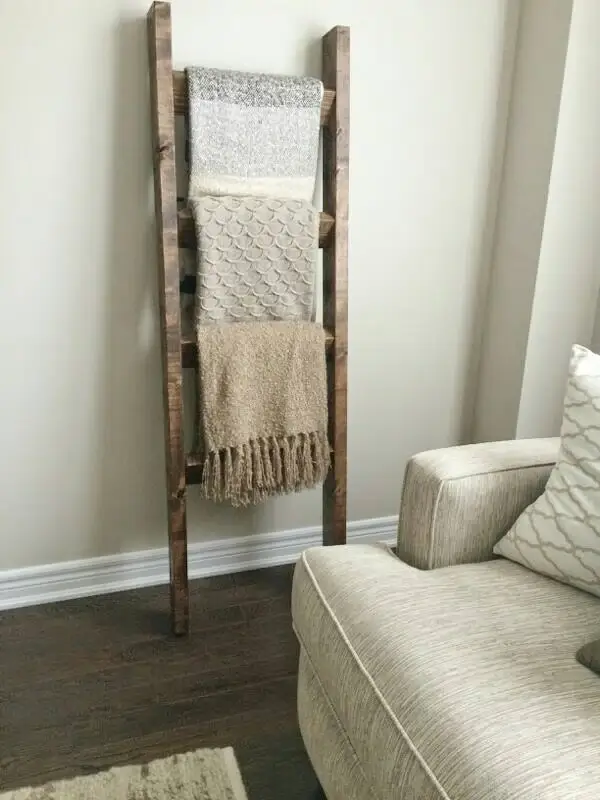
43. Wooden Blanket Ladder – household things to make with wood
- Time Required: 2-4 hours
- Difficulty Level: Beginner to Intermediate
A blanket ladder is a great way to organize and store blankets and makes a great decoration for any home.
You can find the wood for this project at most home stores, and you can easily make a profit of $10 or more per ladder.
This is a quick and easy project you can complete in an afternoon, and it’s perfect for selling at craft fairs and markets.
If you’re interested in learning more about projects, check out our guide on wood turning projects that sell to discover exciting ideas and opportunities.
Can You Make Money Off Woodworking?
Yes, woodworking is very profitable if you’re skilled, know your worth, and have a viable plan on what to make and where to sell it.
Of course, you can also get into woodworking as a hobby. However, you can gradually turn it into a hobby if you’re serious and earn a decent side income from the trade to supplement your day job. Or you can turn it into your day job.
The best part is that you’re not limited to making wooden items. You can also make money from your woodworking skills by;
- Teaching others woodworking
- Starting a woodworking blog
- Flipping furniture
How Much Money Can you Make Selling Woodworking Projects?
According to data released in May 2020, the median annual wage for the average woodworker is $33,750. However, dedicated woodworkers make way more.
For instance, the top 10% of woodworkers make $51,520, on average, while those who specialize in fine woodworking make $100,000+ per year. In general, most people doing woodworking full-time make $45,000+.
If you’re wondering about the bottom end of the scale, the last 10% of woodworkers make $23,210 annually. These are usually hobbyists who work 9-5 jobs and only focus on woodworking in the evenings and n weekends.
Woodworking Advantages (and Challenges)
Apart from making simple profitable woodworking projects, becoming a woodworker (part-time or full-time) has many advantages and disadvantages.
Advantages
- High job satisfaction
- Great job security
- Exercise your creativity
- It’s good for physical exercise
- You don’t need to work full-time
Disadvantages
- Risk of accidental injuries.
- The job requires raw muscle strength.
- You need special training to become a better woodworker.
- Inconsistent/seasonal work opportunities.
What you Need to Build Woodworking Projects that Make Money
The items you need to build woodworking projects to make money vary depending on the type of project. However, you need the following at the most basic;
- Wood: You need plenty of wood for your project. So, you should find a good source if you intend to make it a long-term engagement. The best places to get wood for your woodworking project are sawmills, hardware stores, and fine woodworking stores.
- Saws: You need at least two types of saws as you get started (you can acquire others later). The first is a circular saw to cut large wood pieces into the exact divisions you need. Secondly, you also need a jigsaw for precision cutting.
- Power drill: Although you can always use a hand drill, power drills save time and increase precision. A good power drill costs just under $1,000, though you can find modest models for around $300 to $500.
- Clamps: You certainly need a carpenter’s clamp as it often proves invaluable when you need to attach two or more pieces of wood when gluing or screwing.
- Sandpaper: You’ll need lots of sandpaper to smoothen the wood surfaces, though you can also save up and purchase a sanding machine. Beware that sandpapers come in different textures/ratings.
- Paint/stain: Finally, you should also budget for paints and stains for finishing. You’ll need multiple tins of each. However, we recommend waiting until you know the type of project before purchasing your paints and stains.
Easy Wood Projects That Sell: Where to Find the Market
Many budding woodworkers and DIY enthusiasts are initially worried about finding a ready market for their wooden items. Well, you don’t have to be. There are dozens of places where you can sell your crafts with relative ease. These include;
Sell to the local community
The first and best way to sell woodworking items is by inviting your local community to visit your store to shop your items. Word of mouth works excellently as you begin.
Later on, you can print flyers and posters for distribution to the local community and even attend local trade fairs to advertise your wares.
Facebook Marketplace
The Facebook Marketplace is open to everyone (not necessarily businesses) who wants to sell something – and it’s completely free.
To advertise your items, take a picture of the item, publish it on the marketplace, and add a short description to help customers understand the item and your business better.
Social media platforms
Other than the Facebook Marketplace, you can also advertise your items on various social media platforms for free.
For instance, if you want to sell on Instagram, you just need to snap a picture of the item, publish it, add a short description and ask people to buy.
A great way to get started is by using Instagram stories. This will allow you to show off your work in a fun and creative manner, and also help you connect with potential buyers.
To make the most of your Instagram stories, be sure to use an Instagram story maker. This will allow you to add text, graphics, and other effects to your videos and photos. You can also use this app to create short video clips of your work in progress. This will help potential buyers see just how much work goes into creating each project.
You can do the same on Facebook, Twitter, TikTok, etc.
Sell at an online store
E-commerce platforms such as Etsy and Shopify are excellent places to sell woodworking items as you expand your business.
You can set up a personal store within the platforms at a small monthly fee and target the tens of millions of shoppers who flock to the platforms every day. Amazon and eBay are other platforms to consider.
Build a dedicated website
Finally, you can build a website with a dedicated e-store to advertise and sell your wares. The best part is that platforms such as WordPress now make it very easy to build and set up an e-commerce website.
Woodworking Business Tips
The following are several business tips to help you save costs and maximize profits when you have some woodworking ideas to sell.
- Cut costs by buying in bulk.
- Build used tools and equipment.
- Take short courses to sharpen your woodworking skills.
- Use affordable woods such as pine wood.
- Practice with DIY projects
- Invest in power tools
- Utilize pallet wood/scrap wood/leftover wood.
- Use word of mouth to get the word out.
Looking to embark on a woodworking career but unsure where to begin? Explore our list of the best woodworking schools in the world to kickstart your journey.
FAQs
What wooden items sell well?
Some of the best wooden items that sell well are wooden signs, wooden pallets, kitchenware, furniture, surfboards, boxes, and picture frames. You can also make significant profits by making and selling chests, which people use for home decoration and to store items.
How do I start selling wood projects?
The best way to start selling your wood projects is to sell locally. For instance, many successful woodworkers started off selling their wares in garages before graduating to dedicated stores. Besides local selling, you can also easily sell your items online, especially on social media. It’s completely free.
How do I start a woodworking business?
You should begin with a plan. Once you have a plan, turn the woodworking business into a legal entity by getting the necessary permits and licenses. Then get insurance for your business to protect yourself from liabilities. From there, you can open a business account for the business, get an address, and set up a website for your business.
Read also: Woodworking wedding gift ideas.
What can I build at home to sell?
You can make at least 90% of the wooden items typically made in professional workshops at home and sell them offline or online. These include regular and fine furniture, cabinets, doors & door frames, windows & window frames, coat racks, fruit bowls, and wood carving designs. It all comes down to your interests.
Is woodworking a good career?
Yes, woodworking is a skilled trade that can be an excellent career choice if done correctly. First off, it’s a wide industry with plenty of exciting subsectors. Additionally, woodworking offers excellent work-life balance and plenty of physical exercises often lacking in other careers. Above all, woodworking is profitable.
Wood Products That Sell Summary
Building woodworking crafts to sell can be a lucrative side hustle if you put in the hard work. You can even turn it into a full-time job if you’re dedicated.
However, it requires basic woodworking skills, standard tools, and the right marketing channels. Above all, you must identify items that sell fast in your community or target market.
Fortunately, you now know some of the most profitable woodworking projects to build and sell. Give us a call or drop a comment if you need any assistance.