Can you apply Polyurethane over old Polyurethane? It sounds confusing, right? The wood was good enough with an old polyurethane finish. But now you’ve decided it’s time for a fresh coat.
Is it even possible to apply Polyurethane on the wood again? This poly advice article will break down a few concerns and provide simple ways to help you Polyurethane your furniture, floor, or cabinet, even if they were previously finished with a different type of Polyurethane.
Let’s dive in.
Can You Apply Polyurethane Over Old Polyurethane?
As long as you use the proper steps to prepare the finish, you can put Polyurethane over old Polyurethane. But before you apply the topcoat polyurethane, you might have to sand the surface lightly using a dull 120 to 150 grit abrasive or using a heavy floor buffer.
How Do You Recoat Polyurethane?
Recoating your surface depends on some factors:
- The polyurethane finish should not have wax buildup.
- The existing surface must be Polyurethane.
Going against this will make the surface reject the new finish.
Tools and Supplies for Applying Polyurethane over Old Polyurethane
Here’s what you’ll need if you want to apply water-based poly over oil-based poly.
- Polyurethane sealer (Find out which is better between water-based and oil-based polyurethane?)
- White vinegar.
- Water.
- Tack cloth.
- 5” to 3” bristle brush (natural bristles for oil; synthetic for water).
- 1/2 or 3/8 nap roller
- Extra roller cover or pad made.
- Respirator with a vapor cartridge – if using oil-based polyurethane only.
- 220 grit sandpaper or 320 and 400 sandpaper for finer grits.
How to Put Polyurethane over Old Polyurethane (Step by Step)
To recoat Polyurethane, follow these steps:
Step 1: Cleaning the Surface to Remove Dust
In a ratio of 10:1, mix water with white vinegar. Use a tack cloth to clean the wood surface. Alternatively, use a wood floor cleaner.
Step 2: Sand the Wood Surface
Use a 220 grit sandpaper or 320 and 400 for sanding the surface. This is to ensure that there are no high spots.
Step 3: Prepare the Poly
Use a stirring stick to stir the Polyurethane. However, don’t whip or shake it to prevent air bubbles from forming.
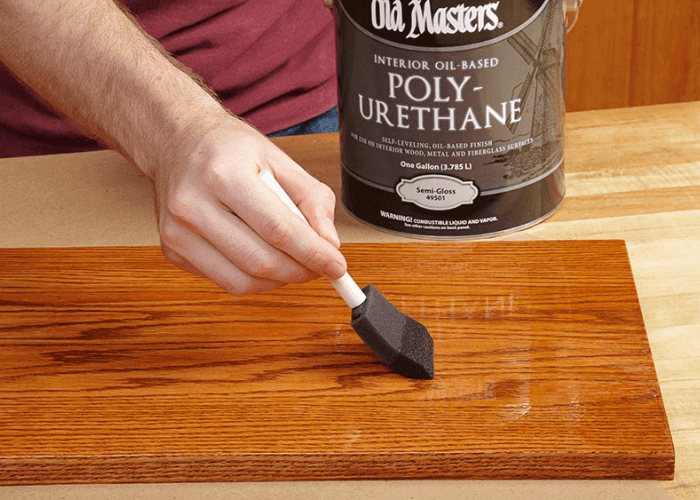
Step 4: Apply The First Polyurethane Recoat
Using the 5″ to 3″ brush, apply Polyurethane to the wood edges. Use a roller or pad to apply Polyurethane to the center of the surface is huge and give it 24hrs to dry.
Step 5: Sand the Surface Once More
Afterward, use steel wood (oil-based material) or an abrasive pad (for water-based Polyurethane) for sanding the wood lightly.
Step 6: Apply the Last Coat
Apply the last coat of Polyurethane as you did in step 4.
Step 7: Check the Finish
After it dries, check the finish for orange-peel texture. If an orange-peel texture is present, scratch the surface with moderate pressure using a coin; the finish should not peel away. If the surface flakes with moderate scratching, you might have to sand the floor and refinish it again.
Important Tip:
Before applying a succeeding coat, the floor needs to be lightly abraded to make the new coating adhere and give you a level finish. A process called screening.
Can I Apply a Second Coat of Polyurethane Without Sanding?
The simple answer is no; you can’t. However, if you want your surface to be good, there is no shortcut but to sand the surface before applying the second coat. Before sanding, give the Polyurethane enough time to dry and cure properly. Practically between 24 to 48 hours. Sanding between each subsequent coat will ensure you get the best results.
What Happens if You Don’t Sand Between Coats of Polyurethane?
Sanding between coats of Polyurethane is vital to your finishes. If you don’t’ sand;
- You risk ruining your finish when you apply the next coat.
- The wood surface may have high spots which create bubbles.
- You will have brush marks on your finish.
- You risk having dust particles in your finish.
Find out other risks in our article “Do you have to sand between coats of poly?”
Facts About Polyurethane
Brush across the wood grain before applying the finish.
All finishes soak on wood no matter how you apply. So why is it always advisable to brush across the grain to work the finish into the wood? Well, this makes the varnish even thicker.
The longer you brush, the thicker the coat will become. And when the coating gets thick, brush marks will be more pronounced, compromising the smoothness of the coat.
Read: Can you polyurethane over old varnish?
Don’t shake the Polyurethane as it may form bubbles.
If you shake the polyurethane can before applying it, bubbles will form in the finish. And even after brushing on the surface, bubbles will still appear. The majority of the bubbles, however, are a result of brushing. Therefore, to avoid bubbles in polyurethane finish, reduce turbulence caused by the rapid movement of the brush.
It is common to get bubbles on the coat whether the can is shaken or not. But don’t allow the bubbles to dry in the finish, even though they mostly pop out on their own.
If the bubbles get trapped, tip them using a brush, and they’ll break. Alternatively, add 5% or 10% mineral spirit to slow the drying and allow the bubbles more time to pop out on their own
Thin the first coat 50% to get a perfect bond.
Primers mostly create a strong bond for paint. This is because they have a higher ratio of binder to pigment. Considering all finishes are binders, they bond ideally even without other products.
To attain a perfect bonding between coats, apply a thin coat of Polyurethane up to 50% as the first layer and the coat will dry fast. The thinner the layer, the shorter the drying time.
Sand between coats to get a perfect bond.
The core reason for sanding a surface before applying another coat is to create a scratched surface which gives the next layer of finish an excellent adhesion. Besides, Polyurethane dries slowly. So, before applying the next coat, sand the surface first to remove dust nibs.
Use sandpaper to perfectly remove all the flaws without creating deep scratches on the floor. Again, I will recommend a regular or {p} grade sander. If you use a flat block, your sandpaper may clog, creating deeper scratches into the finish.
How Do You Restore a Polyurethane Finish?
Correcting polyurethane finish strokes is so easy. However, the procedures do differ depending on the damaged surface. So, let’s see how you can restore the polyurethane finish on various surfaces.
Cabinets
Where the cabinets are doesn’t matter – whether in the bedroom or the kitchen, cabinets get exposed to excess moisture or cooking oil, which damages their finish. So whenever you detect oil or water spots on the surface of your cabinet, use Miniwax Wood Cabinet Cleaner to wipe them off.
After cleaning, apply Minwax Wipe-On Poly. Use the wet sanding technique to ensure no scratches on the cabinet surface.
Furniture
Most of the furniture today has clear coats of protective finish like Polyurethane. Unfortunately, the furniture wears and tear with time, leaving scratches on the surface. To fix this, use the Minwax Wood Finish Stain Markers. These products are available in your local store in up to eight colors.
The product will remove minor blemishes without spending a lot of money on costly refinishing. However, you might have to use Minwax Blend-Fil Pencil for deeper scratches that require filling. They fill the holes on the furniture’s surface and restore the wood’s original color.
Wooden floors
Every day, your floor wears and tears due to the grit on the sole of your shores. You can reduce this by strategically placing doormats. Alternatively, regular cleaning and vacuuming with Minwax Hardwood Floor Cleaner minimize wear and tear of the floor surface.
For refinishing, you can learn how to apply Polyurethane to wood floors.
Roting wood
Water is the worst enemy of wood. It softens and causes decay even in the toughest hardwoods given enough time. So if you come across any softened wood, use a screwdriver to get rid of the rotten wood fibers.
Allow the area to completely dry and apply a liberal coat of Minwax Wood Hardener. Give it time to penetrate the wood grains and harden the wood fibbers. Next, fill the remaining cavities with Minwax High-performance Wood Filler.
Nail holes
Whether the nail holes are in trim work or furniture, quickly fill the holes using Minwax Wood Putty. Next, apply this product to the nail hole and wipe off the excess with a soft cloth.
Read also: Ways to pick a polyurethane finish for hardwood flooring.
How Do You Fix Streaky Polyurethane?
In the process of applying Polyurethane, you might end up with streaky poly. To fix streaky and wet Polyurethane, especially when encountering issues like polyurethane not drying, clean up the wood with a damp piece of cloth to check if the surface is even.
If the poly is thick, sand the surface once more. If the poly is not thick, add another coat of Polyurethane. Check again if you have achieved an even sheen and buff it with wax.
Why Did My Polyurethane Turn White?
Suppose you apply a quick-drying finish to a surface with high humidity; chances are high the finish will turn milky. This is because the finish hardened before the moisture trapped in the finish fully evaporated.
However, this is never the case with Polyurethane. Not even the water-based one. Polyurethane turns white because of the accumulation of zinc oxide—an element used as a flattening agent.
Polyurethane manufacturers add zinc oxide to create a satin finish and as a flattening agent at the same time. Zinc oxide is of service as it helps cut the gloss out of the sheen. It also helps dispense reflected light.
As a rule of thumb, stir the poly well before use as Zinc oxide tends to settle at the bottom of the can.
To fix the white spots, sand it down if it is a high spot and draw out the moisture.
Ways To Prevent the Recurrence
If you want to solve the issue with cloudiness in your Polyurethane, consider these tips:
- Stir: Stir your varnish thoroughly. This should be done until you no longer see white residue on the stirring stick.
- Let the wood dry well: Ensure that the wood is completely dry before applying a new coat of Polyurethane. If you’re not sure that the wood is dry, use a few drops of water. If the water doesn’t soak in fast, then the wood surface is not dry to paint
- Never build up coats: If it’s a must that you build up coats using a gloss material, then use satin for the last two coats.
What Is the Best Applicator for Polyurethane?
You can brush, roll, wipe or even spray Polyurethane.
For brush lovers, bristled brush is known to offer a perfect finish.
But you are also not restricted to one type of brush. For example, even though expensive, form brushes work perfectly for flat surfaces.
Related read: Brush on polyurethane vs wipe on polyurethane.
How Do You Polish or Smooth the Final Coat of Polyurethane?
After applying your desired number of coats, you might want to spray minwax Polyurethane to the final coat and allow it to cure overnight.
Using a 1500 grit sandpaper, remove any dust nibs and smoothen sand the last poly coat before applying automotive paste wax, giving the floor a perfect shiny finish. You can wax using either a soft cotton rag or a polishing pad.
You may want
Polyurethane over Polyurethane FAQs
1. Can You Put Too Many Coats of Polyurethane?
Many coats of Polyurethane won’t do much good. So it is generally not recommended. Applying up to four layers of Polyurethane will compromise the beauty of your floor.
2. Is One Coat of Polyurethane Enough?
For outstanding results, you might have to use two to three coats of poly. But before applying the next layer, you will have to wait for quite some time to allow Polyurethane to dry and cure well.
3. Can You Use a Roller to Apply Polyurethane?
The simple answer is yes, and you can use a paint roller to apply Polyurethane. Using rollers eliminates brush lines and helps you apply the right amount of Polyurethane.
4. Do You Sand the Last Coat of Polyurethane?
Yes, you can but slightly. If you must sand, you might have to use 600 grit sandpaper. Although this practice is not highly recommended, it leaves a scuffed-looking surface on your finish.
Final thoughts?
Can You Apply Polyurethane Over Old Polyurethane? The answer is yes.
This sealer plays a critical role in protecting wood surfaces, and the result of recoating poly will always be fantastic.
Be sure not to leave any bubbles on your finish.
I want to re-polyurethane the base of a dinning room table what is the best way, should I sand likely then poly,
or sand off all n start over?
Sanding off all would give the best resuts
Can I apply this process with oil based poly over a table that has been previously coated with 2 pack poly.?
I intend to clean the table then sand the fine, shallow scratches with 350 grit
( sanding in the direction of the grain) and re-cleaning before applying oil based poly with a small roller.
Sure, that would work
Hi David
Thanks for the advice. I will give it a go. Cheers John
I need to recoat a polyurethane finish on 30 yr old kitchen cabinets, originally finished with polyurethane. I am concerned about oil-y contamination present on the surface. Would it be a mistake to scrub with TSP before applying new coat?
Sure thing, Polyurethane does not adhere properly to greasy or oily surfaces, so you must clean the contaminated surface thoroughly with detergent or TSP.