Ever wondered if you can put polyurethane over paint and what the benefits could be?
You’re not alone; even seasoned DIYers pause at this question.
Here’s an eye-opener: the right application can extend your paint job’s lifespan by 50%! And with a track record of 15 years in materials science and home improvement, I’m uniquely qualified to guide you.
In this article, you’ll learn the ins and outs of applying polyurethane over paint—from compatibility tests to pro tips
But first things first;
Can polyurethane be used over paint?
Yes, you can put poly over paint. As long as the paint is fully cured and clean, you can apply both water-based and oil-based polyurethane over any paint. These paints include latex, chalk, enamel, and spray paint. However, you must be cautious of discoloration, especially from oil-based polyurethane.
What is Polyurethane?
It’s basically a super-versatile polymer. You’ll find it in everything from your comfy couch to the insulation in your walls. There are two main types: water-based and oil-based.
- Water-Based: Think of this as the “nice guy” of the polyurethane world. It’s eco-friendly, has low odor, and dries super fast. Plus, it leaves a clear finish.
- Oil-Based: This one’s the tough guy—durable but smells stronger and takes its time drying. It leaves an amber tint, which some people love for that vintage vibe.
What is Paint?
Moving on to paint, you’ve got two big players: water-based and oil-based.
- Water-Based: Quick to dry, easy on the nose, and easy to clean up. It’s super versatile, great for both indoors and outdoors.
- Oil-Based: This is your go-to for heavy-duty stuff. It’s strong but needs more time to dry and has a higher odor. It leaves a glossy finish that really stands out.
Can you put polyurethane over latex paint?
Yes, you can apply polyurethane over latex paint to add a durable, protective finish. Allow the latex paint 4-8 hours to dry dry before applying polyurethane.
Apply a water-based polyurethane using a quality brush or sprayer. Multiple coats may be needed, and sanding lightly between coats ensures the best results.
You can also prefer to use oil-based polyurethane over latex paint without any hassle.
And you can put polyurethane over chalk paint?
Can You Put Polyurethane Over Enamel Paint?
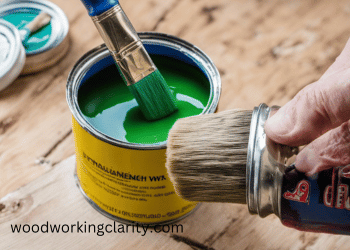
Yes, you can use polyurethane on enamel paint. Both water-based and oil-based versions work.
Here’s the kicker: enamel paint cures faster. You don’t have to wait 21 to 30 days. A short 7-day wait can suffice, but 14 days is ideal.
Once it’s good and cured, go ahead and add that polyurethane.
Can You Use Polyurethane Over Spray Paint?
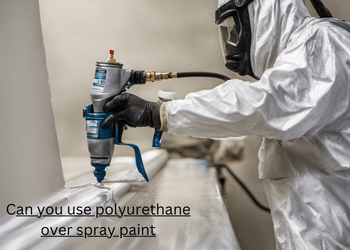
Yes, you can put polyurethane over spray paint if given time to cure. Allow the wood spray paint at least 24 hours to dry.
Clean the surface with a mix like TSP and warm water.
Scuff it lightly with 320-grit sandpaper for better adhesion.
For a smooth, bubble-free finish, apply the polyurethane with a high-quality brush or a sprayer rather than a roller, which can introduce bubbles.
Can you spray polyurethane over paint?
Yes, you can spray polyurethane over paint. Polyurethane is commonly used as a protective coating over painted surfaces to provide durability and a glossy finish.
Before applying polyurethane, ensure the paint is fully dry and cured.
Properly prepare the surface, clean it thoroughly, and follow the application guidelines of the polyurethane product. Use the appropriate spraying equipment and techniques.
Can you use wipe-on poly over paint?
Yes, you can use wipe-on polyurethane over paint to enhance durability and finish. To achieve optimal results, ensure the painted surface is clean, dry, and lightly sanded with fine-grit sandpaper.
Apply the wipe-on poly with a lint-free cloth in thin, even coats. Typically, wipe-on poly dries in 2-3 hours, but consult the manufacturer’s guidelines for precise drying times.
How to Apply Polyurethane Over Paint
Supplies Needed:
- Sandpaper (220-grit and 320-grit)
- Tack cloth or a microfiber cloth
- Painters tape
- Polyurethane (Water-based or Oil-based)
- Paintbrush or foam brush
- Paint tray or disposable container
- Protective gloves
- Respirator mask
- Safety goggles
- Drop cloth
- Stir sticks
- Rags
- Mineral spirits (if using oil-based polyurethane)
Steps to Apply Polyurethane Top coat over Paint
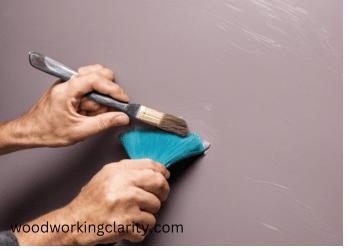
Step 1: Suit Up for Safety
Alright, folks, step one is all about playing it safe. Safety first, right?
So, grab those safety gloves to keep your hands chemical-free. Pop on some goggles to shield your eyes from any unexpected splashes, and don a mask to keep those fumes at bay.
Skipping the safety gear is a big no-no. If you’ve got pets or little ones running around, ensure they’re safely out of the workspace, okay?
Harmful fumes and accidental spills are more than just an inconvenience; they’re a health hazard.
Step 2: Prepare Your Workspace
On to step two: getting your workspace ready for action.
Start by clearing the area—yes, even that heavy couch has got to go. Once that’s done, spread out some drop cloths. This is your safety net for any accidental drips or spills. Cleaning wet polyurethane off a floor isn’t a fun job.
Here’s what not to do: Don’t use newspaper or thin plastic sheets as a substitute for drop cloths. They might tear or soak through, and you’ll end up with a mess you didn’t plan for.
Step 3: Optimize Ventilation
Ventilation is crucial here, both for your health and the quality of your finish. Pop open those windows to get the air moving.
If you want to go the extra mile, set up an exhaust fan that points outside. This will help yank those pesky fumes right out of the room.
Never, and I mean never, work in a space without good airflow. Why? Breathing in too much polyurethane fumes can cause headaches, dizziness, and even respiratory issues.
And trust me, oil-based polyurethane packs a bigger punch in the fumes department than water-based ones.
Alright, ventilation check done? On to the next step.
Step 4: Assemble Supplies
Let’s get all the supplies in one place. Grab a high-quality can of polyurethane.
Next, if you’re using oil-based poly, get a natural bristle brush. For water-based, a synthetic brush is your best bet. Don’t forget some 220-grit sandpaper too!
Tip: Get everything together before you start. There’s nothing worse than realizing you’re missing something crucial when you’re knee-deep in the process. It throws off your groove and wastes time.
Alright, got all your supplies? Sweet, let’s keep rolling.
Step 5: Sand the surface

Grab your 220-grit sandpaper and start at one corner of the surface and move in a circular motion.
Light, even pressure is your friend here; we’re aiming for just a tad bit of texture, not deep grooves.
What Not to Do: Don’t go overboard by pressing too hard or using a coarser grit. That’ll just create marks that you’ll have to fix later. And hey, don’t forget to sand the edges and corners, they want to look good too.
A gentle sanding not only helps the polyurethane stick better but also makes the finish look professionally smooth.
Step 6: Clean-Up
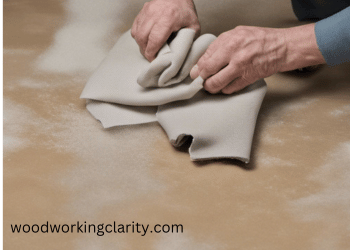
Alright, you’ve sanded like a pro, but now we have a little mess to clear up.
Grab a tack cloth or a lint-free cloth and gently wipe away all that sanding residue. Start from one end and work your way to the other to make sure you don’t miss any spots.
What Not to Do: A damp cloth might seem like a quick fix, but inappropriate. Moisture and polyurethane are not BFFs. A wet surface can mess with adhesion and slow down drying time.
Step 7: Stir the Pot—Gently
Pop open the can and grab a stirring stick. Now, stir gently in a circular motion.

Imagine you’re making a fine sauce; you don’t want to rush this step. If the polyurethane seems too thick, you can thin it out slightly according to the manufacturer’s guidelines.
Stirring the polyurethane properly ensures it mixes well, giving you a consistent, professional-grade finish. So keep it slow and steady.
What Not to Do: No maraca moves here, please! Shaking will introduce bubbles, and bubbles are the nemesis of a smooth finish.
Step 8: Patch Test
Pick a discreet spot, like behind a table leg. Apply a small amount of polyurethane and wait 24 hours.
After 24 hours, inspect the spot. If it’s smooth with no issues like bubbling or peeling, you’re good to go.
If not, you’ll need to reassess—either your paint and polyurethane aren’t compatible, or your surface prep needs tweaking.
What Not to Do: Don’t skip this step; a bad reaction means redoing the polyurethane job.
Step 9: Apply the First Coat
Dip your brush about an inch into the polyurethane, then lightly tap it against the can’s edge to remove excess. Apply using long, even strokes, going with the grain of the wood for the best finish.
What Not to Do: Avoid applying the polyurethane too thickly, as this could result in an uneven, sticky finish that takes forever to dry.
Pro Tip: Work at a steady pace and don’t rush. The goal is smooth coverage, so take your time.
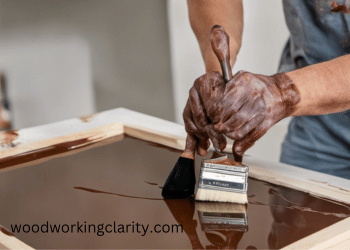
Step 10: Wait and Sand
Once your first coat is dry, gently sand the surface based on the manufacturer’s recommended drying time of 4-6 hours.
Use 220-grit sandpaper and go with the grain of the wood. You’re aiming to scuff the surface just enough for the next coat to adhere well.
What Not to Do: Don’t apply a second coat of poly without sanding.
Don’t press too hard while sanding; a light touch is all that’s needed. You want to remove minor imperfections like raised fibers or bubbles, not the newly applied polyurethane itself.
Pro Tip: After sanding, wipe the surface with a tack cloth to remove any sanding dust before applying the next coat. This ensures a smooth finish.
Step 11: The Final Coat
Apply your final coat just like you did the first.
However, if the area you’re working on will see a lot of action—like a floor, a kitchen table, or a child’s playset—you may want a third coat for extra durability and longevity.
Step 12: Final Touches
Congratulations, you’ve made it to the finish line.
Gently peel off the painter’s tape to reveal your masterpiece. Clean your polyurethane brush and tray immediately.
If you used water-based polyurethane, a simple rinse with warm water will do. For oil-based, you’ll need mineral spirits to get everything clean.
Don’t yank off the tape too quickly, as it could damage your freshly coated surface.
Pro Tip: Avoid heavy use for at least 48 hours to let the polyurethane cure fully.
Can you put polyurethane over water-based paint?
Yes, you can put polyurethane over water-based paint. Polyurethane is compatible with water-based paint and can be applied as a protective topcoat.
Ensure the water-based paint is fully dry and cured before applying polyurethane. Follow the application guidelines provided by the polyurethane product manufacturer to achieve the best results.
Can you put polyurethane over oil-based paint?
Yes, applying polyurethane over oil-based paint requires attention to detail. Ensure compatibility between the paint and polyurethane products. Allow ample drying time for the oil-based paint to cure.
Conduct a small test to check for any unwanted reactions. Be aware of potential yellowing effects and provide proper ventilation during application.
Should you put polyurethane over paint?
Applying poly over paint adds a protective layer that enhances durability and longevity. Polyurethane acts as a sealant, offering a barrier against moisture and wear, which is particularly useful for high-traffic areas like floors or frequently used furniture. It also gives a finished, professional look, enhancing the paint’s sheen.
- Enhanced Durability: One of the primary benefits is increased durability. This protective layer shields the paint from chipping, peeling, and general wear and tear.
- Moisture Resistance: Polyurethane acts as a sealant, creating a barrier that helps protect the painted surface from moisture. This is particularly advantageous in bathrooms, kitchens, or outdoor settings where moisture is a concern.
- Improved Aesthetics: Applying polyurethane can elevate the look of a painted surface, giving it a finished, professional appearance. It can also enhance the paint’s natural sheen.
- UV Protection: Some types of polyurethane come with added UV protection, which can be beneficial for outdoor items or surfaces exposed to direct sunlight, helping to prevent fading.
- Ease of Cleaning: A polyurethane coat makes the surface easier to clean, creating a smoother, less porous finish. This makes it more resistant to stains and easier to wipe down.
- Enhanced Color: Polyurethane can make colors appear richer and more vibrant, which is especially beneficial for decorative or artistic pieces.
- Versatility: Polyurethane can be used on a variety of surfaces including wood, concrete, and more, providing flexibility in its applications.
- Longevity: A well-applied polyurethane coat can extend the life of your paint job, saving you both time and money in the long run by reducing the frequency of needed touch-ups or repaints.
- Chemical Resistance: A coat of polyurethane can offer some level of protection against household chemicals, making it a good option for surfaces like countertops or workshop tables.
- Customizable Sheen: Polyurethane comes in various finishes from matte to high gloss, allowing you to choose the level of shine you desire for your painted surface.
Using Water-Based Polyurethane Over Paint
Pros:
- Quick Drying Time: Water-based polyurethane dries significantly faster than its oil-based counterpart, allowing you to complete your project more quickly.
- Low Odor and Low VOC: Being low in volatile organic compounds (VOCs) and having a minimal odor, water-based polyurethane is a more eco-friendly option and makes for easier indoor applications.
Con:
- Less Durability: While convenient and eco-friendly, water-based polyurethane is generally less durable than oil-based versions, making it less suitable for high-traffic or outdoor areas.
What is the best polyurethane over paint?
The best polyurethane to use over paint depends on your specific needs. For indoor projects, water-based polyurethane is ideal due to its low odor and quick drying time.
For outdoor or high-traffic areas, oil-based polyurethane offers superior durability. Always opt for a high-quality product and conduct a patch test for compatibility.
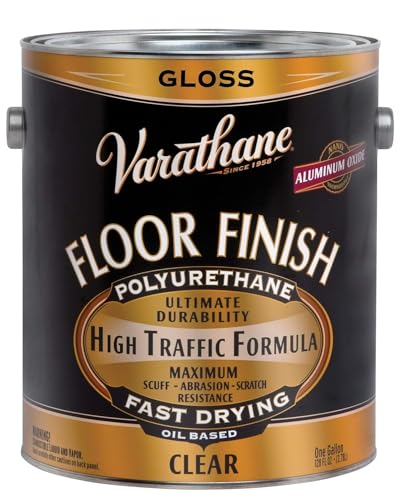
- Oil-based wood floor finish - Classic Clear Gloss
- Excellent self-leveling eliminates brush marks
- Delivers great scratch & mar resistance
How long should the paint dry before applying polyurethane?
Wait 24 – 72 hours for the paint to dry completely before adding polyurethane.
If unsure if the paint has fully cured, wait an extra day or two to be safe. Water-based paints generally dry within a few hours to a day, while oil-based paints may take around 24-48 hours.
However, drying time can vary based on factors like humidity and temperature. Always consult the manufacturer’s instructions on the paint can for the most accurate guidelines.
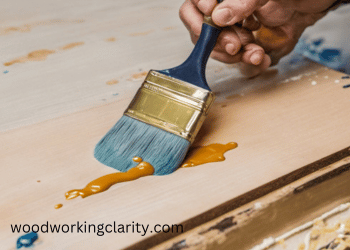
How Can You Determine If the Paint Is Dry or Cured?
To determine if the paint is dry, firmly touch the paint’s surface in a discrete area. If the paint is not sticky or tacky, then it is dry.
To determine if the paint is cured, poke the paint with your fingernail. If your nail leaves an indentation, then the paint is not cured. However, the paint has fully cured if there is no mark.
Don’t apply a coat of polyurethane varnish until the paint has fully cured. Otherwise, the cleaning and sanding process will ruin the paint and damage the wood.
Post-Application Care
Taking care of your tools and finish is crucial for long-lasting results.
Cleaning Your Tools
Cleaning brushes doesn’t have to be a hassle. For oil-based poly, you’ll want mineral spirits. For water-based, warm water and soap do the job.
Always let them dry fully before storing.
Maintaining the Polyurethane Finish
Keep that finish sparkling with a gentle wipe using a soft cloth and mild detergent.
For extra sheen, a bit of furniture polish works wonders. Just buff gently.
Long-term Care Tips
For the long haul, avoid direct sunlight and extreme conditions. Coasters and mats are your surface’s best friends. If you notice minor damages, touch-up kits are your go-to solution.
FAQs
Can Minwax polyurethane be used over paint?
Yes, Minwax polyurethane can be used over paint. Minwax offers a range of polyurethane products that are specifically designed to be applied over painted surfaces.
They provide protection, durability, and a beautiful finish. Follow the instructions provided by Minwax for the best results.
Should you use polyurethane over painted floor?
Adding polyurethane over painted floors can extend their life and enhance their look. Just be sure the paint is fully cured, which usually takes at least 24 hours.
Clean and lightly sand the surface before application. Always do a patch test first to ensure the paint and polyurethane are compatible.
Can You Put Polyurethane Over White Paint?
Yes, you can put polyurethane over white paint, but it is highly likely to be yellow. This is the one scenario in which even water-based poly will yellow.
As a result, many manufacturers tell you not to put it on white paint for fear you won’t like the outcome.
Learn how to spray polyurethane finish today.
Can you put clear polyurethane over paint?
Yes, you can put clear poly over paint. Clear polyurethane is preferred for its durability, scratch and moisture resistance, ability to enhance appearance, UV protection, and versatility.
It provides a strong and long-lasting protective layer, adds a glossy finish, and works on various surfaces. Consider project requirements and manufacturer instructions when choosing a coating.
Can you put polyurethane over painted furniture?
Yes, you can put polyurethane over painted furniture. Polyurethane can be applied over different types of paint, including latex, oil-based, acrylic, chalk, and enamel.
Ensure the paint is fully dry and cured before applying polyurethane. Follow manufacturer instructions for compatibility and best results.
Can you put urethane over paint?
Yes, you can put urethane over paint. Urethane, specifically polyurethane, is often used as a protective topcoat over painted surfaces.
It provides additional durability resistance to scratches and moisture and can enhance the appearance of the paint by providing a glossy finish. It is commonly used on various surfaces such as wood, metal, and even certain types of plastic.
Further, Read on: Can You Paint Over Polyurethane
5 Things to Avoid When putting polyurethane over paint
- Avoid applying polyurethane over fresh paint: Wait until the paint has fully cured to prevent potential chemical reactions or unwanted texture changes.
- Avoid excessive brush strokes: Overworking the polyurethane can lead to streaks or bubbles in the finish. Use smooth, deliberate strokes and avoid going over the same area repeatedly.
- Avoid applying in extreme temperatures: Extremely hot or cold environments can affect polyurethane’s drying and curing process, leading to uneven results. Choose moderate temperature conditions for optimal application.
- Avoid using a low-quality brush: Using a cheap or poor-quality brush may result in bristle marks or shedding, compromising the smoothness of the polyurethane finish. Invest in a high-quality brush for a professional outcome.
- Avoid heavy-handed application: Excessive polyurethane can lead to drips, sagging, or an uneven finish. Use thin, even coats, and allow adequate drying time between each layer to achieve a flawless result.
Final Thoughts on Can You Use Polyurethane Over Paint?
As you have seen in this article, you can apply polyurethane over paint as long as it has cured. We have also made the important distinction between drying and curing so you don’t ruin your painting job.
If the paint takes too long to dry, you know how to speed up the process.
With all of this knowledge at your fingertips, it is time to put it to the test. But first, you need to decide – will you be using water-based polyurethane or oil-based polyurethane? I know what I’d choose.

