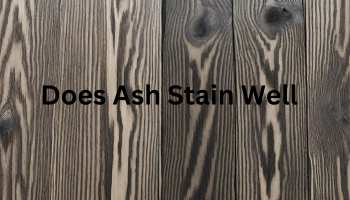
You’ll find ash wood on the handle of most garden implements, in kitchen cabinets, food containers, furniture, flooring, and more. Ash wood is one of the most common hardwoods found in our homes.
It comes from ash trees and has a beautiful beige to light brown color that is often stained to look like oak and used as a low-cost alternative.
That’s why it is considered one of the best woods to stain. Staining ash wood can give it any number of stunning colors to suit various decors.
Unlike oak, ash wood is relatively inexpensive but shares nearly all the premium oak features. But does ash stain well? Dive in to learn about staining like wood.
Does Ash Stain Well?
Yes, ash stains pretty well. Thanks to its large pores and prominent straight grain structure, it accepts any wood stain color and produces a wide range of beautiful shades. Both water-based and basic oil stains penetrate ash wood furniture evenly to create the desired shades without turning blotchy. Ash works well with various wood stains, making its straight grain pop. Unfortunately, as some woodworkers observe, it’s hard to find wood that stains and ash.
Is Staining Ash Wood Easy?
Ash wood is top on the list of easy-to-stain woods. It readily absorbs stains and allows the pigments to penetrate its large open pores easily throughout the surface. This typically results in beautiful finishes for stained ash wood.
The wood has open pores evenly distributed across its entire surface. This pore structure makes it easy for wood stains to penetrate the wood and distribute the pigment without causing any blotchy spots.
As with red oak and other ring-porous hardwoods, stain pigment accentuates the large open pores of ash, allowing you to create the look you want.
You can expect your ash wood to accept any stain without losing its texture or grain pattern. This is why woodworkers and DIYers like to stain it to resemble an oak or don it in various stunning colors and shades.
Once you stain ash, you can use any clear coat to lock in the color and make it durable. This is because all topcoat finishes work well on this tropical hardwood.
Notice that if you clear coat ash wood without staining it, the white color may become yellow with age—the same way stained maple does. Staining ash wood before applying the clear coat can help maintain its natural color and prevent undesired yellowing over time.
Therefore, to make the most of ash, you may want to know how to stain it with various colors. Want to stain it white? Here’s more on white stain on wood.
How to Stain Ash Wood
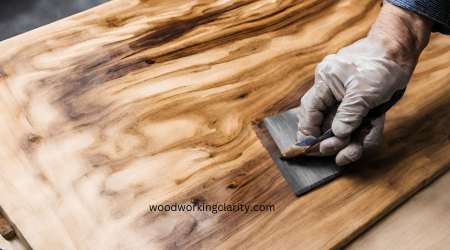
Ashwood is the best wood for stain if you have the knowledge and tools.
This section provides a detailed list of the supplies you will need for staining ash, the following procedure, and a handful of stain recommendations that should do the job perfectly each time.
What you will need for the job
- Wood stain in your preferred shade
- 220 grit sandpaper
- Applicator (paintbrush or lint-free cloth)
- Rags or tackcloth
- Hand gloves
- Drop cloth
Ash Wood Staining Procedure
Here are the steps to follow to get your stain in. Once you have assembled everything you will need for the job, you can begin by preparing your workspace.
As a norm, you should always lay down a drop cloth or plastic sheeting to protect the floor from the wood stain. You never know when you are going to spill something. The plastic sheeting will collect all of that.
Next, ensure there’s good ventilation where you are working. Working outdoors, such as in a carport, you should have all the airflow you need. But if you are indoors, such as in your garage or basement, you may want to open the windows for better air circulation.
Step 1: Clean and sand the wood
Whether you are staining ash wood furniture, cabinetry, or a piece of ash wood, always begin by cleaning it to remove any dirt and grime accumulated on the surface. If the wood isn’t overly dirty, sand it without cleaning it first.
Use 220 grit sandpaper to sand the wood surface nicely and evenly. Please don’t be too aggressive; keep the pressure gentle and even across the entire surface. You can have the sandpaper on a sanding sponge for manual sanding or use an orbital sander instead.
The choice of sanding tool should depend on the size of your project and the nature of the wood. For instance, an orbital sander may not reach some nooks and crevices, such as under the railings on your deck.
Whatever the case, ensure you cover the entire surface to make it smooth.
Choosing your sandpaper grit
Finer-grit sandpaper isn’t recommended for ash wood as it may block the pores. Neither should you use too coarse grit sandpaper; it will likely leave unsightly scratch marks on the surface.
So, what grit sandpaper should you use? Always stick to medium-grit sandpaper with ash to get the best results. If you want the wood to stain darker, 220-grit sandpaper should open up the pores enough to create that look.
However, if you want a lighter, more natural wood finish, you can go as fine as 320 grit.
Step 2: Clean the sanding dust and let the wood dry
The next essential step after sanding is to remove the wood dust. Here, you can use a tack cloth or damp rag. If you opt for a rag, ensure it’s lint-free to avoid leaving any debris on the sanded surface.
Also, ensure you wring out as much water as possible; you don’t want to put water on the wood as it may raise the grain and spoil the smoothness.
After using a damp rag on your sanded wood, please leave it to dry completely before applying the stain.
Step 3: Apply the wood stain
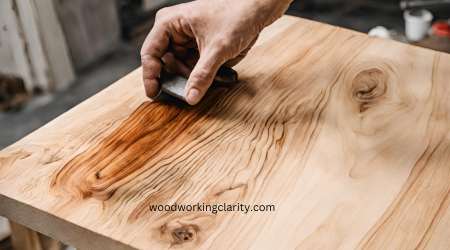
You can always use a clean, lint-free rag to apply the stain or stick to a natural-bristled paintbrush. The most important part is not how the stain gets onto the wood but how the excess gets out.
By this, we mean it’s essential to wipe the excess stain before it dries and becomes tacky after applying it.
So, whether you use a paintbrush or rag, saturate the applicator with the stain and rub it evenly across the surface. The objective is to create an even coverage all over the wood surface.
If you want to stain the wood dark, you can leave the stain on for about five minutes or slightly longer before wiping. However, if you want a lighter, more natural look, wipe the excess stain immediately after applying it.
The longer the stain stays on the wood before wiping the excess, the darker the finish. The average wait time is five to ten minutes, but water-borne stains may dry faster than oil-based options. So, pay attention to your chosen stain’s weather and drying behavior.
More importantly, you can generally apply the stain in any direction. But you must follow the direction of the wood grain when wiping off the excess. How well you follow this final rule will directly influence the quality of your results.
Step 4. Let the stain dry completely
Various stains have different drying times, so you must read the product label for the manufacturer’s recommended drying time and follow it.
Allow the wood to dry for the entire time recommended for drying.
Most wood stains will be dry and ready for recoating in 1 to 2 hours. After that time elapses, inspect the surface and see if it will need more color.
Step 5. Add another coat of the stain if necessary, and let it dry
After the stained surface has dried completely, inspect the wood to see if you are happy with the color. If you prefer darker, apply a second coat like the first, carefully wiping the excess along the wood grain.
You will often need to wait at least 8 hours before applying a top coat of your choice. To be safer, we recommend letting the stain cure for up to 24 hours before sealing it with your top coat.
Step 6: Seal the finished ash wood
Always apply a protective topcoat after staining your ask. You need a durable clear coat to lock in the stain color and protect the surface from wear and tear.
Ask works perfectly will various finishes, including regular nitrocellulose lacquer. However, if you apply wood finishing on ash furniture or kitchen cabinets that require a more durable topcoat for protection, varnish or polyurethane may be more advantageous.
Best Finish for Ash Wood
- Best Overall Stain for Ash Wood – Ready Seal 100 Clear
- Best Bang for the Buck – Varathane 262025 Premium Stain
- Best Oil-based Gel Stain – General Finishes
- Best Penetrating Stain on Ash Wood – Minwax 70012444 Wood Finish
- Best for Easy Application – Rust-Oleum 260365 Ultimate Wood Stain
Our Top Picks
What is the Best Stain for Ash Wood?
Experimenting with multiple ash wood stain samples can give you a feel of the best look to go for. Experimentation can take a long time to identify the best stain colors on ash wood.
So, we have done the legwork to help narrow your research down to just a handful of the best ash wood stain options. Find them below.
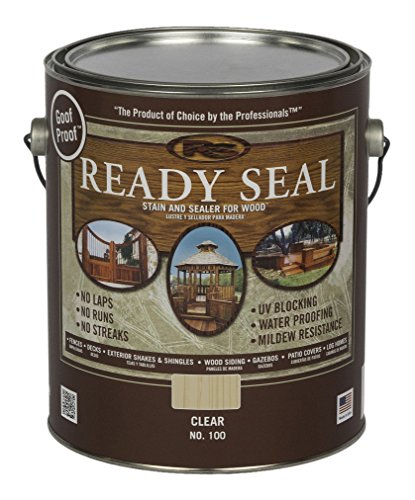
1. Best Overall Stain for Ash Wood – Ready Seal 100 Clear
- Requires no primer
- May be applied using sprayer, roller or brush
- Requires no back brushing or wet-line application
Ready Seal 100 Clear is the indisputable champion for staining Ash wood. Its exceptional qualities make it a standout choice.
This wood stain requires no primer, saving you time and effort. It’s incredibly versatile, allowing for sprayer, roller, or brush application.
What sets it apart is that it doesn’t need back brushing or wet-line application, simplifying the staining process. Plus, you can apply it in various temperatures, making it convenient for various conditions.
Having used Ready Seal 100 Clear, I can vouch for its excellence. This product effortlessly delivers a flawless finish without the hassle of a primer. It’s a game-changer in convenience and makes your DIY projects a breeze.
While Ready Seal 100 Clear is pricier, it’s worth every penny. This isn’t just another wood stain; it’s a revolution in wood finishing.
Yes, it might come with a premium price tag, but remember, with this product, you’re investing in unmatched convenience and top-tier quality. It’s simply the best value for your money.
Ready Seal 100 Clear sets the bar high for wood stains. Its time-saving, user-friendly features and exceptional results make it the best choice for staining ash wood.
Pros:
- No primer needed
- Versatile application methods
- Eliminates back brushing
- Suitable for various temperature ranges
- Provides a flawless finish
Cons:
- Slightly higher price point
- Limited color options
2. Best Bang for the Buck – Varathane 262025 Premium Stain
- Ideal for use on all interior wood projects: furniture, cabinets, doors, trim and paneling
- One-coat coverage, fast-drying oil based formula
- Dries to the touch in just 1 hour and covers up to 70 square feet
Ranked as the best budget-friendly option, the Varathane 262025 Premium competes favorably with the top pick, Ready Seal 100 Clear. While the latter may have some premium features, Varathane offers a remarkable balance between cost and quality.
The Varathane 262025 Premium proves its worth with a host of features:
This wood stain is perfect for interior wood projects, including furniture, cabinets, doors, trim, and paneling. It’s your go-to solution for all things wood.
Varathane fast-drying, oil-based formula means you only need one coat. It simplifies the staining process and saves you time and effort.
Unlike some stains that can take ages to dry, Varathane dries to the touch in one hour, allowing you to move on with your project.
This high-performance stain system is enhanced with nano pigment particles, highlighting the natural wood grain. Your wood projects won’t just be protected; they’ll look stunning, too.
Varathane 262025 Premium offers a more budget-friendly alternative to Ready Seal 100 Clear. It shines in affordability and efficient one-coat coverage. It’s ideal for those looking for great results without breaking the bank.
Pros:
- Versatile application
- One-coat coverage
- Rapid drying time
- Enhances wood’s natural beauty
Cons:
- Limited color options
- It may not offer the same premium quality as Ready Seal
3. Best Oil-based Gel Stain – General Finishes
- This is the stain that has the most "finishing feel" of all General Finishes' products
- Woodworkers love the lustrous finish that shows up
- Heavy-bodied, and so does not penetrate as deeply into the wood as liquid oil-base stains do
General Finishes is the best oil-based gel stain, and here’s why.
The standout feature of this product is its remarkable consistency. It is ideal for those who appreciate precision and control in their Ash wood staining projects.
The primary feature that sets General Finishes apart is its consistency in application.
Unlike liquid oil-based stains, which can sometimes penetrate too, the gel formula ensures that the stain remains precisely where you put it.
This level of control is crucial for woodworkers who seek an even, streak-free finish.
In my hands-on experience with General Finishes, the consistency of this gel stain was truly a game-changer.
It allowed me to achieve an incredibly even and professional-looking finish. This is often challenging with other staining products. It’s like having the precision of a skilled craftsman in a can.
While it might need extra drying time and patience, its exceptional finish is well worth it.
Pros:
- Exceptional consistency for precise application
- Reduces the likelihood of streaks or blotches
- Ideal for achieving an even finish
- Versatile and compatible with various wood types
- Minimal mess and waste
Cons:
- Slightly longer drying time compared to some liquid stains
- May require a bit more patience, but the results are worth it
4. Best Penetrating Stain on Ash Wood – Minwax 70012444 Wood Finish
- RICH EVEN COLOR – Minwax Wood Finish is a deep penetrating, oil-based wood stain that provides beautiful color and enhances the natural wood grain in one coat. It’s perfect for interior staining projects such as wood furniture, cabinets, doors and more.
- QUICK DRYING – Staining interior wood has never been quicker. The special formula allows it to deeply penetrate wood pores within 5 minutes of application, resists lapping, and dries in two hours, making all your wood projects quick, beautiful and easy.
- EASY TO APPLY – Use a clean cloth or wood stain brush to apply this wood stain in the direction of the grain. Wait 5-15 minutes and wipe away excess stain. The longer you wait, the darker/richer the color. Reapply coats for deeper color.
The Minwax 70012444 Wood Finish Penetrating Stain is your best choice for an exceptional penetrating wood stain on ash wood.
Its remarkable ability to enhance the natural wood grain and provide an even, rich color in a single coat offers a distinct edge.
This Minwax stain is a game-changer for highlighting ash wood’s innate beauty.
Its exceptional feature is the ability to penetrate the wood, unveiling its exquisite grain. This means you get a consistent, beautiful finish with just one application.
Through hands-on testing, I was captivated by how effortlessly this stain enriched the wood’s natural grain. It created an elegant and stunning finish. It’s like an artist’s brushstroke, showcasing the wood’s beauty.
It may not be suitable for floors, but its reliability and brand trust make it a standout choice for interior wood projects.
Pros:
- Deep penetration ensures lasting protection and grain enhancement.
- Achieve even, rich color with just one application.
- Quick drying in two hours for efficient projects.
- Versatile for small projects, furniture, cabinets, and doors.
- Trusted brand with a century of reliability.
Cons:
- Unsuitable for flooring applications; not designed for that.
- The color change might be necessary for the preferred shade.
5. Best for Easy Application – Rust-Oleum 260365 Ultimate Wood Stain
- High performance stain enhances wood grain on interior surfaces such as cabinets, doors, furniture, floors and more
- Fast drying, oil based formula provides maximum durability and color in one coat
- Dries to the touch in 1 hour and covers up to 70 sq. ft. per half pint
Rust-Oleum 260365 Ultimate Wood Stain is the best choice for effortless application, and here’s why. It stands out for its user-friendly features.
It is ideal for those who focus on a straightforward, hassle-free staining experience.
The standout feature of this wood stain is its remarkable ease of application. It’s designed to cater to users who seek a smooth, uncomplicated staining process. This means you don’t have to worry about complicated techniques or extensive preparations.
After conducting practical tests, I found applying this stain to be easy. It’s as smooth as a gentle breeze, making it accessible for even those with limited woodworking skills to meet a remarkable finish.
Rust-Oleum 260365 Ultimate Wood Stain takes the lead in quick drying time and versatility. It is a standout choice for both beginners and experienced woodworkers. Elevate your woodworking game with this effortless and effective staining solution.
Pros:
- Designed for user-friendly staining.
- Dries to the touch in just one hour.
- Suitable for various interior surfaces.
- It can be top-coated with polyurethane.
- Provides even color without conditioner.
Cons:
- Primarily for interior surfaces.
- Few color choices are available.
Does Ash Require a Wood Conditioner Before Staining?
Applying wood conditioner or grain filler on ash is unnecessary before staining it. The wood is one of the easiest to stain, thanks to its large open pores that allow it to penetrate easily and spread to distribute the pigment stain evenly across the surface.
Ash is practically blotch-free, so you can always stain it without worrying about a pre-stain wood conditioner.
Staining Ash Cabinets: Tips and Tricks
A few best practices will help you get the desired results when getting ash cabinets stained.
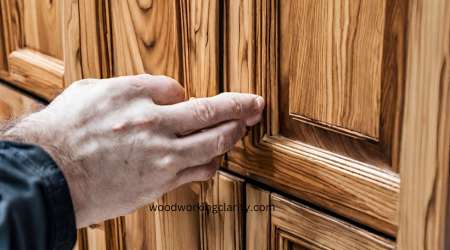
1. Practice with your chosen stain and finish on sample boards before your project
Ash wood works well with many stains and nearly every sealant or topcoat. While this gives you some limitless options, you can be spoilt for choice.
So, have some pieces of scrap wood resembling your project and try out the stains you are considering on these pieces. Since ash wood is easy to stain, you should aim for the best possible outcome.
By practicing with a few options, you can see the look that best represents your desired finish, then go for it.
2. Use a more durable clear coat to lock in the stain
Cabinets take quite a bit of abuse in their service life, so you must shield them in a durable coat to stand up to the challenge.
Especially if these kitchen cabinets are likely to be constantly in use, while using a regular top coat such as nitrocellulose lacquer may hold up less than fine. A more robust sealant such as varnish or polyurethane should be a better choice.
After applying the wood stain, follow through with a coat of durable sealer to lock in the color and protect your stained wood.
3. Don’t sand too fine if you prefer a darker color
Ash absorbs stains well due to its large open pores. If you want to stain it dark, you will keep those pores as open as possible.
Fine-grit sandpaper will close the wood’s pores, reducing its ability to absorb the stain. As a result, only a small amount of the pigment will penetrate.
On the other hand, you don’t want to go too coarse as such sandpaper will create undesirable scratches on the wood surface. The best sandpaper for the job is a medium 220-grit.
You can begin coarser, like 150 or 180-grit, if the wood has pronounced surface inconsistencies or previous finish that you want to remove first. But always finish with 220-grit sandpaper to achieve your desired dramatic and remarkable look.
If you want to change your Ashwood to green, here’s how to obtain a green stained wood.
How to Care for Ash Furniture
Ash wood has a beautiful, light color that you may want to preserve. To care for this wood, keep the furniture dry and wipe and dust it regularly to avoid dust and dirt buildup.
Additionally, apply a hard-wearing, protective finish such as varnish, lacquer, or polyurethane, even if you stain the wood. These film-forming topcoats will waterproof the wood and protect it from scratches and discoloration.
Ultimately, it’s best to steer clear of commercial cleaners and polishes; they can damage the finish or make the surface sticky. A sticky surface is a dust and dirt trap you don’t want.
FAQs
What does ash wood look like when stained?
Ash wood has a hint of beige to light brown with beautiful, straight wood grain. When stained, it tends to look much like oak. Pick any stain product that matches its color, or go for a more dramatic look with darker shades.
What are the disadvantages of ash wood?
Ash is considered a perishable, non-durable wood. It’s prone to rotting when damp or in contact with the ground. The wood is also typically susceptible to attack by fungi and beetles such as the emerald ash borer.
Does ash wood turn yellow?
Yes, white ash tends to yellow over time. Staining ash wood is typically a viable workaround if you do not like the yellow tint of aging ash.
How to get a dark stain on ash?
To stain ash dark, avoid sanding it with fine-grit sandpaper. Instead, use 220 grit sandpaper and let the stain stay on the wood for five to ten minutes before wiping the excess during application. You may also apply two coats instead of one when staining ash dark.
Does teak wood stain well?
Yes, teak wood stains exceptionally well. Due to its dense and oily nature, teak wood readily accepts stains and finishes, enhancing beautiful and long-lasting color. The rich, natural tones of teak wood make it popular for furniture and outdoor applications.
Ash Wood Finishes Summary
Ash wood is aesthetically pleasing in its natural color, but it can be even more spectacular if you stain it in a color that matches your décor better. Does ash stain well? It does indeed.
If you have a woodworking project involving ash staining coming up, feel free to use this article to guide you through it. We hope you find the information in this article useful. Please leave a comment in the comments section, if any.
Also, check our woodworking tips on staining pine doors.

