Staining Hemlock is relatively easy, but it has its share of challenges. First, you need to learn how to stain hemlock wood to finish hemlock wood projects like a pro.
Hemlock is a porous wood often used for creating furniture and other construction projects. Stained Hemlock wood displays beautiful straight grain and has a better lifespan since it absorbs stains.
In this post, we’ll cover the steps of staining Hemlock and how to avoid blotchy streaks on the final piece. Read on.
Staining Hemlock
Start by lightly sanding the surface and then remove the sanding dust. Next, apply a pre-stain conditioning treatment and then apply the stain evenly following the direction of the wood grain. Finally, let the first stain coat dry before applying the subsequent coats.
How to Stain Hemlock Wood Furniture
Hemlock makes excellent lumber for furniture since it’s easy to work with using both hand and machine tools. It also responds well to paint, stain, and even glue and is more affordable than Douglas fir.
However, you are likely to experience the uneven staining properties of hemlock wood species –it’s one of the many varieties of softwood.
But, the secret to getting a flawlessly finished hemlock lies in the sanding and conditioning stage. But first, assemble all the tools and materials you will need.
Things You Will Need
- 220-grit sandpaper
- Tack cloth
- Pre-stain wood conditioner
- Stain brush
- Wood stain
- Paint stir stick
- Lint-free cloth
- Clearcoat Varnish
Step 1: Prep your work station
Every woodworking project comes with its share of dust and waste pieces. Considering that this is a stain job, there’s bound to be stain splatters and bleed through.
That’s why you need to ventilate your workstation and seal anything that shouldn’t get soiled. You can use painter’s plastic or newspapers to seal off the floor and other items in the workstation.
Then, secure the drop cloths with painter’s tape.
Also Read: How to Get Stain Out of Skin
Step 2: Sand and clean hemlock wood
If you are working on soiled or slightly used lumber, you must clean it before sanding. First, scrub it using a stiff brush and soapy water. Next, rinse it clean and then bleach it to restore the wood’s bright color. Finally, let it air dry fully.
However, if you are working on a new piece of lumber for your furniture, skip the cleaning and go straight to the sanding part.
Start sanding the piece using 100-grit sandpaper, following the direction of the wood grain. This grit will even down any rough knots, raised grain, and end grain. Then, remove the sanding dust using a vacuum with a hose.
Repeat the sanding process using 180-grit sandpaper to ensure you have a smooth and even surface. Again, vacuum the dust off and then follow with a tack cloth to ensure no more dust grains are lingering on the sanded surface.
In the absence of a tack cloth, dampen a clean cloth in mineral spirits and wipe it on the surface to collect every dust grain. Here’s more information on how to clean furniture after sanding.
Step 3: Apply pre-stain sealer
Applying a pre-stain wood conditioner acts as a blotch control for the final look of the stained Hemlock. The wood conditioner will partly fill the thirsty pores such that when you apply the stain, the surface stains evenly without chances of grain reversal.
Stir wood conditioner, dip a paintbrush and start coating the entire furniture. Brush the conditioner along the direction of the grain and overlap each coat by an inch.
You can also choose to spray the wood conditioner. It’s fast and just as effective as the brushing method. Let the conditioner soak into the wood pores and then wipe the excess after five minutes. A single coat should be enough.
Alternatively, you can mix three parts of dewaxed shellac with two parts of denatured alcohol. Then, apply it to the wood as pre-stain. It serves the same purpose as a wood conditioner –to prevent grain reversal.
Lightly sand any raised grain using fine grit (200) sandpaper and wipe the dust with a dry cloth. Let that coat dry for about 30 minutes before you begin the staining process.
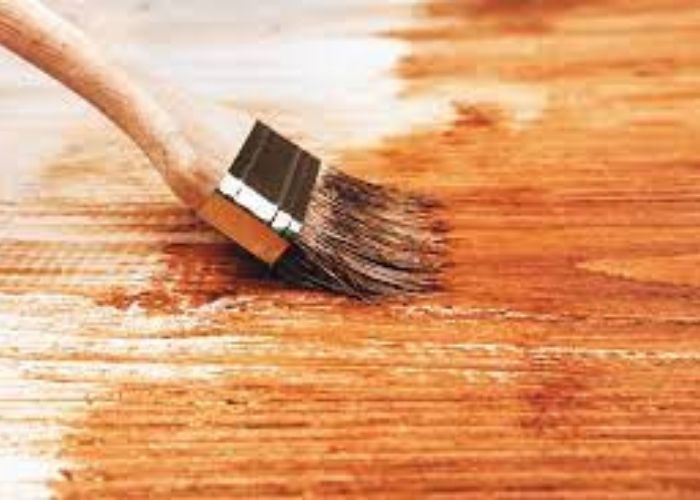
Step 4: Stain hemlock wood furniture
Hemlock lumber is light in color. If you plan to retain the color, you can use transparent stains or drying oil like Linseed or Tung oil. But if you’d like some fresh color, use a stain like Golden Oak.
Still, if you want it darker, you can use a dark stain in the shade of walnut. Whether you are using oil stains, water-based or dye stains, don’t shake the stain can –you will create bubbles, and the stain won’t go on evenly.
Instead, gently stir it from the bottom to the top to mix and let loose some of the stain pigments that had settled at the bottom.
Flip the furniture and begin staining the bottom side first. Then, use a fine bristled stain brush to apply the stain evenly on the piece of furniture.
You can also spray the stain using a suitable spray gun or pump sprayer. Always use interior stain for interior furniture and exterior stain for exterior applications.
Wait for the first coat to dry to the touch before applying the rest of the stain layers. Follow the manufacturer’s recommended waiting time for the stain coat to dry. If you plan to apply a varnish, wait for the last coat to dry. Here’s how long to let stain dry.
Step 5: Apply varnish to your stained hemlock wood
It’s essential to apply a finishing product that’s water and scratch-resistant. An excellent option to consider is polyurethane. You can also decide the amount of sheen you want on your furniture.
Apply oil-based poly using a natural bristled brush once the stain is fully cured. Ensure you coat every inch of your furniture and then allow it to cure for about eight hours before applying the second coat.
Important Read: How to Get Rid of Wood Stain Smell on Furniture
FAQs
The best stain for Hemlock
The best stain for Hemlock is Minwax Golden Oak. Since plain Hemlock is pale or light-colored, this penetrating stain enhances the rich grain pattern without concealing the wood‘s color. In addition, it’s easy to apply and dries up pretty fast; you’d finish your entire staining project on the same day.
Can you stain hemlock wood?
Yes, you can stain Hemlock wood. It’s porous lumber which means you can stain it with any color from a light golden hue to dark walnut tint. This wood species is an excellent choice for furniture and other home projects.
Read Also: Does Ash Stain Well?
How long does Hemlock take to dry?
Green hemlock timber dries out pretty fast. It will be about 80% dried in about five to six weeks. This time frame varies depending on the thickness of the wood and the weather conditions in your location.
What color is hemlock wood?
Western Hemlock wood is light, while the heartwood of the Eastern Hemlock has a light reddish-brown tint. The sapwood isn’t noticeably different in pigmentation but often appears lighter in color. Sometimes, the wood contains dark streaks caused by bark maggots.
Is Hemlock stronger than pine?
Yes, Hemlock is a lot stronger and harder than pine. Therefore, it’s used in situations requiring high strength, for example, jacking timbers. Green hemlock lumber is pretty heavy but is easily worked with manual and motorized tools. However, once it dries, working on Hemlock can be difficult.
Also Read: Can You Stain a Pine Door?
Hemlock wood stain colors
Hemlock can take up just about any wood stain color. But, particular ones blend well with the grain pattern and texture. You can stain wood with light-colored stains or dark brown to black wood stains. Use oil-based stains to add a beautiful rich color and enhance the natural wood grain.
Is Hemlock a hardwood?
No, western Hemlock is a softwood only found in North America. Eastern hemlock wood is reasonably lightweight, uneven in texture, moderately hard, and coarse grain.
Best stain for rough cut Hemlock
Rough cut hemlock can take any penetrating oil stain. Minwax Early American stain is an excellent candidate. It soaks into the porous pores and adds a brown tint to the surface. Staining rough-cut Hemlock gives it a rich and rustic color.
Recommend Reading: Can you Restain Wood?
Conclusion
Having learned how to stain hemlock wood, go ahead and add a pop of stain color to your furniture, siding, and other woodworking projects.
You should remember from this blog post that staining hemlock, like other softwood species, needs thorough sanding and conditioning treatment. This allows uniform stain absorption and prevents blotchy stain or grain reversal effect.
Good luck with your Hemlock woodworking project!