Mahogany has an open-grained structure, making it an ideal candidate for staining. The open grains easily absorb wood stain and allow the pigment to penetrate the pores and distribute the color evenly.
Staining mahogany requires following some simple steps to get the desired look and texture. Ideally, the procedure and supplies to use in this process depend on your preferred texture for the mahogany wood.
If you have a wood finishing project involving staining mahogany, read along to learn how to stain mahogany correctly to achieve the best results.
Can You Stain Mahogany?
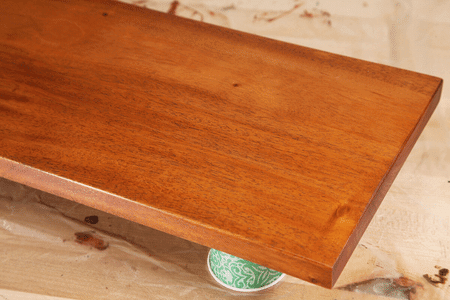
Yes! Mahogany stains pretty well due to its open pore structure resembling that of oak and walnut. This tropical hardwood will have a flat, smooth feel if you apply a grain filler before staining or a textured surface if you apply the stain without grain filling.
Therefore when staining mahogany, you can choose to fill the grains if you want a smooth surface, or leave them open if you prefer a textured, natural feel instead.
How to Stain Mahogany Wood
Mahogany will accept nearly all kinds of wood stain. However, water-based stains offer the best results, especially if you prefer a rough texture. The stains will raise the grain and create a nice, textured feel.
Still, you can sand the textured surface and make it smooth to the touch. In this case, you will want to pair it with a water-based grain filler, preferably dark-colored, such as Timbermate’s mahogany color filler.
Such pigmented fillers and wood stains do an excellent job of highlighting the character of the wood by darkening it without obscuring the grain pattern.
The supplies you will need
- Wood filler
- Wood stain
- Staining brush, foam brush, or clean cotton wiping cloth (best brush for staining wood)
- Plastic sheeting or tarp
- Paint thinner
- Nylon rag
- Wood stain rags
- Vacuum (optional)
- Solar Lux aniline dye (optional)
- Gel stain (optional)
- 120-grit and 150-grit sandpaper
- Personal protection, including gloves and optional eye protection
Procedure to follow
Once you have everything you need in place, follow these steps to finish your mahogany wood.
Step 1: Prepare your workstation
Start by laying down a tarp or plastic sheeting to collect any spilling stains or wood filler. You will be working with pigmented products that can stain your floor or garden, so you need a tarp to help prevent such unintended staining.
You will need to wear protective rubber gloves before starting the project to protect your hands from staining.
You could also wear eye protection when sanding if you prefer not to take any chances with your eyes. However, if you choose water-based products, you may not need to wear a respirator or protective face mask, for that matter.
A respirator or mask is often necessary when working with products emitting toxic fumes. Oil-based products are notorious in that regard due to the high levels of volatile organic compounds (VOCs) in them.
Step 2: Prepare the wood
You will not need to clean the wood before sanding unless it has accumulated grime and dirt on it—a case of refinishing a previously finished piece of wood or wooden furniture.
However, if that is not the case, sand the mahogany wood with 120-grit sandpaper to scuff it up. Next, switch to 150-grit sandpaper and give the piece a quick once-over to make it as smooth as possible.
The first sanding should help remove any surface inconsistencies, while the second and final sanding smoothens the surface.
After sanding, you can vacuum the excess sanding dust before wiping with a tack cloth or just go straight to wiping the wood dust without vacuuming.
Step 3: Prepare a filler
Before you stain wood, decide whether to fill the pores with a grain filler for a smooth finish. Leaving the wood grain open will allow the character of the genuine mahogany wood to show through a textured surface that can be felt by hand and seen through the final topcoat.
If you prefer a smooth feel, closing the grain is your first step. Woodgrain filler is the mixture of a binder and a filler material like silica, calcium carbonate, or clay.
These fillers are formulated to be easy to work into the wood grain. They are typically used on open-grained wood types such as mahogany and oak. Such woods have large open pores that can be challenging to fill with clear finishes.
Applying the finish directly to such woods often result in a textured surface, with the coarse texture visible through the finished wood surface.
All said, ensure you mix your chosen wood filer according to the manufacturer’s instructions on the product label.
You may have to use paint thinner to mix the filler to a paste-like consistency.
Step 4: Apply the filler
Once your filler is ready, you can apply it to the bare wood surface using a nylon rag. Ensure you work against the direction of the grain for the best results.
Ensure you fill a small area at a time. This will ensure the product does not dry out before you finish applying and working it into the grain properly.
After applying against the grain, wipe the excess along the direction of the wood grain and allow it to dry for 24 hours before proceeding to the next step.
Step 5: Sand it
The wood should be dry after the 24-hour waiting time. Smoothen it by sanding it lightly with 120-grit sandpaper, then 150-grit sandpaper. Ensure you cover every inch of the surface while sanding.
We recommend using a fine-grit sanding sponge for this purpose. It does a great job evening out the raised grain and making the wood surface nice and smooth.
Once done, use a tack cloth to wipe the sanding dust, then let it dry for a moment.
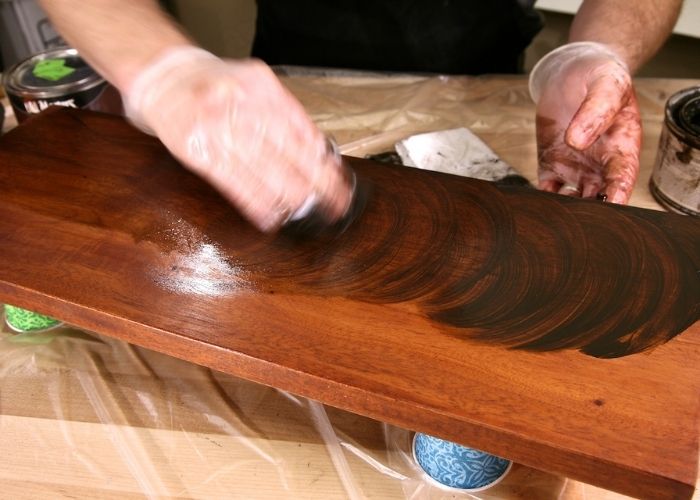
Step 6: Apply the stain
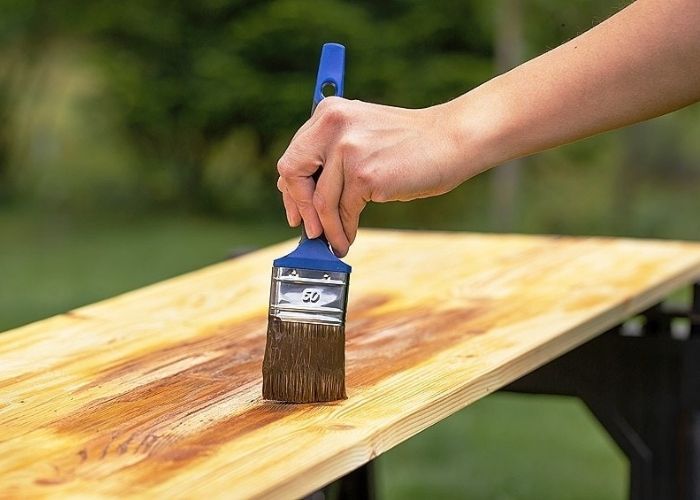
The next step is to apply your chosen wood stain. You can use a clean cotton cloth, natural bristled paintbrush, or foam brush.
Whichever tool you choose, you must wipe the excess stain with a cotton cloth after applying it. If you want a deeper stain color, let the stain sit for 5 to 10 minutes before wiping the excess.
However, if you prefer a lighter color, you can wipe the excess stain immediately. You can apply the stain in any direction, but always ensure you follow the direction of the wood grain when wiping the excess.
The important thing is to ensure you cover the entire wood surface evenly with the stain, both when applying and when wiping. Wiping within the grain helps hide any marks created while you wipe.
Related Post: How to Stain Eucalyptus Wood
Step 7: Allow it to dry
After applying your stain, let it dry completely. The product label should indicate how long you must wait for the product to dry—ensure you follow this instruction to the letter.
If the weather is cold, you may have to wait for longer for the stain to dry. Once dry, you will be able to see the actual color of the stain and assess if you are happy with it or prefer it darker.
To darken the wood some more, apply another coat of the stain after it has dried completely.
Step 8: Seal it
After your last coat of stain has fully dried, you can apply a sealer to lock in the color and protect the surface. Leaving a stained wood surface unsealed can lead to premature wear, which is not something you would want.
Most stains will be ready for sealing after drying for 24 hours. However, some may take longer depending on the weather, substrate, and stain type.
It helps to always check the recommended times on the label and follow them accordingly. Once the surface is ready for sealing, you may need to sand it lightly with fine sandpaper before wiping the protective finish onto the stained surface.
Here, you can apply polyurethane, shellac, or varnish, whichever you prefer or have on hand.
Do you feel an awful smell from staining? Here is how to get wood stain smell out of house.
Why Should You Apply Grain Filler when Staining Mahogany?
Grain filler is essential for creating a smooth texture on open-grained woods like walnut, oak, and mahogany. This step is especially important if you are looking to achieve a glossy, mirror-like finish.
Without filling the grain, the wood will end up with a textured surface and you may not achieve a mirror-like texture no matter how smooth you sand the surface.
What is the Best Filler for Mahogany?
Water-based fillers like Aqua Coat are the best for mahogany. It dries pretty fast and is easy to clean. The product is also low odor and non-toxic.
The water-borne formula means it does not have toxic levels of volatile organic compounds, hence environmentally friendly.
Most importantly, this product does an excellent job filling the wood grain and texturing it just the way you want.
Tips for Finishing your Mahogany Woodworking Project
Mahogany is easy to finish or stain to get to the color and feel you want. To make the most of this special quality, here are some tips to keep in mind:
- Always decide the surface texture you want to achieve before starting the project. This will determine the things you will need for the project and the steps you must follow to complete it.
- Always apply a suitable wood grain filler before the stain if you want a mirror-like texture. Leaving the pores open without filling will result in a textured surface.
- You can work with oil-based or water-based products, but penetrating oil-based stains provide the best results.
- Whenever possible, always test the products on a piece of scrap wood to get a feel of what to expect at the end of the project.
Is Mahogany Hard to Stain?
No, mahogany is one of the easiest wood types to stain. Its large open pores accept stain easily and allow the pigment to penetrate and evenly spread the colour.
Mahogany accepts all kinds of stains, but penetrating oil-based stains provide the best results.
Here are some other top-quality woods that stain well.
Best Stain for Mahogany Wood
As already mentioned, mahogany works well with all wood stain types, but penetrating oil-based stains tend to be easier to apply and give the best-looking results.
Additionally, some stains tend to do better bringing out specific colors than others. So we did a little research and found these stains to be ideal for mahogany for these respective applications.
The best dark stain for mahogany – Varathane Premium Fast Dry Wood Stain
If you want to give your mahogany wood a really dark look in the least time possible, this premium-quality oil-based wood stain from Verathane is your best bet.
It boasts a fast-drying formula that cuts your project time in half. Half because the one-coat coverage means you only need one coat to get the results you want.
This is as opposed to its competitors that require two coats, taking up double the amount of time to apply.
Its rich, dark color gives your interior mahogany wood projects a premium, top-shelf appearance ideal for cabinets, furniture, trim, paneling, doors, and just about every interior wood project.
Mahogany clear finish – Nourish & Protect WOCL001 Clear Wood Preserver
Mahogany has a beautiful color and grain pattern in its natural state. If you wish to maintain this look, this clear-colored wood preservative from Nourish & Protect is for you.
It is a high-quality, low-odor oil-based wood preservative that deeply penetrates your mahogany, giving it a semi-transparent matte finish. This quality allows the natural texture of your mahogany wood to remain unaffected.
Its durable formula offers long-lasting protection against water damage, fungi, and the discoloration associated with molds and other fungi. It also protects your mahogany from wood-boring insects.
Once you apply it, it offers all the protection needed, so you will not need to spend any extra dime on subsequent topcoats.
A special walnut stain on the mahogany door – HOWARD Restor-A-Finish
HOWARD’s Restor-A-Finish features a unique penetrating formula that treats your wood like no other finish on the market.
The special oil-based formula not only penetrates and fills up the open-pore structure of mahogany but also blends out minor scratches and abrasions on the wood.
It is ideal for a mahogany door that has sustained some blemishes from daily use. This product will restore it and remove those minor imperfections without requiring stripping down or removing the previous finish.
It is quite easy to apply. Just wipe it onto the door, then wipe off the excess to let it do the magic on your wood.
This should take only a few minutes, saving you a ton of elbow grease.
See also: Top finishes for gun stocks
Mahogany Stain Colors
Mahogany wood looks good in nearly every available stain color, from dark brown oil stain to medium brown walnut color options.
However, most woodworkers frequently go for maple-pine, dark walnut, golden oak, neutral, cherry, mahogany, walnut, ebony, and dark oak.
Related: Mahogany vs Teak
FAQs
What is the best finish for mahogany?
Lacquer is a top choice for finishing mahogany. It dries super-fast, is highly durable, and forms a solid coat. Additionally, only two coats of lacquer are often adequate for sealing and protecting mahogany permanently without masking the wood grain appearance.
How to stain a mahogany door
To stain the exterior of a mahogany door, apply an alkyd-resin-based stain and sealer blend using a high-quality paintbrush after sanding the surface. Wait for the stain to dry for four to six hours, then sand it lightly with fine-grit sandpaper. Next, apply a second coat of the wood stain and allow it to dry for four to six hours. Depending on your preference, you could choose a dark walnut stain on the mahogany door.
Read also: Best stain for pine ceiling
Conclusion
Staining mahogany wood is a simple process, but you can make it longer or shorter depending on the look and feel you want to achieve with your project.
If you want a smooth surface, ensure you apply a wood grain filler before staining your mahogany, then sand it to take care of the raised grain.
If you prefer a textured look and feel instead, apply the stain directly to the sanded wood surface without filling the grain.
We hope this tutorial helps make your next project a success.
With unfinished mahogany interior home doors, is it possible to get a finish with light brown color with no red tone in it? If so, how can this be accomplished? (Hopefully with minimal work) 😊
I am refinishing a mahogoney table. I have stripped and sanded down to 120 grit. After about 30 minutes to an hour, I am getting an oily bleed through from the pores. I have wiped the piece down with minieral spirits two times after this has occurred but I am still getting bleed thorugh. It looks like someone has “spattered” the top. My intent is to stain the piece. Should I seal the piece immediately after sanding/wiping with mineral spirits before the bleed through happens? If I just stain without sealing, will this bleed through affect the staining ( I intend to use oil based stain)? Obviously I am stumped and any advice on the best way to proceed will be greatly appreciated.
It’s probably the mineral spirits working back out of the grain. This happens a lot with open grain wood like oak. Keep wiping and don’t add more. Keep babysitting this till it quits. It’s what I have to do with oak.
It will likely happen with stains also. However, stain is more critical because if left unattended, the “spatters” will dry and affect the quality of the finish.
When I stain and experience this, I babysit it wiping this seepage until it stops.
Can I get a picture or video of the table? Sometimes visual aids help
Also, when wiping excess seepage, I use paper towels. Far more absorbent than a rag.
Any tips on getting a dark stain on mahogany? Not red, just dark. Is it about the number of coats of stain or do you recommend a specific stain?
Here you go – search for “how to stain wood darker” using the search button on our site