Staining pine doors can be a struggle for many DIY-ers because of its uneven stain absorption property. That’s why learning how to stain pine doors is beneficial, especially for those home improvement projects involving pine wood.
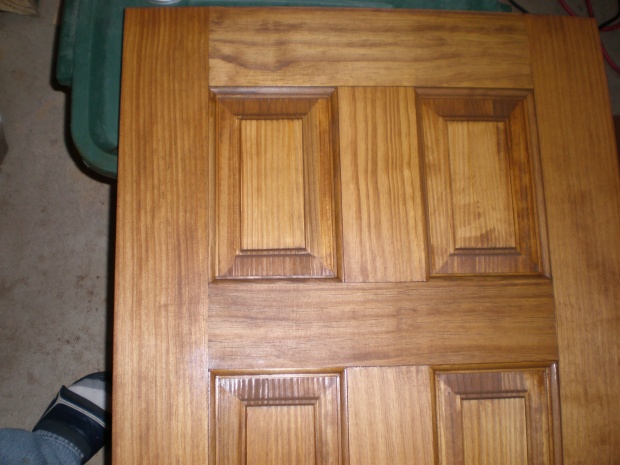
Properly stained pine doors add a luxurious and sophisticated touch to the entire room by displaying the complex wood grain pattern that paint would conceal.
Staining a pine door doesn’t automatically result in a success story. To avoid a potential disaster, follow our expertly curated guide.
How to Stain Pine Doors
Pine, among other softwoods, is challenging to stain because of its uneven surface grain composition.
There’s the porous earlywood grain and the dense latewood grain. The former absorbs lots of stains quickly, while the latter is a bit hesitant. This complexity can easily result in stain splotches or generally a muddy feel and appearance on your pine door.
That’s why I have put together all the steps you will need to follow to have a beautifully stained pine door.
Tools and materials you will need
- Two sawhorses
- A plastic sheeting and painter’s tape
- Sandpaper (100 grit to 220 grit)
- Sanding block
- Wood stain
- Pre-stain sealer
- Clearcoat finish
- Paintbrush and foam brush
- Rags
- Spray gun
The procedure to follow
Here are the simple steps to follow when staining a pine door.
Step 1: Prepare yourself and your workstation
Ensure your workstation is adequately ventilated. Line the entire surface of the floor with a plastic painter’s tarp or sheeting and secure it with painter’s tape.
If this is your first encounter with pine wood, don’t jump on your project yet. Instead, we highly recommend that you first practice the process on pieces of scrap pine wood. This will help you get familiar with the procedure and the materials.
Experiment on the veneered stock, end grain, and face grain until you are confident with the process and the results.
Step 2: Prepare the pinewood door
If you are working on a new pine door from the factory, skip this part and go straight to the next step.
However, if you’re resurfacing a rustic pine door, carefully detach the hardware from your door and inspect it for damages. In case of any loose knots, pour epoxy into the gaps to fix them. Once the epoxy on the damaged area has dried, sand it down to match the surface.
Step 3: Sand and clean your pine door
Position your sawhorses in equal length as the pine door you plan to stain. Next, lay the door flat on the two sawhorses in preparation for light sanding. Sanding opens up the wood pores to help absorb stains better.
Wrap a 100 grit sandpaper on a hand block, and gently sand the surface. The idea is to smooth down the rough spots and any inconsistencies.
When you’ve finished sanding, wipe the dust with a clean cloth and repeat the sanding process using 150 or 180 grit sandpaper for a more refined surface.
Since sanding compresses the wood grain, you need to raise them before coating them with a wood conditioner.
Soak a cotton cloth in water, wring out excess water and run the damp rag on the surface of the sanded door. Wipe it in long strokes from end to end. The dampness will raise the grain while picking the loose dust from the surface.
Step 4: Apply pre-stain sealer
Apply two coats of pre-stain wood conditioner using a foam brush. Ensure you spread an even layer of the conditioner on the entire surface and the sides of the door.
The first coat will quickly soak into the wood fibers. Wipe off the excess and then let it dry for 2 to 4 hours. Next, lightly sand it using 200-grit sandpaper to even out the raised grain. Finally, wipe the dust using a dry cloth, then apply the second coat.
After the last coat, let the door sit still for up to 4 hours. Then, flip the door and repeat the process for the other side.
Ensure the surface is completely dry before the next step. This will help you achieve a sleek finish when you stain.
In place of a wood conditioner, you can use dewaxed shellac to help block tannins from seeping through to the surface. It can also fill up the thirsty wood pores on the wood face and end grain. Follow the manufacturer’s instructions for mixing it with mineral spirits before you apply it to your pine.
Pre-sealing pine helps in preventing the uneven stain absorption responsible for the blotching or grain reversal of pine.
Also Reas: Eucalyptus Wood Stain Application
Step 5: Staining Pine Doors
Dip a foam brush in the stain and brush it on your pine door. Rub the stain in long, soft strokes going in the direction of the wood grain. Next, squish the sponge brush into the corners and edges of the door to stain the hard-to-reach areas.
Work on a small section at a time to avoid leaving the excess stain sitting on the surface for longer than recommended. Immediately wipe off the excess stain after a minute or two using a clean cloth.
Allow the first coat of stain to dry to the touch before applying the second layer. If you rush the process, the stain layers will appear muddy and way too tacky for life! Be patient.
After an hour, flip the door and stain the other side while the stained side continues to dry.
When the surface no longer feels tacky, apply the second coat or third until you achieve your desired wood shade. If you’re looking for a rich and deeper color, consider brushing on a layer of darker stain or dye instead of several coats of semi-transparent stain that only results in a light color.
After the final coat, let it dry for up to 24 or 48 hours. If the stain takes forever to dry, read our article on drying wood stains faster for a solution.
Step 6: Finish the pine door
Run a dry, clean cloth on the stained surface to remove dust and anything that may have settled on the surface while the wood stain dried.
Next, prepare your clear coat finish by gently stirring it. If you shake it, you will create bubbles that won’t apply evenly on the surface.
Recommended post: Whitewood vs yellow pine
The Finishes to Use on Pine Wood
Most finishes work well on pine wood. So, you can choose to use lacquer, varnish, or polyurethane, depending on your preference. Ensure you apply a thin coat at a time to avoid prolonged drying time.
Use a clean bristle brush to apply the clear coat to every inch of the stained interior pine door. Brush on two coats of the finish and wait for each layer to dry fully before recoating.
You can also use a spray gun to speed up the process. First, filter the prepared finish into the spray bottle and close the lid of both the spray gun and the seal coat. Then, spray the finish on the entire stained area.
Hold the gun horizontal with the nozzle standing at eight inches above the surface. Overlap each coat by about an inch for an even finish. Seal spray the edges and wait for them to dry before flipping and sealing the other side.
If you want a deeper gloss for your door, apply up to four coats and allow enough drying time before subsequent coats.
After the top coat, let the finished piece remain flat on the sawhorses until the door completely dries.
This finish will ensure the interior stained pine door can withstand the heavy traffic in and out of rooms -especially for the house’s front door. In addition, the seal coat forms a solid barrier against moisture, dirt, and general mishandling.
Here is a related read: best finish for your tongue and groove pine ceiling.
What is the Best pine door stain?
The best pine door stain is MINWAX Penetrating Wood Stain. This is an oil-based penetrating stain perfect for pinewood and other types of wood projects. Judging by its name, this stain is designed to penetrate, stain, and seal your pine door to enhance its natural grain while guaranteeing its durability.
This stain brand has up to 28 different stain hues; you get to choose which shade best matches your pinewood color. Considering that it’s specifically meant for indoor use, it’s the perfect choice for your pine doors and other interior furniture.
What is the Best Finish for Pine Doors?
A lacquer clear wood finish works great on pine doors. It’s specifically designed for interior surfaces. This product dries to the touch within 30 minutes, and you don’t need to sand between coats. Besides, this seal coat dries to a crystal clear satin that guarantees a durable finish for your pine doors.
Is Pine Good for Staining?
Pine as softwood is hard to stain and can become blotchy and unattractive when stained. Pine behaves in this manner because its grain is unevenly dense. However, if you apply a wood sealer before staining it, you can achieve a pleasant finish.
Can You use Wood Stain on Pine?
Yes, you can. But you should know that pine has an unevenly dense grain that’s hard to stain. That said, regular wood stains will trigger grain reversal because of uneven stain absorption. To avoid this coloring process, apply an even coat of wood conditioner before the wood stain.
Related:
FAQs
What kind of stain should I use on Pine?
If your pinewood is going to be used outdoors, you are better off using an oil-based stain for treating exterior pine. It can withstand the outdoor elements and protect the wood for longer. But, if the pine project is indoors, you can use water-based, dye stains, or even gel stains.
Should I stain my pine doors?
Staining is relative to personal preferences. For example, if you admire the beautiful natural wood grain and the knotty defects, you should stain them. If you like a pop of color that brightens up the space and blends in with the color scheme, you can paint your pine doors. But if you want to achieve some cool effects as well as to save fading paint, try staining over paint.
Is it better to paint or stain pine?
Painting, staining, or even oiling pine lies in individual preferences. Either way, you can choose lighter or darker stains and paints based on what complements your space. Stain pine for its natural aesthetics and paint it for your satisfaction.
Staining pine door to look like oak
Achieve elegance by staining pine to resemble oak for your doors. With the technique of staining pine to look like oak, transform your space affordably. Enjoy the timeless oak appearance without compromising your budget. Elevate your interior design effortlessly with this stylish solution.
Conclusion
Staining pine doors can be highly gratifying when you know what you’re doing. It’s also possible to end up with a messy finish, but that won’t be you because you know how to stain pine doors like a pro.
If you remember anything from this post, let it be that the key to beautiful interior stained pine doors lies in the sanding and pre-sealing of the wood. Without it, pine can frustrate you.
Leave a comment or question in the comments section below if you need any help with your pinewood project.