Sanding is an essential step in refinishing a deck. And, you must do it correctly to get the desired results—which means choosing the right sandpaper, approaching the grain from the right angle, and applying the right amount of pressure.
Knowing what grit sandpaper for deck sanding can get you halfway to your desired results. After that, focus on choosing the right tools for the job and following the correct procedure to achieve the best outcome.
Read along to learn the best grit sandpaper for your deck and the proper procedure for completing the job.
What Grit Sandpaper for Deck Sanding?
Sanding a deck requires coarse sandpaper to achieve the right texture. Use 60- or 80-grit sandpaper on your main deck boards and 80- or 100-grit sandpaper on the handrails around your deck. Once you finish sanding, ensure you vacuum the entire deck thoroughly to remove all the sanding dust that might settle on the new finish.
Some people recommend starting with much coarser sandpaper, such as 20-grit for the initial pass before progressing toward a medium grit. While this is a systematic way to achieve the correct surface texture, it might mean more work in deck sanding.
When you sand a deck, you could simply do the entire sanding in one go with 60 or 80-grit sandpaper. This approach should save you some elbow grease.
In any case, you must know the proper grit sanding paper to use for the best sanding. Sandpapers exist across various grits, from coarse grain, through medium coarse grain, to fine and extra-fine grain size.
What is Grit in Sandpaper?
Grit is the term describing how abrasive sandpaper is. This abrasiveness is determined by the particles or grains and their arrangement on the sanding material, equivalent to the number of microns used.
Grit in sandpapers is measured by the number of grains of abrasive particles per square inch. Smaller grit numbers correspond to coarser sandpapers, while higher numbers represent finer grit sandpapers.
Therefore, a finer grade of sandpaper will have a higher number, while a coarser grain of sandpaper will have a lower number. These grade numbers (grit values) are typically written on the back of the paper.
Any grit value from 60 to 80 grit is coarse, 100 to 150 grit is medium, while 180 to 220 grit is fine. Anything from 320 and higher grit value is ultra-fine.
How to Sand a Deck Before Staining or Painting
Refinishing a deck typically requires power washing or scrubbing the deck with a brightener first. While this step is essential to achieving the best outcomes of deck refinishing, it expands the wood.
Once dry, the wood fibers can remain raised and with splinters. So, before staining or sealing, a light but thorough sanding of the decking boards, posts, railings, and stairs is often crucial.
Sanding helps open the wood grain to absorb stain or paint better. For example, you could use 20 to 50 grit sandpaper for the first pass and finish with 60 to 80 grit sandpaper for the final pass on an orbital or belt sander.
Alternatively, you may stick to 60 or 80 grit sandpaper on the orbital sander or belt sander and achieve the same results. The same sander you use on the decking boards should work equally well for the railings, posts, and stairs.
Sanding a new deck
As a rule of thumb, you should always let new decking boards dry completely before applying any finish on them. Ideally, allow a new deck to season for a minimum of 30 days or longer, depending on the weather.
You want to let the wood dry before you finish or seal it. Some pressure-treated wood can take up to six months to dry enough to absorb a deck stain or sealant.
So, before you stain or seal the wood, sprinkle some water on it to test if it is dry and ready for staining or sealing. If the wood readily absorbs the water, you can apply the finish. However, if the water beads up on the boards, you would have to wait longer.
Sanding a painted or stained deck
Sanding is a great way to remove paint from the deck without using chemicals. Previously painted decking boards require sanding different sandpaper grits.
Start with coarse 80-grit sandpaper to remove the old finish before sanding the wood with medium 120-grit sandpaper to prep it for refinishing.
Depending on the wood you are using, you may also give the wood a final quick once over with fine 180-grit sandpaper. Remember to brush away the sanding dust from the wood whenever you are changing sandpapers.
Related: Best sander for furniture
Sanding your Wood Deck – Step by Step Process
Decks require periodic maintenance to remain sound and serviceable for longer. That involves treating them with deck stains, exterior paint, or sealant. In any of these cases, you must clean and properly sand the wood before finishing it.
Supplies for sanding a deck
Here is a comprehensive list of the things tools and materials you may need depending on the condition of your wooden deck. Notice that a few listed items may be optional or applicable only to some instances.
- Scrub brush
- Deck brightener (for weathered deck boards)
- Bucket
- Screw gun
- Deck screws (Here’s a review for the best deck screw guns.)
- Putty knife
- Wood filler
- Power washer
- 60- or 80-grit sandpaper
- Clean rags
- Tack cloths
- Vacuum
- An oscillating or random-orbit sander
- Respirator (optional)
- Eye protection
- Knee pads (optional)
Procedure
Once you have assembled everything and prepared your workspace, follow these steps to sand your deck before staining or painting.
Step 1: Protect yourself
Before completing your deck refinishing project, the first thing you may want to do is to wear the proper personal protection.
This may include safety goggles to protect your eyes, heavy gloves for your hands, and a dust mask or respirator to protect your lungs.
You could also opt for knee pads depending on personal safety preferences and the equipment you plan to use.
Although random orbital sanders are generally safe, it could never hurt to err on the side of caution when operating power tools.
Sanding dust can be an allergen, so you may want to be keen on wearing a respirator if you have allergic reactions to particulate matter. This protection should help minimize the risk of reaction.
Step 2: Clean the wood
Whether dealing with new or weathered wood, washing is essential in removing dirt, debris, and accumulated dust.
Start by clearing the deck of all toys, outdoor furniture, potted plants, grills, and any other exterior object. Next, use plastic sheeting to cover the lawn or garden plants to protect them from the cleaning chemicals you will be using.
If you plan to stain or paint the deck, the product manufacturer will usually include instructions on cleaning the wood on the label. Consider following these instructions to clean the wood correctly.
In most cases, you will need to spray the deck with a biodegradable deck cleaner to remove mildew and accumulated dirt. Once the dirt is sufficiently soaked, you can scrub it off with a long-handled stiff-bristled brush that is easy on your spine.
Now is the time to apply a wood brightener to the surface for weathered deck boards. The product should do an excellent job of enhancing the deck’s appearance. Once done, rinse the entire deck with a garden hose.
You could use a pressure washer, but ensure you have it on a low setting or follow instructions to avoid damaging the wood.
Step 3: Inspect and repair the surfaces
Once the boards are clean, carefully inspect each for any grooves and damages that may require filling or fixing before sanding.
Check all the edges, surfaces, railings, and stairs for fasteners that may have come loose or pieces that may be missing. If the woods have weathered screws, consider replacing them.
Likewise, if some boards are damaged or missing, remove or replace them accordingly. Finally, any deep gouges or grooves in the wood must be filled and allowed to dry before the next step.
Overall, you want to check every part of the deck to ensure everything is in proper working order before you start sanding.
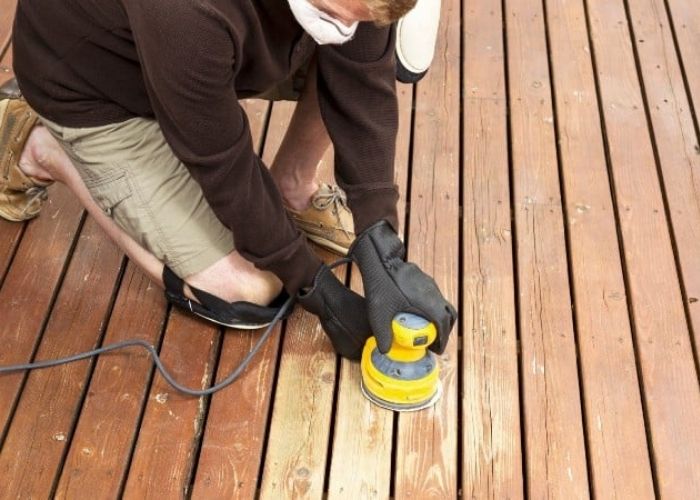
Step 4: Sand the decking boards and stairs
Once you complete all the preliminary activities, it is time to sand the wood. We recommend using 60- or 80- grit sandpaper attached to an orbital sander for the decking boards and stairs.
Whether your deck consists of previously finished wood or new lumber, the power sander will do a good job removing any surface inconsistencies and smoothing it out to prepare it for staining, painting, or sealing.
The sanding is not to create the smoothest possible wood surface but to even it out. You don’t want a deck to have a smooth, slippery surface, so avoid any fine-grit sandpaper.
The finer the paper, the more likely it is to clog the wood fibers and pores in the wood, preventing stains and sealers from penetrating and adhering correctly.
Remember that woods such as cedar, redwood, and pressure-treated pine commonly used on decks and stair treads are relatively soft. Belt sanders can easily gouge them, so a random or oscillating orbital sander is generally the better choice.
Still, do not apply too much pressure while sanding a deck to avoid damaging the woods.
When you finish sanding, thoroughly vacuum every inch of the deck surface and stair treads to remove the wood dust.
Step 5: Sand the decking board edges
The edges of a deck board can be difficult to access, making it challenging to sand them. So, consider using a smaller detail sander to smooth out these areas where standard orbital sanders cannot fit.
While at it, ensure you use the same sandpaper grit as the rest of the decking surface: a grit value between 60 and 80.
Once you finish sanding, vacuum the edges and wipe them to remove the dust.
Step 6: Sand the railings
While the orbital sander is designed to work for various wood types, a sanding sponge may better work on the balustrades and railings instead. Railings are highly visible, so you want to ensure you sand them the best you can.
Since the railings should be smoother, go for finer grit sandpaper, often 80- to 100-grit sandpaper on a sanding sponge.
Ensure you take your time to sand all the nooks and crannies with the finer sanding paper. After sanding, use a shop vacuum to clear away the wood dust.
Read More: What Grit Sandpaper for Wood Before Painting
Step 7: Vacuum the entire deck
It is vital to give the entire deck a final vacuuming to remove all the debris and wood dust that might have fallen on it while sanding the other surfaces.
You can use a tack cloth or clean rags to wipe the railings and other smaller sections, but vacuuming should do for the rest of the deck. Here’s more on cleaning deck after sanding before painting or staining.
What is the Best Sandpaper for Removing Paint from Wood?
Coarse 80-grit is the best sandpaper for removing paint from wood. You could use it by hand or attach it to a power sander, depending on the nature and size of the project.
The important thing is to use enough pressure to remove the paint but not too much that damages the wood.
Can I Use a Belt Sander on my Deck?
Yes, sanding a deck with a belt sander can be a pretty quick way to remove deck material. Belt sanders are ideal for larger surfaces that could use a fast action. Belt sanders are best suited to harder wood types.
However, they are aggressive and unideal for most soft deck woods.
Sanding a deck with an orbital sander is preferred for standard softer deck wood types. Orbital sanders will helps remove any old paint or sealant and smooth out any rough patch on your deck.
Even better, you can operate an orbital sander with one hand when working in confined spaces. If you have a smaller deck or need more precision, a small hand-held belt sander might also be a suitable option.
What is the Best Sander for Deck Boards?
The best sander for deck refinishing is a random or oscillating orbital sander. It sands wood in an elliptical pattern, perfect for woods commonly used on decks such as cedar, redwood, and pressure-treated pine that are relatively soft.
Belt sanders tend to be aggressive and can easily gouge these softwoods.
The design and elliptical movement of random orbital sanders mean they blend sanding directions along the wood grain and across it.
This property means you do not have to worry about keeping a straight line to cover your entire deck with a random orbit sander.
Wood Deck Sander Reviews
Searching for the best sander for sanding a deck, look no further than the Makita 9403 4″ x 24″ Belt Sander, Teal.

- Low noise (84dB) for operator comfort
- 4" wide belt with a speed of 1,640 ft./min. for fast material removal
- Labyrinth construction seals and protects motor and bearings from dust and debris for longer tool life
This outdoor deck sander is ideal for fast material removal, with a 4″ wide belt and a speed of 1,640 ft./min.
What is the Best Time to Sand a Deck?
The best time for the deck sanding is during warm and dry weather with no precipitation. A minimum of three warm, dry days in a row should provide the dryness required for proper sanding.
Any deck refinishing projects such as staining, painting, and sealing require specific temperature ranges for their application.
Each of these products also has various recommended drying times. However, you cannot apply any of these products without cleaning and sanding the deck.
Notice that the deck surface requires about 24 to 48 hours of drying time after washing it before you can sand it. If it rains on the wood deck during this drying period, you must give it at least an extra day to dry.
So, it is always best to check the weather forecast to ensure there will be no rain for at least three days of your sanding. Then, plan your work according to the weather forecast to guarantee satisfactory results and zero frustration.
FAQs
Is it worth sanding a deck before staining?
Yes, if you’re planning on staining your deck, it’s worth taking the time to sand it first. Sanding will help create a smooth surface that will allow the stain to penetrate the wood evenly. This will give you a much better result than if you just applied stain directly to an un-sanded surface.
So, What Grit Sandpaper for Deck Sanding?
The right sandpaper grit for a deck is 60- or 80-grit on your main deck boards and 80- or 100-grit sandpaper on the handrails around your deck.
Refinishing your deck can add years to its service life and even make an old weathered deck look brand new. Nonetheless, the quality of your finish will depend on how well you prep it by cleaning and sanding.
Please leave a comment if you have any thoughts or find this guide helpful.
Next, Read on What Grit Sandpaper To Remove Varnish From Wood.