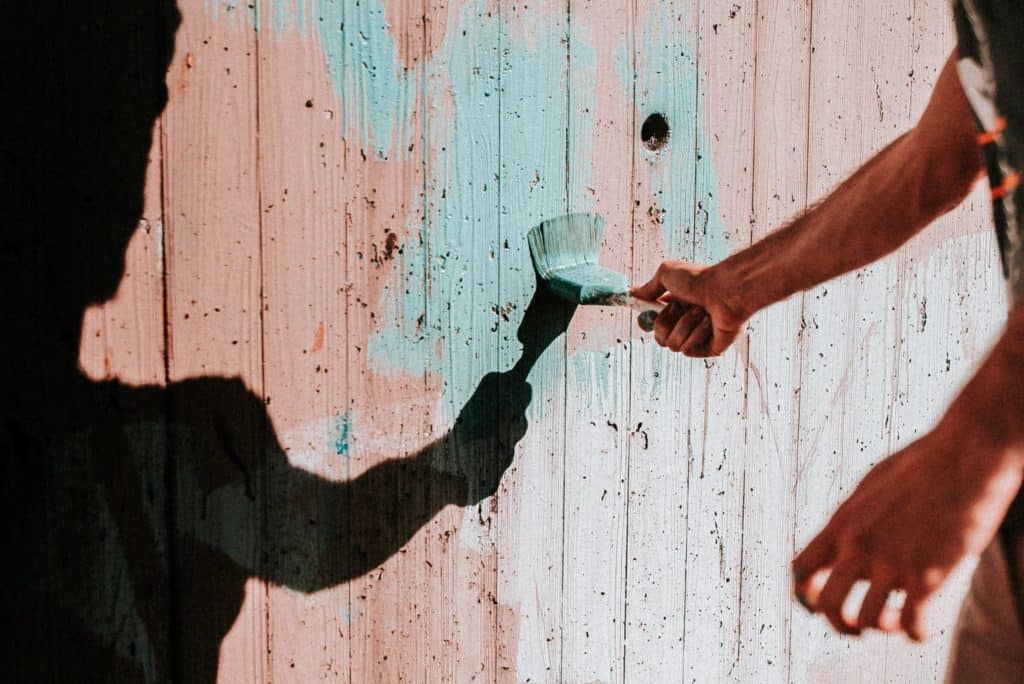
Is it better to stain or paint the pressure treated wood for your next project? Regardless, your research has cautioned you on what happens if you stain pressure treated wood too soon.
But, no need to worry. With this guide, we’ll make sure your stained pressure treated wood will be in tip-top shape for your planned project: may it be a deck, porch, or fence.
We’ll work together so you can stain pressure treated wood properly. We’ll make your project a worthy addition to your home.
What Happens If You Stain Pressure Treated Wood too Soon?
If you stain pressure treated wood too soon, the stain will be unable to penetrate the wood fully, meaning the stain will remain unabsorbed. This will make your deck have ugly patches, splits, splinters, and cracks.
Can you Stain Pressure Treated Wood
Yes, you can stain pressure-treated lumber. Staining pressure-treated lumber is beneficial as it serves to further protect the wood against elements. This is because the pressure treatment only protects the wood against rot, while staining will prevent the wood surface from cracking.
But there are some things to consider first:
- Age of the wood: It’s typically recommended to wait until the wood is dry before staining, which can take several weeks to several months, depending on your local climate conditions. This is because pressure-treated wood is often quite wet when purchased, and stain will not adhere properly to wet wood.
- Preparation: Before staining, it’s a good idea to clean the wood thoroughly to remove any dirt, mildew, or other surface contaminants. A power washer can be helpful for this, but be careful not to damage the wood with too much pressure. After washing, let the wood dry completely.
- Testing: Always test the stain on a small, inconspicuous area first to ensure you’re happy with the color and finish.
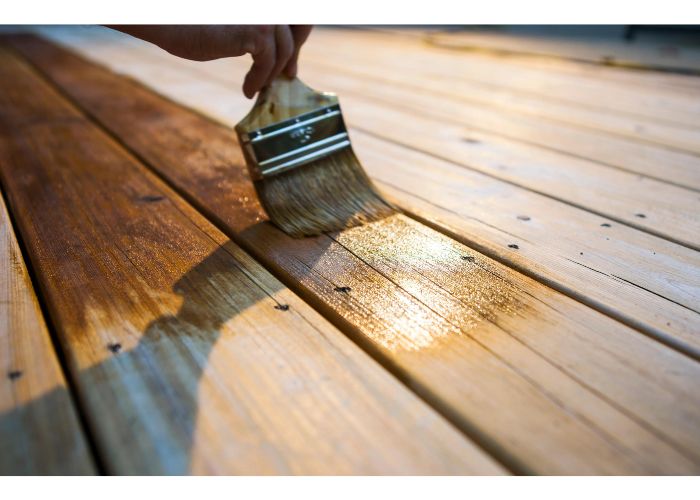
- Application: When applying the stain, follow the manufacturer’s instructions for the best results. You’ll typically want to use a brush or roller, and apply the stain evenly along the grain of the wood.
- Sealing: After the stain is dry, you might want to apply a sealant to help protect the wood from moisture and UV damage.
Is it Better to Stain or Paint Pressure Treated Wood?
Having lumber go under pressure treatment makes it resistant to mold, water and decay, and insect damage. This durability is due to the chemicals used to treat wood.
Before, the pressure treating process of the wood raised health and environmental concerns. But now, the alkaline copper quaternary or ACQ wood preservative being used has been approved both by the national authorities and your local environmental agency.
Pressure treating the lumber, however, makes it look dull and uninviting when you use it on a new deck fence. This is because wood undergoing treatment usually comes in green, tan, brown, dark, and natural wood color.
Thus, you’ll need to paint treated wood or stain it. Although you’re inclined to apply stain or paint immediately, you’ll need to wait a few weeks or up to a few months before the wood dries.
Wet pressure treated lumber won’t absorb the paint or stain.
So, can you paint pressure treated wood?
While it’s possible to paint pressure treated wood, this isn’t recommended by experts. Here’s why:
- Although paint provides a pop of color, it doesn’t stick well on pressure treated wood. This is because of the chemicals on pressure treated wood. But you can paint pressure treated lumber if you follow the proper steps.
- By painting, you can easily have an even finish. Paint, however, doesn’t allow the lumber to breathe; instead facilitates the development of rot, mold, and mildew.
- With paint, you’ll need at least a third coat– a primer and two layers of paint- for the lumber to have additional protection. Mold and mildew, in general, aren’t a threat to the pressure treated wood. These, however, put people’s health at risk. Plus, you would have to spend time cleaning off the mold and applying the mildewcide regularly.
- Less time and effort in preparation. You must sand the pressure treated wood’s surface and apply latex primer before painting. But in staining pressure treated lumber, you only need to clean the wood with soap and water. After the lumber has air-dried, you can apply the stain.
- Wood stain protects wood from sunlight, cracking, entry of additional moisture, and against the elements. Even though treated wood is already resistant to moisture, insect attacks, and damage, tough stains help make the lumber more durable.
- With stains, you can take advantage of the pressure treated wood’s natural beauty and characteristics. This adds character to your project.
What You Will Need for Staining Pressure Treated Wood:
- Oil-based or water based stain – (Is oil based or water based stain better?)
- Bristle brush
- Brush for cleaning the lumber
- Mild detergent
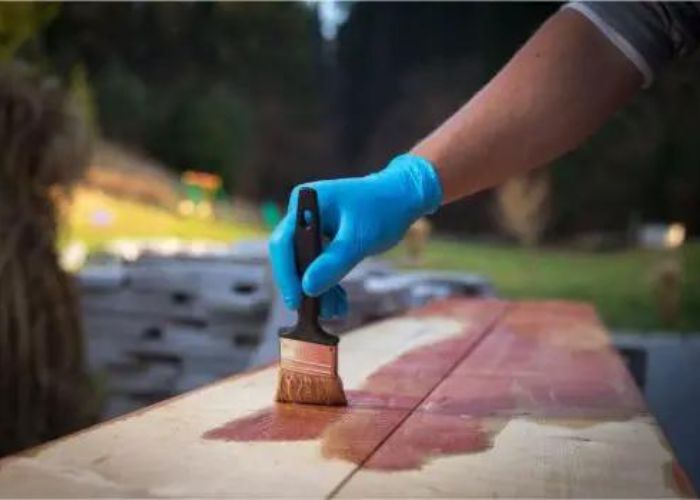
- Gloves
How Long to wait to Stain Pressure Treated Wood?
Generally, wait till the treated wood is completely dry. The time it takes for drying pressure treated wood varies from a few weeks to a few months, depending on the climate in your area.
This because pressure-treated lumber off the shelf is wet and cannot be painted or stained immediately. So, staining pressure treated wood takes patience and diligence in following the procedure
How do I Prepare Pressure Treated Wood for Staining?
Here are the steps in applying stain correctly:
Step one: Check the weather.
Just a general suggestion, wait for two to three days of dry weather before you start the process of staining your pressure treated lumber deck or porch during dry weather,
This is because, despite the overall improvement on today’s pressure treated wood, it’s still vulnerable to such factors as humidity and the heat of direct sunlight. Humidity will dry the stain if you apply it faster.
Thus, we recommend beginning the preparation and staining process on the third day of sunny weather.
In addition, don’t go on staining treated wood directly under the sun. The heat will quickly evaporate the stain faster than the rate the lumber can absorb it.
Step two: Make sure the wood is dry.
Before putting the stain on, it’s important to make sure your pressure treated wood is dry. From the store, wait for the wood to dry for two to three weeks. During this time, you should periodically check the wood’s moisture content.
This is necessary because it’s possible to over-dry the wood. If the wood becomes too dry, it loses its natural ability to make the stain adhere to it.
You can perform the sprinkle test to check if it’s dry enough. First, sprinkle a bit of water on the wood. The lumber is still wet if water beads form on the wet spot. But if the water is absorbed, it’s dry and ready for staining.
An alternative is pressing a nail into the wood. However, if water comes out while pressing the nail, you must wait some more.
Still, if you’re unsure, you can get a moisture meter. The ideal moisture content is below 19 percent. Nineteen is a critical number because, at this level where experts believe mold and rot start developing.
Tip: Stack the pressure treated wood in a crisscross pattern allowing the air to dry it. The waiting period for the wood to dry is 2-3 days. This is best done during warm, low-humidity weather.
Step three: Choose the correct stain
Two types of stains are available in the market: oil-based stains and latex stains. No particular stain is superior to the other, as they have advantages and disadvantages. Thus, the best stain varies per project.
For installing a new deck, It’s better to use oil-based stains, as lumber absorbs these completely, sealing the lumber from water. And because the wood will soak in the stain, this additional layer protects from ultraviolet or UV rays.
Oil-based stain enhances the natural look of pressure treated lumber. This type comes in various wood tones, including cedar, oak, and redwood. Or you can opt for a semi-transparent stain or a transparent stain.
In time, the exposed, old wood and the semi-transparent or transparent stain will bring more character and let the lumber’s natural beauty enhance your deck or porch.
The problem with using an oil-based exterior stain is, it doesn’t last long. You’ll be applying stains every year. Plus, the oil is food for mold, mildew, and algae.
Water-based stains or latex stains, on the other hand, dry quickly. Even if the wood is damp, this type of stain adheres and is absorbed by the lumber. This is also easier to clean, with dirt coming off with just soap and water.
The downside is, a water-based stain gives the lumber a paint-like finish, hiding the natural wood grain patterns and removing the wood’s natural look.
Step four: Clean the wood
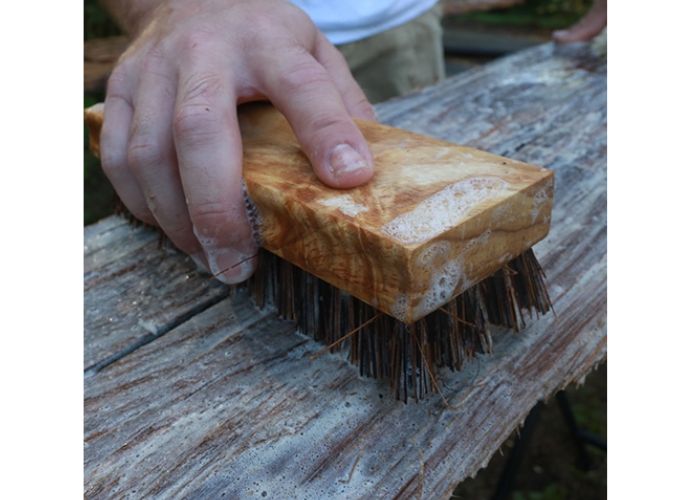
You can use a stiff brush, mild detergent, and water to remove the grime and debris. Soapy water is better than using a pressure washer. A power washer will wash away the chemical preservatives on your treated lumber.
Step five: Allow the wood to dry
Again, wait until the wood is dry enough. Sadly, this may take a few weeks. This is necessary to let the stain’s chemicals leach on and for the wood to absorb them properly.
To ensure the wood is completely dry, periodically perform the abovementioned water test. Again, be conscious of whether or not beads form on the wood’s surface, telling you if the wood is dry enough.
Alternatively, you can measure moisture levels using a moisture content meter.
Now, you’re ready to go stain pressure-treated lumber for your project.
See Also: How Long Should Deck Stain Dry Before Stepping on It
How to Stain Pressure Treated Wood
Step one: Preparing the stain
Meticulously mix the stain before application. It’s also advised you continue to stir it periodically as you apply it to your project.
Tip: You can request your favorite local hardware store to mix the stain before you buy it thoroughly.
Step two: Test the stain
Apply a small portion on the treated wood using a paint pad applicator and let the stain properly adhere. This way, you can assess if the stain has the right shade for your project before applying and letting it adhere properly to all your planks and boards.
You can request your favorite local hardware store to mix the stain.
Tip: Put a light stain first. If the treated wood isn’t ready for staining (i.e., wet), you can wait for the wood to sufficiently dry, then apply a darker stain.
Step three: Apply at least one coat of stain
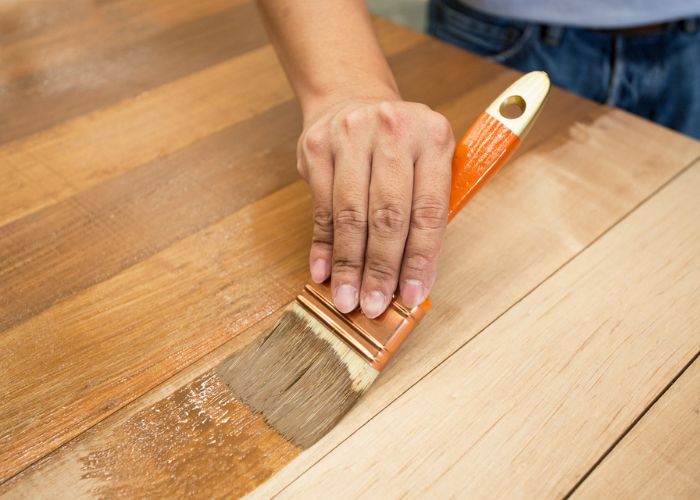
In handling the treated wood and applying stains, it’s best to wear gloves. Apply the stain but also be mindful that repeated brushstrokes on a specific area will mean additional layers of the stain. These can change the shade of the treated wood in your final output.
Reminder: Don’t apply wood stain directly under the sun. This is because the heat will dry the wood stain too fast, even before the wood can absorb it.
Following these instructions in preparing the wood for staining, you can be sure the wood stain has been appropriately applied, the wood is protected, and the wood finish is done evenly.
How long for wet wood to dry is a crucial factor to consider, but in case you may not have noticed that the wood is still wet, what happens if you stain pressure-treated wood too soon?
- The stain won’t fully penetrate the wood. Thus, you can only partially enjoy the advantages mentioned above.
- The stain won’t stick as well as when the wood is dry. Thus, it may be washed away more easily by rain.
What Should I Do if I Stained Too Soon?
For light-colored stain:
- Wait for the wood to dry completely.
- Re-apply a stain with a darker color as a remedy.
In case you have applied a darker shade, you need to:
- Remove the upper layer of stain. Use light sandpaper on the wood surface or a chemical stain stripper.
- Make sure the wood surface is completely dry before trying again.
Maintaining your stained treated wood
One advantage of stained-treated wood is it’s easy to maintain. But what is the best stain for pressure treated wood?
Of course, you need to keep your project clean.
- Apply a cleaner/brightener every one to three years. Then apply one coat of sealer to bring out the color of the old stain.
- Keeping the pristine condition of your porch or deck means cleaning these regularly. Whip out your garden hose, brush, and some detergent every few months.
- If you cannot clean your pressure treated wood deck or porch for more than three years, you may want to use a power washer instead of a garden hose to loosen the gunk and dirt.
Over time, you must refurbish the older pressure-treated wood deck with new planks. It might be tempting, but refrain from putting composite decking over a frame made up of pressure-treated lumber. This is because composite lumber is heavier than treated lumber.
FAQs
When can you stain pressure treated wood?
Wait until your pressure-treated wood is completely dry before applying the stain. This is because chemicals in pressure-treated wood can trap moisture and block the stain from penetrating. Drying times will vary depending on weather and climate but typically last anywhere from 3 weeks up to a month or more!
How long before you can stain pressure treated wood?
Before you can stain, wait 72 hours for pressure-treated wood to dry completely if kiln-dried at the lumber yard. You can check the board for tags and ask the hardware store staff if it’s already Kiln dried If not, it usually takes a few weeks to six months before you can stain.
Can you stain green treated wood?
Yes, you can stain green-treated wood. Green treated wood means that it was infused with copper, chromium, and arsenic or CCA. While CCA kills fungi, termites, and other pests, stain green treated wood to prevent surface cracks.
Can you stain treated wood right away?
Yes, you can stain treated wood right away using exterior oil or water-based stain if it was already Kiln dried at the lumber yard. Confirm it was already dried by looking at the tag or stamp. If you see KDAT (kiln-dried after treatment) or ADAT (air-dried after treatment), stain it immediately.
What Happens if You Stain Pressure treated Wood Too Soon Summary
We’re sure you’re now more confident putting stains on your treated wood. You also don’t have to be caught unaware because you know what happens if you stain pressure-treated wood too soon.
Applying stain isn’t complicated. With patience, enough time, and guidance, you can make the stain adhere to the wood and make your deck, fence posts, picnic tables, or any other project more durable and beautiful.