Tongue and groove ceilings are prone to discolouration, splitting, and moisture. It’s time to unlock the secrets to transforming your space with the Best Finish for tongue and groove pine ceiling.
I am a DIY devotee who became a professional woodworker and has spent countless hours researching and testing different finishes for wood suitable for pine ceilings. I tested 9 products and found general finishes to be the undisputed champion.
With years of experience, we understand the nuances that make General Finishes stand out, and we’ll delve into the specifics shortly.
Read on as we elevate your interior aesthetics.
Our Top Picks
Best Finish for Tongue and Groove Pine Ceiling
- General Finishes Water Based Wood Stain – Best Overall
- Sunnyside Corporation 87232S Boiled Linseed Oil – Best Bang for the Buck
- Varathane 200261H Water-Based Polyurethane – Most Durable Finish
- 1/2 pt Minwax 25555 Clear Polycrylic – Best Clear finish for Groove Pine Ceilings
- Hope’s Pure Tung Oil, Wood Finish and Sealer – Best Waterproof Natural Finish
- Watco Rust-Oleum A 65741 Danish Oil Wood Finish – Best for Sealing pine ceiling
- Rust-Oleum Zinsser 304H 1-Quart Clear Shellac – Best Clear Shellac for Pine
- Minwax 618604444 Color Wash Transparent – Best for Weathered/ gray look
- Water-Base Wipe-On Polyurethane 16fl oz – Best For minor Touch-ups
Best Finish for Tongue and Groove Pine Ceiling-(Updated List)
1. Best Overall Finish – General Finishes Water-Based Wood Stain
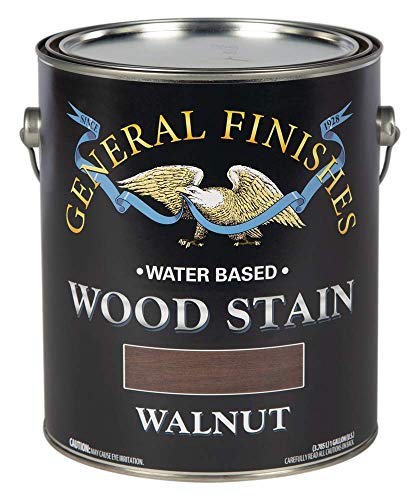
- High-quality pigments produce rich, dark colors; Can be hand-applied or sprayed.
- Indoor use only; Formulated to provide workability similar to oil based stains
- Low odor, low VOC, water cleanup and noncombustible
General Finishes Water Based Wood Stain is undoubtedly the champion of wood stains, and I say this with absolute confidence after extensive hands-on testing. This remarkable product is the best overall for a multitude of reasons.
First and foremost, this wood stain’s low odor and low VOC (Volatile Organic Compounds) formula make it pleasant to work with but also environmentally responsible. The fact that it’s noncombustible adds an extra layer of safety, which is particularly crucial when working with wood finishes.
It is available in different colors, so as you use it for tongue and groove pine ceilings, you can easily find one that matches your home decor. You can create your custom shades by intermixing different General Finishes Water Based Wood Stains, allowing for endless design possibilities. Additionally, it can be mixed with any GF water-based topcoat to tint and tone, ensuring a seamless finish.
Another beautiful aspect of this pet safe wood finish is combining water-based wood stains with any water-based topcoat to create your dream colors.
I was thoroughly impressed by the ease of application and the consistency of the stain. The results were consistently flawless, with no blotching or streaking. The final finish was smooth and rich, bringing out the natural beauty of the wood.
Compared to other wood stains I’ve used, General Finishes Water Based Wood Stain stands out as the best overall. It combines eco-friendliness, customizability, and exceptional quality to provide a superior wood staining experience. If you’re looking for a wood stain that’s both user-friendly and produces outstanding results on tongue and groove pine ceiling, this product is a clear winner.
What I Liked Most
- It’s safe for the environment, kids, and pets
- It’s a low VOC
- It has high-quality pigment, producing a rich, uniform, and dark color
- Easily cleans up with soap and water.
- It is non-flammable
What Could Be Improved
- Ideal for interior use only
2. Best Bang for the Buck– Sunnyside Corporation 87232S Boiled Linseed Oil
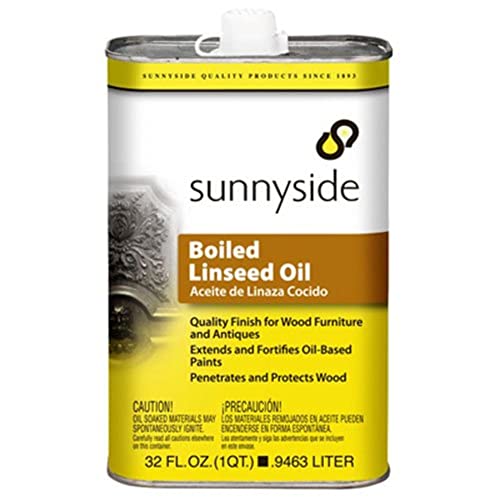
- Penetrates and protects wood creating a quality finish for wood furniture and antiques
- Enhances natural wood tones and grain patterns of wood
- Extends and fortifies oil-based paints and coatings
The Sunnyside Corporation 87232S Boiled Linseed Oil is a remarkable product, and it takes the second spot in my rankings with a unique value proposition that makes it the best budget option.
The exceptional features and benefits of this boiled linseed oil include:
- Wood preservation: This linseed oil penetrates and protects wood, creating a high-quality finish for wood furniture and antiques. It acts as a shield against the elements, ensuring your tongue and groove ceiling are intact.
- Enhanced aesthetics: It enhances the natural tones and grain patterns of the wood, adding a warm, lustrous finish that brings out the wood’s beauty. Your furniture and woodwork will look stunning.
- Versatile use: Not limited to wood preservation, this linseed oil also extends and fortifies oil-based paints and coatings, making it a valuable addition to your DIY toolkit.
- Quick drying: With a fast drying time of 12-18 hours (depending on conditions), I could use my wooden items in no time.
- Natural origin: Derived from the seed of the flax plant, this linseed oil assures a uniformly tough, elastic, and glossy film, giving your woodwork a professional-grade finish.
Comparing it to the first product reviewed, the General Finishes Water Based Wood Stain, the Sunnyside Boiled Linseed Oil offered me an entirely different value proposition.
It is budget-friendly and excels at wood preservation and enhancement, making it a great choice for if your are looking for a cost-effective way to protect and beautify your wooden items. In terms of price, the Sunnyside Boiled Linseed Oil wins hands down as the best budget option.
What I Liked Most
- Affordable
- Enhanced Aesthetics
- Versatile Application
- Quick Drying
What Could Be Improved
- Longer drying time compared to some other finishes.
- May require adequate ventilation due to fumes.
3. Most Durable Finish – Varathane 200261H Water-Based Ultimate Polyurethane
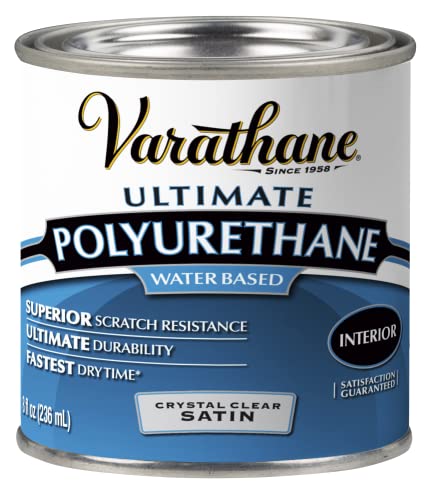
- Protects indoor wood surfaces such as furniture, windows, cabinets, trim and more
- Water based formula dries fast and cleans up with soap and water
- Dries to the touch in 30 minutes with coverage up to 31.25 sq. ft., recoat after 2 hours
Varathane 200261H Water-Based Ultimate Polyurethane stands tall as the epitome of durability when protecting your tongue and grove ceiling.
This polyurethane excels in safeguarding indoor wood surfaces. Besides being environmentally friendly, its water-based formula dries rapidly and cleans up easily with just soap and water.
What truly sets Varathane apart is its remarkable durability. It dries to the touch in 30 minutes and provides outstanding stain and scratch resistance, ensuring your tongue and grove stay pristine and beautiful for years.
Its excellent clarity is unmatched, allowing the wood’s natural beauty to shine through. In terms of application, this polyurethane covers up to 31.25 sq. ft. per can and can be recoated after just 2 hours, making your finishing projects quicker and more efficient. Its satin finish adds a classic touch and enhances the wood’s natural appearance.
Having used several wood finishes, I can confidently attest that Varathane 200261H Water-Based Ultimate Polyurethane’s durability is second to none. It keeps wood surfaces looking immaculate while withstanding the test of time, making it the top choice for anyone looking to protect and enhance their tongue and grove ceiling.
What I Liked Most
- Works magic on tongue and groove ceiling
- Superb coverage
- Effortless to use
What Could Be Improved
- It’s pricey
4. Best Clear Finish for Groove Pine Ceilings – 1/2 pt Minwax 25555 Clear Polycrylic

- PROTECT WOOD SURFACES – Minwax Polycrylic Protective Finish protects and adds beauty to your interior wood projects, including woodwork, furniture, doors and cabinets. The clear top coat protects against scratches, spills, dirt and more.
- CRYSTAL CLEAR FINISH THAT LASTS – The crystal clear finished offered in this protective coating is ideal for use over all Minwax Oil-Based and Water-Based Stains and colors, as well as all wood species including light woods like maple, ash and birch.
- GLOSS SHEEN – Give your wood projects a sleek finish with this gloss clear varnish. It not only protects the natural beauty of the wood, but offers a shiny, sleek sheen for a bright, modern look. It’s also non-yellowing, non-ambering and low odor.
I love using Minwax Polycrylic Protective Finish for furniture, woodwork, and other surfaces. It’s a crystal clear top coat that protects and enhances the wood’s beauty. It’s perfect for safeguarding against scratches, blemishes, and scuffs.
One of the things I love about this clear sealer is that it remains transparent even after drying, making it ideal for use over all Minwax Oil-Based and Water-Based Stains and Colors. It works well on all wood species, including lighter woods like maple, cedar, ash, and birch.
Another great feature of this polyacrylic finish is its quick-drying formula. I can recoat after just 2 hours, which helps me finish my projects faster. Using a high-quality fibre brush gives me the best results during application.
Cleaning up is a breeze too! I can easily wipe down the surface with soap and water, and the protective wood gloss finish maintains the natural beauty of the wood.
Additionally, it provides a shiny, modern sheen that adds a touch of elegance to my projects. I also appreciate that it’s non-ambering, non-yellowing, and odourless, making it a convenient choice for my woodworking needs.
What I Liked Most
- You can use it indoors because it does not have an overpowering odor.
- It is thin and runny, so a little goes a long way.
- It is self-levelling as long as you are using a high-quality brush
- It highlights beautiful woodgrain creating a glow from within
- It will not remain tacky or sticky because it dries hard
What Could Be Improved
- It is expensive but worth every penny
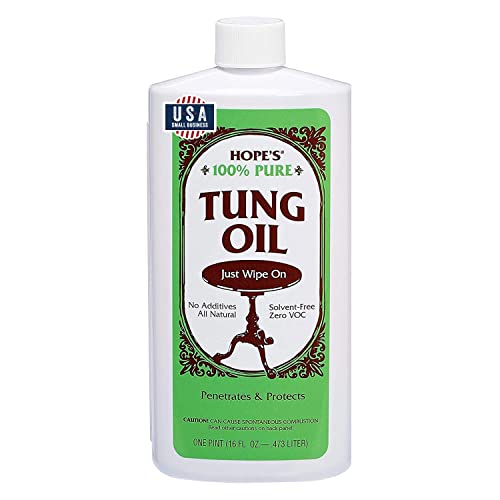
5. Best Waterproof Natural Finish – Hope’s Pure Tung Oil, Waterproof Natural Wood Finish and Sealer
- Easy to Use - Tung oil is a natural oil recognized by craftsmen to offer the ultimate hand-rubbed finish for all fine woods; just wipe on and allow the oil to cure at room temperature
- Permeates - Unlike other finishes that form a film on the wood’s surface, tung oil penetrates deep into the wood fibers, cures to a flexible non-oily solid, and becomes part of the wood itself
- Protects - Resistant to moisture, alcohol, oil, and everyday wear for lasting beauty and protection; lasts many times longer than mineral oil and wax based products
I’ve used Hope’s Pure Tung Oil for years, just like woodworkers have done for centuries, to enhance the color and protect my pinewood projects.
What I love about this product is how easy it is to use. Unlike some wood stains that require special brushes or paint pads, I can wipe it on with my bare hands without worrying about skin irritation or damage.
The result is a hand-rubbed, low gloss finish that makes my tongue and groove pine ceilings or boards look brand new, even if they’ve been around for years.
The textured finish it creates is not only stunning but also incredibly durable. It’s amazing how well it resists humidity and alcoholic beverages.
One of the best things about Hope’s Pure Tung Oil is that it’s all-natural and doesn’t contain harmful chemicals.
Unlike other finishes that form a surface film on the wood, tung oil penetrates deep into the wood fibres and cures to a flexible, non-oily substance, protecting the wood from the inside out. It becomes part of the wood, providing long-lasting protection.
In addition to using it on tongue and groove pine, I’ve also used it on other surfaces with great results. It repels alcohol, moisture, and everyday wear and tear, making it ideal for new, unpolished wood, stripped wood, weathered wood, concrete floors, countertops, brick, stone, and cast iron.
It’s amazing how well it holds up even in high-traffic areas like cookouts and barbeques.
Hope’s Pure Tung Oil outperforms wax-based products and mineral oil, and I’ve been thrilled with the phenomenal results it delivers on nearly any surface that allows the oil to penetrate.
It’s a versatile and reliable choice for protecting and enhancing the beauty of wood and other surfaces.
What I Liked Most
- Easy to use
- Ecofriendly
- It has a matte finish that enhances the wood grain nicely.
- It offers optimal protection from the inside out
- It gives you long-lasting beauty and protection
What Could Be Improved
- It takes longer to dry based on weather conditions
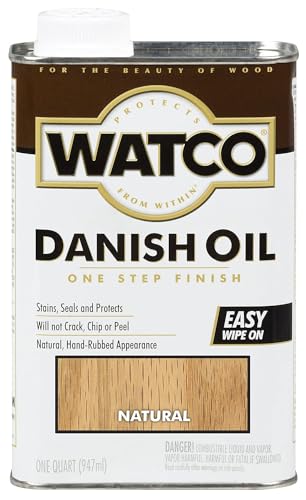
6. Best for Sealing Pine Ceiling – Watco Rust-Oleum A65741 Danish Oil Wood Finish
- Ideal for use on a variety of indoor wood surfaces including bare, stripped or sanded; not recommended for floors
- Oil-based formula of blended oil & varnish penetrates deeply into wood pores for ultimate protection
- Dries to the touch in as little as 6 hours and covers up to 170 sq ft
Rust-Oleum Watco Danish Oil is a finish that has impressed me with its performance, which is why it made it to the top of my list for groove and pine ceilings.
I love that this oil-based formula combines the best of both oil and varnish. It penetrates pine wood just like regular oil, but when it dries, it forms a tough, durable coat similar to varnish.
This means it stains, seals, and protects my groove pine ceilings all in one step, leaving them with a natural, hand-rubbed look.
Unlike some varnishes that can flake, crack, or peel off after drying, Watco Rust-Oleum Danish Oil is unique. It doesn’t crack but instead gives my tongue and groove wood a warm, natural glow.
The natural finish it creates restores the appearance of my pine wood ceiling, making it look like it’s been refreshed with new life.
I find that this Danish Oil rivals even the popular Minwax finish when achieving a natural finish on the wood. If I want to stain my tongue and groove wood, this product never disappoints, and the results always intrigue me.
Applying the oil is easy. I spread it onto the surface and let it penetrate the wood. After fifteen minutes, I wipe off excess oil and let the first coat dry completely.
I can then apply additional coats as needed, ensuring proper drying overnight. The whole process takes less than an hour, and the result is a rich, soft glow that enhances the natural appearance and feel of the wood.
Rust-Oleum Watco Danish Oil has truly exceeded my expectations in performance, and I highly recommend it for anyone looking to finish and protect their groove and pine ceilings with a natural, hand-rubbed look.
What I Liked Most
- It thoroughly penetrates the wood
- It makes the wood look and feels natural
- It dries faster compared to raw linseed oil
What Could Be Improved
- Unsuitable for high-traffic areas
7. Best Clear Shellac for Pine – Rust-Oleum Zinsser 304H 1-Quart Bulls Eye Clear Shellac

- This product adds a great value
- 1 quart
- Seals, preserves wood, art, Statuary & metal
I love using Rust-Oleum Zinsser Bulls Shellac for my woodworking projects. One of the best things about it is that it’s derived from a lac bug’s secretion, making it a non-toxic substance that’s safe to use around the house.
As someone with woodworking experience, I know how frustrating waiting for the varnish to dry can be. Sometimes it takes forever, and it can delay my project, especially when I’m pressed for time. But with this product, that’s not the case.
The drying time of Rust-Oleum Zinsser Bulls Shellac is amazing – it dries in as little as forty minutes to an hour. That means I can apply a second coat if needed and finish my ceiling project in one day.
It’s a huge time-saver and makes my woodworking projects much more efficient. I can confidently use this product, knowing it dries quickly and helps me meet my project deadlines without sacrificing quality.
Furthermore, I don’t need multiple coats to achieve a high gloss finish. This product only requires two coats, and I leave it at that. A subtle yellow tint and unclear finish may be noticed specified in the instructions.
If you don’t like that, you might not appreciate this product. However, if you don’t mind a faint tint in exchange for a durable and low-cost product, grab it, and you’ll be happy with your decision.
Remember to buy the size you need because purchasing large quantities for later use may not do you any good. It penetrates ceiling boards, is odorless and is gorgeous. Even so, avoid using it on hardwood floors.
What I Liked Most
- Quick-drying time
- It’s a non-toxic formula
- You only need two coats for professional results
What Could Be Improved
- It may yellow your project- work on a scrap piece first
8. Best for Weathered/ gray look – Minwax 618604444 Color Wash Transparent Layering Color
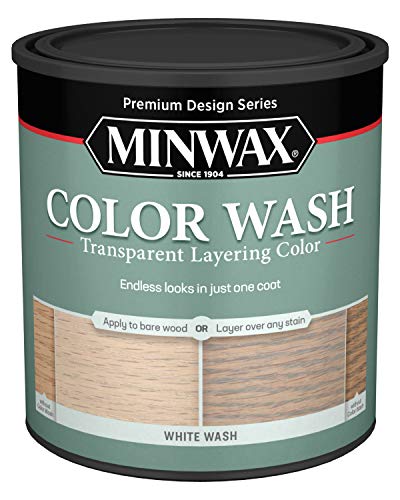
- Adds a touch or age & character to bare or already stained wood
- Apply over oil or water-based stain with a synthetic or foam brush, stain pad or rag.
- Dries in 1 hour. Endless coats in just one coat.
If you want to give your groove pine a weathered or aged look, this is the perfect product. I personally love using it for this purpose. You can use a paint pad, a clean rag, or a synthetic brush to apply the stain.
You can use this product to finish tongue and groove panels and unfinished wood. Wondering how many coats you need to apply? I can confirm that just one coat is enough, but you can apply countless coats to achieve the desired effect.
The best part is that the finish dries in just an hour, making the process quick and efficient. Clean-up is also a breeze with just soap and water. This stain adds a faint white shade to groove panels and pine panelling, allowing the natural wood grain to shine.
To ensure great results, surface preparation is crucial. Make sure the bare wood is clean and dry before starting. I recommend sanding with medium-grit sandpaper and gradually increasing the grit until finishing with 220 grit.
Don’t forget to remove the sanding dust. If you’re working on stained wood, remove the stain with mineral spirits and ensure the surface is dry before applying this product.
Before proceeding, I suggest working on a hidden section of the wood or a scrap piece to see if you like the color. Remember to mix the stain extensively before and during the application, thinning or shaking it.
When applying the stain, go against the natural wood grain and wipe off any excess stain in under two minutes. Wiping against the grain of the wood will give you professional results.
Let the stain dry completely, and if you’re satisfied with the color, you can apply your favourite protective topcoat. Avoid sanding between coats for best results.
What I Liked Most
- Covers excellently
- Super easy to use
- One coat is enough for incredible results
What Could Be Improved
- It dries lightning-fast, so you need to work faster.
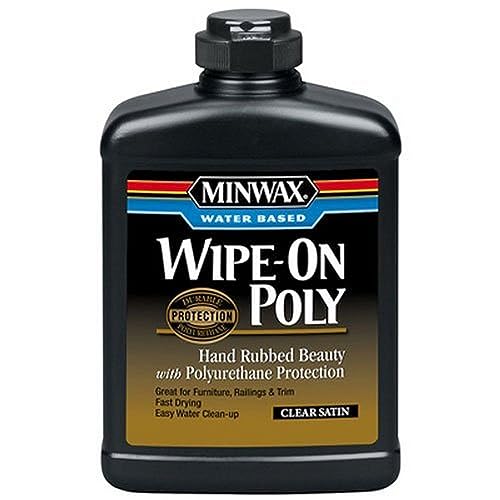
9. Best For Minor Touch-Ups – Water-Base Wipe-On Polyurethane 16fl Oz
- Excellent Durability
- Ultra Fast-Drying
- Low Odor
I love using Minwax Water Based Wipe-On Poly for its long-lasting, clear finish that combines polyurethane protection with classic hand-rubbed beauty.
With this product, I don’t have to worry about ugly brush marks or streaks that could ruin the look of my groove pine ceiling.
Cleanup is also a breeze, as I don’t need to use mineral spirits. Just water and soap do the trick. I can confidently use it indoors without worrying about pungent odors lingering for weeks or months after use.
What’s great about this product is that it’s so simple to use that even as a complete novice, I can achieve expert-looking results. It’s perfect for various wood surfaces, such as furniture, interior doors, tongue and groove, trim, and more.
I often use it to renovate small areas and give them a durable layer of topcoat protection. It’s worth noting that this product is thinner than standard polyurethanes, so I may need to apply more coats for optimal results.
One thing to remember is that once the product hits the wood, I only have about thirty seconds before it becomes tacky. So I need to work quickly to maintain a wet working surface and ensure my strokes merge beautifully.
If a blemish appears, I look the other way and sand it out later. After applying multiple coats, I buff the surface smoothly with fine sandpaper for a flawless finish.
Create a thick enough layer to sand out all the imperfections without hitting bare wood. Once I’m satisfied with the results, I may polish it further or apply a paste wax on top for added protection.
Using a foam brush helps me achieve uniform coats for a professional-looking finish.
What I Liked Most
- It’s odorless
- Phenomenal results
- Dries fast; you finish your project in a few hours
What Could Be Improved
- Not great for massive areas
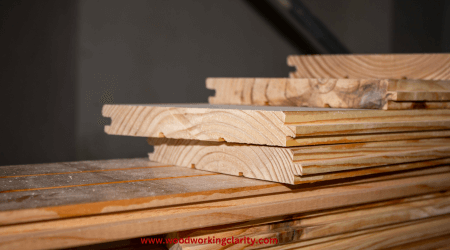
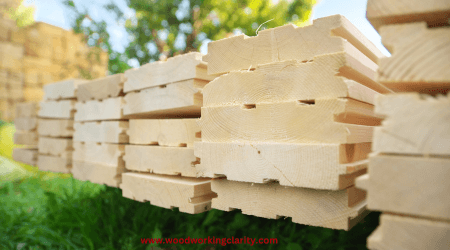
What is Tongue and Groove Pine?
Tongue and groove is a technique of fitting corresponding objects together, edge to edge. It is popular in flooring, panelling, parquetry, and similar structures.
Tongue and groove joints enable two flat pieces to be securely joined to form one flat surface. In short, tongue and groove pine is a method of joining wood appropriately.
The panelling has one edge that protrudes on one side. The other edge has a big opening for another piece of panelling’s distended trim. Tongue and groove pine is suitable for use on walls and ceilings.
Pinewood products are beautiful and rustic, with knots, color variations, and mineral streaks. Therefore, painted knotty pine walls can add a touch of rustic charm to your interior, while stained pine can create a warm and inviting atmosphere.
Pine tongue is used on roofs since it is simple to install, reasonably priced, and visually appealing. Tongue and groove ceilings give the illusion of a uniformly aligned ceiling.
Furthermore, because all pieces fit together snugly, there is no risk of seeing through gaps between the panels.
Factors to Consider Before Buying the Best Finish for Tongue and Groove Pine Ceiling
Before spending any money on a finish for pine and groove ceilings, it’s essential to get a few things right to make your efforts worthwhile. Here are the critical things to consider before settling on any finish.
Color
You can’t just pick any finish color that pleases you when you need to finish your tongue. Pick a color that compliments your taste and style and blends excellently with your home decor items.
Also, go for a color that sends the right first impression to anyone who walks through your doors. You can borrow ideas from home decor magazines or home contractors to help you pick the appropriate color palette.
Understand your project and determine whether you need to preserve the natural beauty of wood or if you need to conceal it, and then pick a color that suits your preferences.
Drying time
Consider its dry time and cure time before spending a dime on any finish when installing pine. Drying time is the amount of time prescribed between product coats.
It is also known as recoat time. Cure time is the amount of time recommended before exposing your finished projects to routine use.
Understand that drying time will differ based on temperature and humidity, application method, and whether you work with bare wood or stained surfaces.
A finish’s drying time determines how quickly or slows you can complete your project and move on to something else. Water-based products dry faster than oil-based products.
Durability
It refers to the length of the finish before applying a maintenance coat. Generally,oil-based products are more durable than their water-based counterparts.
However, high-quality water-based products in the market offer unparalleled durability. They may be pricey, but they are eco-friendly, odorless, and dry faster.
Do You Need to Finish Pine Tongue and Groove Ceiling?
Yes, you have to finish a tongue and groove ceiling to give it a fighting chance against unforgiving elements. Unfinished or natural pine is prone to fading, discoloration, clamping, and moisture damage.
A high-quality finish will protect the pine wood grime, dirt, abrasion, and moisture and keep it elegant for decades.
Remember to prep the surface well before applying the finish of your choice. Understand your project well to pick a finish to give you the dream results.
How to Finish Tongue and Groove Pine Ceiling
You are overjoyed because you have finished installing a tongue and groove pine ceiling in your dream home or porch. It has created a rustic look, and you couldn’t be happier.
Pinewood is such a gorgeous natural wood, and it may feel like you are making a massive mistake by wanting to cover it up with a finish or paint. However, instead of leaving your pine in its natural state, finishing it is a brilliant idea.
When finishing a tongue and groove pine ceiling, you must first decide whether you need a surface finish or a deep penetrating finish. A surface finish is just about any finish that sits on top of your wood, such as paint.
A penetrating finish permeates the wood’s surface, producing a more natural appearance. Surface finishes last longer than penetrating finishes but do not appear natural.
Tongue-and-groove ceilings are made up of interlocking lips designed to conceal nails. When finishing a tongue-and-groove ceiling, the procedure is more important than style.
Portions of the tongue may be exposed over time due to periodic movements in your wood. It is essential to stain the wood of a tongue-and-groove ceiling before installation.
Contrarily Oth, the unstained sections of the tongue will finally become exposed, resulting in lines of bare timber that diminish the overall appearance.
Here’s how you go about it.
What you’ll need
- Tack cloth
- Plastic drop cloths
- Wood stain
- Mineral spirits
- Step ladder
- Heavy-duty fabric drop cloths
- 4-inch-wide paintbrush
Step-by-step procedure
Step 1: Spread your sizable plastic
Spread your sizable plastic drop cloth on the floor. Place a fabric drop cloth on top of it. Note. The stain will bleed through fabric drop cloths and pool on the plastic drop cloths. To avoid messes when staining, simply use these two drop cloths in tandem.
Step 2: Lay groove boards
Place the tongue and groove panels on top of the drop cloths. Be keen to decide which side of the groove panels will be exposed once you install and place that side facing upwards.
Step 3: Clean the wood
Wipe the wood’s surface with a clean tack cloth to remove dirt.
Step 4: Apply the finish
Using a 4-inch paintbrush, apply your favourite finish strictly following the manufacturer’s instructions or based on other people’s experiences from your in-depth research.
Apply thin layers instead of thick layers. Allow the finish to dry and cure appropriately. The dry time differs from product to product.
Step 5: Cleanup after work
If you use a water-based stain, clean your brushes with a soapy solution. If you use oil-based products, clean the recommended tool with mineral spirits.
If you are refinishing an installed tongue and groove ceiling, spread a plastic drop cloth on the ground and overlay it with a fabric drop cloth. Use a step ladder to get to the ceiling and apply the new finish described above.
Which Way Should the Tongue and Groove Ceiling be Installed?
Installing tongue and groove ceilings over bare framing or drywall is an excellent cover-up for an unsightly ceiling or for creating a rustic feel. Start by removing the old ceiling, if any.
Measure your roof size before heading to your local hardware store to buy tongue and groove boards. Grove pine ceilings are pricey, so it helps to correct the measurement.
You’ll need a wood filler, wood adhesive, 16 gauge nails, caulk, and the boards (Here is the best caulk for interior trim and baseboard).
Stain the board before installation. Cut the groove of your wood to fit your roof, and ensure you fix the first board correctly because it’ll determine the results.
Install the remaining panels and cut the boards with a jigsaw if you need to create room for lights.
How Do You Seal A Knotty Pine Ceiling?
There are various factors to consider when sealing a knotty pine ceiling to protect the wood and maintain its appearance. The process involves several steps:
- Clean the ceiling surface by vacuuming or dusting to remove debris and dirt.
- Sand the wood to remove loose pieces, dirt, and splinters for a smoother finish.
- Apply a latex primer to help the sealant adhere better to the wood.
- Apply a coat of sealant to cover all cracks, crevices, knots, and other features on the wood.
- Optionally, you can apply a stain to protect the wood from moisture and UV damage. Use a brush to apply multiple thin coats of varnish evenly across the surface, or follow the package directions if using stains.
- Allow several days for drying before applying any other chemical treatments.
Following these steps will ensure a proper seal for your knotty pine ceiling, extending its lifespan and maintaining its appearance.
How Do You Keep Pine Tongue and Grooves from Turning Yellow?
Use water-based polyurethane or penetrating finishes since they do not have a yellow hue. Penetrating finishes include; tung oil, linseed oil, cedar oil, mineral oil, teak oil, paste wax, tinted washes, etc., if you want to retain the natural look of pine.
Note that pine is difficult to stain because it absorbs stains unevenly. So, test the stain on a scrap board to see if you like the final look.
Do You Need to Stain Both Sides of the Tongue and Groove?
When using a water-based polyurethane or sealant, it is sufficient to apply only to the groove board’s edge. Nevertheless, if you use an oil-based product, you must apply the stain to both sides of the joint for it to be impactful.
Let the stain completely dry before using the ceiling boards. For best results, tongue-and-groove ceilings should be stained before installation.
On the other hand, if the builder hung the roof without first staining it, finish the ceiling using the method we discussed here. Then, as time goes by, touch up the unstained areas of the tongue that have become exposed.
Read also: Pine vs Whitewood
FAQs
Should I stain my tongue and groove the ceiling?
Yes. Stain your tongue and groove ceiling before installation for superb results. Pinewood is susceptible to cracking, discoloration, mold and mildew, and anything else that wreaks havoc on wood. Staining or painting helps preserve its natural look and allows its beauty to last for years.
What do you put on tongue and groove pine?
You thin a small amount of polyurethane with mineral spirits in a ratio of 2:1. Dip a good quality paintbrush in the sealant and put it on the surface of your object in long, even strokes. The sealant makes the finish adhere to the pine effectively and last longer.
How do you apply polyurethane to a tongue and groove ceiling?
Cover the floor with a drop cloth and use painter’s tape to protect the areas you do not need to be stained. Follow the manufacturer’s instructions on the ideal nozzle size and sprayer pressure settings. Test on a drop cloth first to ensure that the layers are uniform. Increase the pressure if you don’t get a coherent spray. You spray uniform strokes across the entire surface of the ceiling.
Also, read our article on best polyurethane for exterior doors to make an informed choice when it comes to protecting and preserving your entryways.
Conclusion
Achieving a stunning tongue and groove pine ceiling has never been easier. Our exploration of the Best Finish for Tongue and Groove Pine Ceiling has brought us to a resounding choice: General finishes water based wood stain.
Its superior quality and versatility make it the top contender in our extensive testing. But remember, the best choice depends on your unique project, and we’ve highlighted various scenarios to guide your decision.
So, choose your finish wisely whether you seek rustic warmth or contemporary elegance. Your ceiling’s transformation awaits.and affordability.