We all know how frustrating it is when we’re trying to dry wood in an oven. The heat doesn’t penetrate the wood, no matter how long we leave it there.
But don’t worry – we’ve got a few tricks up our sleeve to help you get the job done quickly and efficiently.
So read on, and learn how to dry wood in an oven like a pro!
How To Dry Wood In An Oven
To prepare your oven for drying, reposition the oven racks and preheat them to the desired heating temperature. After this is done, add the wood to the oven, ensuring they don’t touch each other. After drying for an hour, check the moisture level to confirm if it’s dried to your taste, and redry if necessary.
How to Dry Wood Slices in the Oven – (A Step by Step Process)
Before starting the wood drying process, get everything you need nearby. Also, make sure your wood is in optimum condition before starting.
Supplies for baking wood in the oven
- Fire Extinguisher: Make sure the extinguisher is functional and has enough gas
- Mitts
- Moisture Meter/ Weighing Balance: Test either of these by using them on the damp wood
- Wire Cooling Racks
- Epoxy (optional)
- Wood Glue (optional)
- Wood stabilizing solution (optional)
Steps to Drying Wood in Oven for Crafts
Take the following step-by-step guide to dry your wood in a common kitchen oven:
Step 1: Prepare your oven
- Reposition Your Racks
Rearrange your oven racks so that one is in the center and another is at the bottom. Adequate air around the wood is essential to ensure the wood dries evenly.
Hence, placing the wood in the center rack will help ensure adequate air around the wood. Then, place a large sheet pan at the bottom to catch any small pieces of wood that escape through the center rack rungs.
- Preheat the Oven
Keep the oven temperature between 200°F (93°C) – 225°F (107°C). Make sure the temperature doesn’t reach 500°F (260°C) as wood is flammable at this temperature.
Turn on the convection fan if it has one. This will help ensure rapid circulation of the heat. Then, place an oven-safe thermometer on the center rack (even if there’s an in-built oven thermometer).
This will ensure accurate readings of the oven’s temperature to prevent overdrying. After 10 – 15 mins, check the thermometer’s readings to see if it is at the desired temperature.
- Measure the wood moisture before placing it in the oven
You can either use a wood moisture meter or a weighing balance to measure the wood’s moisture. The moisture level of the wood gives you an idea of how long to dry the wood for.
For example, wood for firewood should have a moisture level of around 15% – 20%. To use an electric moisture meter, gently push the wood downwards on the two metal contact points on the meter.
The weighing balance is a good alternative if you don’t have a wood moisture meter. The wood will weigh higher when damp. Hence, the loss in weight after drying gives an idea of the amount of moisture lost.
Step 2: Load the wood
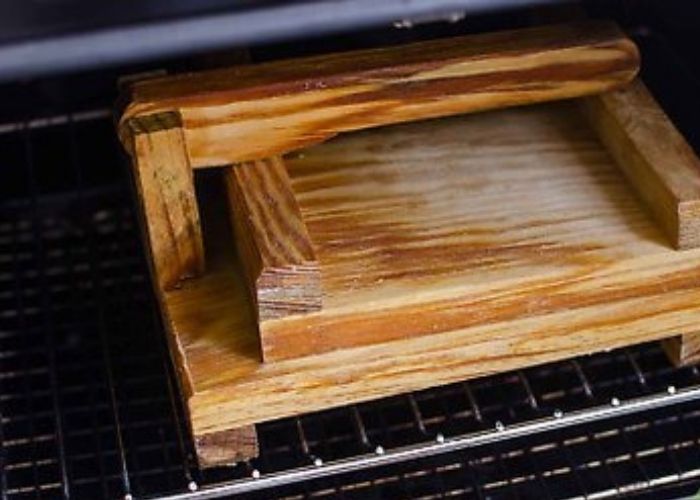
- Spread the Wood Out on the Center Rack
If the wood pieces are large, cut them into smaller sizes. Then, make sure the wood pieces are spread out on the center rack without touching each other. If the pieces are touching, they won’t dry properly.
Also, place them at right angles to the center rack wires. The wood pieces wouldn’t fall through to the bottom sheet pan.
- Recheck all Parameters
Before closing the oven, make sure to check the temperature and the placement of the wood.
Ensure the temperature isn’t over 225°F as extreme temperatures could cause cracking or warping of the wood. Also, ensure the wood pieces aren’t touching each other.
- Dry the Wood
Dry the wood for 1 hour. Make sure you’re close by and set a timer to ensure you do not overdry the wood.
You can also check the temperature in 10-minute intervals to ensure no drop or ignition of the wood. Do not forget to keep your fire extinguisher nearby.
Step 3: Inspect the wood
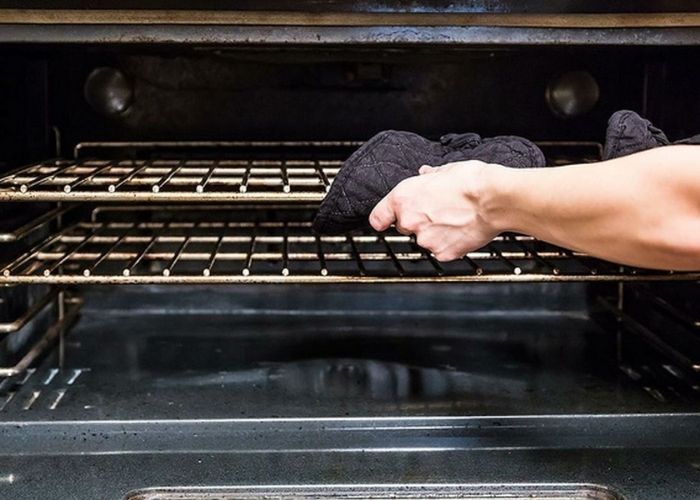
- Bring Out the Wood After an Hour
After an hour of heating, bring out the wood using the mitts to check its moisture content. Use the moisture meter, as explained earlier, to check for the moisture level.
If the meter isn’t available, place the dry wood on the wire cooling rack to cool. Then, use the weighing balance to check for weight loss.
If the moisture level is still high, you can continue to heat the wood in 15-minute intervals. However, don’t overdry the wood to prevent physical deformities.
- Bring Out Wood to Cool
After completing the drying process, bring out the wood to cool by spreading it out on the wire cooling racks.
Make sure the wood pieces don’t touch to allow even cooling. Use the mitts and ensure you don’t touch wood with your bare hand.
- Check for Deformities After Cooling
After the wood cools, check if any pieces are cracked or warped. This step isn’t necessary if the wood is meant for the fireplace or to serve as fuel.
To fix the cracks, you can add wood glue or epoxy. To unwarp the wood, you can wrap it in clothes and iron it. This might take several trials before the warp is corrected.
- Add Wood Stabilizing Solution If Desired
After drying, you can add a wood stabilizing solution or sealant to the wood surface. This ensures that the wood stays dry even in storage.
To apply the wood stabilizing solution, wait until the wood cools down to room temperature. Then, apply the solution across the surface of the wood as desired using a brush or sponge. Finally, leave the wood to air dry.
Safety First: Precautions When Drying Wood in the Oven
It is no news that wood is quite flammable in the right conditions. Hence, you need to give the wood drying process enough attention to prevent any fire hazards from occurring.
Below are a few steps you could take to ensure optimum safety when drying wood:
- Keep a fire extinguisher nearby. This will be very useful in the occurrence of any fire.
- Test the wood drying process with a few pieces of wood. This is important if you plan to use dry wood for decorative or functional processes. By initially testing it out, you’ll know if the drying process has any negative effect on the wood.
- Use mittens when removing the dry wood from the oven to prevent burning your hands.
- If you notice any smoke when drying, turn off the oven immediately and try to find out the source of the smoke. Check if there’s any chance of any fire outbreak. If not, open all windows and open the door to allow the smoke to dissipate.
- If the outbreak occurs, keep the oven door closed and wait for a few minutes to see if the fire will die out. If it doesn’t, open the oven door and use the fire extinguisher to put it out before it gets out of control. If the fire is larger than you can handle, get the appropriate authorities to help.
Also, if you notice you need to dry large amounts/sizes of wood, it is better to use an industrial kiln.
Advantages & Disadvantages of Drying Wood in Kitchen Oven
Why is it advisable to use your kitchen for drying wood? Below are a few advantages on why your kitchen might just be the perfect avenue for you to dry your wood:
Advantages
- Speed: This technique is faster than most methods. Methods such as salting the wood or air drying take days or even weeks. However, with drying, you’re done in hours.
- Prevents Mold Formation and Eradicates Pests: With this method, you can prevent mold formation and eliminate any pests or insects present in the wood.
- Prevents Drying Defects: Unlike most methods, drying dries wood pieces evenly and rarely causes any drying defects common with other methods.
Disadvantages
- You need to have additional equipment such as weighing balance or moisture meters to accurately carry out this procedure.
- It can evaporate other substances in the wood apart from the water. This could have adverse effects on the wood especially if it is meant for functional purposes.
- The drying method might require some calculation, hence, you might make some errors.
How to Tell When Wood is Dry
After drying your wood, some characteristics help determine if it is properly dried or still needs more baking. Examples of these physical characteristics include:
- The wood becomes lighter in weight.
- The wood does not make any sounds when hit with another piece of wood.
- It becomes lighter in color.
- It darkens over time.
- It does not hiss when it burns (wood for fireplace or firewood).
- The wood has cracks in the end grain.
While these characteristics are good pointers to determining how dry your wood is, the best method is to use moisture meters. These moisture meters give more accurate results about the dryness of the wood.
They come in two types: pin-type and pinless moisture meters. How do the two of them differ? Let’s examine each closely:
Pin-Type Moisture Meter
Pin-type moisture meters use electrodes to determine the moisture content of the wood. Dig the electrodes into a piece of wood, and it uses the electrical resistance offered to measure moisture content.
Water conducts electricity; hence, damp wood will offer less resistance to the meter, leading to a high moisture content reading. The reverse works for dry wood.
The dry range of the pin-type moisture meters falls between 6% – 8% moisture content. Therefore, dig the electrodes deep into the wood to get more accurate moisture content readings.
Pinless Moisture Meter
This moisture meter uses a sensor pad to read the moisture content in place of an electrode. It can read the moisture level of a wood piece about a quarter to half-inch thick.
With this type, you can take readings easily as you do not have to struggle with inserting electrodes into the wood.
Which is Better – Pin-Type or Pinless Moisture Meters?
The pin-type moisture meters will give more accurate readings than the pinless moisture meters. However, while the pinless meter also has its advantage (easy method of taking readings), it cannot give results as accurate as the pin-type meter.
Hence, which is better depends on what you’re looking for. If you want a meter that is easy to operate, the pinless moisture meter is the better choice.
However, if you require precise information about your wood, the pin-type moisture meter is more appropriate.
Are Moisture Meters Accurate?
The accuracy of a moisture meter depends on the quality of the brand you’re using and the amount you’re willing to pay.
The costlier moisture meters will offer higher accuracy and quality measurement than affordable ones. For example, a top brand might be able to offer accuracy up to 0.01% of your wood’s wetness.
So, if you require a high degree of accuracy and precision in measuring moisture content, you must be ready to spend the big bucks in getting a premium moisture meter.
FAQs
Can you dry wood in the oven?
Yes, you can dry wood in the kitchen oven. However, the size of wood they can take might be a limitation for drying wood in a kitchen oven. Hence, you might have to cut down the wood to smaller sizes and reposition the racks.
How do you dry fresh-cut lumber?
Drying fresh lumber requires a different process from drying smaller wood pieces. With huge lumber, you definitely can’t use kitchen ovens. Instead, the two most popular methods are the use of either air-drying or heat from kilns.
How to kiln dry wood in the oven?
To carry out kiln drying of wood in an oven, you must ensure all the materials needed are within your reach. Then, follow these steps.
- First, reposition the racks to allow maximum heat circulation.
- Then, you preheat the to the desired temperature.
- After preheating, measure the wood moisture level to determine the period of heating.
- Load the wood into the and heat till satisfaction.
- Bring out of the when done and allow to cool on the wire cooling rack.
Can you dry firewood in the oven?
Yes, Yes, drying firewood in an oven requires temperatures between 200 and 425 degrees F. However, you do not need to check for cracks or warps with firewood since the wood would end up as fuel.
How do you dry wood slices in the oven?
To dry wood slices in an oven, you must ensure the wood slices are spread out without touching each other on the center rack. Then, you preheat the to a temperature within the range of 200°F (93°C) – 225°F (107°C). Then, you measure the average moisture of the wood slices to know how long to heat them for. Finally, load the wood into the heat for a predetermined time.
Read also: Does wood shrink in heat?
What temperature should you dry wood?
You should dry wood at a temperature ranging from 200F (93C) to 225F (107C). However, you must ensure the temperature doesn’t go as high as 500°F (260°C( as wood gets ignited at this point.
How long does it take for wood to dry out?
The period required for wood to dry depends on the method of drying used and the size of the wood. For small-sized pieces of wood, air drying could take about a week, while drying would only take about an hour. However, you might have to air-dry for up to a year for lumber, while kiln drying might last for 6 – 8 weeks.
Does baking wood make it stronger?
Yes, baking wood makes the wood stronger. As it loses moisture, it increases in strength. However, there is a point where it becomes counterproductive. The wood becomes brittle and starts cracking if the baking is too much. Therefore, paying close attention when drying/baking wood is advisable.
Can you put wood in the oven?
Yes, you can put wood in an oven. However, you might need to cut the wood into smaller pieces and reposition your racks. Once you’ve done this, your wood should easily fit into the oven.
Read: Can you stain damp wood?
Can you Dry Out Wood in the Oven Summary
While air-drying is a more cost-effective method, getting dry wood takes way too long. However, with drying, the process is much faster.
However, you need to pay full attention to the process to ensure no hazard or structural deformities occur. Not being able to give full attention will lead to problems such as wood cracking or warping.
However, if you follow all the steps listed in this article, you should have your properly dried wood in no time.
Also, learn other methods of drying wet wood faster.