Many woodworkers have probably had the unfortunate experience of trying to remove a screw that’s completely missing its head. It can be incredibly frustrating, especially if you don’t have any tools that can help you out.
But don’t worry, there is a way to get that screw out without any special equipment. In this blog post, I’m going to show you how to remove a broken screw with no head.
We’ll also share some tips on how to avoid this situation in the future. So whether you’re a beginner or an expert woodworker, stay tuned.
How to Remove a Screw with No Head
First, be careful to choose a suitable bit for your screw, depending on the diameter. Then you’ll need to drill a screw hole gently not to overheat the bit. Next, it is time to use a suitable extractor to fit into the hole. Finally, rotate the extractor appropriately to remove it.
Tools to remove a stripped screw
The essential tools include
- Pliers
- Putty knife
- Steel wool
- Fine sandpaper
- Abrasive powders
- Drill bit
- Wood glue
- Wood dowel
- Wood plastic
- Screwdriver kit
- Cutting tools
How to remove a screw with no head from a wood surface (step-by-step)
Removing a screw with no head may seem difficult, but you can achieve this without a headache with the right tools and procedure. Below is a stepwise guide to achieving this.
Step 1: Select screw extractors
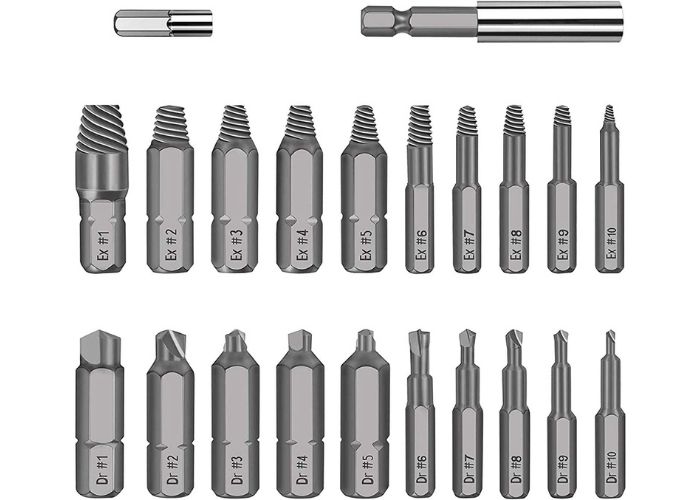
A screw extractor is a primary tool that comes to your rescue when you need to remove a broken screw. You can use this tool to remove damaged screws and bolts.
The extractor is made from hard steel and usually resembles a standard drill bit. The top end of the extractor is square-headed, allowing you to opt for various operating methods.
For example, you can attach the square head to a T-handle to help rotate the extractor. Also, a locking plier can serve as a grip for the extractor; however, the T-handle has a better grip.
The body of the extractor is threaded and tappers at the other end. There are different extractors, including spiral flute and straight flute, among others.
These extractors come in various sizes; hence, selecting a suitable extractor that fits the screw you wish to remove is essential. Although, many extractors are multipurpose and can remove other fasteners.
To have a variety to choose from, it is best to get a screw extractor set. Most extractors are easy to use, even if it’s your first time.
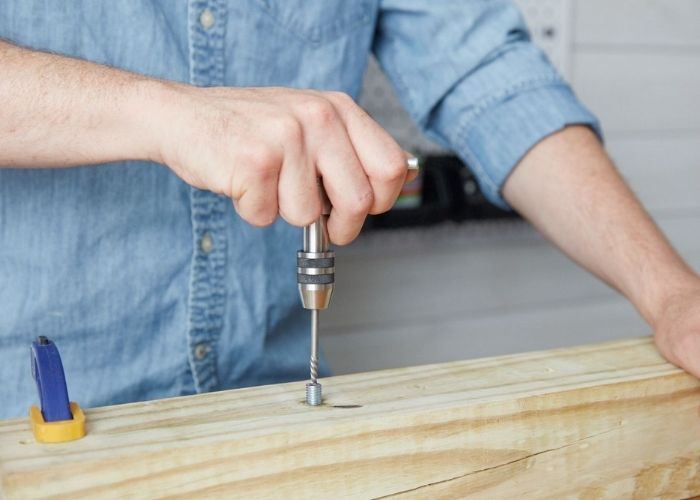
Step 2: Drill a screw hole
Once you’ve selected a suitable extractor, the next step is to drill a pilot hole. Using a bit with a smaller diameter, bore a hole in the middle of the screw.
Many extractor sets contain various sizes to meet your needs. However, be careful to drill with a gentle motion; otherwise, the bit will get overheated and may break.
Generally, the nature of the broken screw head and the size of the extractor will determine how much you should drill. Also, to prevent overheating the drill bit, you may need to apply a few drops of cutting fluid before drilling.
For more detailed guidance on how to screw hooks into wood without drill and additional tips on successfully extracting broken screws.
Step3: Hammer the screw extractor
The pilot hole is set, so what next? Attach a grip to a suitable extractor. It may be a convenient T-handle or locking plier. Then, with adequate pressure, place the extractor into the pilot hole and tap the extractor into the hole with a hammer.
Step 4: Remove the screw
Once the extractor firmly fits into the pilot hole, turn it as you would fasten in a screw. As a result, the tapered end of the extractor penetrates the broken screw and firmly attaches to the head or shank.
What makes the extractor an exciting tool is that it has reverse threading. So, rotating it counterclockwise unscrews the broken screw such that you can eventually remove it from the hole by hand.
There is a type of extractor similar to a hollow cylinder but with saw-cut teeth heads. This extractor works like a standard drill. With this hollow extractor, you’ll need to center it around the headless screw, then burrow it down.
As a result, it penetrates the material surrounding the broken screw, thereby removing both it and the wood. You can then fill screw holes in wood or patch the wood afterward with wood fillers.
However, if the screw still proves stubborn, you can introduce heat using a blowtorch or other related heat source. After that, you can apply a lubricant to the thread and try utilizing the extractor again once it is cool.
Remember that the screw is your primary target; therefore, be careful not to damage the wood surface or metal material using heat.
Step 5: Sanding
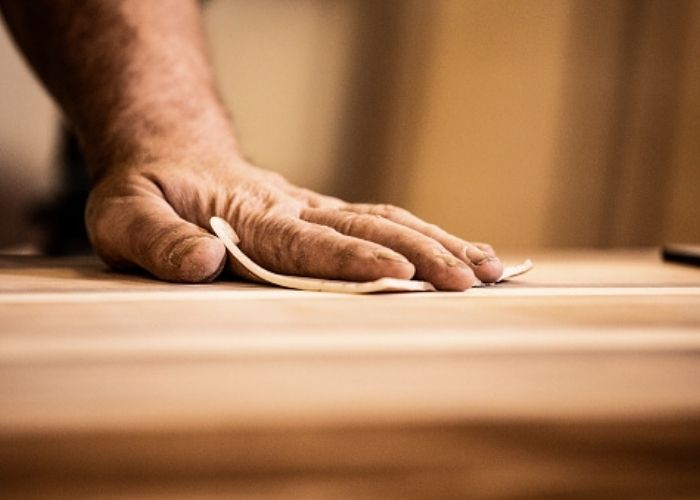
After extracting, sand the rough edges of the wood. You can use a sanding block or high-grit sandpaper. After you sand, clean wood particles off with a damp cloth and allow the wood to dry completely.
Then, paint the surface for even better results. You can sand for both removed screws and after proper filling of a screw holes.
How to Remove a Broken Screw without an Extractor
Using screw-extracting pliers
If the screw shank is exposed enough to be gripped, you can use pliers to remove it. This remains one of the easiest and most reliable methods, and locking pliers are most preferred.
The work is done once you can grab even a tiny part of the shank to turn it out. However, this method requires you to be patient.
Using rubber bands
When the head of a screw is gone, rubber bands are valuable accessories to help pull it out. Rubber bands offer enough grip to extract or loosen to an extent.
Get a thick rubber band and fix it over the screw. Then, with a suitable screwdriver, turn gently to unscrew.
However, sometimes using a rubber band may not do the best job as only a tiny portion of the shank is removed. Don’t worry! You can use a plier to complete the task.
Using wood plug cutters
If the screw is deep into the wooden surface and thus not reachable, you can handle it the hard way. The cutter used for wood plugs is a creative tool to remove it, and this tool is similar to hollow cylinder extractors with saw-cut teeth.
You can bore a hole into the surrounding wood of the screw with a wood plug cutter. As a result, the shank becomes visible to grip. Then you can use a locking plier or a drill chuck to remove it from the screw hole.
Using a chisel
Another removal option is to dig the surrounding wood with a chisel. You can use a chisel to create a countersink around the screw.
The countersink offers space to use a nose plier to remove it. Also, you can apply an unlocking agent to facilitate removal.
What Causes a Broken Screw Head?
A screw does not break suddenly; there are various factors behind the damage. These factors range from stress to rust, age, and pressure.
Too much stress
Too much of anything always has adverse effects. Overstressing on one area may cause it to break. Like every item, it has a maximum load limit, and beyond this limit, it begins to stretch, deform and eventually break.
This frequently happens when using an instrument of the wrong size, such as using a flat screwdriver on a Phillips screw or when using a screwdriver that is smaller than it should be.
Pressure
Applying too much pressure can also cause it to break, which can occur with electric or manual screwdrivers. When using your screwdriver, ensure you regulate the pressure you apply, especially with electric screwdrivers.
Rust
Screws tend to rust upon exposure to atmospheric agents like oxygen, water, acids, or organic chemicals. As a result, they get weak and break easily.
However, rusting depends on the material from which they are made. For example, brass materials are less resistant to corrosion than stainless steel.
Age
Screws usually wear off over time as a result of accumulated fatigue. As they age, they experience fatigue, which can be a combination of overstressing, pressure, and corrosion.
This affects the efficiency and makes them more susceptible to breakage.
Covering the Screw
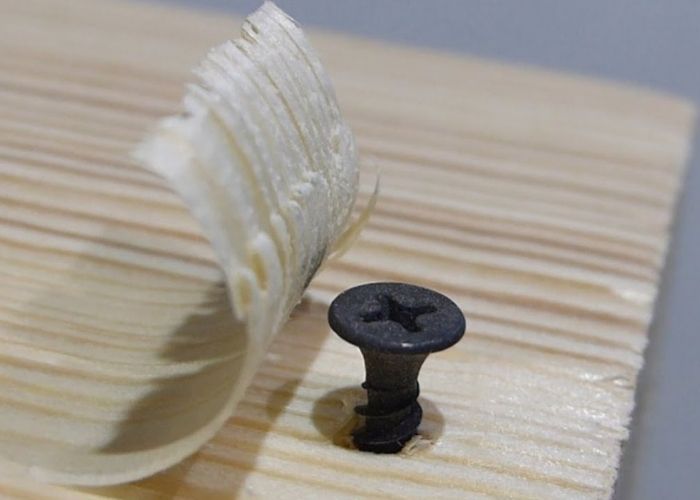
If removing the screw is proving particularly difficult, why not just use cover it? Yes, you can do that. There are different ways of covering broken screws, with the most typical being wood fillers.
For filling screw holes, you need to select a good wood filler. Then, using a putty knife, you can apply to the broken screw and essentially get a “filled” surface. You can pull this off if you do it neatly.
Aside from hardware store wood fillers, you can use scrap wood for filling holes. Do not hesitate to add more wood filler if you are not satisfied with the initial results. Just make sure you add in small quantities not to overfill the hole.
Another way is to use a patch on the broken screw, giving a patched spot. You can do this to cover nail or screw holes. As with wood fillers, the objective is to cover the screw hole.
You can paint a completely invisible spot for both a filled and patched area.
Also, you can paint over a new screw to make it invisible if you decide to replace the broken screw. Choose your preferred shade of paint, often one with the same color as the wood.
Dangers of Broken Screw Heads?
It happens very often that you have to remove a screw with a broken head from wood surfaces. Broken screw heads can pose several difficulties and reduces fastening efficiency.
First, it is a hell of work to extract or replace it without the right tools if you fix it in the wrong spot. Also, if you eventually remove it, the affected area may be rough.
In addition, the broken screw head can damage the surface in which it is inserted, especially in a weak or thin wood. Aside from this, if you decide to cover it, the wood may not have a smooth surface.
Related read: Best cabinet screws.
FAQs
How to unscrew a stripped screw?
If the stripped screw is due to corrosion, you should first clean the rust using a wire brush. Then, you can spray an unlocking agent to facilitate removal. Next, allow the unlocking agent to act for some time, then unscrew gently with a suitable screwdriver.
How to remove a broken screw in a wall plug?
The first thing to do is heat the visible part of the plug inside the wall close to the melting point. Then you try to melt it with the tip of the screwdriver itself and make the plug inside the wall with the screwdriver’s tip become a single body.
How to fill screw holes in wood using wood fillers?
After extraction, your need to fill screw holes in wood, and the wood filler is a great aid. You can easily use a good wood filler, like the epoxy wood filler, using a putty knife. Let your wood filler dry, and then clean with a damp cloth. Wood fillers are available in various colors. Filling holes is a great way to cover screw holes.
Related Post: Can You Screw Into Wood Filler
What can I use instead of a screwdriver?
- Coin
- Utility knife
- Metal file
- Parrot key
- Tweezers
How to extract a broken screw from wood without wood glue?
First, drill the broken screw and then use an extractor. Then, screwing the extractor, unscrew the broken pin.
How to unscrew a headless screw?
Another alternative to attempting to remove the screw is to cut the head with a hacksaw and then use a flat-blade screwdriver.
Conclusion
Removing a screw with no head is a typical problem at home and in the furniture workshop. However, there are several solutions to extract it without damaging it and the surface more than necessary.
Remember that the screws get stripped and broken for various reasons. Oxidation and rust from atmospheric agents, pressure, and age cause the problem making it difficult to remove.
After removing screws, there are always screw holes. You can use wood fillers to fill these screw holes or use a patch to give a filled hole.
Learn more on How To Screw Into Wood Without Drill in 3 Easy Ways or read the best decking screw gun for the money