Learning how to make wood filler with sawdust can help you fill gaps and cracks on your wood without highlighting the filling.
These gaps in your wood could result from nail holes, uneven joints, holes in the knots, or a crack caused by hammering.
You get a lighter shade or darker color depending on the wood you want to fill if you can make your sawdust wood filler. The advantage is that you whip your own in small batches rather than buying large commercial wood filler that will go to waste.
As an experienced woodworker, I’ll tell you what you will need for your DIY wood fillers, the various binding agents you can use, and how to apply them for your projects.
Read on.
How To Make Wood Filler With Sawdust
- Sand, a piece of scrap wood, to get matching sawdust.
- Mix the sawdust with wood glue, epoxy, or CA glue.
- Push the wood filler into the gaps or cracks on the wood.
- Sand the filled area smooth once the wood filler fully dries.
- Finish the wood project by applying a coat of wood stain or paint.
Tools and Materials for Homemade Wood Filler
- Power sander
- Fine grit sandpaper
- Wood glue, Epoxy, CA glue, Shellac
- Plastic putty knife
- Craft stick
- Tack cloth
- Disposable gloves
- Mask
How to Make Wood Filler With Sawdust- Steps
Step 1: Sand a sample wood to get sawdust
First, ensure you’re working in a well-ventilated space. Then wear your mask to avoid inhaling flying dust.
To make your own DIY wood filler, you need to have sawdust. Sand a scrap piece of the same wood you want to fill. You can use a sander with a collection bag like a random orbit sander or belt sander.
If you don’t have a power sander, you can use palm sandpaper and collect the dust generated on a paper plate or a piece of cardboard. Save the rest of the wood dust in a dry container for future use.
Remember to always sand along the direction of the wood grain. Use 100 or 120 or fine-grit sandpaper to get fine sawdust.
Step 2: Mix the sawdust with a binding agent
Wear disposable gloves and use a craft stick, then dispose of them once you’re done
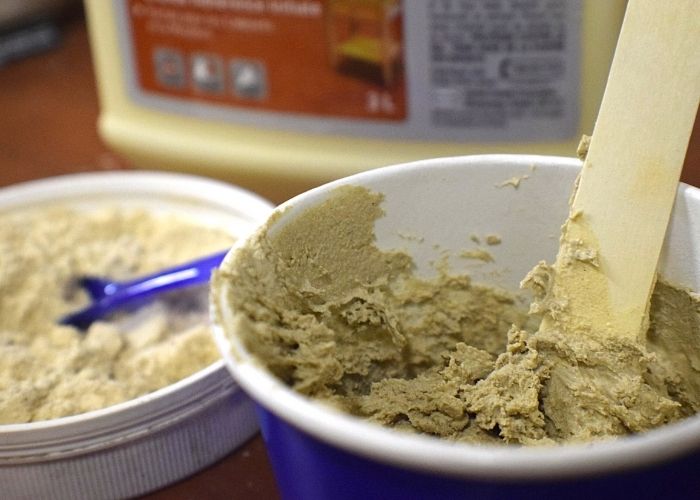
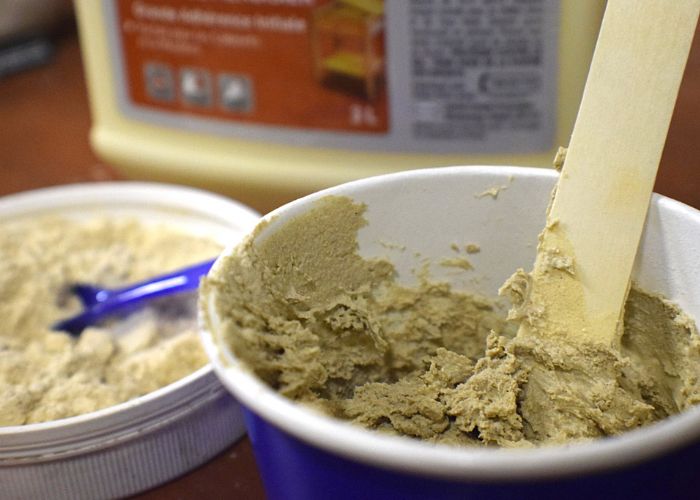
Put the sawdust in a small pile on a cardboard or paper plate. Add a little wood glue and mix it with a plastic putty knife or a craft stick. Add more glue and continue mixing until you get putty-like consistency.
Keep in mind that the binding agent you use will affect the color of the putty. Therefore, we recommend white or transparent glue to have a close or exact color match with your wood project.
Here’s a brief about the different binding agents you can mix with sawdust to make your own DIY wood filler.
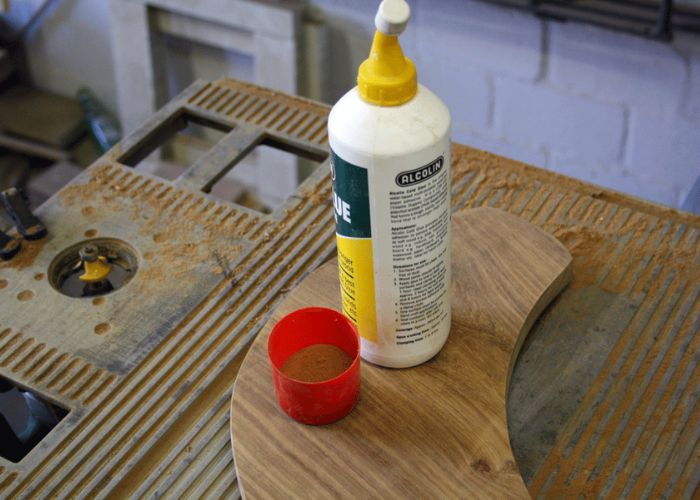
Wood Glue: This is one of the most common adhesives among woodworkers. It usually comes in two color tones: white and yellow glue.
For this purpose, use white wood glue so you don’t change the color of the filler so much. We wouldn’t want to have the filled cracks or gaps appearing too conspicuously. Also, the filler will dry solid hard and blend in with the rest of the wood.
Here is the strongest wood glue to make wood filler that I recommend.
Shellac: Shellac is better known as a wood finish. The process of mixing it with sawdust is the same. The only issue with shellac wood filler is, it won’t dry solid enough like the surrounding wood.
The filler will dry somehow but still be soft enough to dent with a finger or a craft stick. Use it for decorative purposes and not pieces that will require structural strength. You may want to compare other wood fillers and spackle for wood for the best outcome.
Epoxy: This is your best option if you’re making homemade wood filler to fill knots and big cracks in the wood. It dries solid, therefore, guarantees structural strength.
Pick a clear epoxy for wood that is transparent so that the filler material will look almost as good as the surrounding wood. In addition, epoxy is known to dry quickly, so you have less than five minutes to make and apply the wood filler.
CA glue: Also known as super glue, it is an excellent binding agent you can mix with sawdust and get homemade wood filler. Just like Epoxy, it sets pretty fast. That means as soon as you have the desired consistency of the putty, you need to fill the gaps or cracks.
You can use the wood filler epoxy to bridge large gaps. Also, you might get a slightly darker color shade than the rest of the wood, but it won’t be shouting.
Step 3: Push the wood filler into your wood
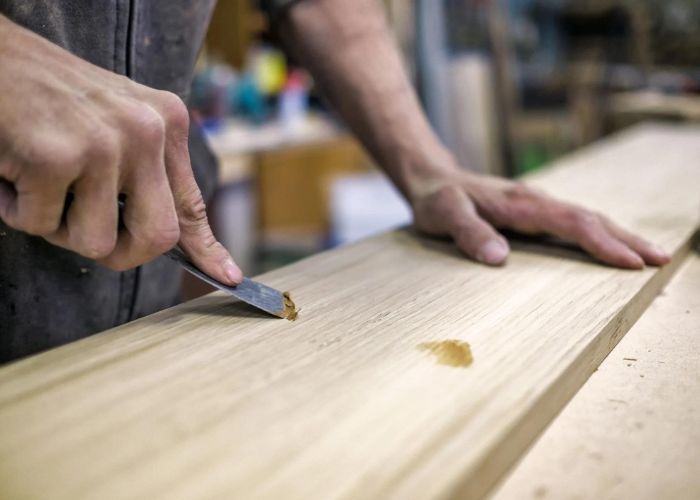
Once you have the desired consistency of your DIY wood filler, scoop and spread it into the voids you want to fill. Then, whether you are using a plastic putty knife or a craft stick, ensure you stuff the void.
Then spread an extra layer of the filler on the surface of the wood. If you have a protruding lump, don’t worry about it, it tends to shrink when it dries. You want to have a more or less flat surface and not dip when the wood filler dries.
Step 4: Sand the wood
Once the filler has sufficiently dried, you need to smooth the surface to have an even wood surface. You can begin by scraping the excess huge junks of filler using a metal putty knife.
Then sand over it using 80 grit sandpaper. Then finish sanding with fine 120 grit sandpaper. Remember to always sand along the wood grain.
You could certainly use a palm sander or a power sander. Assess the filled gaps and how blended the wood looks.
Step 5: Finish the wood project.
Use a tack cloth to wipe the sanded area. Then finish the wood project by applying a coat of wood stain or paint.
Read Also: Halting the Spread of a Wood Crack
Why Make Your Own Wood Filler?
If you are wondering why you would want to make homemade wood filler when you can buy commercial wood filler, I have answers to that below.
Making your own wood filler can help you create an almost exact color match with the wood you want to fill. That’s because the sawdust you will use is from the same wood you are working on. The binding agent causes a slight difference in color: basically wood glue.
Whitewood glue or transparent one is your best bet to get a better color match since most wood glues have a brown tint.
Another reason why you would want to make your own sawdust wood filler is for convenience. By this, I mean you can always make your own filler within minutes if you run out of them at one point. That way, your project doesn’t have to stall before you can get more.
Homemade DIY filler is inexpensive compared to store-bought wood fillers. An excellent cost saver since the materials are most likely already in your workshop.
DIY wood fillers are best used on small holes such as nail holes, gouges, cracks, or knotholes.
Read: Best Exterior Wood Filler for Decks
The Shortcomings of Wood Fillers
Both homemade and store-bought wood filler has the same shortcomings. Even the best exterior wood filler for large holes you know may still disappoint you.
However, the shortcomings have remedies to counter them. In the end, every woodworking project involves dealing with ups and downs and making the most of it.
As mentioned before, wood fillers, both commercial and homemade, tend to shrink when it dries. To counter this aspect, consider applying slightly more filler above the surface of the wood- afterward, sand down the excess filler material.
Wood fillers set and dry completely hard because of the bonding agent used; this makes it impenetrable. So while it is an advantage, it’s also a disadvantage since it doesn’t soak up wood stains if that’s the type of finish you wanted to go for.
To get an unnoticeable finish, consider painting the wood or otherwise use a polyurethane coating varnish over it. This coat will go over the wood filler and dry evenly as the rest of the wood you’ve been handling.
PRO-TIP
Since naturally, all the imperfections on the wood are a shade darker, consider adding a little bit of carpenter’s charcoal dust to the sawdust, then mix it with your preferred adhesive.
This tip is for situations where your wood filler material is lighter than the surrounding raw wood. That will help give your wood a more uniform or acceptable appearance.
Also Read: Is Wood Filler Stainable?
FAQs
What can I mix with sawdust to make wood filler?
You can mix a binding agent with sawdust to make the wood filler. The binding agent can be one of the following; wood glue, Epoxy, CA glue, or Clear shellac. Mix a little sawdust with the binding agent and use the paste to fill the void. Sand down the wood to a smooth finish once the wood filler fully dries.
How do you make wooden sawdust filler?
Assemble a small pile of sawdust on a cardboard or paper plate. Add a little wood glue and mix it with a plastic putty knife or a craft stick. Add more glue and continue mixing until the resulting paste is a putty-like consistency.
(Also read about wood putty hardening).
How do I make my own wood filler?
First, you sand a sample wood to get the sawdust. Next, put a little bit of the sawdust on a block of scrap wood, and then add wood glue, epoxy, or CA glue. Mix well using a craft stick. Next, add more glue until you get a putty-like consistency. That’s the desired consistency of wood filler.
How do you fill gaps with sawdust?
Mix sawdust from a sample wood with epoxy or white wood glue to make sawdust wood filler. Once you have a thick paste, apply it into the gaps using a craft stick. Next, apply a thick layer to sufficiently cover the gap and slightly rise above the wood surface. Sand down the excess wood filler once it dries.
Conclusion
With the option of buying commercial wood fillers, it’s a great advantage when you know how to make wood fillers with sawdust. That said, it is a convenient option when you suddenly need to make a quick fix; it can also be the best color match for your project and ultimately saving money.
As with most woodworking projects, you will need to practice and experiment here and there before you get the hang of it. So go ahead and make your own wood filler using these woodworking tips, then decide whether it works for you or the store-bought is the way to go.
Let me know if you find this guide practical. See you in the next one. Good luck!
Hi David, we used this method of wood glue and sawdust mix. It worked great except the glue outside the gap is so hard and strong its like sanding concrete. Is there another way to get the excess off. We did 6 hours of strait sanding using an industrial sander and 20 grit. Only got through less than half of a 10 thousand sq ft room. We tried heavy grit on a hand sander too. Thank you for any insight.
Sincerely,
Cheryl
hello Goodell david. I wondered if u have an idea for filler that will accept a tongue oil/ citrus mix stain? Doing an old pine subfloor. the oil is on the darker side. Filling nail holes. Thank you. I tried plastic wood filler. Doesnt take. And regular filler. no go. Thank you. ..T
You can find stainable wood fillers here – https://woodworkingclarity.com/is-wood-filler-stainable/
Goodwill, thanks this was helpful. I do have a question for you. Can I use this same concept on a painted wood piece? I have cups on a beloved 60 year old hutch. It’s green. I am sanding the top and middle and staining that area for a two toned look. Too much water damage from a plant! While sanding it I wondered if I could use the colored sawdust for filler on areas that have chips. The feet, the drawers and the cabinet door.
Thanks for your time.
Kathy
Sure, you can