Wood glue can be an excellent way to avoid screws, nails, or nail holes in exposed wood surfaces. But it can be challenging to choose between staining your wood after gluing it and gluing stained wood.
It’s usually recommended to use wood glue on bare wood because it doesn’t stick properly to a finished surface. Stains generally enter and occupy the pores in the wood, which could prevent the glue from creating a solid bond.
Still, applying wood glue before staining isn’t viable in some circumstances.
So this article explains if and how you can use glue on stained wood plus a few options of the best glue for stained wood.
Will Wood Glue Stick to Stained Wood?
Yes, wood glue will stick to stained wood, although the bond it creates on top of the stained surface will likely not be as strong as bare wood. To achieve a strong wood joint using the glue, you must prepare the surface and preferably use glues designed to work on stained wood surfaces.
Why Gluing Stained Wood is Challenging
The glue needs to penetrate the wood’s fiber structure and pores to create a strong bond. This happens when you apply wood glue on bare wood. In such cases, the resulting bond at the glue joint can be stronger than screws and nails.
When you use glue on stained wood, the layer of stain between the bare wood and the glue results in a weaker joint, this is because the stain occupies the pores that glue needs to penetrate.
Consequently, the glue has a reduced surface area to attach to, resulting in a relatively weaker bond.
Thankfully, there’re a few ways to achieve a strong enough bond with wood glue on stained wood.
How to Use Wood Glue on Stained Wood
Since wood glue won’t bond to a stained surface well, you need to prep the wood before gluing it to improve adhesion.
Here is a detailed look at the steps you need to follow to glue stained wood for the best results.
Step 1: Prep the wood surface
The first thing to do is ensure the stained wood is clean and dry before applying glue. This part includes reducing the amount of wood stain in the areas you want to modify and scuffing them up to give the glue something to grip on.
You could go directly to sanding the piece with medium to coarse-grit sandpaper or wipe it first with a stain removing solution before sanding.
Sanding directly
If you choose this option, ensure the wood is dry, then use medium to coarse grit sandpaper to scuff up the surface. A 120-grit sandpaper should get the job done correctly. While at it, don’t sand the areas where you won’t apply the wood glue.
After sanding, wipe off the sanding dust with a dry brush, tack cloth, or damp rag to remove all the residue. If you use a damp rag for this purpose, ensure you let the sanded surface dry completely before gluing it.
Using stain removing solution
Alternatively, you can deal with the stain before sanding the surface. Often, this may be a necessary step if your wood has a film-forming stain on it.
Use a lint-free rag to apply a stain removing solution such as mineral spirits on the area you want to join with wood glue. Let the solution soak the stain for about two minutes, then rub it with the rag dampened with the stain removing solution.
Let the area dry thoroughly, then scuff it up with 120-grit sandpaper. Next, clean the sanding dust to ready the piece for gluing.
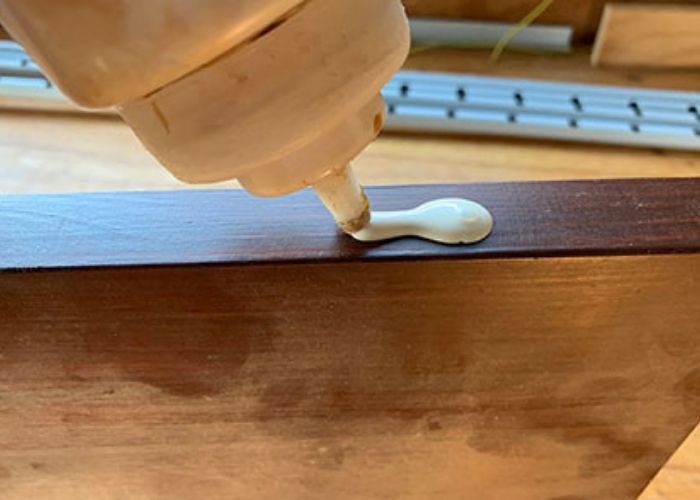
Step 2: Apply wood glue
Here, you want to apply the glue to both the surfaces you want to join together.
Because most of our glues are designed to bond bare wood, gluing one surface is usually enough. But for stained wood, you want to maximize the bond. So just glue a thin layer over both surfaces.
Then, use a glue brush to spread it out evenly on the surfaces for better coverage. Or, read the instructions on the product label and follow the application procedure the manufacturer has specified.
Step 3: Join and clamp the pieces
Once you complete spreading the glue, join the pieces together and clamp them for approximately 20 to 30minutes.
Clamping is usually unnecessary when using glue on bare wood, but stained woods are different. They require clamping pressure after applying the glue for firmer bonding.
About half an hour should be enough clamping time to create the desired bond. And it should get even stronger in the few days to follow.
Allow the wood to cure overnight.
Read: How to hold wood together without clamps
Step 4: Clean away the excess glue while wet
Immediately after joining your two pieces of wood together and clamping them, you should see the excess glue appear on the sides of the joined surfaces.
We recommend removing that excess glue immediately while it’s still wet. Otherwise, you might weaken the bond by removing the excess glue after the joined section has dried.
At this stage, you can easily wipe off the glue with a rag or paper towel. If you choose a rag to clean the glue marks, ensure it’s old enough to throw away after use.
Step 5: Store the leftover glue in a cool, dry place
You probably won’t use all the wood glue you bought. You may want to keep such leftover products for future use, so proper storage is essential.
The best way to keep such glue is in a cool place away from direct sunlight. Direct sun exposure could let the UV light react with the glue and damage it.
Best glue for stained wood
The best wood glue for stained wood is Titebond Polyurethane Glue. The glue cures to form a strong bond on any wood type. It works like epoxy and bonds to stained wood surfaces almost the same way as unstained wood. Titebond Polyurethane glue is solvent-free and completely waterproof, so it’ll create a strong joint. It is also the best glue for MDF.
Guidelines for using Titebond polyurethane glue
- Keep the application temperatures around 100C or 500F.
- Always clamp the woods after applying the glue.
- Give the project approximately 25 to 30 minutes of clamping time for the best results.

- Adhesives & Sealants
- Country of manufacture: United States
- Manufacturer: Titebond
PROS
- The glue is solvent-free
- It adheres to stained wood to create a strong bond
- It’s completely waterproof
CONS
- The glue expands after application
What glue to use on finished wood
Here are other great wood glues to try as well.
Gorilla glue
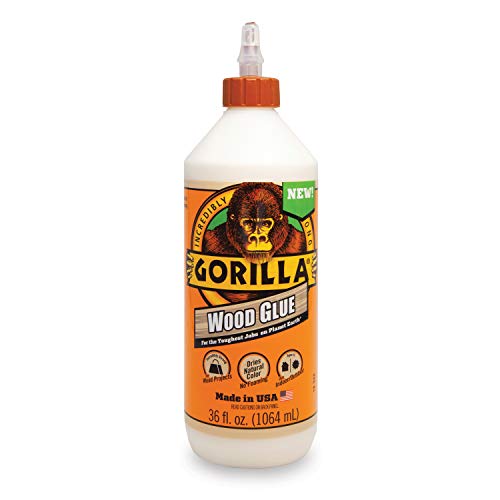
- Complete Projects Fast: Requires only 20-30 minutes of clamp time, fully cured in 24 hours. Quickly creates an incredibly strong bond for wood projects.
- Use Indoors or Outdoors: Passes ANSI/HPVA Type II water resistance. Can be used for all sorts of woodworking projects and repairs as an interior or exterior wood glue.
- Versatile: Ideal for use on hardwoods, softwoods, and natural wood composites. Is a great wood super glue for a wide variety of wood types and materials.
Gorilla wood glue is ideal for several woodwork applications, including gluing over a stained surface. It’s highly weather-resistant and offers excellent results for both indoor and outdoor applications.
Like any product, Gorilla wood glue has its share of limitations, so we will look at the pros and cons below.
PROS
- The glue adheres to stained wood surfaces
- It works well indoors and outdoors
- Retains its dimensions after drying
- Retains the wood’s natural color after drying
- It’s weather-resistant
CONS
- The glue requires clamping to create a strong bond.
- It takes longer to cure
Elmer’s wood glue MAX
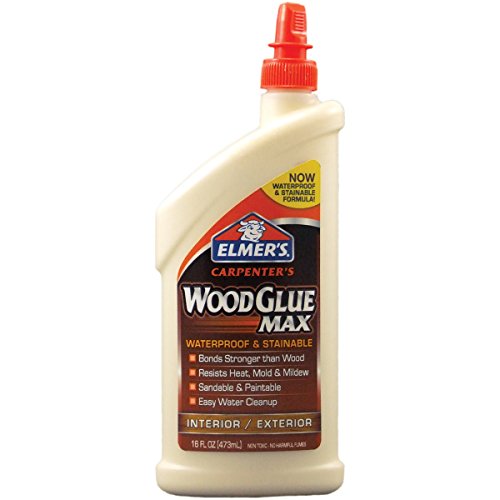
- Extra-strength wood adhesive
- Non-toxic, no harmful fumes and easy to clean up with water
- Sandable and Paintable
This is a superior version of the standard Elmer’s wood glue. While the regular version will only work on unfinished wood, Elmer’s wood glue MAX can form strong bonds on stained wood joints.
The glue is also highly weather-resistant, so you can use it on outdoor applications.
Even though this is one of the best glues for pressure-treated wood, it has a few limitations you may want to know about.
PROS
- It’s non-toxic and ecofriendly
- It produces no irritating fumes
- It forms strong bonds on stained wood
- You can use it indoors and outdoors
- Highly weather-resistant
- The glue requires less clamping time
CONS
- It only works with wood and not non-wood surfaces
Staining Your Wood Before Gluing
The typical best way to work with wood glue is to apply it on bare wood. But sometimes, the most practical approach is to stain your wood before gluing it.
Whenever this is the case for you, here are the steps you can follow to improve the quality of your outcomes.
Step 1
Put a painter’s tape over the areas you intend to attach other pieces with wood glue. The tape will help protect these areas from getting stained. The idea is to avoid getting wood stains on the areas you plan on gluing.
Step 2
Stain the wood.
Step 3
Remove the painter’s tape and let the piece dry. If you’re wondering how to remove tape adhesive from wood, we have some useful tips in our article to ensure a residue-free finish.
Step 4
Apply the glue and attach the pieces. Immediately after attaching, consider clamping the wood blocks together for at least half an hour or longer, depending on the drying time of the wood glue.
When Should I Stain Before Gluing?
The common practice in woodworking is to assemble parts first then finish last. However, you don’t always have to follow that linear mindset. There’re instances where it makes more sense to finish your wood first then glue the parts together last.
Read along to learn about these situations.
When access will become challenging later
You may want to stain first and glue the parts afterward in cases where it will be difficult to access all wood surfaces after assembly.
For instance, assemblies that involve parts such as spindles spaced closely together would make it difficult to stain every wood surface after attaching them.
In such a case, the prudent thing to do is cover the tenons with painter’s tape and brush on the stain and topcoat before you glue joints into place. This alternative will allow easy access to all the spindles’ sides and edges of each rail.
Choosing to go in this direction can be an excellent way to avoid uneven coloring resulting from stains getting stuck in hard-to-reach areas.
Cabinets and bookshelves are the other cases of instances where access becomes difficult afterward. Their interiors are generally easier to reach while still exposed.
When the project includes contrasting parts
If you intend to apply contrasting stain colors on your project for aesthetics, getting the desired results may be challenging after assembly.
In such a case, your best bet would be to stain first, then assemble later. This way, there’re reduced chances of getting a color where you don’t want it.
When parts of the project are designed to shift or move
If you are working with movable project parts or pieces designed to shift as a mode of their function, you may be better off staining and finishing the parts before gluing them into place.
The movement or shifting could mean some surfaces will be unexposed from time to time. This situation could be problematic depending on where the project is located, so stain and finish the wood first before gluing it together.
Can You Stain Over Wood Glue?
Yes, you can stain your project after assembling it using wood glue. But you need to ensure you remove every ounce of the excess glue from the wood surface before applying stain for the best results. Most wood stains need to penetrate the wood to darken it. With wood glue already in place, you can still ensure better coverage by removing the excess glue.
How to remove excess glue before staining
How you remove the excess wood glue depends on the stage at which you are doing it—whether it’s still wet, has skimmed over, or is dry.
Note that we have recommended removing excess wood glue while it’s wet. The adhesive is far easier to remove before it dries. However, if you must deal with it after it has dried, you will be better off knowing how to remove adhesive from wood then.
- Wet glue – wipe off the glue residue with a rag or cloth.
- It started to harden – scrape it off with plastic putty knife.
- Dry glue – Scrape the dried glue with a cabinet scraper. Sanding off the glue may be necessary, depending on where you are staining.
Alternative Ways to Connect Stained Wood Pieces Without Wood Glue
You don’t always have to use wood glue to attach pieces of wood, especially if it’s stained. You can go for a method that works better for stained wood.
Epoxy resin
The best alternative when attaching stained pieces of wood is to use epoxy resin instead of wood glue.
Epoxy resin is specially designed to work with most surfaces, including wood with a stain on it. This adhesive comes in two separate compounds that you must mix to form a powerful bonding wood and several other materials.
If your wood has an oil-based stain on it, consider inquiring from the manufacturer if the epoxy resin will work for your case. The resin is less effective with some oil stains.
You will also need to be patient when working with epoxy because it has a longer setting time than glue.
Construction adhesive
You can also use construction adhesive instead of wood glue. Be sure to check with the supplier to ensure it will work with your specific wood stain type before buying.
FAQs
Should you stain the wood before gluing?
You should pre-stain your wood then glue it afterward if you prefer that alternative. However, it’s better to use painter’s tape to cover the glue area before you start staining.
Will Gorilla Wood Glue work on stained wood?
Gorilla wood glue is one of the best options to use on stained surfaces. But will gorilla glue work on finished surfaces? No. The glue won’t work on painted or varnished surfaces. It also doesn’t adhere to surfaces with urethane or shellac finishes on them.
What glue works on the stain?
Titebond Polyurethane glue is the best wood glue to use on stained surfaces. It offers epoxy-like strength to the joined areas, attaching the wood pieces firmly together. Titebond wood glues are 100-percent waterproof, so they can work in moisture-prone environments.
Does wood glue stick to polyurethane?
Wood glue doesn’t stick to a polyurethane finish. You could try Gorilla glue, but ensure you clamp the attached pieces together for several minutes to have a little chance. Whatever the case, gluing polyurethane finished surfaces isn’t a good idea.
Will super glue work on stained wood?
Absolutely. Superglue will work on stained wood, but the clamping area needs to be small for the gluing to stand a chance of successful bonding. Don’t use super glue on woodworking projects with large clamping areas because super glue is ineffective at gap filling. Read more on Super Glue Working on Wood.
Check out this guide on the optimal farmhouse table stain for expert advice on achieving the perfect rustic look.
Does wood glue work
Gluing stained wood surface is an option to consider when no other viable alternative is in the cards. This is because the overall bond will not be as strong as the bond between wood glue and bare wood. We hope you found this tutorial helpful in completing your woodworking project. Otherwise, let us know what you think in the comments.