Staining wood can enhance its appearance, but sometimes the project could get messy. You must know how to fix a bad stain job to get the desired results.
Typically, how to fix a bad stain job will depend on whether you are dealing with minor or significant wood staining problems.
Read along to learn;
- How to fix a bad stain job with minor wood staining problems
- How to fix a bad stain job with serious wood staining mistakes
- Seven Most Common Wood Staining Problems and Mistakes
- How to fix wood stain mistakes
- Major wood staining problems and mistakes
How to Fix a Bad Stain Job with Minor Wood Staining Problems
A slight mistake or omission in your woodworking can cause minor wood staining problems. Thankfully, you can get rid of such glitches with simple yet effective fixes if you know how to fix wood stain mistakes.
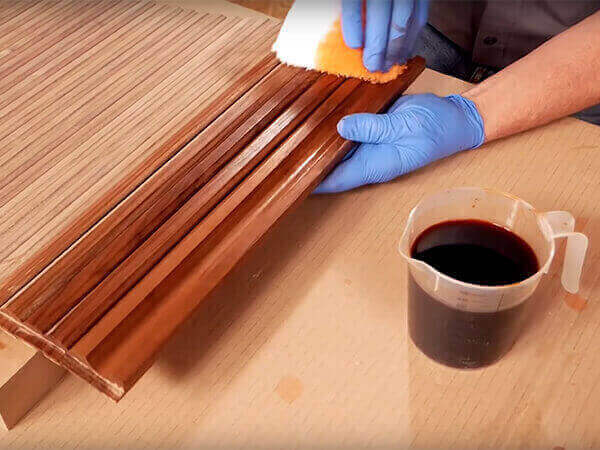
1. Wipe tacky oil-based stains with mineral spirits
If the stained furniture is still tacky after its stipulated drying time has elapsed, the chances are it will never be dry unless you fix it.
A tacky stained surface can result if you do not wipe off the extra stain during application. Wiping off the excess wood stain is an essential part of the application process. It helps even out the stain on the wood furniture and allows it to cure.
If you leave on more of the product than the wood can absorb, the solvent in it will evaporate, leaving behind a tacky substance.
How to remove excess oil-based stains
To remove excess oil stain from wood, soak a rag or sponge with mineral spirits and wipe the stained furniture with it till the stickiness is gone.
Instead of mineral spirits, apply water on the stained surface and scrub with a sponge or rag.
In each case, the solvent should dissolve the excess stain and loosen the pigment. Once loose, the rag or sponge should wipe away the excess pigment.
Make sure to use the best rags for staining wood or else you’ll blunder.
2. Add another layer of stain and wipe
If you left an excess stain on or forgot to wipe, fix the stickiness by applying another stain coat over the stained surface. Let the stain sit on the furniture for a few minutes to dissolve and reactivate the pigments from the initial application.
You can then remove them by wiping off the excess on the second coat. This step will leave your piece looking smooth and dry.
3. Apply more coats of stain to darken the color
Wood stain tends to have lighter shade when dry than when it is wet on wood. If the stain is not dark enough after drying, you can still darken it and here is how to stain wood a darker color.
One way to deal with a light stained wood is to apply additional layers. Unless it is a dense hardwood like oak, the wood should be able to accommodate one or two more coats of stain, depending on its density and stain type.
Re-staining will add more stain pigment to the wood, making it darker. The second coat should also help fix uneven staining.
Check out how long to let stain dry between coats to avoid any mistakes.
How to darken the color with additional coats of stain
- Apply another thin layer of the same stain.
- Apply another layer of gel stain on top of your standard oil-based stain layer.
How to Fix Wood Stain Mistakes – Serious Wood Staining Blunders
The ideal way to fix a significant wood stain mistake is to sand down the piece to bare wood and then re-stain it. However, this is just one of the methods you could use. Here are more solutions;
1. Sand the entire surface down and reapply the stain
If visible scratches appear on the surface or the stained surface looks blotchy, hide them by applying another layer of the same wood stain. The best way out of such a scenario is to undo the entire coat and stain the wood afresh.
First, sand the entire surface along the grain with coarse sandpaper such as 100 or 120-grit sandpaper or sanding block. Ensure you are meticulous with the sanding to cover every inch of the stained surface.
Next, switch to finer-grit sandpaper such as 220-grit sandpaper for final sanding. Sand along the direction of the wood grain until the wooden surface is smooth to the touch.
For this much sanding job, you would better use a power sander. It will help you go faster.
Explore more. Do you sand between coats of stain? Read to find out.
What could cause this problem?
Improper sanding
Failure to sand the wood properly can be a culprit here. For example, if you use a coarse grit sander and neglect following with a finer-grit option, you can end up with a rough wood surface with undesirable streaks.
Sanding against the direction of the wood grain is another cause of unwanted scratches on the wood surface.
Staining in direct sunlight
If the weather is too hot, the stain will be drying out too quickly during application.
Different types of wood stains work differently. But all of them work by absorbing into the wood to create an even surface. If the stain dries too quickly, it will become tacky before you can wipe off the excess, leaving bubbles and an uneven, splotchy finish.
Incomplete stripping
If you’re staining a previously finished wood, you’ll sometimes use chemical strippers to remove the trusty old finish before applying a new one.
After applying the stripper and wiping it down, ensure no blotches or faded spots remain. If any, you would need to remove them by sanding or applying another layer of the stripper.
If you ignore this step, the chances are your new coat of stain will not adhere to the wood properly.
Related Post: Best Wood for Staining Dark
2. Remove the stain layer with a chemical stain stripper and redo the project
As we’ve hinted above, you can use a chemical stripper to remove the stain finish.
If you were staining a deck, you likely used a deck stain. Unlike regular wood stains, deck stains contain varnish, making them dry to a hard finish on the surface of the decking boards.
If you did some bad stain jobs here, you may have to remove the old stain before restaining the deck.
How to fix a bad deck stain job
In this case, we’ll remove the deck stain using a Chemical Stain Stripper. And here are the steps;
Step 1: Apply a generous, even layer of the stain stripper on the surface of the decking boards.
Step 2: Let it sit for at least 20 minutes or until bubbles begin to form. Always read the product label for the recommended wait time.
Step 3: Scrape the chemical stain stripper and the stain along the wood grain using a metal paint scraper.
Step 4: Dip a ball of medium coarse steel wool in a bowl of mineral spirits and wipe down the stripped surface. You may need to use several steel wool balls to clean up the stripper and stain residue. Coarse steel wool should do the job here.
Step 5: Allow the deck to dry completely. Then scuff sand your deck with 150-grit. Follow it with 220-grit sandpaper before you re-stain.
If you are working on a concrete surface, here is a guide on removing wood stain from concrete.
3. Paint the piece to cover up the bad stain job
If you feel demoralized by a failed project, you may lack the drive to redo it. However, covering up the messed layer may be a viable alternative way of how to fix a bad staining job.
Option 1: Paint over it
You will need to let the stained piece dry. Then give it a light sanding before painting over the stained surface.
Whichever paint you choose, start by applying a good primer to help the paint adhere better to the stained wood. Then follow the instructions on each product’s label to complete the staining job.
Option 2: Cover it up with a super dark stain
You can buy a naturally darker stain or add more pigment to the stain you have. A higher pigment-to-vehicle ratio means more colorant in the product and a greater tinting capacity.
To apply stain, ensure the surface is completely dry. Then lightly sand the wood surface with 120-grit and then 220-grit sandpaper.
After that, use a rag or natural bristled or foam brush to apply the darker coat of stain to create an improved look and fix a bad stain job.
Option 3: Let the surface dry and apply a topcoat
You can apply a topcoat finish for the paint and the darker stain to give it a nice sheen. We recommend spraying it with 3 to 4 layers of lacquer following the directions on the product label.
4. Apply a glaze over the bad stain job
If you don’t mind a darker, antique look on your project, you may substitute the darker stain (in option three above) with a wood glaze.
A glaze is a thickened, heavily pigmented wood stain. It can be oil-based or water-based stains. So, use an oil-based glaze if you used an oil-based stain and water based glaze if you used water based stain.
Let the surface with the bad stain job dry completely to apply the glaze, then scuff sand it. Brush or spray the glaze on the wood. Spread it out into a thin film with a natural bristled chip brush.
Consider practicing first on a piece of scrap wood before going all-in on your project.
What about tung oil? Can you apply tung oil over stain to fix the mistakes?
Seven Most Common Wood Staining Problems and Mistakes
Here are the most common mistakes while staining wood. These mistakes can be grouped as either severe or minor wood staining mistakes.
Minor Wood Staining Problems and Mistakes include:
1. Stain not drying
One of the biggest wood staining mistakes is to ignore wiping off the excess wood stains. Or, you might wait too long before wiping, in which case the bad stain will have dried and become impossible to wipe off.
Either of these mistakes will result in the stained surface being tacky or wood not taking stain. And, such a surface may never be completely dry until you fix it.
2. Stain not dark enough or appears uneven
Some woods don’t stain too well. For example, dense hardwoods like birch can be hard to stain. Why? Because they don’t have enough pores to absorb the wood stain.
When you stain such woods, they will allow only a single application, depriving you the color intensity you want.
3. Stain is darker than you wished for
The opposite can be true. You usually need to wait till the entire piece is completely dry to judge the color correctly. If you applied more than one coat, you might end up with a darker look than you intended. Check out our article on How to Make Dark Stained Wood Lighter.
Major Wood Staining Problems and Mistakes
Wood Staining can be a great way to update the look of your home, or to finish a woodworking project. However, it’s important to avoid common wood finishing mistakes that can ruin your project.
Let’s discuss the most common wood staining problems and mistakes, so you can avoid them yourself.
1. Starting off too big
Usually, you need to wipe off all the stain that is in excess as you go. However, if you stain an extensive area before wiping, the stain may dry before you wipe. This will likely result in a blotchy or uneven appearance.
To avoid this mistake, stain a small area at a time, especially if you are working on a big project. Just don’t bite more than you can chew.
2. Ignoring wood conditioner
Wood conditioner helps ensure uniform color and prevents splotchy, uneven staining. In addition, it prepares the wood to absorb oil-based stains evenly.
Failure to apply the conditioner before the staining process can result in poor, unsatisfactory results.
3. Getting inaccurate stain color
Achieving the exact color stain you see at the hardware store might be tricky.
It’s advisable to bring a piece of wood resembling the one you intend to stain. This sample can give you a more precise representation of what to expect.
4. Overlooking the sanding or the stripping process
If you don’t sand along the wood grain, you may cause streaks that become visible after staining.
Also, if you are working on a previously finished piece and fail to strip it correctly, the new layer is likely to appear splotchy with unsightly spots.
Have you ever wondered, does stain go bad over time or can it maintain its quality and effectiveness indefinitely? Read our article to find out.
FAQs
Can I paint over stain?
Yes, you can paint over stain and other related wood finishes as long as you prep the surface properly. First, lightly sand all glossy surfaces until the wood finish is dull, then wipe it with a clean rag dampened with de-glosser. Finally, let it dry before painting.
What do I do if my wood stain is too dark?
If the wood looks too dark for your liking, soak a clean cloth in mineral spirits or turpentine. Then, rub the wood with a clean cloth firmly and evenly along the grain. It should lighten the color without risking removing the stain.
How to Get wood stain off hands
Use rubbing alcohol or isopropyl alcohol and acetone. Dip a clean rag into a bowl with the solvents. Rub your hand with the rag until tstain is gone. Rinse it off with lukewarm water and soap. You can read the full article on how to get wood stain off hands.
Also Read: How to Dispose of Oil Based Stain
Final Thoughts on How to Fix a Bad Stain Job
Learning how to fix wood stain mistakes will help avoid stains and errors.
You can deal with a bad stain job in many ways. But some methods are more time-consuming than others. Also, you realize some approaches are suitable for minor issues while others are ideal for serious stain job mistakes.
We hope this article helps you learn how to fix a bad stain job and solve your wood staining problem. Please share your thoughts or comments with us in the comment section.