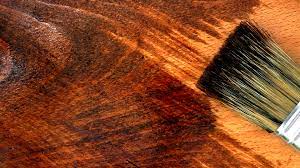
When staining a piece of wood that already has a stain, it can be challenging to determine the best way to approach it. For example, you will need to decide whether to go darker or lighter, use the same stain color, or change to something else.
Whatever you decide, staining over stain could be a great way to touch up the look and give your stained wood a fresh appeal.
Read along to find out the following;
- Can you put stain over stain?
- Can you put a darker stain over a lighter stain?
- Do you have to remove old stain before restaining?
- Can you sand stained wood and restain?
- Can you restain wood a different color?
- How to stain cabinets that are already stained
Can you Stain Over Stain?
Yes. You can apply wood stain over a stained wood surface by following a few simple steps. The process is particularly easier if you apply a darker wood stain instead of a lighter one. You could also mix two or more wood stains to create a custom color for staining over the stain.
What Happens if You Stain Over Stain?
Staining over stain can change the color or darken it depending on the stain you use over the stained wood. Staining on top of another stain with a darker-colored wood stain typically deepens the color.
If you stain over an older stain with a lighter color of the same shade, the change may be insignificant or negligible. As a rule of thumb, you should always apply a darker shade over a lighter one when staining over a stain to get the best results.
Staining over stain is also a technique used to rectify wood stain mistakes or enhance the overall appearance of the wood surface.
How to Stain Furniture That is Already Stained?
When it is time to touch up your furniture, cabinets, hardwood floor, or some other wooden item, you will need to start by deciding the stain to use. Once that is done, your next task is to assemble a few supplies to use.
Materials and tools for staining over stained wood
- Wood stain
- A pair of hand gloves
- Drop cloth
- Sealer
- Foam brush
- Sander
- Lint free cloth for staining
- Rubber gloves
- Tack cloth
Steps for Applying Stain Over Stain
Once you have everything you need to complete this project, here’s how to stain over stain.
Step 1: Prep the working area
The chances are that there will be items within the area where you wish to stain the stained wood. Start by moving them out the way to create enough room for you to move around unobstructed.
Also, you want to protect the floor from accidental spills that could spoil the look. So ensure you lay a tarp or plastic sheeting on the floor to collect any such spills and sanding dust.
You can also use old newspapers to cover the surfaces if it is a small project. However, a larger project will require a larger drop cloth or tarp to protect the floor and any objects that cannot move out of the way.
Even if you are working outdoors, you will still need to cover the lawn and any garden plants that the stain might affect.
Step 2: Prepare the wood
Interesting Read: Best Wood to Stain Black
You must clean the wood before staining it, but before that, you will need to disassemble any attachments if it is an elaborate piece.
For instance, if you are staining a set of cabinets, you may need to remove the doors, drawers, and other hardware. This step allows you to access the various surfaces that need staining.
For example, you may separately stain the hardware you have taken apart if necessary. This step will make it easier to access your project’s various parts and cover them evenly with wood stain.
It can also lead to quicker drying by exposing the surfaces to the air better.
Having applied wood putty to wood cracks, there’s no need to worry. Can you stain wood putty? Yes, it can be stained.
Step 3: Sanding stained wood to restain
Once the parts have come apart, proceed to sand. This is not intended to remove the existing coat of stain. Instead, sanding removes any surface inconsistencies and smoothens the wood for a more beautiful finish.
Sanding is also essential for opening the wood grain and exposing the pores to absorb the stain better. This is especially important for penetrating stains, and they work by getting absorbed into the wood pores.
This step is also the part where you remove any surface dirt. If the wood is particularly grimy, you may want to wash it or wipe away the grime first with a damp rag before sanding. Again, ensure you let the wood dry thoroughly before sanding it.
You can start with medium-coarse sandpaper before switching to fine grit sandpaper for final sanding. The first one should remove any surface inconsistencies while the final smoothens the wood for staining.
Sand the wood along the direction of the wood grain. This strategy ensures that any lines caused while sanding are aligned with the rain and hidden.
You can use an orbital sander or sanding block depending on the size of your project or personal preference. Whichever method you choose, ensure you sand the wood lightly and evenly, covering every inch of the surface.
Step 4: Wipe away the sanding dust
After sanding, use a tack cloth to wipe away the sanding dust. You could also use a lint-free rag dampened with water. Whichever tool you prefer, ensure you wipe away all the wood dust to leave a clean surface, ready for the wood stain.
More importantly, ensure you let the wood dry before proceeding to the next step.
Step 5: Apply the stain
Are you working on an oak floor? Here are the best stain for red oak floors.
Once the wood is dry, dip a clean rag into the stain and wipe it gently on the surface, covering every area you wish to stain. To keep it saturated with the stain, you may have to dunk the rag back into the stain several times.
Before touching the stain, wear latex or rubber gloves to protect your hands from staining. The skin is porous, and it can be pretty difficult to remove a stain from it.
It is also best to wear clothes that you do not mind staining and soiling. Old clothes are usually the best for this project. Ensure you cover the entire wood surface with an even coat of the stain.
A rag works best with penetrating wood stains. If you are applying a gel stain, a foam brush will be a better tool for application.
Do not worry about following a specific direction at this point; just focus on getting an even cat on every inch of the wood surface.
Once done, allow the stain to sit on the wood surface for the recommended time. Always read the product label for this information. Often, this wait time will be anywhere between 5 and 15 minutes.
It is when the pigments in your wood stain penetrate the wood to color it. The longer the wait time, the deeper the color. However, you must not wait for too long before wiping, as the stain will become tacky and messy.
Step 6: Wipe the excess stain and let it dry
When the recommended wait time elapses, use a lint-free rag to wipe off the excess stain. Follow the direction of the wood grain to disguise any marks forming while you wipe.
This should leave a thin film of wood stain on the wood surface, allowing the grain of the wood to show more dramatically. You should know you have wiped well when no streaks remain on the surface.
Once done, leave the wood to dry for the recommended time on the label. Usually, the drying time can be anywhere from 18 to 24 hours.
Each manufacturer will specify the drying time of their respective products. Ensure you read this and follow it for the best results.
Step 7: Add a second coat of stain if necessary
After the stain has dried, you will be able to see its true color. If you like it, you can proceed to seal the piece. If you prefer a deeper shade, consider adding another coat of stain by following the same procedure.
You may need to scuff sand between the coats of stain before applying the last coat. Then let the wood dry.
See: How long to let the stain dry between coats?
Step 8: Seal it up
The last part of the project is to apply a clear top coat over the stained surface. This coat must come after the stain has fully dried. Read the product label for instructions regarding when to sell it.
Then follow the manufacturer’s instructions on the sealant label to apply two to three coats of the clear cost. This will lock in the color and protect the surface from scratches and discoloration.
Do You Have to Remove the Old Stain Before Re-staining?
Removing the old wood stain before re-staining is not always necessary when applying a darker stain. However, you must always remove any old protective topcoat on the wood to re-stain it.
Any varnish, lacquer, or polyurethane left on the wood surface will prevent the new stain from penetrating the wood. You may only have to strip off the old stain if you want a lighter color.
Removing a previous darker stain coat will help you achieve the desired shade using a lighter-colored wood stain. Use a stain stripper for the job.
Also Read: Can You Stain Particle Board Cabinets?
Can You Stain Over Old Stain Without Sanding?
Sanding is necessary when applying wood stain on bare wood or stained surfaces. It helps remove any surface inconsistencies and provides a smooth, even surface ready to accept the stain.
It also helps open up the pores in wood for even pigment distribution.
Can You Put a Darker Stain Over a Light Stain?
Absolutely. Applying a darker-colored wood stain over a light one is a straightforward way to deepen the wood color. You can use a single dark stain or mix multiple dark stains to create a custom shade for your stain.
What Stains Can you Use to Darken Light-Stained Wood Surfaces?
You could use dark-colored water-based or oil-based penetrating stains to darken a light-stained piece of wood. Alternatively, you could go for film-forming stains like gel stains or glaze to darken a light-stained piece of wood.
Polyshades
Minwax PolyShades is a perfect product for darkening lightly stained wood and enhancing its grain. It combines a rich-colored stain with polyurethane sealant in the same product.
This means you need only a single application to give your wood a dramatic dark color and the lasting protection of a sealant. The product line has a reputation for lasting quality and boasts a wide range of beautiful dark colors.
Gel stain
This is a thick, pigment-rich wood stain that dries to form a film on the wood surface. Unlike penetrating stains that work by penetrating the pores in the wood, gel stains have a thick consistency and form a film on the wood’s surface when dry.
When applying gel stain, you must wipe the excess to create a thin film. Applying a thick film can cause drying problems.
Gel stain is a great way to give your stained wood a dark shade, masking much of the wood grain. This characteristic makes gel stain more suitable for wood species with less beautiful grain.
Interesting Read: Wood Stain Vs Gel Stain: What’s the Difference?
Best Dark Stains for Wood
If you are ready to carry out the staining project, here are three leading products you may consider using.
1. Best for staining over stained cabinets – Minwax PolyShades Wood Stain
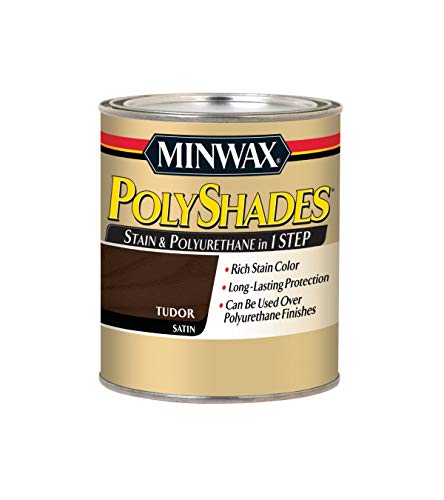
- POLYSHADES WOOD STAIN – Minwax PolyShades is an oil-based wood stain and polyurethane in one. It enhances wood grain by combining beautiful, rich color and long-lasting polyurethane protection in one easy step.
- REDUCE FINISHING TIME – This one-step wood finish can be used over polyurethane finishes, so you can change the color of your wood surface without removing the existing finish. Use on bare or already-finished wood.
- BEAUTIFUL RESULTS – This beautiful wood stain provides a rich finish with a satin sheen. It offers a classic, dark brown color that looks great on a variety of projects. Recommended uses: furniture, woodwork, doors, cabinets & accessories.
This oil-based product from Minwax combines a dark-colored stain and polyurethane in one. The stain is richly pigmented to readily enhance the wood grain, while the sealant in this combo helps create a glossy, beautiful finish.
The product boasts longevity, guaranteeing durable protection for your stained wood. Since the stain already has polyurethane in it, you do not need to apply a protective topcoat after staining the wood.
This significantly helps you complete the project sooner. You also save on the cost of finishing your wood since you do not need to buy a sealant separately.
The product is easy to use. After sanding the wood and wiping the dust, brush it on to transform your wood.
2. Varathane Premium Gel Stain
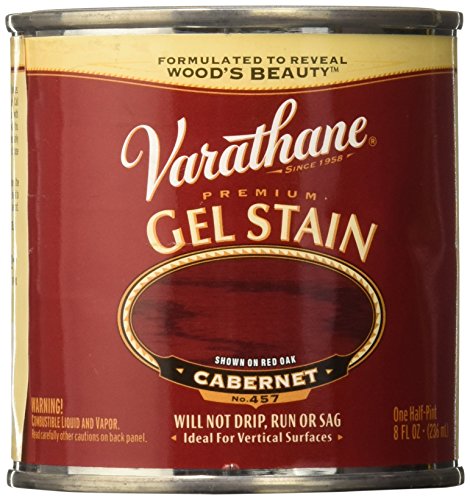
- Designed for vertical surfaces including doors, window trim and furniture; creates a natural wood look on fiberglass and composite doors
- Formulated with a thicker consistency to prevent drips and runs and provides twice the coverage of traditional oil-based stains
- Dries to the touch in 1 hour and covers up to 60 sq ft
If you are refinishing wood with an unattractive grain pattern, this dark gel stain can help mask much of the grain by forming a beautiful film on the surface.
It is a high coverage product that dries to the touch in just one hour. This means you can complete a large project in less time. It is highly versatile, so you can use it across various surfaces.
If you are working on a vertical project, this is the best product for you. It will not drip or run, making it ideal for wooden doors and other vertical wooden objects.
3. Minwax Penetrating Interior Stain
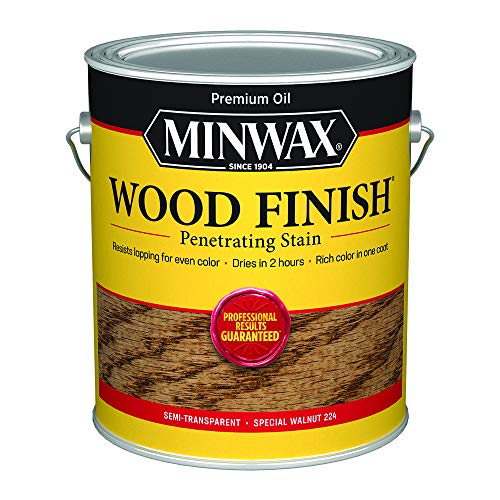
- RICH EVEN COLOR – Minwax Wood Finish is a deep penetrating, oil-based wood stain that provides beautiful color and enhances the natural wood grain in one coat. It’s perfect for interior staining projects such as wood furniture, cabinets, doors and more.
- QUICK DRYING – Staining interior wood has never been quicker. The special formula allows it to deeply penetrate wood pores within 5 minutes of application, resists lapping, and dries in two hours, making all your wood projects quick, beautiful and easy.
- EASY TO APPLY – Use a clean cloth or wood stain brush to apply this wood stain in the direction of the grain. Wait 5-15 minutes and wipe away excess stain. The longer you wait, the darker/richer the color. Reapply coats for deeper color.
For interior projects, this penetrating wood stain from Minwax is likely to be your best choice. Its oil-based formula is designed to penetrate deep into the wood grain to distribute the pigment evenly across the surface.
It does an excellent job at enhancing the wood’s natural grain with its rich color. It is easy to apply with a clean, lint-free rag and dries quickly within 5 minutes of application to save you time off your project allocation.
Also, read our inspirational guide on alder wood stain to learn more about stains.
Staining Stained Wood FAQs
Interesting Read: Can You Put Tung Oil Over Minwax Stain?
Can you re-stain wood a different color?
Yes. When staining over the stain, you can apply a darker shade to alter the tone or go for a different color altogether. Whether to deepen or lighten a stained piece of wood or change to a different stain color depends on what you wish to achieve with the exercise.
Can you put grey stain over brown stain?
Grey wood stain is one of the many color options you can use on top of brown stained wood. Just ensure you sand the wood to open the pores before applying the brown. Both penetrating and gel stains will work in this case.
How do you stain cabinets that are already stained?
Start by removing the doors and drawers of the cabinets, then sand and clean every surface you wish to stain. After that, apply thin coats of your chosen stain, letting them dry thoroughly, and scuff sanding between coats to ensure even coverage.
Can you stain over old stain?
Yes, staining over old stain is pretty straightforward. Simply clean the old stained surface to remove any dirt and grime. Once it is dry, sand it to make it smooth, and apply your chosen stain. If you choose a penetrating oil or water based stain, consider using a clean, lint-free rag to apply it for the best results.
Can you use light stain over dark stain?
Using a lighter stain over a darker one does not usually work. Wood stains typically allow the grain to remain visible. Applying a light wood stain over dark wood furniture will make little difference, with the darker existing stain overshadowing the new lighter one.
Can you use white stain over dark stain?
Using a white stain for wood furniture over a dark stain is a clever way to whitewash the wood and give it a rusty appearance as long as the surface does not have a sealant. You could also swap a light grey stain for the white one and get the same effect. This option is appropriate if you are looking for a retro appeal.
Can you stain over stained concrete?
Yes, it’s possible to stain over previously wood stained concrete. However, proper preparation and choice of stain are crucial for a successful outcome. Ensure the existing stain is well-sealed or removed, and select a compatible concrete stain for the desired finish.
Can you use black stain over brown stain?
Staining black over brown stain is easy and effortless since black is darker than brown. Applying any dark stain over a lighter one works just as well as staining raw wood. Start by prepping the surface to facilitate even color distribution.
Can you stain over varnish?
Staining wood previously coated with varnish will not provide the desired results unless you use a gel stain or glaze. Penetrating oil-based and water-based stains need to penetrate the wood to color it, so applying them over a sealer such as varnish does not work as desired.
Can you use gel stain over stained wood?
Yes, gel stain works perfectly on bare wood as well as stained wood surfaces. The stain forms a film on the wood surface, making staining easier regardless of the surface condition. However, you must sand and clean the stained wood to get the best results with gel stain.
How to change the wood stain color
To alter any wood stain color entirely, you can use a petroleum-based solvent to strip down the existing finish and then apply a different stain color to the wood. Alternatively, you can prep the surface and apply a dark wood stain over the existing stain without stripping it down.
Can you mix two colors of stain?
Yes, you can mix two stain colors to create your own custom color. For example, you can use two regular types of regular stain and gel stain to come up with a colored stain blend for your project. The ratios for this mixture will depend on the color you want.
Can you stain over shellac?
Yes, you can stain over shellac. However, shellac stain can be challenging to work with as it dries quickly, so it’s essential to apply the stain evenly and work efficiently.
Can you stain brown wood grey?
Staining brown wood grey is possible, even though the process is relatively more challenging because it means changing a darker stain to a lighter one. However, following the correct steps and stripping the old stain with a petroleum-based solvent helps yield the desired results.
How to stain over orange wood
Start by using a transparent aerosol toner to tone the color, preferably with a hint of a green or blue cast in the toner. This will help neutralize the wood’s orange color, making it easier to stain into any color you want.
Can you stain finished wood?
Staining finished wood without removing the old finish does not create the desired results. Start by stripping down or sanding away the old finish to have the bare wood to get the best results. This exposes the wood grain, allowing the wood to absorb the stain.
Can you use black stain over white paint?
You can certainly stain over white paint. However, the appearance will be unique rather than an authentic stained wood grain look. Start by stripping down the white paint before applying the wood stain if you want an authentic look.
Can you paint over stain?
It depends.” If the stain is fresh and still wet, you might be able to simply paint over it with a latex-based paint. But if the stain is old and dry, it will likely need to be sanded and primed before painting. And if the stain is particularly deep or dark, you may need to use a heavier-duty primer designed for covering stains. Read more on painting over stained wood here.
Other Post: Can You Stain Bamboo Furniture?
Can You Stain over Stained Wood Summary?
Now that you know that you can stain on top of stain, the supplies to use in completing such a project, and the step-by-step procedure to follow, you can take on your next stain job.
Let us know what you think in the comments section.