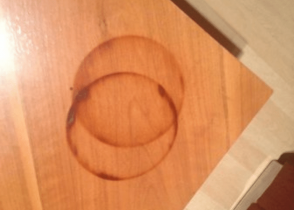
We all prefer to see the wooden items around our homes, garages, or shops looking pristine for longer. Unfortunately, accidents happen, and your wooden paneling, furniture, floor, or toy can sustain burn marks from time to time.
While you cannot keep accidents from happening, you can get rid of any signs of damage if you know how to remove burn marks from wood.
Dive in to learn how to get rid of burned spots on a wood surface.
How to get a burn mark out of wood
To get light burn marks out of wood, dampen the area with a little mineral oil. Next, take some fine steel wool and gently rub the burn mark in a circular motion. You may need to do this for a minute or two before you see any results.
How to Remove Burn Marks From Wood Fast
Here, we look at the basic requirements to get this job done. Of course, the tools may vary based on project or preference, so don’t worry if you have one or more items not included in this list.
Supplies for removing burn marks from wood
- A random orbital sander (for a wooden floor)
- Protective face mask
- 150-grit, 180-grit sandpaper
- Tack cloth
- 220-grit sanding block
- Water-based polyurethane
- Clean rag or towel
- Paintbrush
- Steel wool
- Baking soda
- Toothpaste
How to Remove Burn Marks from Wood
If you are working on minor to moderate burn marks, you will simply need to sand out the burned area or scrub it with steel wool and then reapply the wood’s finishing to restore its original look.
Step 1: Clean the Entire Surface
Cleaning is essential as it helps give you a better sense of the extent of the damage. Do not use any household cleaning products or water in this step. Simply dip a clean rag or towel in some warm water and wipe the surface with it.
The other reason you want to clean the surface before starting to restore it is to remove any loose dirt, dust, and grime that might get in the way when repairing the burns.
Let the wood dry completely before moving to the next step.
Step 2: Remove Superficial Burns with Toothpaste and Baking Soda
After cleaning, you will see if it is a mere singe on the finish that has not reached the wood.
To clear such a superficial burn mark, create a sticky paste by mixing a non-gel toothpaste and baking soda in a bowl. Then apply it over the mark in the direction of the grain.
Let the paste sit there for at least five minutes to fully set in, then wipe it away with a clean rag.
Alternatively, you can use finely powdered pumice or rottenstone and linseed oil to create your paste if you are not satisfied with the results from the mixture above. Notice that these ingredients should create a thin paste, unlike the first one.
Then, use a soft, clean rag to rub the paste on the affected area along the wood grain. Repeat this process until the mark disappears.
You can get all of these items on Amazon or hardware stores near you.
Once the mark is gone, skip the next step and refinish the surface (if necessary), as shown in the final step below. In most cases, your wood will be perfectly okay at this point, and no further action will be necessary.
Read: How does a Hinge Work?
Step 3: Remove Moderate Burns with Fine Steel Wool or Sander
For minor shallow burns that have just barely dug into the wood, you can use steel wool to get rid of the marks.
Go for the finest steel wool you can find – usually, this should have a ranking of 0000 or 000.
Apply a bit of lemon oil for wood, mineral oil, or any non-drying oil on the steel wool to dampen it and help lubricate its tendrils. The idea is to avoid scratching the wood and risk causing unsightly marks on its surface.
If you scratch the wood by mistake, here’s our guide on removing scratches from wood furniture that will be of great help.
Scrub the affected area of the wood with the damp steel wool, ensuring you follow the direction of the grain. Rubbing in a different direction other than the grain might cause some damage.
Observe how the surface changes as you rub, and keep rubbing until the mark is gone.
Get rid of the oil by blotting it dry with a damp clean rag, preferably cotton. Wring out as much water as possible to ensure the cloth is only slightly damp and not soaking wet.
Also, do not rub the oily surface back and forth as this may only spread it. Instead, gently press the cloth down onto the area and wipe it in a single motion to remove the oil. You may wash the cloth and repeat this process until all the oil is gone.
The oil should be enough to provide some kind of finish to the affected area. However, if it looks visibly different from the rest of the surface, you will need to refinish it, as we will see in step 4.
Use a Sander instead of Steel Wool for a Wooden Floor
Suppose you are working on a floor; use a sander instead of steel wool. Using a sander is also the best way to get paint off of hardwood floors.
To protect yourself, wear a protective face mask before you start sanding.
Start by sanding down the blemished area using a random orbital sander with 150-grit sandpaper attached – until the burn mark disappears. You don’t want to sand it too deeply; just feather it out until the bare wood is visible.
Ideally, the deeper the damage, the wider you should sand it. Repeat the sanding with 180-grit sandpaper, and then switch to a 220-grit sanding block to fine-tune the surface.
Be sure to rub along the wood grain each time and not across it, so you do not risk damaging the wood further.
Once done, use a tack cloth to remove all the sanding dust. We do not recommend using a damp rag in this case as it may raise the grain.
Step 4: Rematch the Finish
Whether the original finish was paint or something else such as linseed oil or water-based polyurethane, you will want to apply the same product after sanding and cleaning the burned area.
Most floors have a water-based polyurethane which you can apply by pouring some amount into a bowl or paint bucket and gently applying to the area using a roller or a paintbrush. In any case, the container should have a label with instructions to guide you if it is a different product.
Whatever it is, be sure to start applying it in the middle as you work it out toward the edges of the area you have sanded.
When refinishing a discolored area, the other thing to keep in mind is to start light and gradually increase the product to match the original color.
It is way more difficult to lighten an area if you made it too dark. Darken an area should not be nearly as hard.
To achieve an even sheen, wait for the paint to dry, then spray the area with at least two layers of lacquer. You will need to wait at least an hour for one layer to dry before applying another.
How to remove deep burn marks from wood
Where the wood has sustained much deeper burns, the steps and things you will need for the task will vary slightly from the ones above.
Supplies for getting burn marks out of wood
- Epoxy
- Hand gloves
- Paintbrush
- Work cloth or rag
- Tung oil
- Utility knife
- Spatula
- 120-grit sanding block
- 220-grit sanding sponge
- 80-grit sandpaper
How to Get Rid of Black Burn Marks on Wood
In this case, you will need to do more than just sand out the weathered area. Restoring the wood will require scraping out the burned wood and then patching up the spot with epoxy. Here are the steps to follow.
Step 1: Scrape off the Charred Wood Area With a Utility Knife.
The idea here is to remove the deeply burnt area to remain with bare wood. To do so, you will need to gently drag the edge of your utility knife over it in short strokes until the damaged wood has come out.
Be sure to follow the wood grain, brushing away the scraped debris with a paintbrush as you go.
Step 2: Sand it with a Fine-Grained Sandpaper
Use a 220-grit sanding sponge to smooth out the groove. Remember to work along the grain so that you do not spread out the damage.
Again, use a dry paintbrush to clear out the sanding dust. Next, wet a clean rag with clean water, wring it to ensure it is only slightly damp, and use it to soak up and remove the remaining sanding dust in the damaged area.
Step 3: Restore the Wood’s Color with Tung Oil
Allow it to dry, and then use a piece of clean cloth to apply a layer of Tung oil to help restore the wood’s color. If you do not have the oil at home, you can purchase it on Amazon at any home-improvement store in your location.
You will need to allow the oil to stay overnight so it can soak into the wood. The label on the container should provide you with directions regarding how much oil you should apply. Whatever the case, you should always rub it in along the wood grain.
Step 4: Fill up the Groove with Wood Epoxy
Once the wood has absorbed the oil, use a damp rag to wipe away the excess product.
While the wood is drying, prepare your wood epoxy resin based on the manufacturer’s directions often provided on the label. Consider wearing hand gloves to protect your hands during this exercise.
Then, use a spatula to feed the epoxy into the furrowed area until it is flush with the rest of the wood surface.
The label should indicate how long the epoxy takes to dry. Ideally, this should be about 24 to 48 hours. We recommend letting it dry overnight or for more hours but not less before sanding.
If you have kids or pets, you will want to keep them off the wet item. Otherwise, they might damage the surface before it dries off, and you would have to go over the entire process afresh.
Step 5: Give it a Final Sanding
The epoxy cures into a rigid material, so you will require coarse-grained sandpaper to even it out. A disposable 80-grit sandpaper sheet should get the job done.
Sometimes you may need more than one of these; the abrasive paper can get dull pretty fast due to the hardness of the dry epoxy.
And, you may have to give the surface several thorough but gentle strokes before achieving the desired smoothness.
While sanding, take care not to scrape the healthy wood surface around the area you are repairing. This is where the gentleness aspect comes in.
Once done, consider giving the sanded area a quick once-over with a 120-grit sanding block to make it nice and smooth.
Step 6: Apply the Same Finishing as before the Burn
As a final step in this restoration process, you will need to paint or stain the filled burn mark with a matching color and material. This means you would have to find the same paint if it was painted.
If the wood had a dark color, you might use a black gel stain to turn any wood tone into black without hiding the wood’s grain pattern.
If you are uncertain how to refinish the part, you may want to have an expert help you figure it out. It is better to pay a bit of cash for the right outcome than spoil what you have created with the wrong finish.
If you opt to do it yourself, ensure you apply the product from the middle of the repaired area and work it outward – toward the edges of the area you have epoxied.
Also, you will need to start light and gradually increase the product to match the original color.
If you want a lustrous sheen, you may want to give the surface at least four to five hours to dry, then spray it with two to three layers of lacquer – waiting at least an hour between each layer application for proper dryness.
Bonus: How to remove sharpie from wood table
How to remove burn marks from painted wood
The process of removing burn marks from painted wood can be done in different ways. These will depend on the type and severity. But usually involve getting a little bit abrasive to get rid o the burn mark.
The most common solution is sanding down any areas with fine-grade sandpapers (600 grit) until they’re smooth as glass again.
Steps on how to remove burn marks from painted wood
- Sand with 80 grit to get rid of any rough burn spots.
- Be sure not to overdo it or use too much pressure so as not to cause further damage.
- Clean the wood after sanding
- Switch to 140 grit sandpaper for smoother touches.
- Clear the surface of dust using a damp cloth.
- Repair any scratches and holes with putty.
- Let the putty dry before sanding with 140 grit sandpaper. (Here’s more to learn about wood putty dry time).
- Apply your primer and allow it to dry according to the manufacturer’s instructions
- Sand once more with 140 grit sandpaper
- Apply your varnish
You can also check our guide on can you paint over old paint on wood if you plan to restore your burnt or charred wood.
FAQs
How to remove burn marks from wood floor
Sand the region around the burn marks using 150 medium-grit sandpaper. Shift to use 180-220 fine-grit sandpaper once the bare wood is visible again, fine-tuning it further. If the stains are shallow, it’s simpler. Dampen the wood floor with mineral oil and rub out the mark.
How to remove burn stains from wood
To remove burn stains from wood, rub the stained area using turpentine using a ragged cloth. After the stain is gone, apply a coat of wax to your surface. Recently manufactured lacquers may need you to use a cloth soaked in soapy water. Unless the stain is stubborn, add a few drops of bleaching agent or alcohol.
How to remove deep burn marks from wood
Use linseed oil and softwood polish compound to remove deep burn marks from wood. Make a mixture of the two in the same amounts, then apply it to the burned part using a clean cloth. As you rub the marks, make sure to align to the wood grain until it’s no more. You may need to repeat the process if the burn persists; otherwise, try toothpaste and baking soda.
How to fix burn marks on wood table
Using toothpaste and baking soda, you can do away with any burn marks on your wooden table. Clean the table surface first, then using a mixture of baking powder and toothpaste, apply the resulting sticky white paste. Make sure to mix the paste in proportions of 40: 20, and as you rub, adhere to the direction of the grain.
How to clean burnt items off wood
Three different mechanisms you can apply to clean burnt items off wood include using the following items:
- Dampened steel and mineral oil.
- A mixture of toothpaste and baking powder.
- Piece of cork in turpentine.
How to remove cigarette burn marks from wood
Rub up the burned part using fine steel wood and mineral spirits until it disappears. What is exciting is cigarette burns are the easiest to remove, so you don’t need to struggle. Once you are done, wipe the wood, wax it and clean your surface.
How to fix burnt wood table
The first step in fixing a burned table is to clean the surface. Next, mix one tablespoon of toothpaste with two tablespoons of baking soda, generating a white sticky paste. Rub it on the heat mark until it’s completely out.
Recommended read: How to seal burnt wood.
How to remove burn marks from wood countertop
Apply toothpaste to the burnt section and scrub using a toothbrush for small burns. Alternatively, dig out the damaged section and apply filler. If the burnt area is large, cut the damage and put a surface saver cutting board. You can also resurface with a new laminate for countertops with straight edges.
Concerned about water stains and wondering how to restore your wood? Fret not, as we’ve got you covered with a detailed guide on how to remove water stains from raw wood.
Final Words
The secret to knowing how to remove burn marks from wood is mastering the correct technique for the kind of burn mark your wood item has sustained. You do this, and you can soothe any burns on any wood.
If you’re struggling with heat stains, check our quick guide on how to remove heat stains from wood. Protect your wooden furniture from getting scorched with coasters or heat mats.