Cedar has many practical benefits and aesthetics, making it a popular choice for outdoor applications, including furniture, trim, and siding. Thanks to natural preservatives in its profile, cedar is naturally resistant to weather and most bugs.
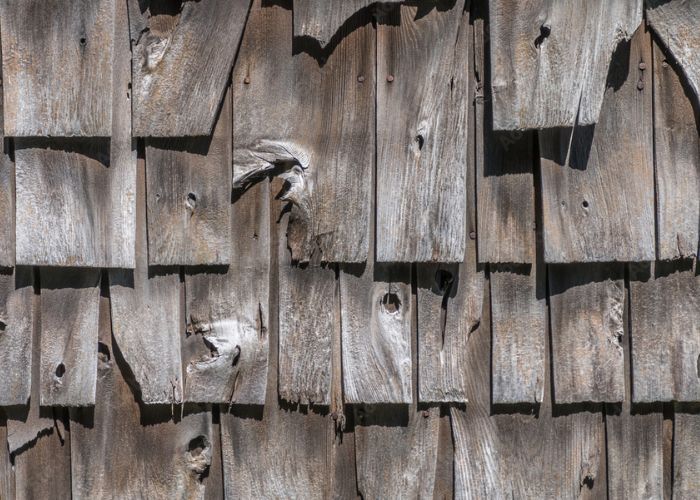
While this wood can withstand UV radiation, moisture, and insects, cedar siding is not immune to weathering. Over time, it can turn grey or sustain discoloration from accumulated molds and other fungi.
Knowing how to restore weathered cedar siding can help you prolong its service life. This is especially important because the wood is usually still structurally sound even when it turns grey or looks weathered.
How Cedar Ages
While cedar boasts powerful natural resistance to weather elements, it still turns grey like most wood types over time. Over time, it can also sustain blackened spots on its surface from molds and other fungi.
The greying in cedar happens as the wood loses some of the natural preservatives near its surface. Some people prefer their wood siding in grey, while others find the color unpleasant.
Prolonged exposure to the elements can make your cedar boards brittle, so refinishing the wood when it becomes weathered and grey may be excellent.
How to Restore Weathered Cedar Siding
Weathered cedar may have accumulated dirt and discoloration on its surface. Such wood surfaces require thorough cleaning before applying any finish to them.
The wood is also likely to have various imperfections you must fix while restoring the siding. Restoring cedar shake siding can eliminate the weathered grey shade and return its beautiful golden hue if done correctly.
What you will need
- Respirator
- Hand gloves
- Cleaning agent
- 220-grit sandpaper
- Sander
- Wood stain/paint
- Applicator
- Paint stripper (optional)
- Primer/wood sealer (Read our article to find the greatest sealers for cedar wood.)
- Rags
- Pressure washer
- Caulk (here are the best outdoor caulk for wood that I recommend)
- Drop cloth
- Epoxy wood filler
The procedure to follow
Once you have everything you need to complete the project, follow these steps to get the job done.
Preliminary step: Prep the work area and protect yourself
Cover the ground and the surrounding area with plastic sheeting or drop cloth. This will help collect debris from the weathered cedar shake siding.
Since you will also sand the wood when prepping it for refinishing, the sheeting will help collect the wood dust, so you don’t have to do extensive cleaning work afterward.
Most importantly, the sheeting or drop cloth helps protect the surrounding foliage and lawn from the chemicals used to clean and treat the old stained siding. Some of these chemicals are corrosive and may damage the adjacent flora.
Step 1: Protect yourself
The chemicals you will be using are equally dangerous to your health. So ensure you protect yourself from chemicals by wearing a pair of protective hand gloves and a high-quality respirator before handling the chemicals, dust, and debris.
It is also essential to wear goggles to keep the chemicals and dust from entering your eyes. Next, close all doors and windows on the side you are restoring. You don’t want all the mess entering your living spaces.
Step 2: Clean the siding
There is likely going to be a lot of dust accumulated on the siding. To clean the wood, follow a systematic approach, starting with removing the surface dirt before dealing with the more stubborn layers.
Rinse off the surface dirt
So, begin by rinsing the weathered siding with a power washer. Be sure to set the washer to medium pressure so it does not eat away at the wood.
You want enough pressure to lift off the dirt from the wood surface and not too much to damage the weathered wood.
Apply a suitable wood cleaner
After removing the surface dirt and debris, you must deal with the more stubborn stain and sticky grime on the wood.
You could use any wood cleaner on the market. Whatever you choose for this step will mainly depend on your personal preferences.
It is important to use a product that can kill molds on the wood surface while loosening the stubborn stains so they can be dislodged and washed off.
If the wood has mold, it will have dark brown or blackened spots. You can kill these with a spray of oxygen bleach, warm water solution, or commercially available mold killer.
Redihan’s Cedar Wash Wood Cleaner is a good example of a product you could use. It consists of organic ingredients, making it eco-friendly.
A single container should cover about 1200 square feet of weathered cedar siding.
- Mix the Cedar Wash Wood Cleaner powder with water in a large spray vessel according to the manufacturer’s instructions.
- Once the solution is ready, spray it onto the weathered wood.
- Let it sit for the recommended time (often about 20 minutes) before scrubbing.
If you choose a different wood cleaner, the directions for use may differ, but much of the procedure will be the same.
Ensure you follow the direction on the container to prepare the product, then apply it to the wall as directed. Most products require spraying them on the wall with a large spray can.
After applying it, let it soak for 15 to 20 minutes or as directed on the packaging.
If you choose a bleach-based, store-bought cleaning solution, mix it with water in a bucket and apply it to the wall with a mop. Ensure you cover every inch of the siding with generous amounts of the concoction.
After that, leave it on to soak for 20 minutes. This step is crucial because applying a layer of finish onto a wall with mildew will only allow the fungi to thrive. They will be sealed inside the wood and allowed to multiply and spread in your home.
Scrub the wood with a nylon brush and rinse
After your selected wood cleaner has soaked into the wood for about 20 minutes, use a nylon brush to scour the weathered siding.
Ensure you apply gentle pressure and keep it even throughout the exercise. You do not want to use too much force that could eat away at the wood. Neither do you want to apply too much pressure that could break any brittle pieces of the wood.
After scrubbing the entire surface, hose it to wash off the debris. Use generous amounts of water to ensure you remove all the dirt and debris.
After finishing the exercise, allow the wood to dry completely before proceeding to the subsequent steps.
This prep work is essential in creating a clean wood surface and promoting better adhesion for the exterior and interior cedar wood finish. Applying a finish to poorly prepared cedar siding may lead to inconsistent coloration and poor adhesion.
Ensure your safety glasses, respirator and gloves are securely in place throughout this process because you do not want the chemicals entering your eyes, lungs, or touching your skin.
Step 3: Remove the old finish
After the clean cedar siding has completely dried, what you do next will depend on whether it has a previous finish.
If it is bare wood already, you may proceed to sand it. However, if the wood has paint or some other hard coat on its surface, consider using a chemical stripper to remove it.
Any product you choose should have instructions to guide you through it. In most cases, this will involve dipping a paintbrush in the stripper and applying an even coat of the product to the cedar boards.
Ensure you cover every part of the surface where you want to remove the previous finish. Once that is done, leave the stripper to stay on for the time specified on the packaging before scraping it off with a paint scraper.
Step 4: Apply epoxy filler to any holes in the wood
Whether you removed an old finish or just cleaned the wood, inspect it for any holes that may require filing before sanding it.
If the individual cedar boards have holes or huge cracks, apply some epoxy filler to these gaps to mend them. Ensure the wood is dry when doing this, and allow the filler to dry completely before proceeding.
Step 5: Sand it
Sanding is the next step after the wood is clean and dry. This step is essential in smoothening the boards and opening their pores to accept the finish better. It also does an excellent job of promoting better adhesion.
Consider using a power sander to move faster. Start with coarse-grit sandpaper to remove the surface inconsistencies before switching to finer 220-grit sandpaper for final sanding.
Go over the entire wood surface with the sandpaper to create a smooth, even surface ready for the finish.
After sanding, wipe the sanding dust with a clean, lint-free rag to remove any dust. Pay attention to the corners and joints wood dust may hide.
Step 6: Caulk any cracks and gaps in the siding
This is an ideal moment to make your home more energy-efficient. Inspect the siding for spaces between the bards that may need sealing, such as around fixtures or openings.
If some of these areas have become loose, consider applying some caulk to seal them up and make your home airtight.
You will also need to inspect any previously caulked sections that you may have loosened during the cleaning and sanding.
Once you identify the areas to caulk, follow the directions on the packaging to apply even amounts of exterior grade caulk to the gaps and leave it to dry accordingly.
Step 7: Apply a primer to the siding
At this point, the wood is now ready for refinishing. Your choice of finishing will determine what you apply to the siding and how you apply it.
If you are re-staining the siding, you may want to apply a compatible pre-stain wood conditioner to the boards. However, if you choose to paint the siding instead, start with the recommended coats of primer before painting it.
Applying primer to the wood
Ideally, the product will have all the instructions for use. In most cases, the best way to apply a primer to your cedar siding is to use a high-quality bristled paintbrush. This should reach all the crevices and cover the wood evenly.
Two coats of primer should be sufficient for most products. Ensure you allow the product to dry thoroughly between coats.
Applying wood conditioner
If you stain the wood, apply a suitable wood conditioner instead. Cedar naturally accepts wood stains well and does not necessarily require a wood conditioner.
However, conditioning the wood always helps you achieve better results. The stain will adhere better, with the colorant more evenly distributed to achieve an even color throughout.
Step 8: Paint or stain it
After the primer or conditioner has dried completely, you can apply the final product—in this case, a paint or exterior-grade wood stain.
If your cedar siding is still sound, with the wood looking beautiful after cleaning and sanding, you can apply exterior wood stain to preserve that color.
The stain should help enhance the wood’s natural beauty without masking the grain. And you can go for a semi-transparent or transparent wood stain.
Painting may be a better alternative if the wood is visibly aged or noticeably weathered, even after cleaning and prepping it.
The objective, in this case, will be to protect the cedar siding and not necessarily to preserve the wood’s natural beauty.
After applying a coat of exterior-grade stain-resistant primer, follow through with a few coats of exterior acrylic latex paint. Such exterior paints are highly elastic and will expand and contract with the wood as temperature changes.
Painting Cedar Siding
Painting cedar wood is a good option if the cedar siding has lost its attractive charm or is visibly run-down. A coat of exterior paint will mask that weathered surface, giving the wood some color and attractive charm.
- Dip a high-quality paintbrush into the can of exterior-grade paint.
- Rub it onto the wood along the direction of the grain, one board at a time.
- Start with the upper boards at move systematically toward the boards on the lower section of the wall.
- The idea is to ensure no runs onto the parts you have painted.
- Allow it to dry per the product instructions, and then add two to three coats to achieve the desired coverage.
Staining Cedar Siding
If you love the color of your cedar siding after cleaning and sanding it, you can stain t with exterior wood stain to maintain the color. Most exterior stains contain wood stain and sealant in one, so sealing after staining will be unnecessary.
Also, you will not need to wipe off the excess stain during application since the sealant in the blend will ensure it dries to form a hard-wearing film on the wood surface.
- Transfer the exterior stain into an open container where you can dip it in a paint pad.
- Use a paint pad to wipe the stain evenly on the cedar boards staining from the top down.
- You may consider staining one board after another depending on the design or arrangement of your cedar siding boards.
- After staining the entire wall, let it dry for the time specified on the product label.
- Following the same procedure and instructions, apply another coat, and let it dry.
You can also use a paintbrush for this process, whichever you prefer. Ensure you follow the manufacturer’s instructions regarding drying times and application methods.
Related: Light grey wood stain
Paint vs Solid Stain: Which is Better for Cedar Siding
To improve the lifespan of a cedar siding, the choice between wood stain and paint hinges on your desired outcome for weathered wood treatment.
If you wish to preserve the natural beauty of your cedar wood and get long-lasting results, consider staining the siding instead of painting it.
Use an exterior-grade product that will last three to five years without refinishing. Stains will penetrate the wood and hold up better to regular wear and tear associated with the exterior environment.
Painting should only be an option if you want to completely change the color of your exterior siding to something else and you do not mind masking the wood grain.
Best Exterior Stain for Cedar Siding
Various brands offer exterior-grade stains that can restore and protect your cedar siding. However, some products are more durable and give truer color, significantly benefiting your cedar siding boards.
For instance, this DEFY Extreme Semi-Transparent Stain dries to form a matte finish, allowing the wood grain to show through the finish. It works excellently for any exterior environment and offers the best protection for cedar siding.
If you want variety, here is our detailed list of the best solid color stain for cedar siding.
FAQs
Is it better to stain or paint cedar siding?
You can stain or paint cedar siding, depending on your preferences. However, staining with semi-transparent stains is generally better as it offers more durable results.
When should you re-stain cedar siding?
Experts recommend re-staining your cedar siding after every two to five years. The exact duration for refinishing the siding will depend on the weather conditions in your area and the quality of wood stain you choose.
What is the Best Clear Cedar Finish for Outdoors?
There are a few things to consider when choosing a clear cedar finish when using cedar outdoors. The most important factor is the climate where the finish will be used. If you live in a hot, humid climate, you’ll need to choose a finish resistant to moisture and humidity.
Another important factor to consider is the type of wood you’re using. Cedar softwood lumber absorbs finishes more easily than harder woods like mahogany or oak. You’ll need a more durable clear sealer for outdoor cedar.
Finally, you’ll need to choose a UV-resistant finish so it doesn’t fade in the sun.
Read also: Is cedar good for cutting boards?
Conclusion
Regular maintenance can preserve your cedar siding and keep it beautiful and sound for years. However, if the siding weathers and starts looking run-down, thorough cleaning, prepping, and refinishing cedar siding can help restore its former glory.
We hope this article helps make your next cedar siding project successful. Leave a comment to let us know your thoughts.