It would be best to learn how to glue plywood together before considering using them for your projects. Plywood is an excellent material for use on both interior and exterior construction projects.
Plywood is a final product of thin layers (plies) of wood veneers glued and pressed together. Each layer of ply is glued perpendicularly to the direction of the wood grain of the preceding layer.
This process makes plywood a reliable material for building thicker, stronger, yet lightweight structures.
Successful gluing of plywood relies on your ability to choose the correct plywood grade for your project, the availability of the tools and materials required, and ultimately, following the step-by-step guide elaborated below. It’s easy.
Let’s dive right in.
How To Glue Plywood Together
Gluing sheets of plywood together isn’t difficult. As an experienced woodworker, I’m putting down what has worked for me and what my friends have recommended. All this is to give you an easy time, and hopefully, get you to enjoy the process of gluing plywood together.
Tools and Materials
- Brayer or roller
- Wood glue (Here’s the best and strongest wood glue)
- Drill
- Drywall screws or screws for mounting cabinets
- Sawhorses
- Plastic putty knife
- Plywood
- Heavy-duty gloves
- Safety glasses
- Clamping cauls
- Plastic sheet or newspaper
- Work gloves
- Safety mask
- Safety glasses
- Spare wood
Step 1: Prepare your workstation
This is a crucial step for every woodworker. Preparing your workstation involves activities such as ventilating the workstation. Remove anything that would cause obstruction. Remove dust and any junk from wood surfaces.
Ensure you set your sawhorses on a flat and stable surface. Space them enough to support your plywood sheets sufficiently. Confirm you have the plywood sheets you intend to work on, the glue, and practically each of the tools and materials listed above.
Seal off the floor and neighbouring parts using newspapers or a plastic sheet. This is done to prevent excess adhesives from staining the unintended parts of the room.
Wear your gloves, mask and safety eyeglasses, and a coverall. You never know where the adhesive will decide to stick.
Step 2: Lay the first sheet of plywood onto the sawhorses
If you’re working with full sheets of plywood, then you need to decide which of the two boards will stay on the underside of the structure and one suited for the upper sheet. The plywood sheet that will come on top is the first one you lay face down onto the sawhorses.
Place the second sheet over and create a drill pattern for when you eventually screw them together. If you plan to use PVA glue, we suggest you drill screw holes closer together, but if you use epoxy, space them farther apart.
Use a pilot drill to drill the screw holes. After that, separate the plywood sheets and slightly countersink each screw hole where they come together on both sheets. This ensures the screw won’t dislodge debris as it pokes through the other sheet.
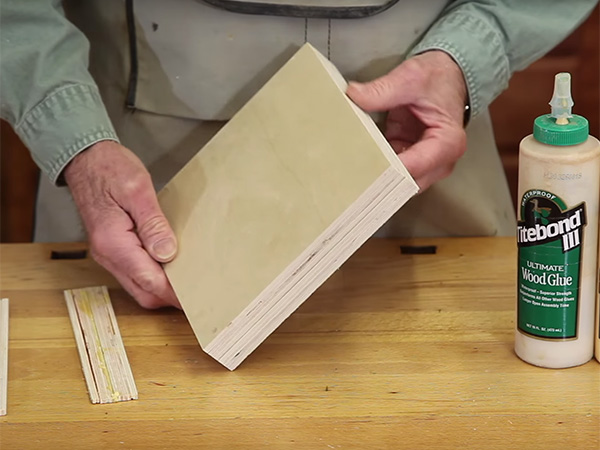
Step 3: Apply the wood glue
Use your best eye to decide what amount of regular wood glue is enough for your plywood. Too little might not give your plywood a tight hold, while too much will be too slippery and potentially give you a hard time when clamping the two or three sheets together.
There’s no specific way of gluing sheets of plywood, provided you have enough to hold your pieces together; that’s all that matters.
But for curiosity’s sake, you can apply glue in a zigzag or a gentle wavy line. You can also use a wood glue dispenser to help with smooth and easy application.
Remember, you only need to apply glue on one sheet of plywood.
Step 4: Spread the adhesive on the first plywood sheet
Pick a brayer, a roller, or a squeegee and spread the glue on every inch of your plywood. Ensure you have enough glue to spread an even layer of glue on the sheet of plywood. Such that when you place the second sheet of plywood, you have enough adhesive to hold the structure together.
Step 5: Put the second sheet of plywood over the first one
The second sheet you will put on the glued surface is the side that will eventually be the bottom sheet. If you can handle it, place the second sheet of plywood while the glue is still relatively wet. If you have someone who can lend you a hand, then it’s equally fantastic.
There’re chances you’ll introduce air when you place the second layer on the glued surface. A trick that could help you is placing scrap sticks on the glued surface and then placing the second plywood sheet on the sticks.
Then gently remove the sticks one after the other, so the sheet gently lands on the glued surface and minimizes the amount of air trapped.
See Also: Connecting Wood at 45 Degree Angle
Step 6: Clamp the two sheets of plywood.
Once you have successfully glued and placed the second plywood sheet, then it’s time to press and clamp the glued plywood faces together. Always ensure the edges are correctly aligned before you clamp them. There’re several clamps you can use to hold the pieces together while the glue dries.
You can opt for cauls to apply pressure to big sheets of plywood. It’s best to place wax paper between the cauls and the plywood to prevent a clamping mark from showing on the plywood.
Consider clamping on the middle of the sheets first, then gradually move towards the outer sides. If you can use more clamps, you will have better chances of the sheets bonding up well without any gaps forming.
However, if you don’t have any clamps and are trying this technique yourself don’t worry. Learn how to use wood glue without clamps.
Step 7: Drive the screws into the plywood sheets.
It’s widely acceptable to screw your glued sheets together while the adhesive cures. You can use either wood screws or drywall screws for this purpose.
Since we had already laid out a drill pattern, driving screws into the holes is all that’s left to do in this step. Drive the coarse-thread screws slowly and bump the trigger to pull up when the screw feels tight. Ensure you fill every screw hole.
Some people have spoken about weighing down your glued plywood. It’s an option, but it won’t guarantee you enough clamping pressure. I highly advocate for the glue and screw method when gluing sheets of plywood together.
Step 8: Remove excess glue
You must remove excess glue sticking out from your glued plywood. You can wipe off the glue with a damp rag as soon as you’ve secured the plywood together. Doing this could potentially remove all the glue traces, but don’t panic if it doesn’t. (Here’s how to remove adhesive from wood).
Remove excess dry glue from your project by pushing plastic putty against it to peel it off.
Step 9: Allow the glue to cure
This step is as important as the other steps, but it’s key to the result of your project. First, you need to allow enough time for the glue to form a tight bond between the glued surfaces.
Usually, the manufacturer specifies the curing time on the instructions manual attached to the product; follow that. In any case, the longer the curing time you can allow, the better. Switch on a fan to supplement the free flow of air in the workstation and consequently help speed up the drying time.
Step 10: Finish the project
The last step of this guide is to finish your project with a protective coat once the glue has dried. Although plywood is a strong material, it’s bound to wear and tear over time.
Flip the plywood over such that the bottom layer becomes the top sheet. For example, you could sand it using fine-grit sandpaper to get a smooth plywood surface. And then, clean the dust off using a shop vacuum then paint or stain it.
You also need to finish the plywood edges to have professional-looking plywood. But, again, you can use a few methods to get that job done: apply wood filler or power sand it.
You can make wood filler by sanding one piece of plywood. Then mix the sawdust from the vacuum bag with the carpenter’s glue. Next, apply a thick paste of wood gap filler to the edges and spread it evenly. Once it dries, sand it to get a smooth, finished edge.
You can also buy a wood filler for large holes from your local hardware store. If you like the appearance of the plywood edges and you don’t want to conceal the patterns, then you make sure you have a smooth and even edge.
How do you Choose the Correct Type of Plywood?
There’re several types and uses of plywood. For instance, Spruce and Baltic Birch ply is used for airplanes. Then there’s marine-grade plywood for boats. Next, beech and Oak make hardwood ply used for subfloors, furniture, roofing, and exterior sheeting. Finally, Pine and Cedar make softwood ply used for shelving and cabinets.
Your home improvement store would most likely have plywood sheets you can use for home improvements. So depending on exactly what you want the plywood sheets for, you can always find a suitable one.
Interesting read: Marine ply alternative
FAQs
What is the difference between plywood and laminate wood?
Plywood and laminate wood are both made of thin wood veneers which are glued together. The main difference lies in the wood grain orientation. It lies parallel for laminate wood, whereas, for plywood, the grain of the alternate layer is crossed at a right angle: cross-graining. Also, the upper layer of laminate wood is often printed with a matte or glossy finish, while plywood is a plain wood finish.
What glue would you use to join two pieces of plywood together
Most glue you could use to join two pieces of plywood together is PVA wood glue, Polyurethane glue, or Epoxy glue. Examples of such regular wood glues are Titebond ii and iii and Gorilla glue. These glues provide sufficient adhesion to hold two pieces of plywood together.
What glue is best for laminating plywood?
Laminating in woodworking can mean; gluing wood adjacent to one another, gluing wood to form layers, or applying a veneer on a flat surface. Polyvinyl acetate wood glue is available in white and yellow color tones. Both are excellent options for laminating plywood. You can also use polyurethane glue and urea-formaldehyde and then clamp the plywood while the glue dries.
How do you put plywood together?
To put plywood together, lay your first plywood sheet on a sawhorse or a flat surface. Apply and spread wood glue using a roller, then place the second plywood on the glued surface. Align the edges, and then clamp them in place using cauls or veneer press or any other practical options at your disposal. Then screw them together for extra support.
How do you glue plywood to the side?
Gluing plywood to the side is usually done to create wider boards suitable for tabletops. First, spread wood glue on one side of the plywood using a roller or a flexible card. Then place the second piece on the glued joint and rub them together. Finally, clamp them in place and allow time for the wood glue to dry.
You can also join two pieces of wood lengthwise by using a biscuit joiner. A biscuit joiner is a tool that cuts small slots in the edges of two pieces of wood. The slots are then filled with small wooden biscuits, which expand when glued and hold the two pieces of wood together.
Can you use contact cement on plywood?
No, contact cement is a terrible choice for gluing layers of plywood together. Instead, use a waterproof wood glue such as the Titebond ii for interior projects and Titebond iii for exterior projects that will be exposed to water and moisture.
Waterproof your plywood if you want to keep your it from deteriorating or rotting. You use a sealant and oil combo or just plain old silicone caulk depending on how much moisture-resistant material is needed in each specific instance.
Is there glue for pasting aluminum & plywood?
Epoxy glues are the glue you would want to go for when pasting aluminum and plywood. Consider two-parts epoxy adhesives that have to be mixed in a syringe while it gets dispensed. These epoxy products can be used on small and large-scale projects to paste aluminum and plywood.
How strong is glued plywood?
Glued plywood is stronger than natural wood since each layer is glued in a process termed cross-graining. It’s then pressed together under high pressure. This makes it resistant to warping, shrinkage, expansion, and cracking. In addition, gluing plywood together gives you a thick piece that carries double amounts of mechanical strength.
See our guide on bending wood with water without breaking it.
Conclusion
Now that you know how to glue plywood together, nothing should stand in your way when you have a plywood project in mind. You realize that you can use it around the home to make; furniture, shelves, cabinets, subfloors, roof, tables, and table surfaces or external structures.
When plywood is used for constructing yarns, wall and guarantees structural longevity. You only need to make sure you have the correct plywood type and the best glue for it. After all, gluing plywood is as easy as prep, glue, and clamp.
What to Next?
If by any chance you overlooked any step, and you would want to fix the mess, then this step-by-step guide on how to unglue plywood might help.