Staining Douglas fir and other softwoods can be pretty challenging due to their uneven texture. But can you stain Douglas fir without the surface appearing blotchy?
Despite being problematic, stained Douglas fir can exude a rich color with dramatic grain suitable for a wide range of applications. However, the wood requires careful preparation and patience during application to achieve the desired finish.
Staining Douglas Fir
Sand the wood and wipe it clean. Apply wood conditioner. Then stain Douglas Fir using gel stain. Apply sealant of your choice for maximum protection.
How to Stain Douglas Fir Wood
When staining softwoods like fir, the quality of your stain job will depend largely on the preparation and stain type.
Skimping on any of these two essential parts will typically lead to an eyesore in your finish. Different stains can often form blotches or air bubbles on this type of wood. However, follow the steps below to achieve an immaculate, even finish.
What you will need
- 100-grit, 150-grit sandpaper
- Sanding block
- Cotton washcloth
- Wood conditioner
- Deck stain pads
- Sponge
Steps to follow
Here is the procedure you must follow to stain the wood correctly.
Step 1: Sand the wood
The Douglas wood doesn’t require deep sanding for its surface preparation. While traditionally, you must sand with coarse-grain sandpaper to remove surface inconsistencies then finish off with fine-grit sandpaper, this procedure will be different.
After removing surface inconsistencies with coarse-grain sandpaper, switch to a medium-grit instead of fine-grit sandpaper.
Sanding with fine grains typically closes the wood pores, making it way more difficult for the stain to set.
Sand the boards with low-grit sandpaper to remove surface inconsistencies.
Begin by removing any inconsistencies on the wood surface with 100-grit sandpaper. We recommend using your sandpaper on a sanding block. A sanding block lets you apply more even pressure consistently across the surface.
Sand along the wood grain to avoid creating any unsightlysand marks on the wood. Sanding along the direction of the wood grain means any scratches the sandpaper leaves on the surface will hide in the wood pattern.
Use higher grit sandpaper to smooth the wood surface.
Once you finish removing the tiny ridges, contours, and holes that typically appear on a softwood surface, it’s time to fine-tune it with medium-grit sandpaper.
Keep the sanding light and consistent, with your sandpaper securely on a sanding block. Here too, sand along the grain until you have covered the entire piece.
The purpose of sanding is to help open up the wood pores for the stain. This is why you want to avoid using high grit sandpaper that might block the pores instead.
If you have raw fir boards, remember to go over the cut ends too with your sandpaper.
Once you finish sanding, use a dry natural-bristled brush to remove the excess sanding dust from your wood.
Step 2: Wipe the sanded wood with a soft, damp sponge to raise the grain.
Ensure you wring the sponge to remove all the excess water before using it on the sanded wood. Sanding tends to compress wood grain, so applying a little moisture uniformly across the entire surface is essential to make the surface fibers swell.
The swelling helps open the pores more naturally. You want to dampen the wood but not fill the pores with water. That’s why you must wring out the excess water from the sponge before using it on the wood.
While rubbing, use heavy, sweeping strokes heading in a single direction. While raising the wood grain, you also want the sponge to remove any remaining wood dust and debris from your entire piece.
Any dust residue on the wood surface could create unsightly marks on your finish.
Step 3: Apply wood conditioner
Wood conditioner such as the Minwax Pre-Stain Wood Conditioner helps prepare bare wood for staining. Apply two coats of the conditioner with a natural bristle brush, spreading it to cover the entire surface evenly.
Ensure the conditioner covers every inch of the exposed wood surface to prepare it for staining. This includes the edges if you are working on bare wood.
Two coats are recommended because softwoods are likely to absorb the first coat as soon as you rub it on. The second coat then stays noticeably on the surface, providing the desired coverage.
The pre-sealed Douglas fir can then take an even coat of wood stain without the finish appearing streaked or blotchy.
Step 4: Wipe off the excess conditioner and let the wood dry
Before letting the wood dry, wipe the surface with a clean cloth to remove the excess product on it. While wiping, keep an eye out for any noticeable wet spots and focus on them.
Ideally, you don’t want to leave too much sealant on your wood as this will block much of the pores leaving no space for the stain. Also, excess pre-sealant may take too long to dry.
Once done, wait for two to three hours for the pre-sealed wood to dry. The drying should occur in a cool, dry place away from direct sunlight or excess humidity.
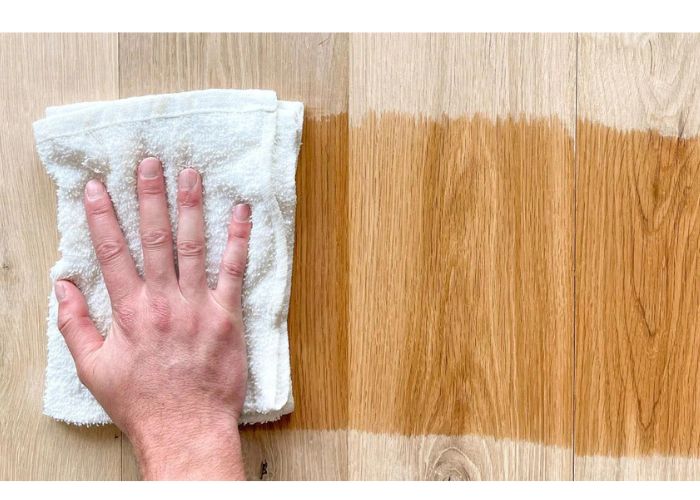
Step 5: Apply a thin layer of gel stain
Gel stains have a thick consistency, so applying a thick layer will lead to drying problems. As a way out, keep your layers thin by applying and wiping the excess stain with a lint-free cloth until you are happy with the coverage.
You could use a foam brush to apply the stain, then wipe with a lint-free cloth. Alternatively, you can use a staining rag to rub the gel stain onto the wood. This way, you will complete the application in one process. The cloth will apply the stain while removing any excess as you go.
It’s crucial that you rub the stain with the grain and not against it. You don’t want your project to have noticeable streaks in all directions.
Step 6: Allow the stain to dry
The gel stain should be dry enough to accept more coats in two hours. However, the drying time will depend on the weather and the thickness of the initial coat.
So we recommend touching the surface to ensure it’s no longer tacky before adding the next layer. In any case, ensure you wait till it’s dry before recoating.
Do you feel a pungent smell from the staining? Check out our guide on how to get rid of wood stain smell.
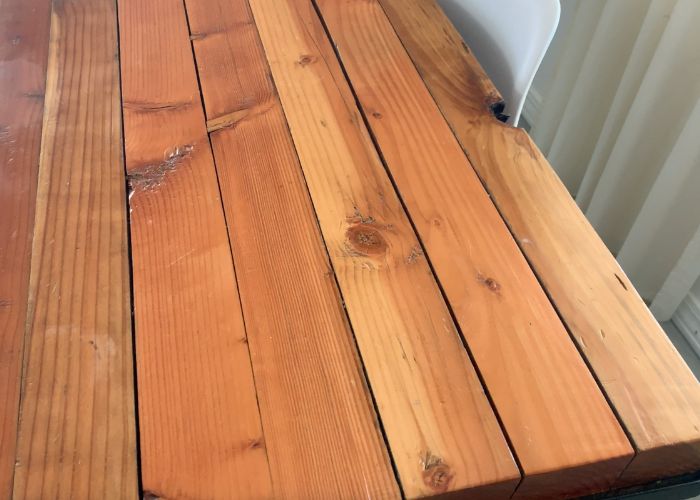
Step 7: Add a second coat
Once the first layer of stain is dry, you can recoat the same way you did the first coat. Two layers of gel stain should provide sufficient coverage, especially after applying the pre-stain conditioner.
This will darken the wood without necessarily masking the grain, which can give your fir an enhanced look.
Step 8: Apply a sealant
Like any wood stain, the stain job will be more durable if you cover it with a protective top coat. You can use any hard-drying clear coat in this case. For instance, shellac, varnish, lacquer, or polyurethane sealants will do an excellent job since they are formulated for this kind of application.
Notice that the gel stain will need to dry for 24 to 48 hours before it can accept a top coat. You should never clear coat the oil stain before it is completely dry, so ensure you test it before proceeding with the finish.
To test if the wood is sufficiently dry, dab it with the corner of a paper towel and observe if any color comes off. If none remains on the paper towel, the stain is ready for the topcoat.
Once you are confident that the stain is ready, wipe down the entire surface lightly with a microfiber cloth and leave it to dry for a few minutes. The wiping will help remove any dust or debris that might be sitting on the surface.
After cleaning the piece, apply one to two layers of your selected clear coat and let it dry. The method of application will depend on the clear coat you have chosen. You could brush it on, use a roller, or spray the finish.
Whichever method you use, ensure you allow enough drying time between the coats based on the manufacturer’s recommendation.
Once dry, the clear coat will lock in the color and protect the surface against scratches—ensuring it remains as durable as possible.
Read also: How to fix rough polyurethane finish.
What is the Best Stain for Douglas Fir?
The best stain for Douglas fir is gel stain. The stain has a thick consistency that slows its absorption into the wood pores. As a result, you have more time to rub it onto the substrate and spread it before it sets and dries out.
The stain also forms a film on the wood surface, with little of it penetrating the wood pores. And you can also use gel stain over laminate wood and furnture.
Douglas Fir Stain examples by Use Cases
Not all gel stains are created equal. From our experiments, some products work better for specific use cases than others. Based on our research, this section presents our recommendations of the best gel stains to use on fir floors, decks, and other exterior applications.
1. Best stain for Douglas fir floors– Thompson’s Waterseal Waterproofing Stain
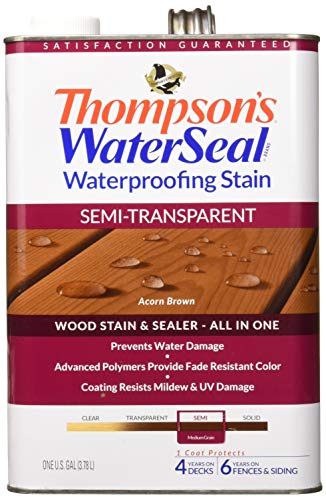
- Color: Acorn Brown
- Semi-Transparent
- Wood sealer and stain, all in one
Floors are typically high-traffic areas. When selecting a stain for your floors, you want something that will dry to form a robust, protective coat resistant to chipping and peeling.
We found Thompson’s Waterseal Waterproofing Stain to fit the bill pretty well. The stain comprises advanced polymer combinations specially designed to preserve the color and prevent it from fading.
Its complex adhesion formula makes it highly resistant to chipping and peeling and will do an excellent job protecting your stained fir floor.
We loved how easy it was to apply this product to the floor. It requires no thinning and goes directly onto the substrate without a primer. And, it works on damp floors, so you don’t have to wait till the floor is completely dry to apply it—meaning you can finish the entire work inside of one day.
2. Best stain for Douglas fir deck– Ready Seal Exterior Stain and Sealer for Wood
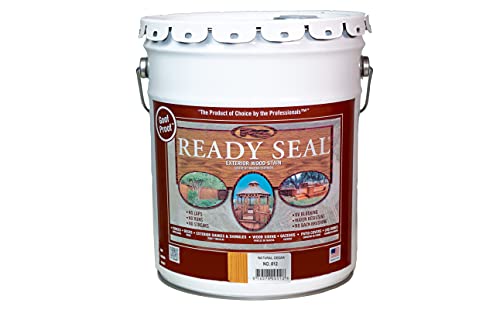
- Requires no primer. Ready Seal is darkest when first applied. It reaches its true color in approximately 14 days. Do not apply Ready Seal over painted or newly stained surfaces. Sealed surfaces inhibit penetration.
- May be applied using sprayer, roller or brush onto the woods surface.
- Requires no back brushing and will nerver leave runs, laps, or streaks.
Decks are high traffic and typically exposed to direct sunlight. When deciding how to stain Douglas fir for outdoor use, choose a stain that’s resistant to the sun’s UV rays.
Secondly, it must be highly resistant to chipping and peeling to withstand heavy foot traffic. This stain for outdoor furniture satisfied both of these requirements in our tests.
It requires no primer, making the application time much less. More importantly, the product is 100 percent waterproof, providing superior deck protection against water and moisture damage.
3. Best exterior stain for Douglas fir-Minwax 66010000 Gel Stain
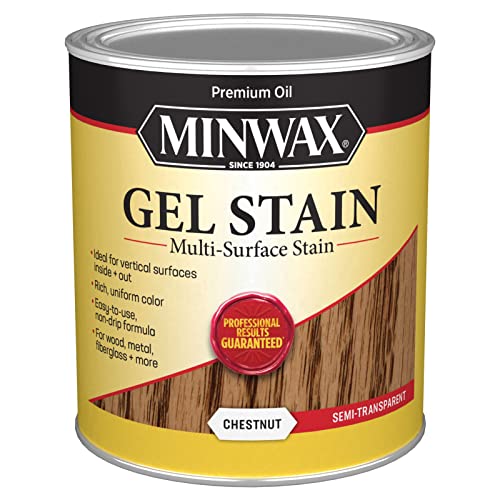
- WOOD GEL STAIN – Minwax Gel Stain is specifically designed to give you full control over the staining process and help you achieve beautiful results. Recommended uses include woodwork, furniture, doors, molding, trim, cabinets, and accessories.
- UNIQUE NON-DRIP FORMULA – The non-drip formula of this gel stain for wood makes application easy, even for vertical surfaces. It’s thick-bodied, so it stays more towards the surface of the wood, allowing for greater color control during application.
- DELIVERS EVEN COLOR – Minwax interior wood stain delivers color evenly on wood and non-wood surfaces, such as metal, veneer, and fiberglass. Pre-treat bare wood with Minwax Pre-Stain Wood Conditioner to ensure you get the most uniform color.
Minwax is a reputable brand, and their gel stain is one of the best for Douglas fir outdoor furniture and other exterior applications.
Minwax’s gel stain is highly resistant to the sun’s harmful UV rays. This property makes it ideal for staining furniture and other wooden items used outdoors. The UV resistance goes a long way in locking in the color and preventing the Douglas fir wood from fading.
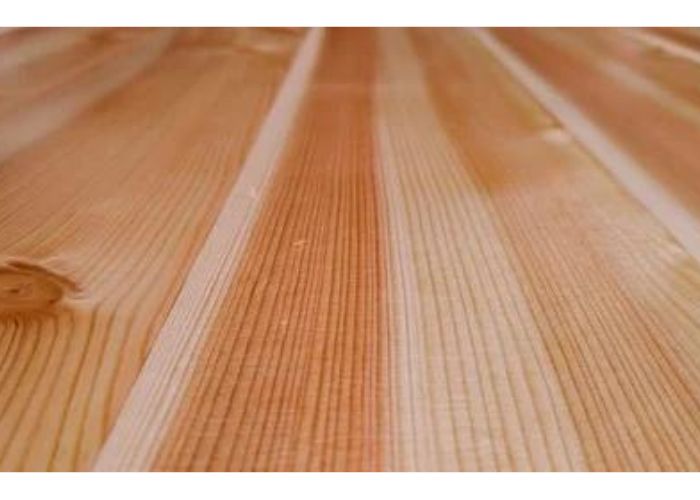
Why should I Use a Gel Stain?
The reason for wood stains forming splotches on softwoods like fir is their uneven penetration. Because softwoods have large, uneven pores on their surfaces, they can remain with darker and lighter parts when you stain them.
Gel stain forms a film on the surface of the substrate
When you use gel stain, it dries to form a film on the wood surface instead of relying purely on absorption for coloring the wood. The film-forming property of gel stains helps you overcome the problems associated with uneven stain absorption.
Gel stains allow for more control during staining
The jelly-like consistency also means you have more control over the staining process. When using standard wood stains, they can usually dry in some parts before you wipe off the excess, leading to splotches on the wood surface.
On the other hand, gel stains tend to dry slowly, allowing you all the time you need to apply the product and remove the excess as necessary.
Gel stains do not necessarily require stripping the wood
You don’t have to strip down the fir wood to use a gel stain on it. If you have old, finished Douglas wood, you can simply clean it up to remove dirt and grime, then recoat it with gel stain without stripping it down to bare wood.
Although the wood will accept stain without stripping, you may have to apply a de-glosser on the finished wood before staining it if the surface is markedly high gloss.
Whatever the case, using gel stain shortens the project time and helps you complete the work sooner.
Also Read: Staining Tips for Acacia Wood
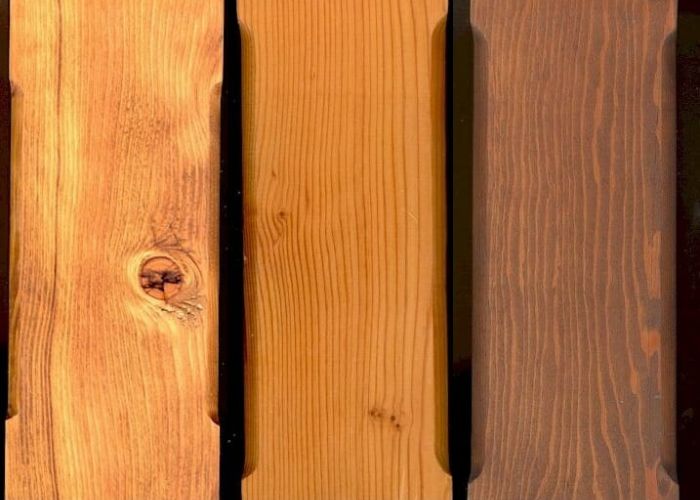
Best Stain Color for Douglas fir
The best Douglas fir stain colors ordinarily come down to personal preferences. However, we have come to notice that the wood’s original color can significantly influence your options.
For instance, Doug fir is primarily orange-red to reddish-brown before staining. We have noticed that staining it with a warmer color, such as the teal blue wood stain can push the limits on its reddish-orange tones.
So, while a reddish wood stain can significantly enhance the look, it can also get to extreme red if it is warm.
If you don’t have a problem with a shouting color, you may like Minwax Gel Stain in Antique Maple or colonial maple. The stain gives Douglas fir a pretty warm hue without being unfriendly to the eye.
If you want to tone it down a little bit, you could choose any number of matching Douglas fir wood stain colors and mix them to get the color you want. For instance, you might go for mixed white and antique maple to achieve an earthy shade.
While we liked the toned-down shade, you might like the bright Fruitwood stain tone better. So, you could as well try them both and see which way feels more appealing.
While at it, always test your stain on a piece of scrap wood before going all-in on your project.
Related Post: Best Stains for Eucalyptus Wood
Douglas fir Finishing Techniques
There’re numerous ways to finish your Douglas wood, so you shouldn’t feel restricted to one method. Read along to see what other options are on the table when it comes to finishing your Doug fir.
Douglas fir finishes
Douglas wood is a popular choice for various outdoor wood projects, including decks and patio furniture. Any wood staying outdoors requires some form of protection from the harsh weather elements outside.
While staining the wood is a popular way to protect it, you can also use a few coats of sealant or paint decks, floors, or furniture made of Douglas wood.
Painting
If you aren’t interested in preserving the wood’s grain, you can paint it with an exterior grade product.
Not all paints are suitable for use outdoors. If you choose to paint the wood, check to ensure you use an exterior grade option designed to protect water damage, UV rays, and other weather elements.
Sealing
If you choose to stain the wood, you will preserve its grain. However, most wood stains are vulnerable to adverse weather conditions outside. Even if you use gel stain, you may still want to clear coat the project with an exterior grade product for increased durability.
Your selected stain may be relatively resilient for the outdoor weather, but it pays to err on the side of caution. Adding a sealer on top of your stained Douglas wood isn’t overkill but a necessity.
A combination of staining and sealing your Douglas fir for exterior use goes a long way in protecting the wood from the elements, making it durable, and saving you money in the long run.
Read also: Can you wax over water-based polyurethane?
What is the Best Finish for Douglas fir?
The best finish for Douglas fir is a combination of gel stain and a clear polyurethane coat. Douglas doesn’t absorb stain too well, but the gel stain helps enhance the wood color, while the polyurethane finish protects the stain color and the wood for maximum durability.
FAQs
Can you use gel stain on Douglas fir?
Yes. You can use gel stain for Douglas fir due to its thickness that slows its absorption into the wood. The stain’s jelly-like consistency means that much of it will remain on the wood surface instead of entering the pores as a standard penetrating stain does.
Can you use Minwax stain on Douglas fir?
Yes, you can use minwax stain on Douglas fir. Minwax is one of the best wood stain brands for any wood type. Consider using Early American stain on Douglas fir for the best protection and color richness.
Can you use provincial stain on Douglas fir?
Provincial stain works better on hardwoods like oak. However, you can use the penetrating stain on Douglas fir if you prep the wood properly. Ensure you prime the wood properly before staining it. Afterward, ensure you seal the Douglas fir stained with provincial stain for durability.
Can you stain Douglas fir dark?
Yes, you can stain Douglas fir dark by choosing a dark walnut stain or any dark-colored gel stain. If you aren’t satisfied with the color intensity after the first coat is dry, consider adding another thin layer of the same color to darken it.
Can you stain Douglas fir grey?
Staining Douglas fir grey is entirely possible. Simply sand the wood with 100-grit, then 150-grit sandpaper attached to a sanding block. After sanding, ensure you wipe the wood dust, apply a primer followed by a grey-colored stain, and let it dry.
Conclusion
If you wish to stain your Douglas wood, stain penetration will significantly influence your options. We hope this tutorial helps you avoid a blotchy project and achieve your desired finish. If you have any thoughts or comments about stained douglas fir, please leave them for us in the comments section below.
What to do Next
If you’re looking to stain your oak furniture soon, you can check out our best oak staining techniques plus the best stain to use for the best results.