One of the most common repair jobs you will encounter as a woodworker is fixing holes and cracks in wood. That’s why it’s important to know how to fill drilled holes in wood with Epoxy.
The goal of making repairs on woodworking projects is to prevent wood damage from spreading throughout the wood. In addition, it’s easier and cheaper to repair wood than to replace an entire board or plank.
This article will guide you through how to fill cracks in wood with epoxy, mention other substances you can use, and provide a few woodworking tips.
Let’s get to it.
How to Fill Cracks in Wood with Epoxy
The popular filling option for wood cracks has been wood putty or wood filler for a long time. However, this completely overlooks the potential benefits of using epoxy resin to fill the same holes and voids in the wood.
For starters, two parts of Epoxy is easy to apply. Then, once it’s mixed well, this Epoxy flows and pours easily to fill any size of large cracks or holes in wood.
Epoxy is also an adhesive that fills the gap in wood and holds the brittle wood fibers together. Once the fill is dry and fully cured, the result is a stronger bond than any paste wood filler could provide.
Another superior benefit you can get using Epoxy is the ability to tint it in any color. So you can create an exact color match with the wood you’re filling. Or you can use different pigments with decorative additives to create eye-catching patterns on the wood.
Do not sleep on two-part Epoxy clear resin for filling voids and wood cracks. Instead, see below for how to use it and all the supplies you will need.
Tools and materials for filling wood cracks with Epoxy
- Two-part liquid Epoxy
- Disposable container
- Pigment
- Disposable spoons or stir sticks
- Masking tape
- Sandpaper
- Sanding block or orbital sander
- Needle
- Latex gloves
The Procedure to Fill Wood Cracks with Epoxy
Follow these simple steps to get you the desired results.
Step 1: Select and buy the best epoxy filler
The first step is choosing the best epoxy wood filler for your project. After all, the strength of the filled void relies on the quality and strength of the epoxy products used.
Do not buy cheap epoxy products. These are most likely products with older formulations and won’t give you the strong fill you desire.
On the flip side, an expensive product doesn’t necessarily mean it’s the best choice. For example, some could be used for surface layers or clear casting and not necessarily for filling cracks.
Your best bet is to buy quality epoxy filler from a trusted brand that will give you long-lasting results.
Step 2: Choose your preferred epoxy open time
Other than going for a quality epoxy product, consider the amount of time you have to work with it while still in a liquid state –open time.
Most epoxy products offer an open time ranging between 5 and 60 minutes. Once the specific open time elapses, the epoxy liquid becomes a gel that barely flows.
You’ll need more time filling larger cracks in wood than tiny ones. You’ll need even more time if you want to tint the Epoxy. Therefore, choose a product that allows you ample time to prepare the Epoxy and fill the voids without rushing.
Step 3: Prepare the surface and seal the underside
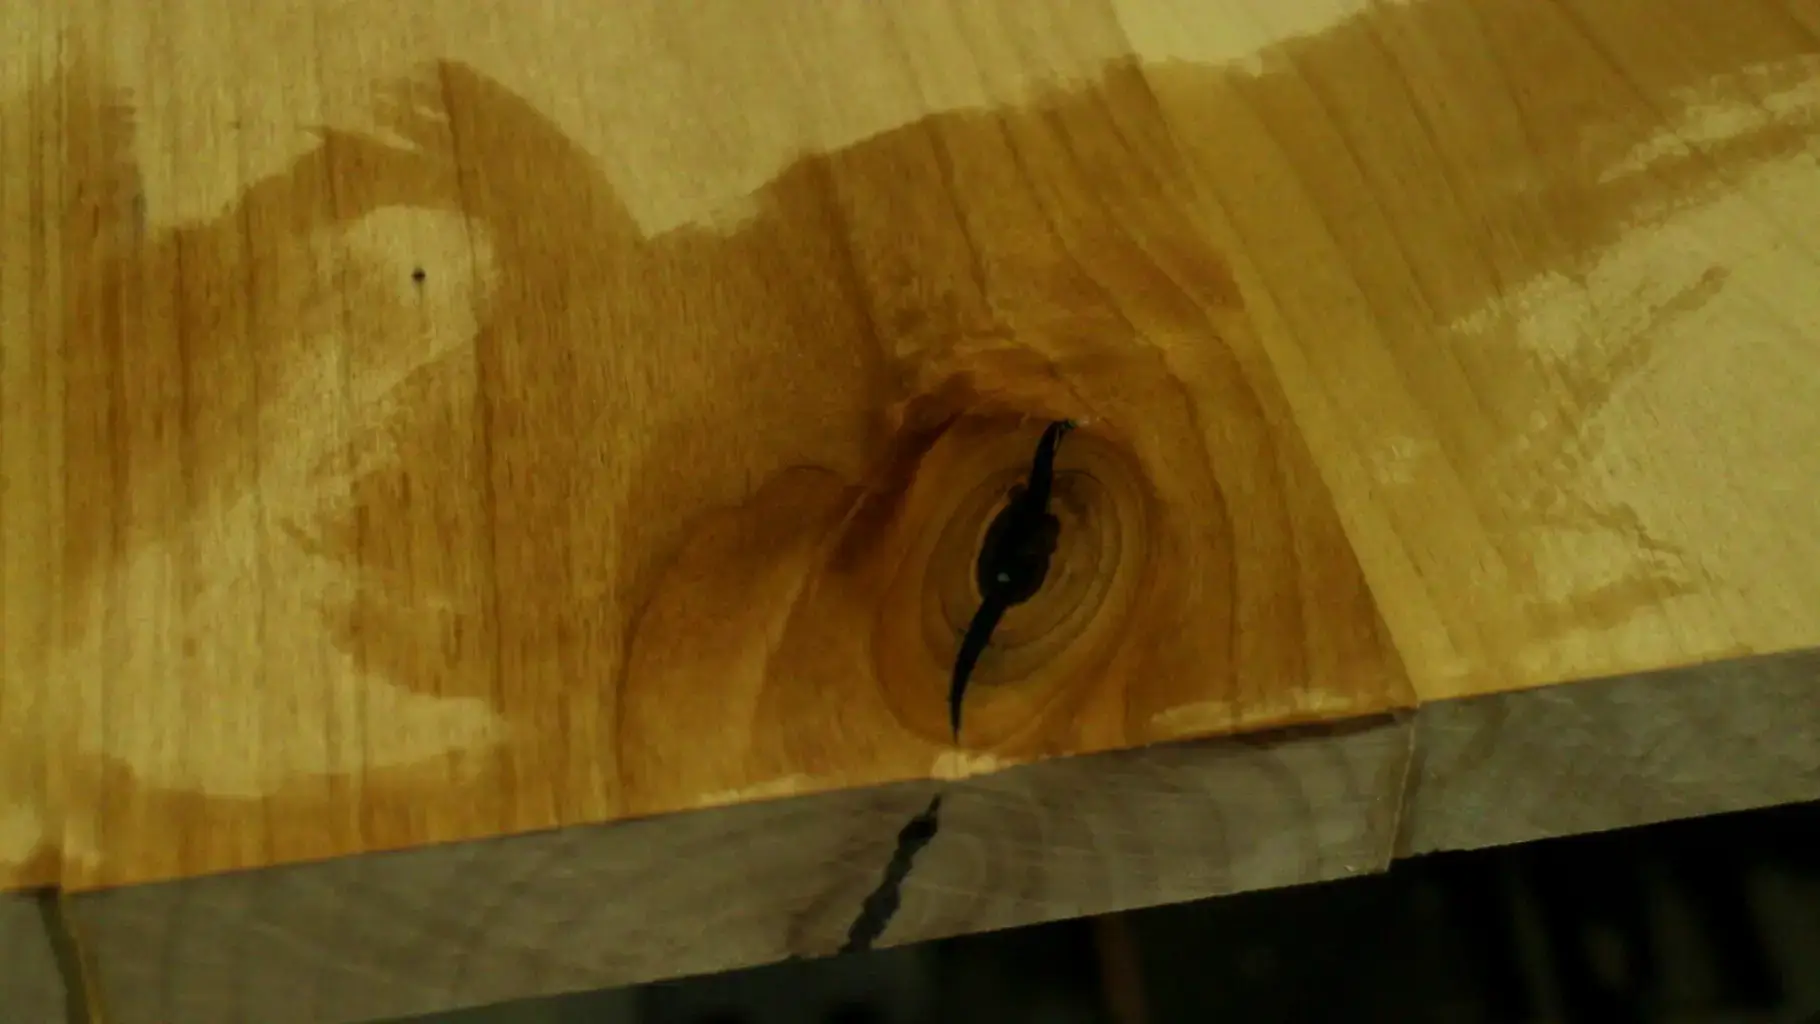
The prep work here involves cleaning the wood crack, voids, or knots like in the case of knotty alder. If you have a small crack or a large void on wood, loosen the failing wood fibers using a chisel or any sharp tool at your disposal.
Slightly sand and then vacuum to eliminate the debris. Check if the crack goes through to the other side. If it does, seal the underside using masking tape.
This tuck tape ensures the epoxy filler won’t leak through the void and create a sticky mess.
Step 4: Measure and mix two parts of epoxy

Mix epoxy using the ratio of 1:1. That is, mix equal parts of resin and hardener; unless the specific product recommends otherwise. Pour the hardener first into a disposable container, followed by the resin.
Stir using a disposable spoon. Scrape from the sides and bottom of the container and keep mixing until the products blend and become transparent. Do not use more hardener than recommended.
Yes, it will speed up the filler’s dry time, but not without making the fill brittle and susceptible to cracking. Using more or too much Epoxy, on the other hand, will make the fill take forever to dry and cure.
Step 5: Tint the epoxy (optional)
Filling wood cracks with colored Epoxy is easy and also optional. The coloring agents are either mica powder or liquid alcohol ink form.
Add a bit of the tint into Epoxy and mix it using a disposable spoon. Keep mixing until you have the perfect tone, whatever that looks like. A little pigment goes a long way.
You can tint the Epoxy to match the wood and have an almost invisible crack mark. This trick is also best at work, especially if you are doing any inlay work and you want the inlay pieces flush with the surrounding wood.
You can also tint Epoxy with a contrasting color or decorative additives like metallic flakes. This will create intriguing patterns which are both functional and aesthetically pleasant.
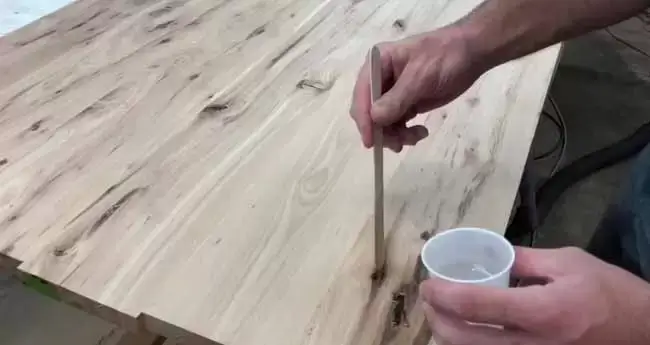
Step 6: Fill up the cracks in wood with epoxy
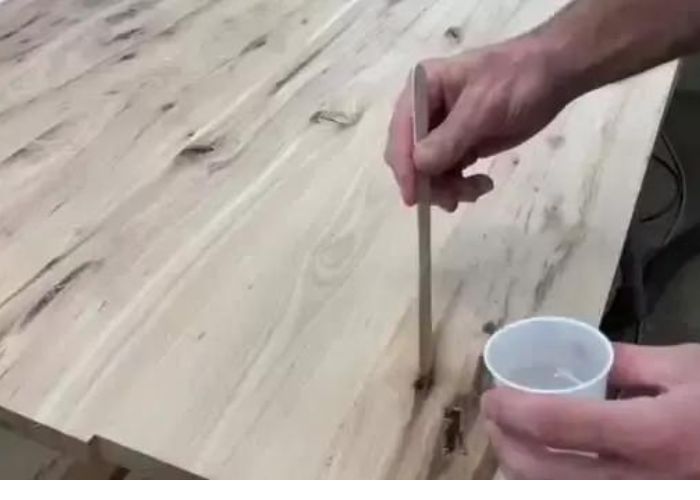
With all the prior prep work, filling up the crack is the easiest. Carefully pour epoxy fill into the crack and slightly overfill the void.
It’s better to overfill the cracks so you can sand back the excess product. However, if you under-fill the crack, you will need to refill it once the first pour has fully dried.
Most epoxy products will dry and cure solid hard in 24 hours. Let it dry for longer if needed. Only after a full cure can you sand down the excess product.
Step 7: Remove air bubbles
If you notice air bubbles forming as you pour the Epoxy, it’s best to remove them before the epoxy sets. You can poke the bubbles using a needle.
Alternatively, you can heat it using a small propane torch. This will heat the resin and make the air bubbles rise and disappear.
Step 8: Remove the tape and sand the cured epoxy
Begin the sanding process once your filled spot has cured. Sand the over-fill to match the rest of the wood. Wrap your sandpaper on a hand block and sand with the grain.
The sanding block will automatically target the high spots and level them down. However, keep checking the sandpaper; it may get clogged with Epoxy and end up less effective. If that happens, replace the sandpaper and continue sanding.
If you filled large voids in wood, using a sanding block may appear labor-intensive. In this case, your easy way out is to sand with an orbital sander. Ensure to keep it moving and avoid creating a divot.
Stop sanding when the filled spot is flush with the surrounding surface. Now sand the entire wood to refresh and prepare it for a finish coat. Finally, clean the wood shavings using a dry rag or tack cloth.
Read also: How to get duct tape residue off wood.
Step 9: Apply the finish coat to the wood
Most brands will label stainable wood fillers to make it easy for the buyer to choose. However, two-part epoxy resin is best coated with film finishes to add a bit of sheen and enhance durability.
For example, you can use lacquer, shellac, varnishes, tung oil, or polyurethane over epoxy resin. Apply it using a roller or hand sprayer over the refurbished wood. Let it dry and cure fully before using the surface.
Remember to properly discard every disposable material that has Epoxy dried on its surface.
Other Filling Choices for Wood Cracks
If you cannot get hold of liquid Epoxy, here are some excellent alternatives to get the job done. The first option is wood putty or wood paste filler.
These paste fillers are often packaged in cans or tubes, and you can get the exact color match with the wood in question. To apply it, scoop and push the filler into the crack or hole using a putty knife.
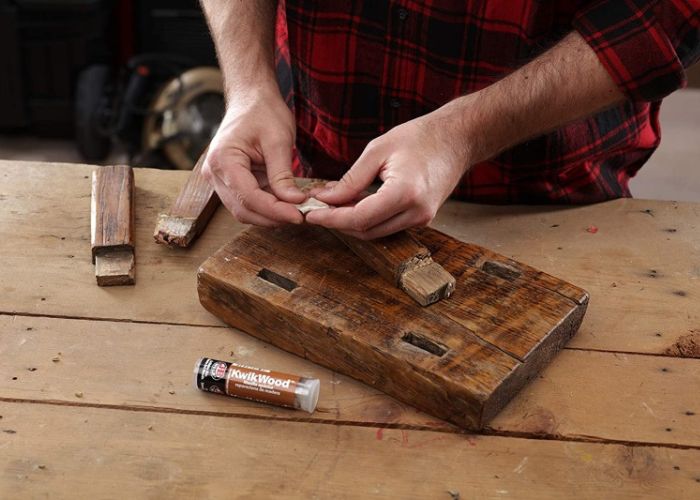
An alternative product is the wood filler sticks. These are crayon-shaped filler sticks, and you can get one matching the color of the wood. Still, if you cannot get the exact color you want, you can blend several colors to get the perfect shade.
Another option is to make DIY wood filler with sawdust and an adhesive. You can use hide glue, wood glue, or Cyanoacrylate glue.
First, mix the sanding dust with the glue until you get a soft paste. Then, apply the mixture into the crack using a putty knife.
What is the Best Epoxy to Fill Wood Cracks?
The best wood crack filler epoxy resin is ProMarine Clear Epoxy resin. This product is highly rated by users who agree that it’s the best quality in the market.
Although originally, this was a resin for table tops, it works incredibly well when filling larger holes, small cracks, and knotholes. It’s easy to mix (1:1) and pour to fill voids. In addition, this epoxy resin is self-leveling and can be tinted.
It allows you an open time of 35 minutes. Cured epoxy fill is solid-hard and waterproof. However, the shortcoming is that it yellows over time.
Interesting read: Can you pour epoxy over uncured epoxy?
Safety Precautions when Using Epoxy to Fill Cracks in Wood
- Consider wearing a mask and latex gloves while handling epoxy wood fillers for your well-being. It also helps to work in a clean and well-ventilated space.
- Only mix the amount of filler you need. If you need more, make another batch instead of preparing a huge amount of epoxy filler only to use a little bit and watch the rest spoil.
- If the Epoxy spills over and makes a mess while filling voids, clean it off using denatured alcohol. Should it get on your skin, use water and mild soap to get it off.
- Store the remaining product in a cool and dry place away from children’s reach.
Read also: What is the best epoxy for tumblers?
FAQs
What kind of Epoxy do you use to fill wood cracks?
You can use wood epoxy putty or liquid epoxy resin to fill wood cracks. Once you settle on the open time you can work with, clean the crack and prepare the surface and underside. Prepare your epoxy filler and fill the wood crack. Once it cures, sand the wood and apply a finish coat.
Can you use Epoxy to fill cracks in wood?
Yes, you can use Epoxy to fill cracks in wood. It forms a strong bond and waterproof fill. The liquid epoxy resin can also fill small holes, cracks, and larger voids. Your major task is to choose a trusted brand and preferred open time; the filling process is a breeze.
How to fill cracks in wood
- Choose the best Epoxy.
- Choose your preferred open time.
- Prepare the surface and seal the underside.
- Measure and mix your two parts epoxy.
- Tint the Epoxy.
- Fill up the cracks with the Epoxy.
- Remove air bubbles.
- Remove tape and sand the cured Epoxy.
- Apply a finish coat to the wood.
Related: How to stop wood from splitting when drying
What is the best Epoxy for filling knot holes?
The best Epoxy to fill knot holes is TotalBoat Epoxy Resin Crystal Clear. This is a two-part liquid epoxy that comes with the resin and hardener –mix using the ratio of 1:1. This Epoxy is self-leveling and can be tinted to match the wood color. When it cures, it forms a strong bond that’s 100% waterproof.
Read Also: Is It Possible to Stain Wood Filler?
Conclusion
With the help of our guide, now you know how to fill cracks in wood with epoxy. The process is simple, and the results are superior to any other filling option in the market.
The top two advantages of using two-part epoxy resin are the liberty to customize the color and its easy-pour consistency. In addition, once cured, the tensile integrity of epoxy fill is unmatched.
If you have any questions about filling wood voids with Epoxy, leave them in the comments section below, and we’ll get back to you ASAP.
Happy filling!
Hi. I have a 3 inchx20 inch 14 ft wood tha have very large crack that can split if I jolt it. I’m from the Philippines. Will epoxy resin bond the cracked wood and I don’t know what kind I can purchase here. Thank you very much
I’m working on building a garden bench using salvaged 3”, 4” and 6” pieces with several large cracks.
Thanks for the clear information!